Stylish DIY Entryway Bench with Hidden Storage
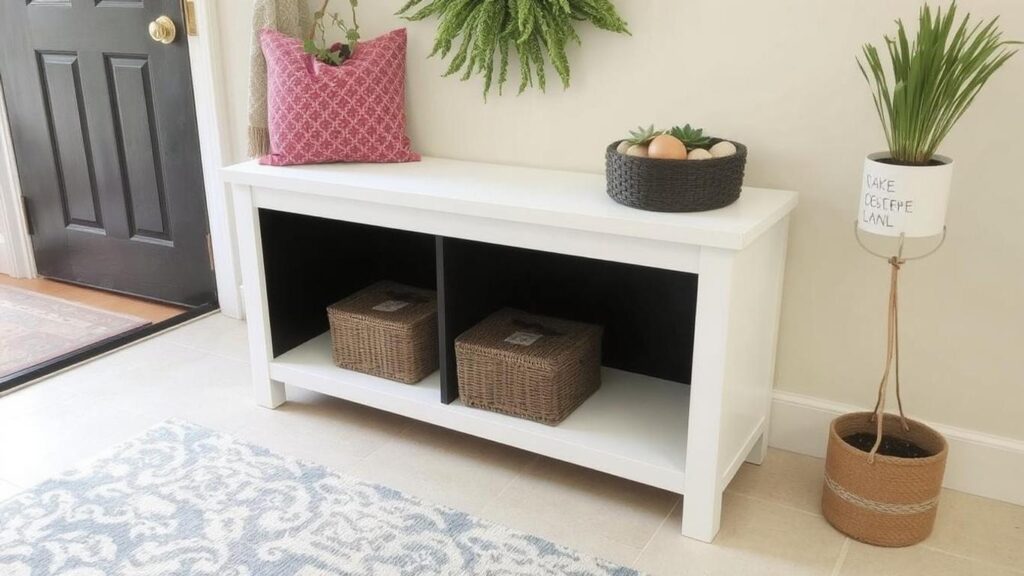
An entryway bench is a functional and stylish addition to any home, providing a place to sit and store shoes, bags, or other essentials. With a DIY entryway bench with hidden storage, you can create a piece of furniture that’s both practical and chic. Here’s a step-by-step guide to building your own stylish entryway bench with hidden storage, perfect for organizing your space in style.
What You’ll Need:
-
Wooden boards (for the seat, sides, and top of the bench)
-
Wood glue and screws
-
Power drill
-
Measuring tape and pencil
-
Sandpaper
-
Hinges (for the lift-up top)
-
Cushion for the seat (optional, for comfort)
-
Fabric or paint (optional, for finishing)
-
Storage baskets or bins (optional, to keep items organized inside)
Step 1: Measure and Cut the Wood
Start by measuring the size of your entryway to determine the dimensions of the bench. A standard size is usually around 18 inches in height, 16-18 inches deep, and 40-48 inches wide, but feel free to adjust the measurements based on your space.
Once you have your measurements, cut the wooden boards to size. You’ll need a piece for the seat, sides, bottom, and the top that will lift to reveal the hidden storage.
Why it works: Accurate measurements ensure the bench fits perfectly into your entryway and provides the right amount of storage space.
Step 2: Assemble the Frame
Start by assembling the basic frame of the bench. Attach the side pieces to the bottom piece using wood glue and screws for a sturdy base. Make sure everything is square and level. Secure the front and back panels to complete the structure.
Why it works: A solid frame ensures the bench will be stable and durable enough to support sitting and storing items inside.
Step 3: Attach the Lift-Up Top
Now, attach the hinges to the back of the bench where the top will lift. These hinges allow you to easily open the top to access the hidden storage compartment. The front of the top should be slightly lifted from the rest of the frame so that it can open smoothly.
Why it works: The lift-up top provides convenient storage while maintaining the stylish appearance of a traditional bench.
Step 4: Sand and Smooth the Wood
Before moving on to the finishing touches, use sandpaper to smooth out any rough edges or surfaces. This will not only improve the look of your bench but also make it safer to use.
Why it works: Sanding helps to avoid splinters and creates a smooth, polished surface for painting or upholstering.
Step 5: Add a Cushion to the Seat (Optional)
For extra comfort, consider adding a cushion to the top of your bench. You can either purchase a pre-made cushion or create your own by cutting foam to fit the size of the seat and covering it with fabric of your choice.
To attach the cushion, simply place it on top of the seat and secure it with a staple gun or upholstery tacks.
Why it works: A cushioned seat adds both comfort and style to the bench, making it a more functional piece of furniture for your entryway.
Step 6: Paint or Stain the Bench (Optional)
To finish off your bench, consider painting or staining the wood to match your home decor. Choose a color that complements the rest of your entryway. You could also add a coat of sealant to protect the wood from wear and tear.
Why it works: The finishing coat enhances the overall appearance of the bench while providing durability and protection from daily use.
Step 7: Organize with Storage Baskets or Bins (Optional)
If you plan to use the hidden storage for shoes, hats, or gloves, consider adding some storage baskets or bins inside the compartment. These will help keep things organized and make it easy to access your items.
Why it works: Baskets or bins help to keep your entryway tidy and ensure that the storage area inside the bench is used efficiently.
Final Touches:
Place your newly built entryway bench with hidden storage in your desired spot near the door. Now, you can sit comfortably while putting on shoes or storing your everyday essentials in style.
Conclusion: A Practical and Stylish DIY Project
This DIY entryway bench with hidden storage is an easy and affordable way to enhance your entryway while keeping it organized. With just a few materials and some time, you can create a functional and chic piece of furniture that will serve you well for years to come. Whether you’re looking for more seating or hidden storage, this bench can be tailored to your specific needs and home style.
Key Takeaways:
-
A lift-up top provides easy access to hidden storage.
-
Adding a cushion creates a comfortable and stylish seat.
-
Paint or stain for a polished look that fits your decor.

