Transform your nursery with a unique and charming touch by creating a pallet wall. It’s a cost-effective way to add texture, warmth, and personality to the room while giving it an eco-friendly vibe. This DIY project is easy to execute, requiring just a few tools and materials. Here’s a step-by-step guide to help you build your very own pallet wall for your nursery.
Materials Needed:
-
Pallets (the number depends on the size of your wall)
-
Measuring tape
-
Saw (if you need to cut pallets to size)
-
Hammer or nail gun
-
Screws (if you prefer more stability)
-
Level
-
Wood finish or paint (optional, depending on your aesthetic)
-
Protective gloves (safety first)
-
Pallet remover tool (if using used pallets that need disassembly)
Step-by-Step Guide:
1. Prepare Your Pallets:
Start by collecting your pallets. You can often find them for free at local stores or online marketplaces. If you want a cleaner, more polished look, you may need to sand them down to remove splinters. You can either leave the natural wood finish or apply a paint/stain to match your nursery theme.
2. Measure and Plan the Wall:
Measure the area where you want to create the pallet wall. This will help you determine how many pallets you need and how to arrange them. If you’re working with a small section of the wall, you may only need 3-4 pallets. For larger walls, plan for more. Make sure to decide whether you want the pallets to run horizontally or vertically.
3. Cutting and Preparing the Pallets:
If your pallets are too large or need adjusting to fit your wall, use a saw to trim them down to the desired size. Cut each pallet carefully to fit your wall dimensions, keeping them uniform.
4. Installation:
Start at the bottom of the wall and use a level to ensure that the first row of pallets is straight. Use a hammer or nail gun to secure the pallets to the wall. For added stability, use screws along the edges and into the studs of the wall. Continue adding rows, stacking pallets on top of each other.
5. Add Finishing Touches:
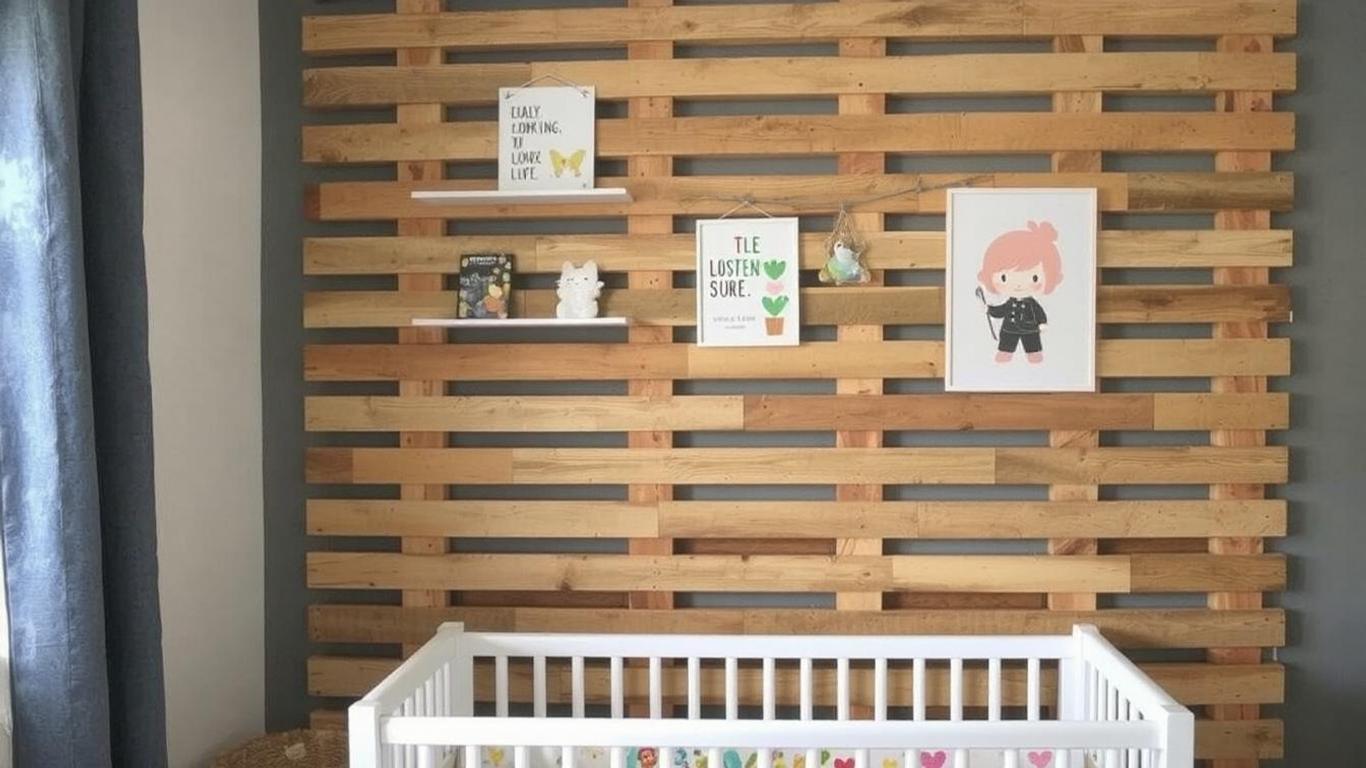
Once all the pallets are up, step back and inspect the wall. You can add a protective finish to enhance the wood’s natural look or opt for a colorful paint to match the nursery decor. If you’ve chosen to leave the pallets raw, consider adding some decorative elements like baby-safe garlands, framed art, or fairy lights to complete the look.
Tips & Tricks:
-
Safety: Be sure to wear gloves and protective eyewear when handling pallets, especially when cutting them.
-
Design Considerations: If you prefer a more modern or minimalist look, you can paint the pallets white or a neutral shade. For a rustic look, leave the wood as is or stain it for a deeper tone.
-
Spacing: If you’re looking for a more industrial feel, leave small gaps between the pallets to let the wall breathe. For a more cohesive look, stack them tightly together.
-
Nursery Decor: Once the wall is complete, complement it with soft nursery items like cozy blankets, plush toys, and hanging decor that add warmth and personality to the space.
Why Choose a Pallet Wall for Your Nursery?
A pallet wall not only adds a unique, stylish feature to your nursery but also offers a great way to recycle and repurpose materials. It’s budget-friendly and can be customized to fit any design theme, from rustic to modern. The best part? You’ll have a fun, hands-on project that results in a beautiful, personalized space for your little one.