
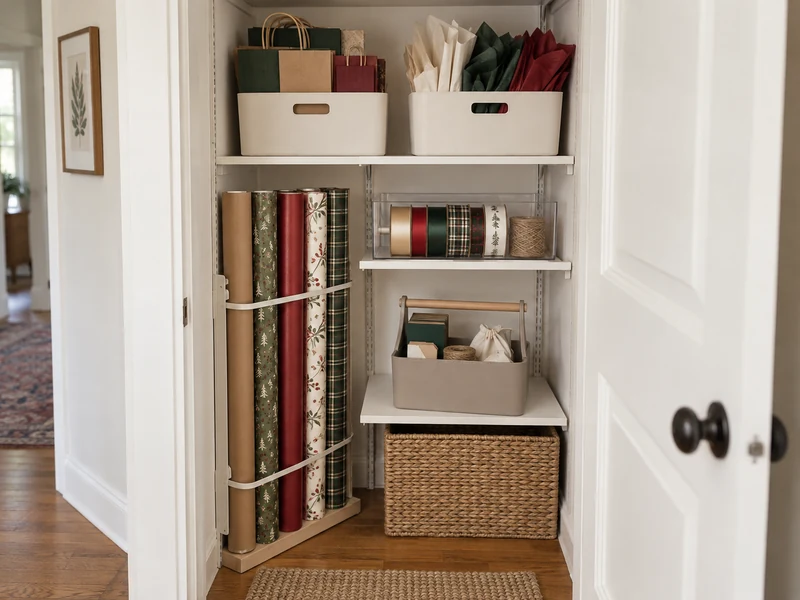
Wrapping paper rarely causes trouble by itself. The clutter starts when tall rolls, soft tissue paper, ribbons, tags, tape, and gift bags are all asked to share one undivided shelf. The rolls slump, the tissue gets crushed, and the scissors disappear just when you need them.
This five-zone system turns part of a small closet into a practical gift-wrap station without requiring a dedicated craft room. It is designed around a closet roughly 30 inches wide, but the method scales up or down because the zones are based on the shape and frequency of use of each supply.
The Five Zones at a Glance
- Roll zone: tall paper rolls stored upright and supported at two heights.
- Bag zone: gift bags filed vertically by size so handles do not tangle.
- Tissue zone: tissue folded loosely and stored flat or upright in one bin.
- Ribbon and tag zone: shallow containers that keep small supplies visible.
- Tool zone: a removable caddy for tape, closed scissors, twine, tags, and a pencil.
The system works because every item can be removed without unloading the shelf around it. It also creates natural limits: when one zone is full, edit that category before buying another organizer.
What You Need
- Tape measure and pencil
- Two medium shelf bins for bags and tissue paper
- One shallow tray or low bin for ribbon
- One narrow file sorter or small open bin for tags and cards
- One handled caddy for frequently used tools
- A vertical roll holder, tall narrow basket, or two properly rated support straps
- Removable labels or blank label clips
- Optional low basket for reusable gift boxes or overflow bags
Measure first and buy containers second. Shelf bins should be at least an inch shallower than the usable shelf depth so the door closes freely and handles do not scrape the frame. If you rent, choose freestanding containers or removable mounting hardware that is compatible with the wall surface.
Step-by-Step Instructions
Step 1: Empty, edit, and group every supply
Take all wrapping supplies out of the closet. Recycle empty cardboard tubes and paper scraps that are too small to use. Discard dried-out tape, damaged bows, and tags that no longer have matching strings. Flatten reusable bags and boxes before grouping them.
Make five piles that match the zones above. Keep holiday-specific supplies within the same physical system rather than building a second hidden stash. A few all-occasion papers, neutral bags, and interchangeable ribbons usually earn their space more often than highly specific designs.
Step 2: Measure the clear space, not just the closet opening
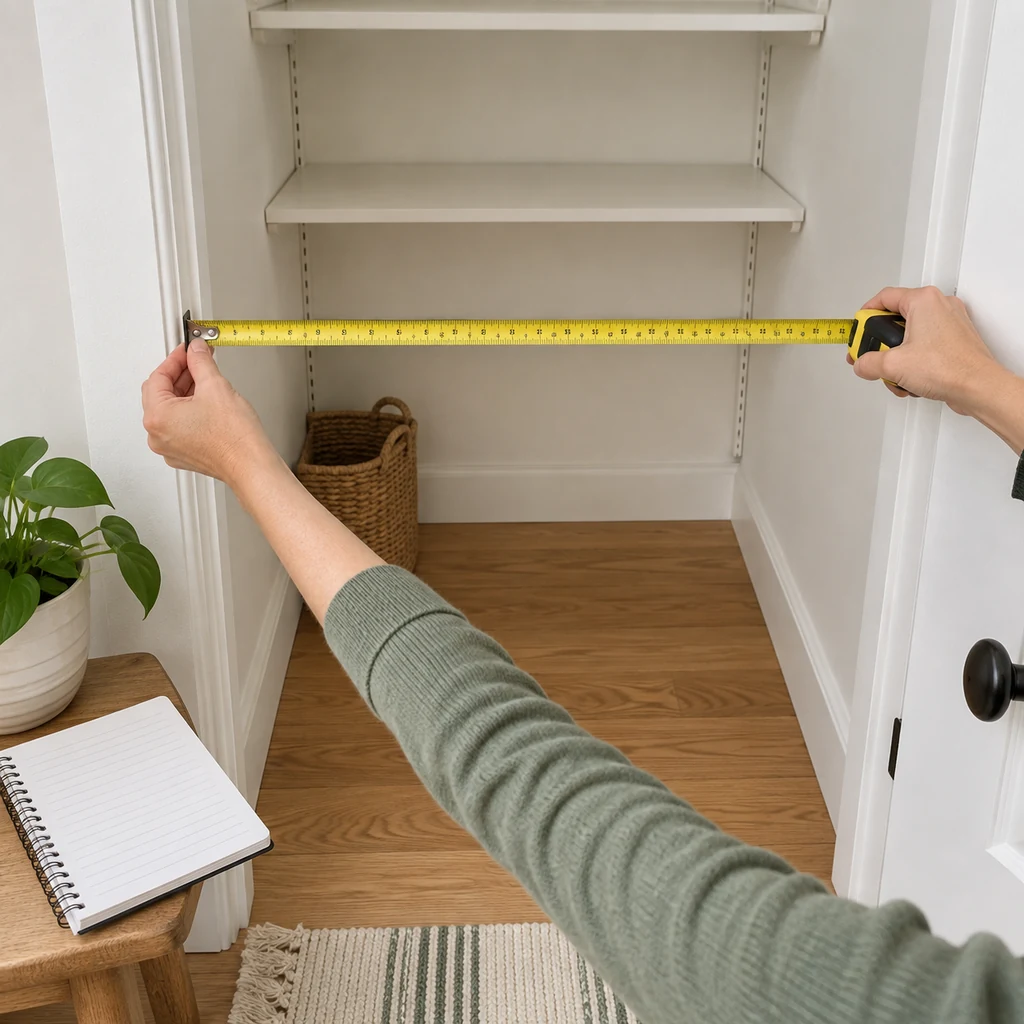
Record the usable width between hinges, trim, shelf tracks, and door hardware. Measure shelf depth from the back wall to the point where the closed door begins. Then measure the height of the tallest paper roll and the distance between shelves.
Open and close the door while holding the tape at the proposed storage depth. This simple check prevents a common mistake: choosing a bin that technically fits the shelf but collides with the knob, hinge, or door panel.
For a closet around 30 inches wide, reserve roughly 8–10 inches of floor width for rolls and use the remaining width for a caddy or low basket. These are planning ranges, not required dimensions; the actual door swing and roll diameter decide the fit.
Step 3: Build Zone 1 for upright paper rolls
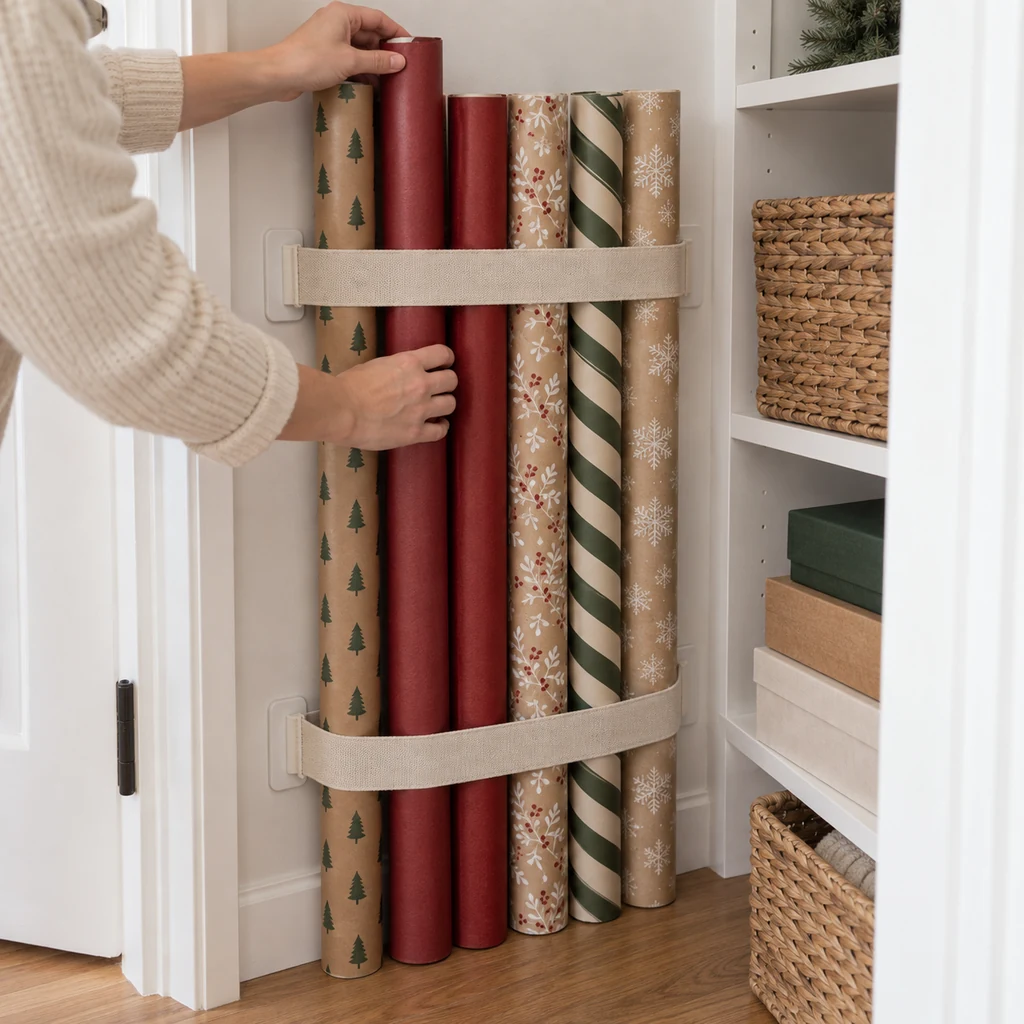
Place the roll zone on the closet floor or against a clear side wall. The roll bottoms should rest on a solid base; the straps are for lateral support, not for carrying the full weight. Use two support points—one low and one around the middle—so tall rolls stay vertical.
If you use wall-mounted straps, follow the hardware manufacturer’s surface preparation, load limit, and curing instructions. Do not attach adhesive hardware to loose paint, wallpaper, dusty plaster, or damp walls. Test the setup with the door moving through its full arc before loading all the rolls.
A freestanding tall basket is the simpler choice when mounting is unsuitable. Avoid packing it tightly: you should be able to pull one roll out without dragging the neighboring paper against a rough edge.
Step 4: Build Zones 2 and 3 for bags and tissue
Sort gift bags into small, medium, and large groups, then file them upright inside a bin with the handles tucked into each bag. Place the tallest bags at the back and short bags at the front. This keeps the handles visible without letting them knot together.
Fold tissue paper loosely along its existing creases. Store it flat in a shallow bin or upright between two firm dividers. Do not compress it under heavy boxes; crushed tissue consumes more space and is harder to reuse neatly.
If shelf height is limited, place the bag and tissue bins side by side rather than stacking them. Each bin should slide forward independently. For more small-space principles, the site’s small closet organization guide explains how to choose containers without crowding the usable opening.
Step 5: Build Zone 4 for ribbon, bows, tags, and cards
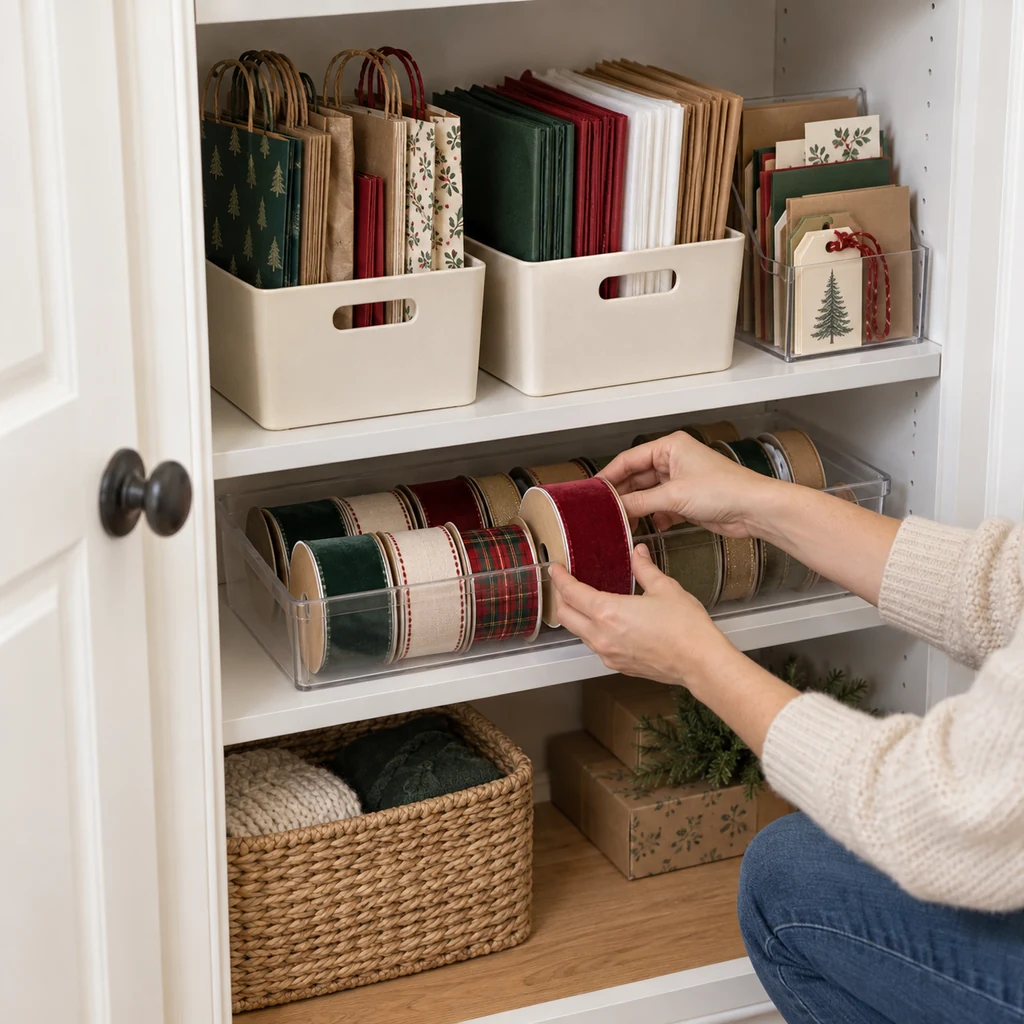
Lay ribbon spools in a shallow tray with their labels or colors visible from above. A deep box encourages stacking, which hides the lower spools and tangles loose ends. Secure each loose ribbon end with its spool notch, a reusable band, or a small paper clip.
Keep flat tags, envelopes, and greeting cards upright in a narrow file sorter. Bows can sit in a separate light bin on the highest reachable shelf because they are bulky but not heavy. Never place a heavy container above eye level where it must be pulled down blindly.
Step 6: Build Zone 5 as a portable tool caddy
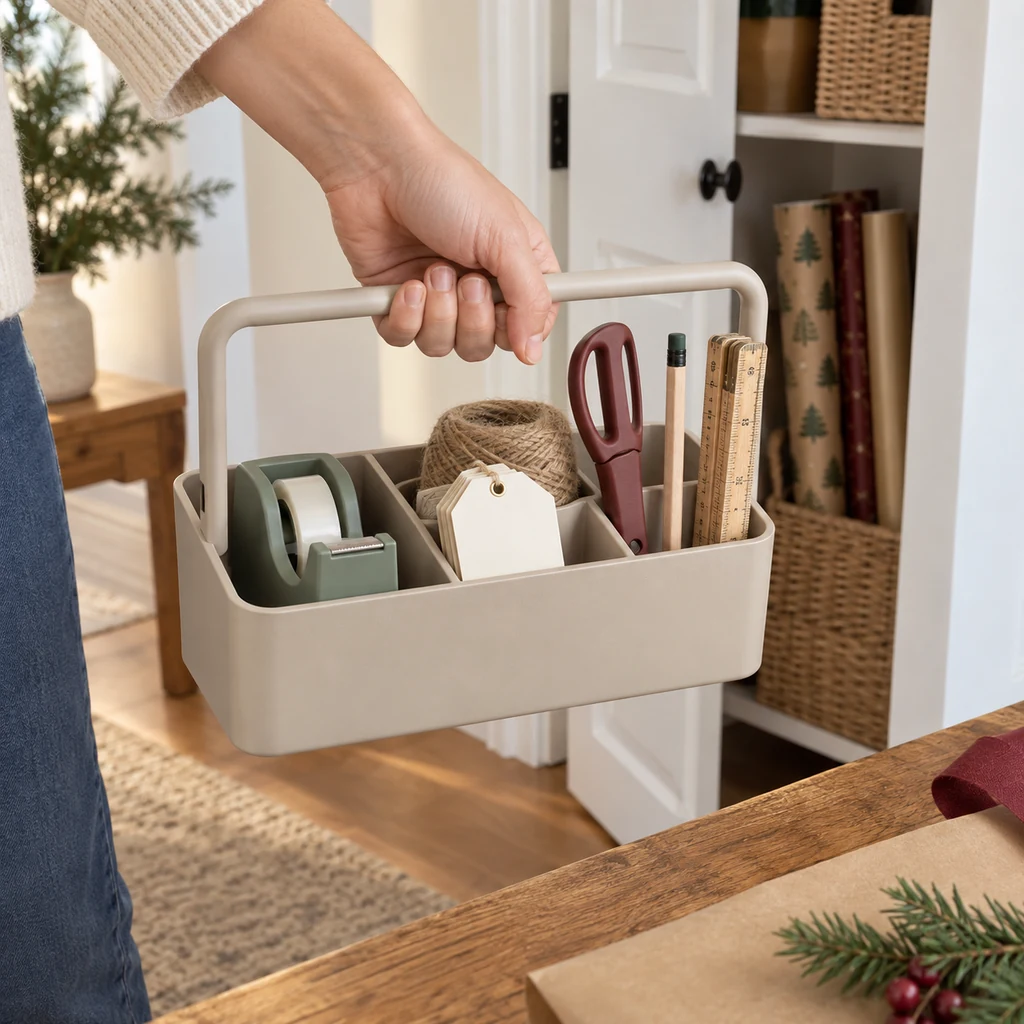
Place one tape dispenser, closed scissors stored point-down, blank tags, twine, a pencil, and a small ruler in a handled caddy. Keep replacement tape in the same zone, but limit tools to the versions you actually use. Duplicates make the caddy heavy and create another place to search.
If children can access the closet, move scissors and other sharp tools to a locked or high location. The caddy should remain light enough to lift with one hand and stable enough that nothing tips out while it is carried.
Step 7: Label, test, and reset the station
Use simple removable labels such as “bags,” “tissue,” “ribbon,” and “tags.” Test the station by wrapping one box from start to finish. You should be able to collect paper, ribbon, a tag, tape, and scissors without moving an unrelated container.
Close the door and check for rubbing, bulging, or pressure against paper rolls. If something catches, reduce the bin depth or move the roll zone away from the hinge side. Give every category a firm boundary instead of filling every inch on the first day.
Best Layout for a 30-Inch Closet
A practical starting layout uses one narrow floor section for vertical rolls, one lower shelf for the portable caddy, one middle shelf for ribbon and tags, and one upper shelf for bags and tissue. Reserve the highest shelf for light, infrequently used items only.
If the closet also stores linens or household supplies, keep gift wrap on one vertical side instead of spreading it across every shelf. The four-zone method in the small linen closet guide can help divide the remaining space by frequency of use.
What Not to Store Here
- Open paint, glue, or leaking markers: these can stain paper and release odors in an enclosed closet.
- Loose cutting blades: keep blades covered and inaccessible to children.
- Heavy boxes on high shelves: store dense items at waist height or below.
- Damp or temperature-sensitive supplies: avoid closets with condensation, plumbing leaks, or direct heat.
- Oversized shipping materials: keep mailing boxes elsewhere so they do not crush bags and tissue.
Common Gift Wrap Storage Mistakes
Buying an organizer before measuring the door swing
A container can match the shelf dimensions and still prevent the door from closing. Measure the clear usable envelope, including knobs, hinges, and trim.
Hanging all the weight from adhesive straps
Let the floor, basket, or lower ledge support roll weight. Use straps only to keep rolls upright unless the mounting system is specifically rated and installed for the full load.
Threading every ribbon onto a permanent rod
A rod looks tidy but makes it slow to remove one spool and awkward to return leftovers. A shallow tray gives faster access and makes editing easier.
Mixing flat paper goods with bulky tools
Scissors, tape dispensers, and twine deform tissue and snag bags. Keep tools in their own rigid caddy.
Saving every scrap
Keep only scraps large enough for a realistic use, such as a small box, tag, or paper band. Store them in one slim folder; when it no longer closes, edit the contents.
How to Keep the System Working All Year
- After each wrapping session: return the caddy, secure ribbon ends, and recycle unusable scraps.
- Before major holidays: count tape refills and tags before buying decorative extras.
- After the holidays: flatten reusable bags, remove damaged tissue, and keep only paper you will use again.
- Every three months: check mounting hardware, shelf stability, and signs of moisture.
- When a zone is full: edit that category instead of expanding into another shelf.
The same “one home for every category” rule works beyond the closet. Use the 30-inch entryway drop-zone layout for daily items and the pantry organization guide for food-storage zones.
Frequently Asked Questions
Should wrapping paper be stored vertically or horizontally?
Either orientation can work. Vertical storage is efficient when rolls rest on a solid base and are supported at two heights. Horizontal storage is better on a deep shelf with dividers that prevent rolls from stacking and crushing one another.
How do I store gift wrap in a rental?
Use a tall floor basket, shelf bins, file sorters, and a portable caddy. If you choose removable adhesive hardware, confirm that it suits the wall finish and follow its removal instructions. Freestanding storage carries less surface-damage risk.
Where should seasonal wrapping paper go?
Keep it in the same roll zone, grouped at one end. One consolidated inventory makes it easier to see what you already own and prevents duplicate purchases.
How many rolls fit in this system?
The photographed concept shows six rolls, but capacity depends on diameter and the available width. Leave enough clearance to remove one roll without scraping or crushing the others; the zone boundary matters more than a fixed roll count.
Final Reset Checklist
- The closet door opens and closes without touching containers or rolls.
- Paper rolls rest on a solid base and have support at two heights.
- Gift bags and tissue can be removed independently.
- Ribbon is visible in one shallow container.
- Tags and cards stay upright and unbent.
- Scissors are closed, secured, and inaccessible to children.
- The portable caddy is light enough to carry safely.
- Heavy items are stored below eye level.
A small gift-wrap closet does not need to hold every possible supply. It needs to protect the paper you use, reveal what you already own, and let you begin wrapping without first clearing a pile. Five clear zones accomplish that with less space and less searching.