
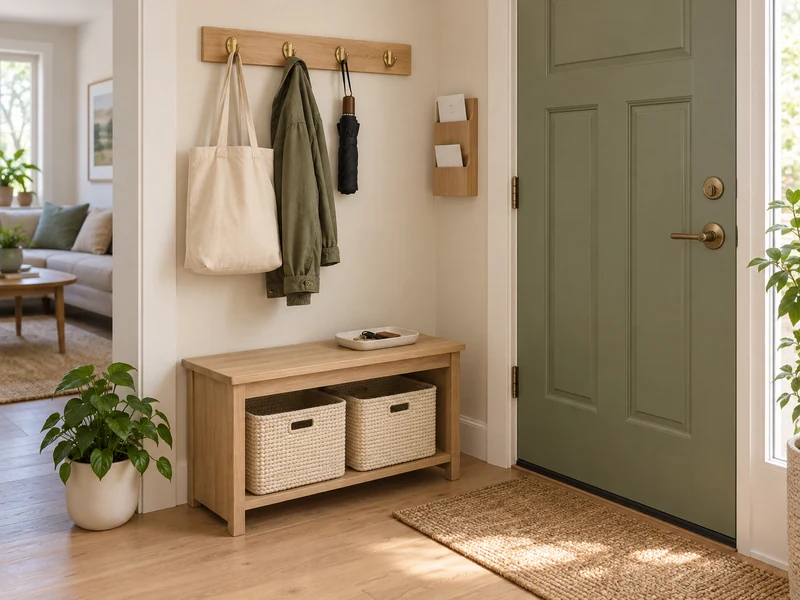
A small entryway does not need a mudroom-sized cabinet. It needs a clear landing place for the few things that cross the door every day. This layout fits a wall section about 30 inches wide and 12 inches deep, using a low bench, four hooks, two baskets, one key tray, and a compact mail holder.
The measurements below are a planning template, not permission to crowd an exit. Your door must open fully, the lock and controls must remain reachable, and the finished setup must preserve the required walking and egress clearance for your home.
Finished footprint: approximately 30 inches wide × 10–12 inches deep, with the hook rail mounted according to the users’ reach and the hardware manufacturer’s instructions.
Why This Small Entryway Layout Works
The system separates five everyday decisions: hang it, drop it, sort it, store it, or take it back out. Keys and sunglasses land in one shallow tray. Current mail gets two slots. Four hooks cap the number of hanging items. Two baskets contain shoes and outgoing essentials. The empty bench surface remains useful instead of becoming another pile.
| Element | Target size | Why it matters |
|---|---|---|
| Bench or low shelf | 28–30 in wide × 10–12 in deep × 17–19 in high | Keeps the floor footprint shallow and the top easy to reach. |
| Hook rail | 24–28 in wide with 4 hooks | Provides useful spacing without encouraging a wall of coats. |
| Key tray | About 8 × 6 in | Large enough for daily pocket items, small enough to enforce a limit. |
| Lower baskets | 2 baskets sized to the shelf opening | Separates shoes from outgoing or reusable items. |
| Mail holder | 2 slim slots | Creates “to process” and “to take out” lanes without becoming an archive. |
What You Need
- One low bench or open shoe shelf, 28–30 inches wide and no more than 12 inches deep
- Two matching baskets that slide in and out without scraping the shelf
- One 24–28-inch rail with four hooks
- Fasteners suitable for your wall type and the expected hanging load
- One shallow tray and one two-slot mail holder
- Painter’s tape, tape measure, pencil, stud finder, and level
- Drill or screwdriver appropriate for the selected mounting hardware
If anyone will sit on the bench, use only a product specifically rated for seating and follow its assembly and load instructions. Adhesive hooks are suitable only for lightweight objects within the stated rating; do not trust them with a loaded backpack, heavy coat, or anything that could fall onto a child or pet.
Step-by-Step Instructions
Step 1 — Edit the Entryway Inventory
Collect everything currently left near the door. Return seasonal gear, paperwork, bulk shoe storage, tools, and rarely used bags to their permanent homes. Keep only daily keys, one current bag per person, frequently worn outerwear, a small rotation of shoes, and items that truly need to leave the house.
This first edit matters more than buying organizers. A 30-inch drop zone cannot function as both a daily landing pad and long-term storage. If the rest of the home also needs a reset, use the room-by-room sequence in the 30-day decluttering guide before assigning containers.
Step 2 — Tape the Footprint and Test the Door
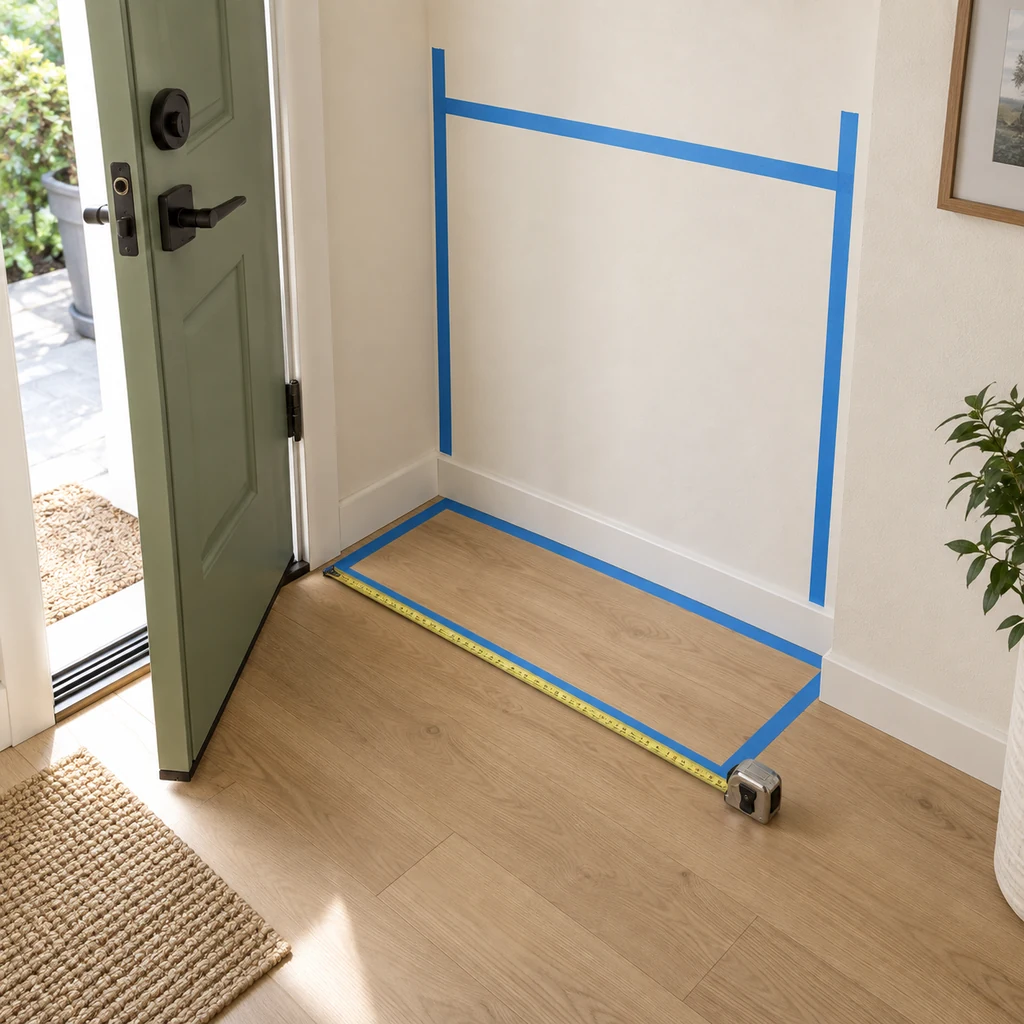
Mark a 30-inch-wide × 12-inch-deep rectangle on the floor with painter’s tape. Mark the proposed rail width on the wall. Open the door through its full travel, operate the handle and lock, and walk through while carrying a bag.
If the door crosses the taped rectangle—as the planning photo deliberately shows—do not place furniture there. Shift the footprint away from the hinge side, reduce its depth, or move the drop zone to the first clear wall beyond the swing. Keep heat sources, electrical panels, alarms, and ventilation grilles accessible.
Step 3 — Place the Low Bench First
Set the bench inside the approved footprint and push it back only as far as the baseboard allows. Confirm that it does not rock and that both baskets can be removed without hitting the door or rug. Leave the top mostly empty; the key tray is the only permanent object it needs.
A rug edge that catches a basket or bench leg creates daily friction. Move the rug, choose shorter baskets, or add non-slip pads rather than forcing the pieces together.
Step 4 — Mount the Hook Rail for the Real Load
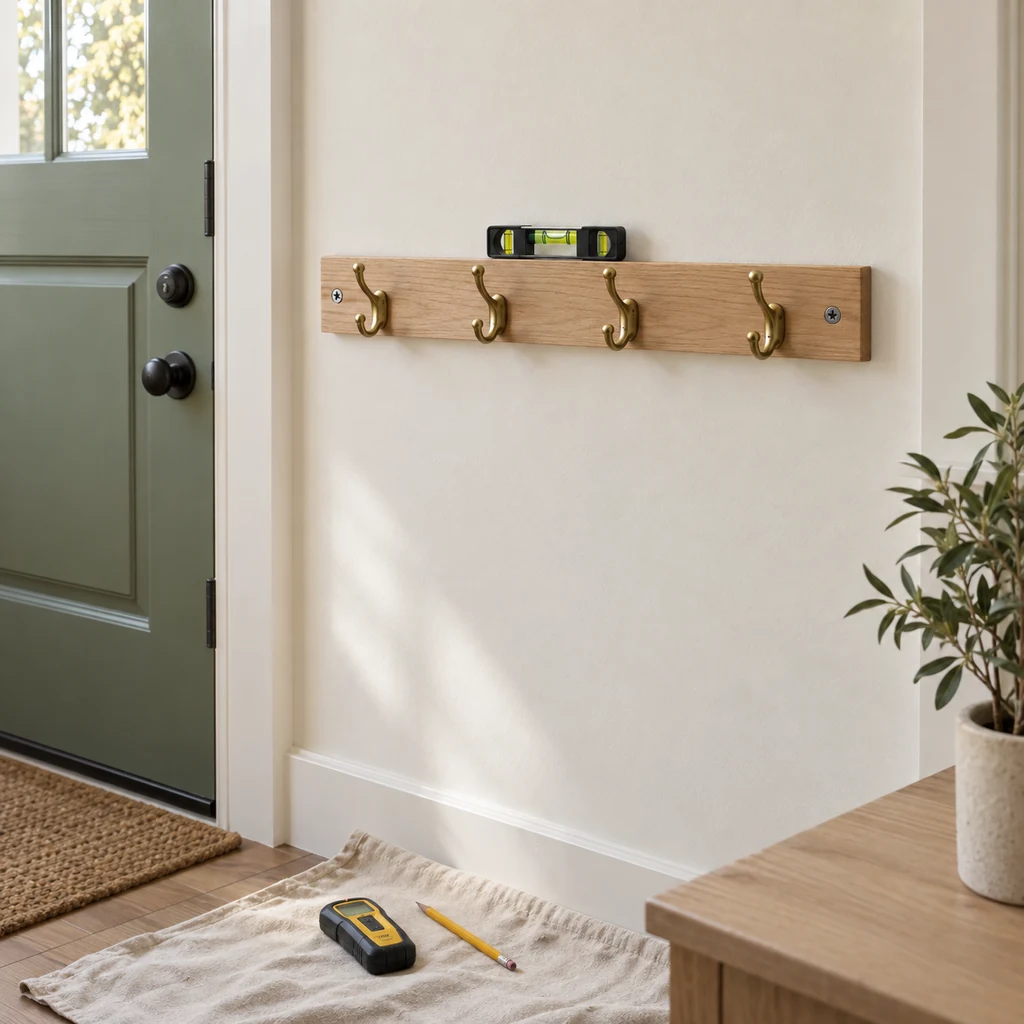
Hold the rail where the shortest regular user can reach it without standing on the bench. Check it with a level and locate wall framing. Fasten into framing whenever the rail and stud spacing allow. Otherwise use anchors specifically rated for your wall construction and the combined load; follow the anchor and rail instructions rather than guessing from appearance.
Before drilling, check for plumbing and electrical hazards. If the wall location is uncertain, use a qualified installer. After mounting, pull down gently on the empty rail, then add one light item at a time and recheck the fasteners.
Step 5 — Give Keys and Mail Separate Limits
Place the tray on the side of the bench closest to the door handle, provided it cannot be knocked off by the door. Reserve it for keys, sunglasses, and one wallet-sized item—not receipts or loose change.
Use one mail slot for papers that need action and the other for items leaving the house. Recycle junk mail before it enters the slot. The holder is full when papers begin to bend or hide one another.
Step 6 — Assign the Two Lower Baskets
Use one basket for the current shoe rotation. Use the second for outgoing parcels, reusable totes, or pet-walk supplies—choose the category that actually causes clutter in your household. Do not mix shoes with clean fabric items.
If you need storage for the rest of the footwear, move it to a closet and use the measurements in the small-closet organization guide to create a separate rotation zone.
Step 7 — Run a Seven-Day Friction Check
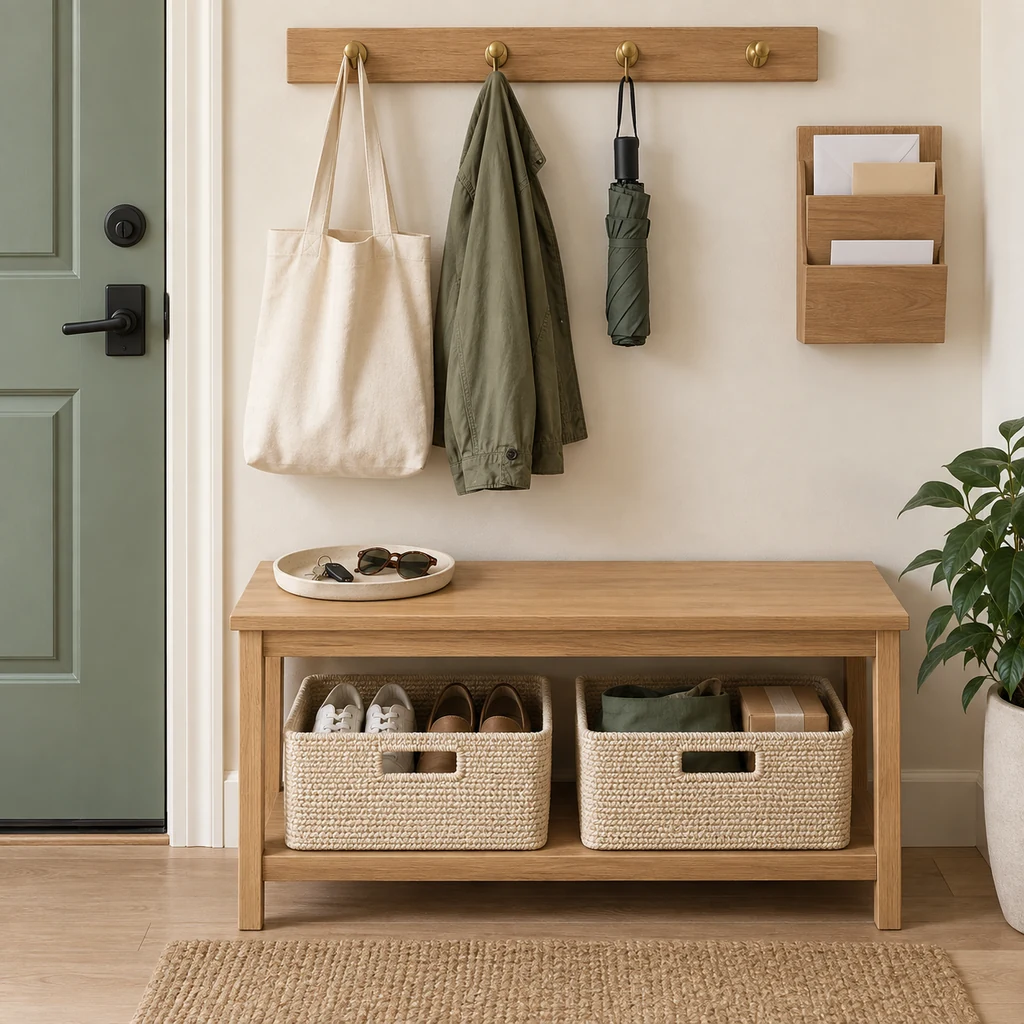
Use the setup normally for one week. Notice where objects still land on the floor or drift across the bench. Move a hook, swap the basket assignments, or relocate the tray only when the same problem repeats. Do not add another container for a one-time exception.
At the end of the week, the bench should still have open surface area, the door should move freely, and every hook should be visible. If not, reduce the number of stored items before increasing capacity.
Common Mistakes That Bring the Clutter Back
- Buying a bench before testing the door: even a shallow piece can enter the swing path near a hinge.
- Mounting hooks too high: unreachable storage guarantees that bags return to the floor.
- Treating the mail holder as filing: two slim slots should hold current decisions, not old paperwork.
- Using adhesive hooks for heavy loads: paint adhesion and rated capacity vary; loaded bags need a properly mounted support.
- Filling the bench with decor: the open surface is working space, not a display shelf. For collected objects, use the editing approach in the vintage trinket shelf guide.
- Adding a basket for every problem: more containers increase capacity but do not improve the routine.
Renter-Friendly and Family Variations
If You Cannot Drill
Replace the wall rail with a stable freestanding coat rack positioned outside the door swing, or use an over-door rack only if the door still closes, latches, and clears the frame without damage. Keep heavy items low. Use removable adhesive only for lightweight keys or empty reusable bags and stay below the manufacturer’s surface and load limits.
If Children Use the Entry
Mount a separate low rail or use accessible lower hooks rather than asking children to climb on the bench. Keep cords, sharp umbrellas, medications, and small choking hazards out of reach. Anchor any tall freestanding unit according to its instructions.
If You Have No Room for a Bench
Use a slim closed shoe cabinet rated for the location, or omit floor furniture and place one washable shoe tray below the hooks. Preserve the same capacity rules: one key tray, two mail decisions, and a defined number of hanging items.
The Five-Minute Weekly Reset
- Return extra coats and bags to their permanent storage.
- Process both mail slots completely.
- Move out-of-rotation shoes away from the entry.
- Deliver parcels and outgoing items to the car or next destination.
- Wipe the tray and bench, then confirm the door path is clear.
Frequently Asked Questions
Is 30 inches wide enough for an entryway drop zone?
Yes, when the setup handles only daily essentials. A 28–30-inch bench, four hooks, two fitted baskets, and a small tray can work well without pretending to replace a coat closet.
How deep should furniture be in a narrow entry?
A depth of 10–12 inches is a useful starting range for this layout. The correct depth is whatever preserves the door swing and safe walking clearance in your specific space.
How high should the hook rail be?
Mount it for the shortest regular user, the length of the hanging items, and the rail manufacturer’s instructions. Test the position with painter’s tape before drilling; there is no single height that fits every household.
What should stay out of the drop zone?
Old mail, seasonal footwear, bulk bags, cleaning supplies, tools, and anything valuable that can be seen or reached from outside should have another home.
How do I stop the bench from becoming a dumping surface?
Keep only one small tray on top, process mail in its own holder, and reset the surface weekly. When an object repeatedly appears there, give it an intentional home or remove it from the entry.