If you’re looking to add a touch of rustic charm to your bedroom, a DIY platform bed is an excellent project that not only combines style, simplicity, and functionality but also sparks your creativity. With its clean lines and minimalist design, a platform bed can be a versatile canvas for your personal style, making it a perfect addition to any room. Whether you’re a beginner or an experienced DIYer, this rustic platform bed tutorial will guide you through the process of building your bed frame from scratch, saving you money while creating a custom piece that’s uniquely yours.
Why Choose a Rustic DIY Platform Bed?
Platform beds are sleek and require no box springs, making them ideal for modern and rustic spaces alike. A rustic DIY platform bed offers a warm, earthy appeal, perfect for those who love the look of reclaimed wood, natural textures, and a cozy atmosphere. But the real joy comes from the satisfaction of building your own furniture, a feeling that’s hard to beat. Not only will you create a piece that’s both functional and full of character, but you’ll also feel a sense of accomplishment and pride.
This platform bed is not just sturdy, it’s a long-term investment. It’s budget-friendly, can be customized to fit your desired size and aesthetic, and it adds a cozy, inviting atmosphere to your bedroom. But most importantly, it’s durable, ensuring that you can enjoy its rustic charm for years to come, making it a secure and confident choice for your home.
Materials You’ll Need
Before getting started, gather the materials and tools needed for the project. Most of these items are easy to find at your local hardware store, and you might even have some of them at home.
Materials:
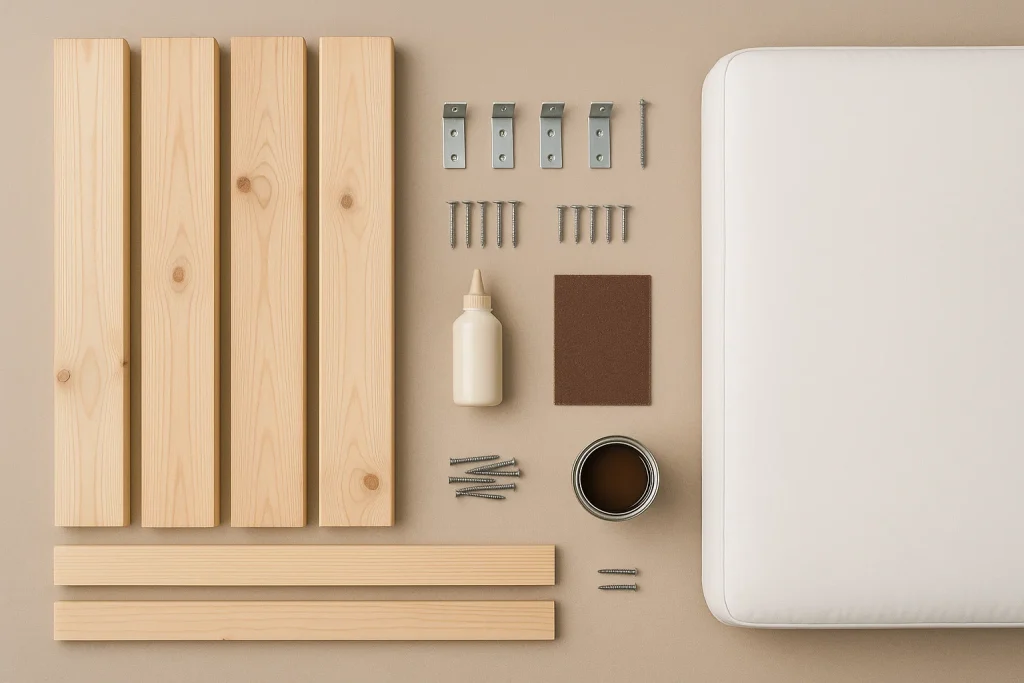
- 4 wooden planks (2×6 or 2×8 for the bed frame)
- 2 wooden planks (1×4 for the slats)
- 4 corner brackets (for added stability)
- 4 wood screws (3 inches)
- 8-12 wood screws (1.5 inches)
- Wood glue
- Sandpaper (medium and fine grit)
- Wood stain or paint (optional for finishing)
- Protective clear coat (for sealing)
- Mattress (size of your choice)
Tools:
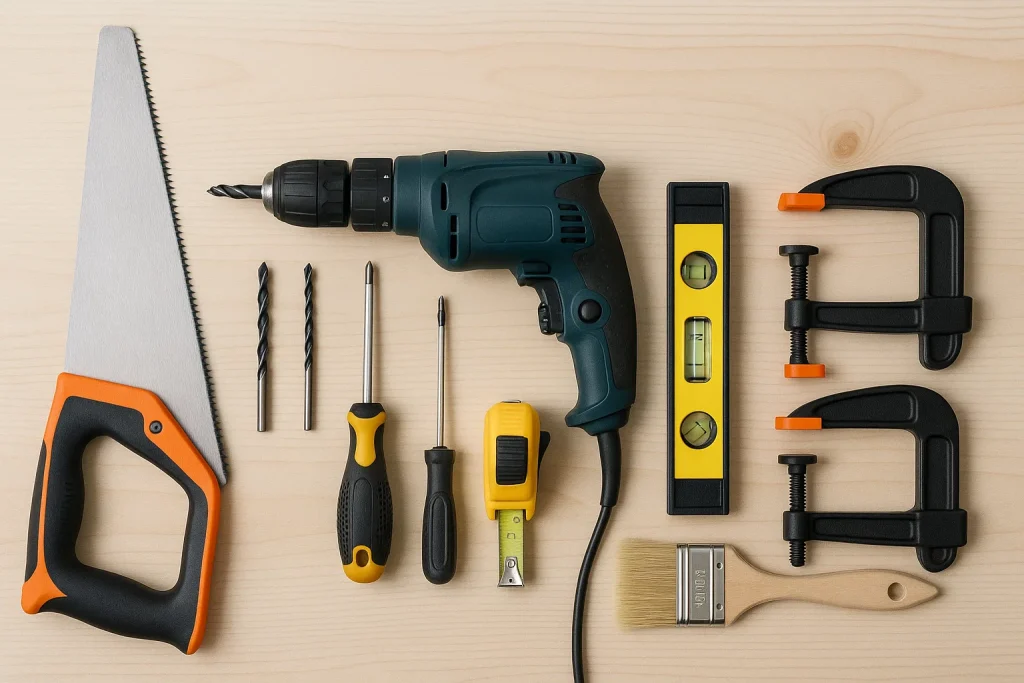
- Saw (for cutting wood to size)
- Drill and drill bits
- Screwdriver
- Measuring tape
- Level
- Clamps (optional for holding wood while drying)
- Paintbrush (if finishing)
Step-by-Step Guide: Building Your Rustic DIY Platform Bed
Step 1: Measure and Cut the Wood
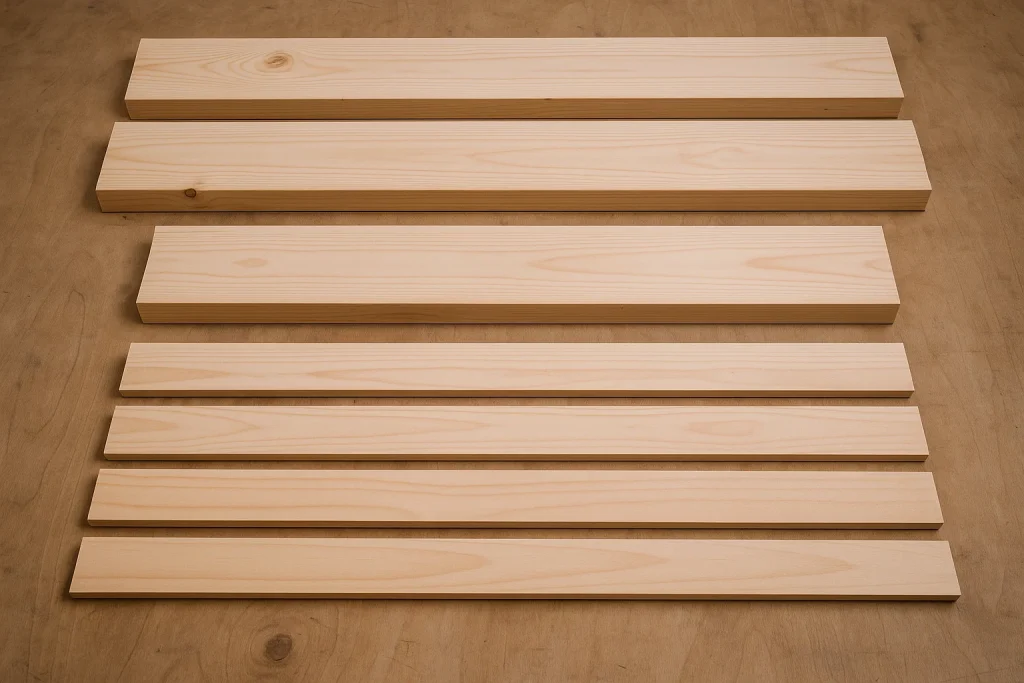
First, measure the dimensions of your mattress. For a standard queen-size bed, the measurements will typically be 60 inches by 80 inches. However, ensure you measure your specific mattress to get accurate dimensions for the frame.
Once you have the measurements, cut the wooden planks accordingly. You’ll need:
- 2 planks of 2×6 for the long sides of the frame
- 2 planks of 2×6 for the short sides of the frame
- 1 plank of 2×6 for the center support beam
- Multiple 1×4 planks (around 8-10) for the slats that will hold the mattress
Step 2: Sand and Prepare the Wood
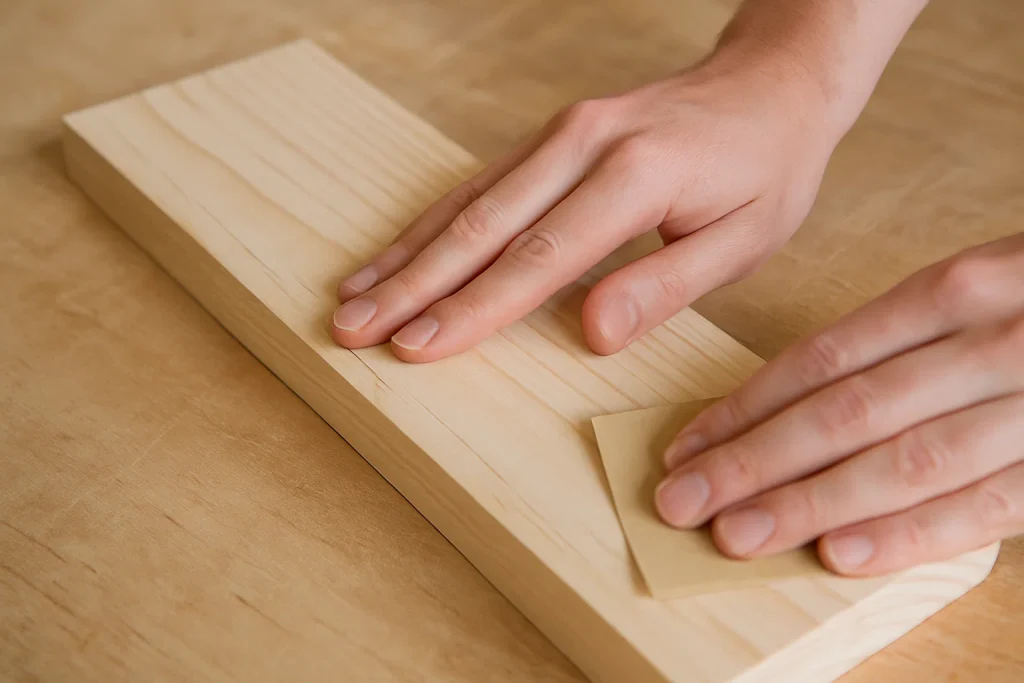
Use medium-grit sandpaper to smooth out the rough edges and surfaces of your wood planks. Once the surface is even, switch to fine-grit sandpaper to give the wood a polished, smooth finish. This step is important, especially if you’re planning to stain or paint the wood.
After sanding, wipe the planks down with a damp cloth to remove any dust or debris.
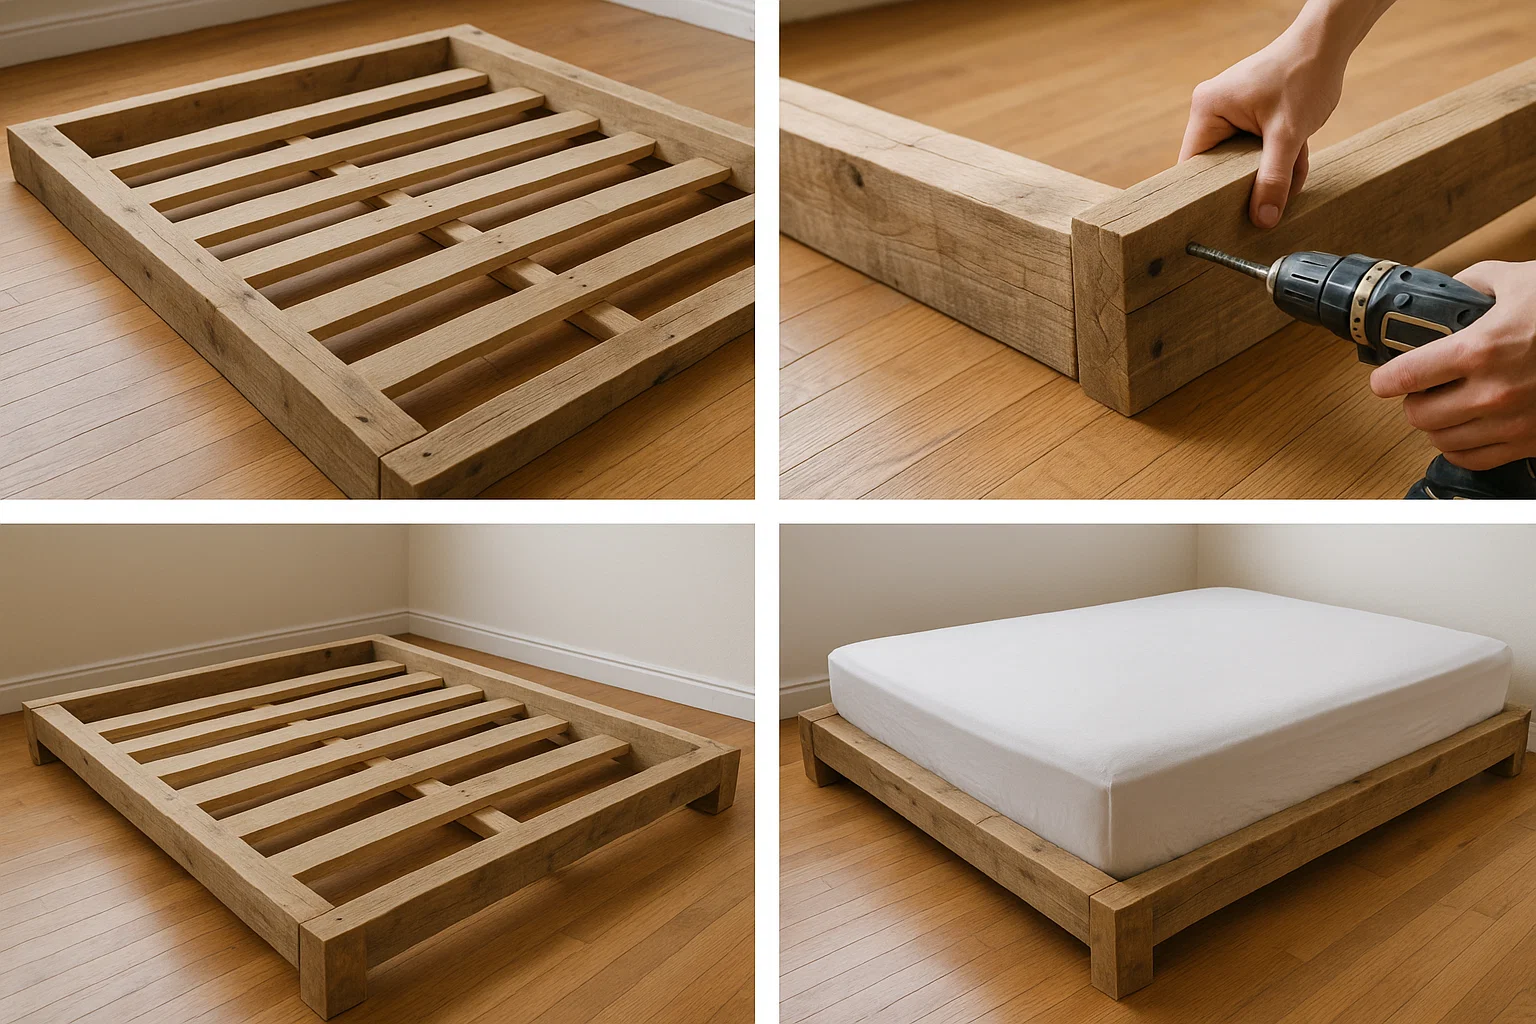
Step 3: Assemble the Bed Frame

Start by creating the bed’s outer frame. Lay the two long pieces of 2×6 flat and attach the two shorter 2×6 pieces at each end, forming a rectangular shape. Use wood glue at the joints and then secure them with 3-inch wood screws. Pre-drill holes to ensure the screws go in smoothly without splitting the wood.
Step 4: Add the Center Support Beam
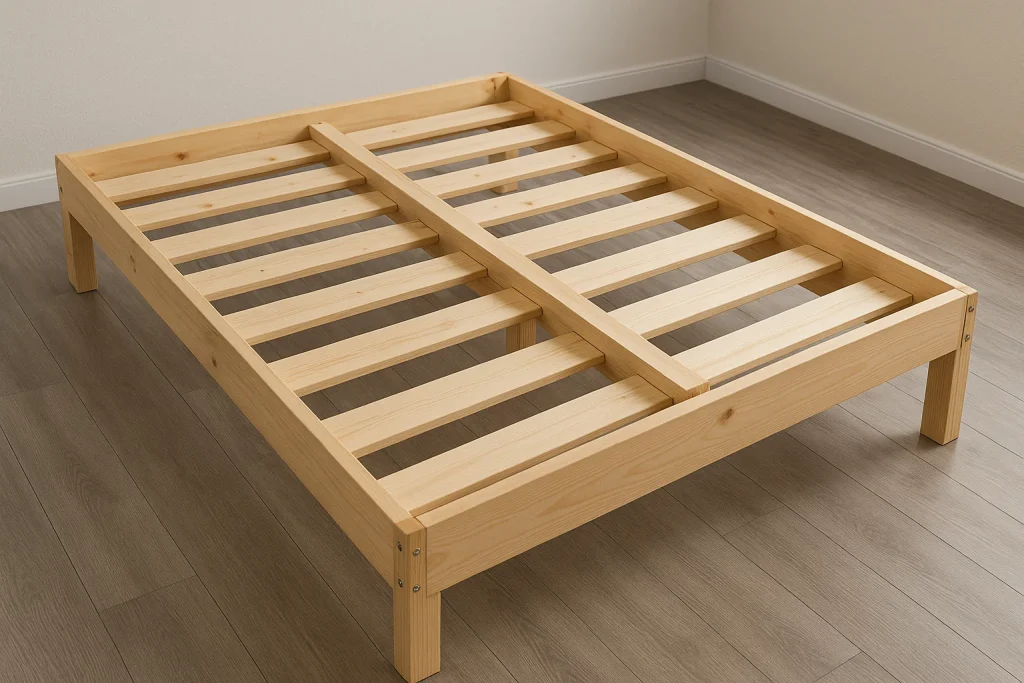
To add extra stability, place the center support beam along the length of the bed frame. This beam will help prevent the bed from sagging over time. Attach it securely in the center of the frame using wood screws, making sure it’s aligned properly.
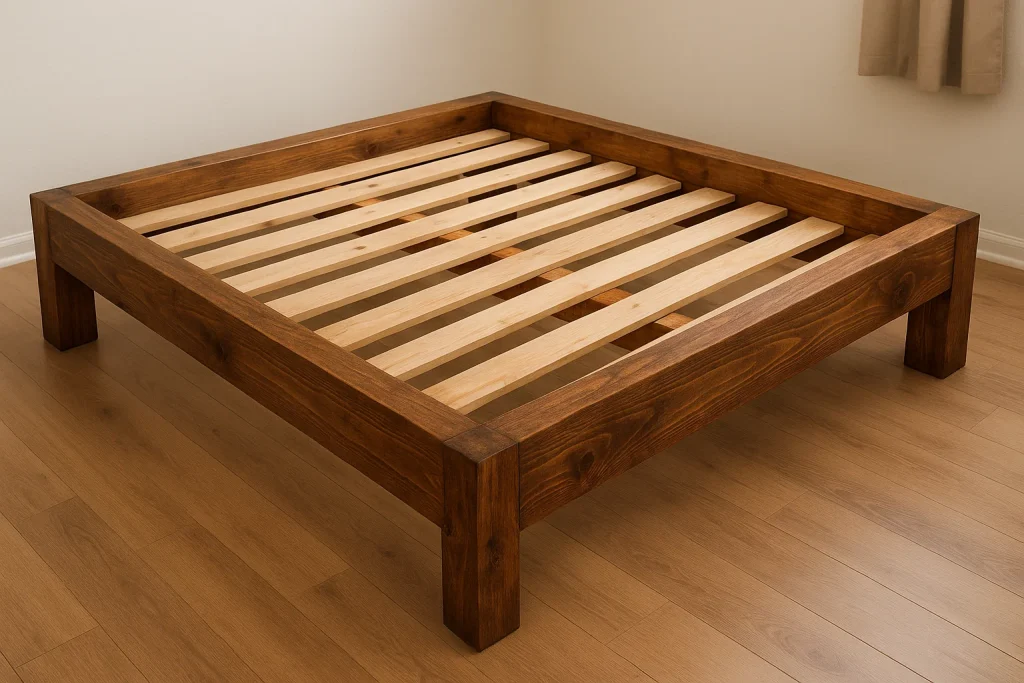
Step 5: Install the Slats
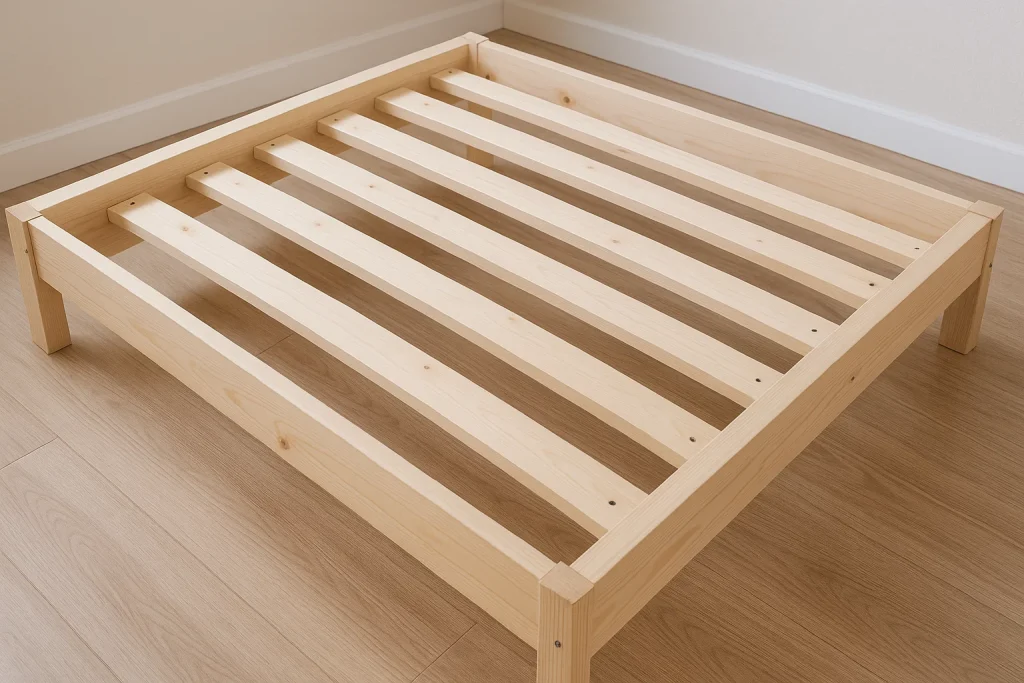
Now it’s time to add the slats that will support your mattress. Lay out the 1×4 planks across the width of the bed frame, leaving about 2-3 inches between each slat. Secure them with 1.5-inch screws into the bed frame. This step is essential for keeping your mattress supported without needing a box spring.
Step 6: Secure the Corner Brackets
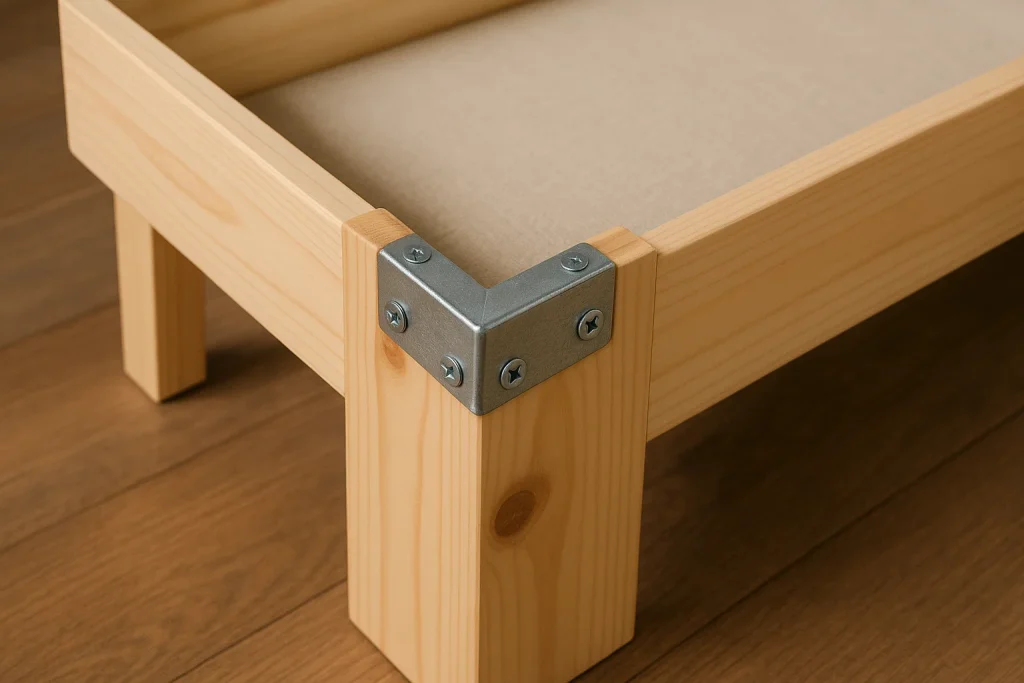
For added strength and stability, you can add metal corner brackets at each corner of the frame. Attach them with screws to further reinforce the bed. This will ensure that the bed frame remains square and stable for years to come.
Step 7: Finish the Wood
Once the frame is fully assembled, you can choose to finish the wood. If you like the natural look of the wood, apply a wood stain to enhance its grain and give it a rustic appearance. Use a paintbrush to apply a thin, even coat, and wipe off any excess with a cloth. Allow the wood to dry completely before adding a protective clear coat to seal the finish.
If you prefer a different look, you can also paint the frame in any color that complements your room’s design.
Step 8: Assemble the Bed and Place Your Mattress
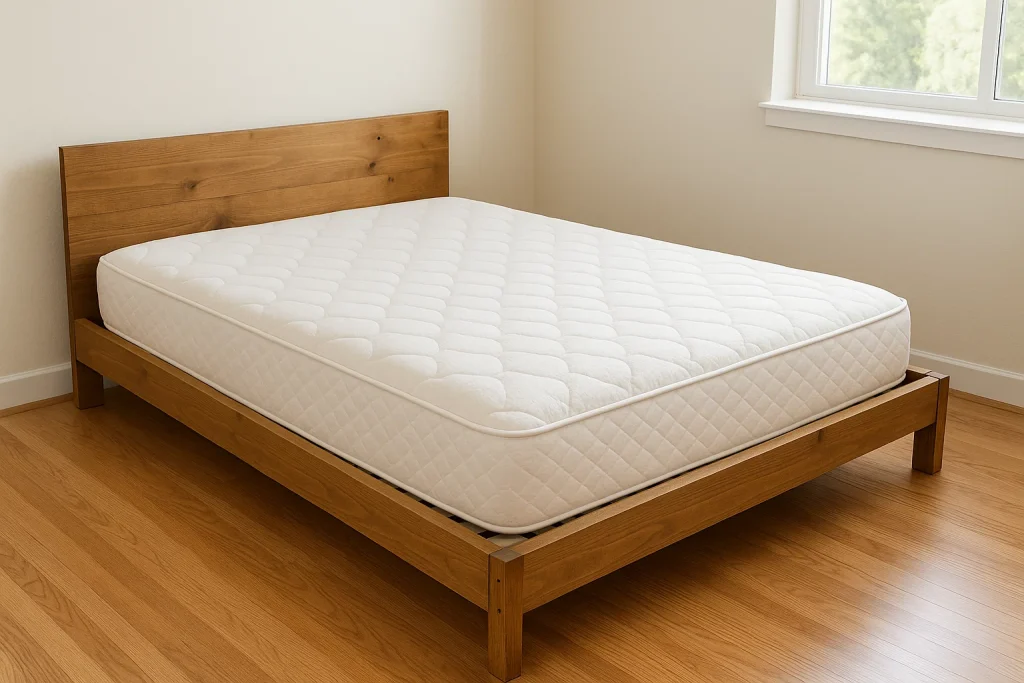
Once the finish is dry, it’s time to assemble the platform bed in your room. Place it where you want the bed to go, then lay your mattress on top. Check that the mattress fits snugly inside the frame, and adjust the slats if necessary.
Final Thoughts
Building a Rustic DIY Platform Bed is a rewarding and fun project that adds a personalized touch to your home. The combination of sturdy wood and rustic charm creates a stylish piece of furniture that enhances the look of any bedroom. Plus, it’s highly customizable, so you can tweak the design and finish to suit your taste.
Whether you’re a DIY enthusiast or a beginner, this project can be tackled with basic woodworking skills, and the result is a durable and beautiful platform bed that you’ll love for years to come.
1 thought on “Rustic DIY Platform Bed Tutorial”
Comments are closed.