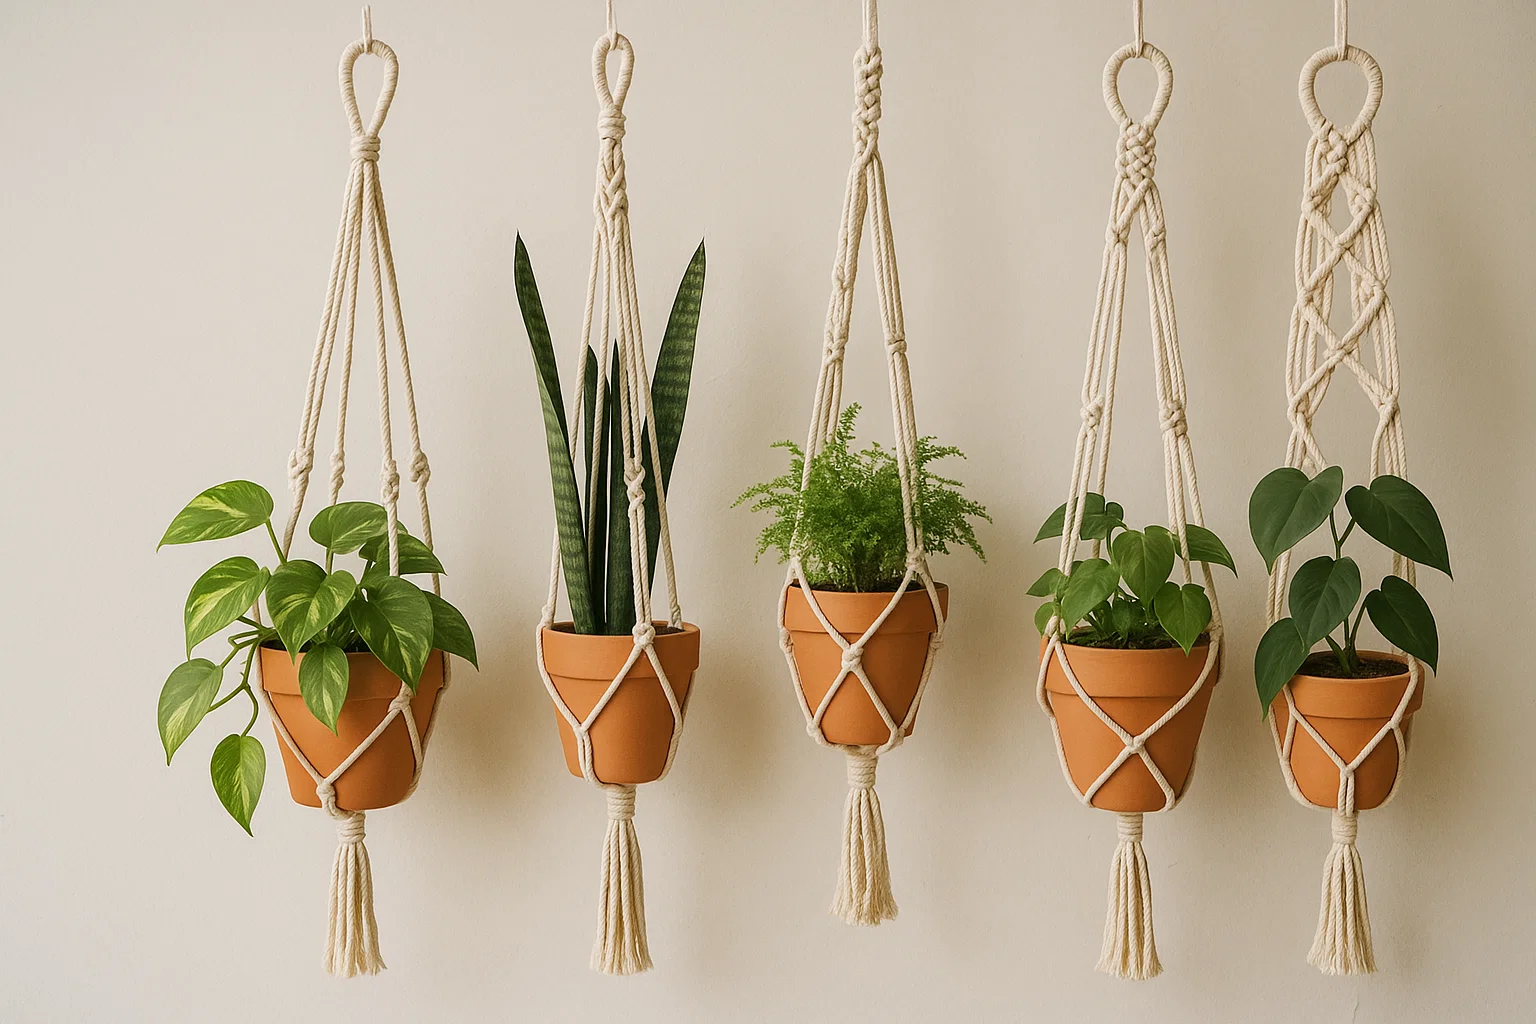
Macramé plant hangers are a beautiful and easy way to bring some bohemian charm to your space while also showcasing your favorite plants. Whether you’re a seasoned crafter or new to macramé, this guide will walk you through creating your very own plant hangers with just a few basic knots and materials. Not only are they a fun DIY project, but they also add a unique touch to your home décor.
Why Macramé Plant Hangers?
Macramé plant hangers are a great way to display your plants in a way that saves space and adds style. Hanging plants can brighten up any room while giving your plants room to grow without taking up valuable counter or shelf space. The process of making a macramé plant hanger is not just a craft, it’s a journey of relaxation and creativity. As you tie each knot, you’ll find yourself unwinding and letting your creative juices flow. And when you see your finished hanger, proudly holding your beloved plant, you’ll feel a sense of accomplishment that’s truly satisfying.
What You’ll Need

Here’s a simple list of materials to get started:
- Cotton or jute cord (approximately 4mm thickness works best)
- Scissors (to trim the cords)
- A ring or wooden dowel (this will be the base for your plant hanger)
- A plant pot (to make sure you have the right size for your hanger)
- Tape measure (optional, but valuable to ensure your lengths are accurate)
- A hook or ceiling hook (for hanging your plant)
Basic Macramé Knots You’ll Need to Know
Before we start, here are the basic macramé knots that you’ll use throughout this project:
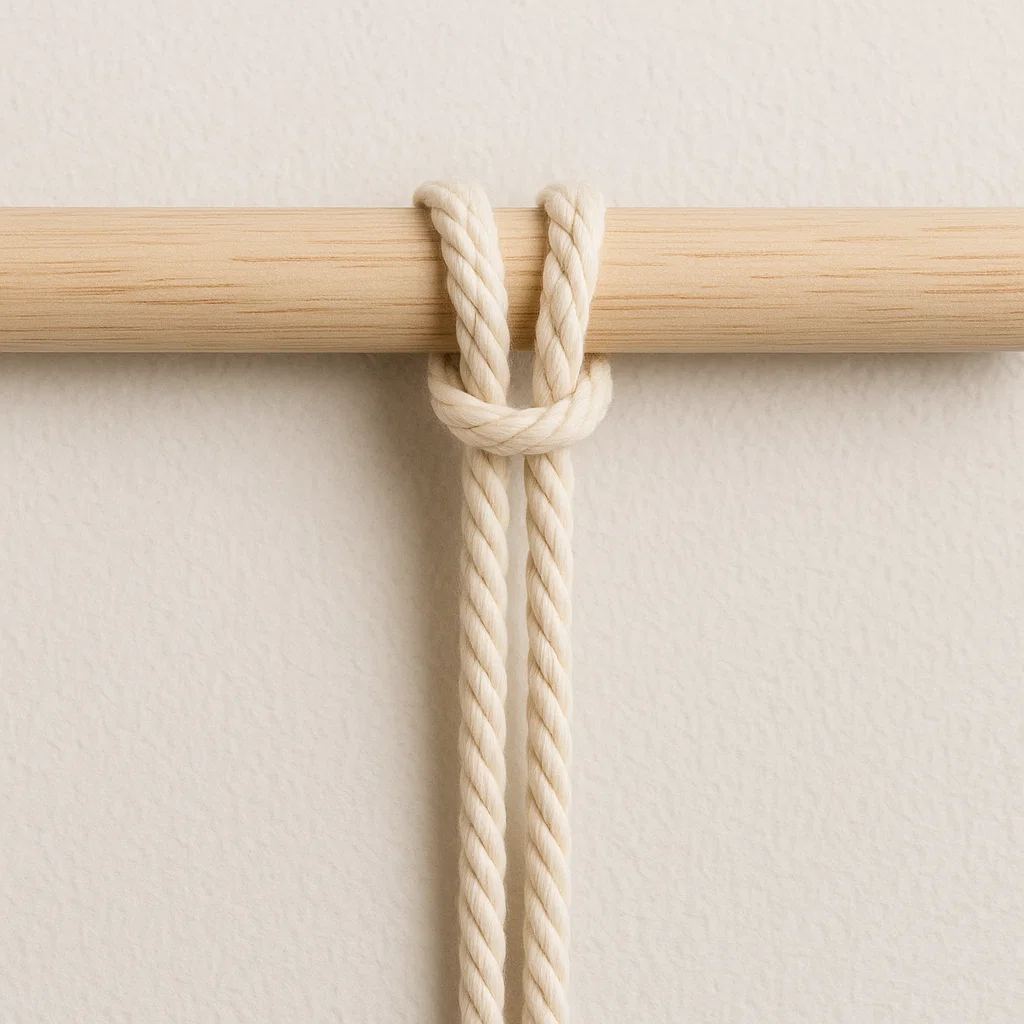
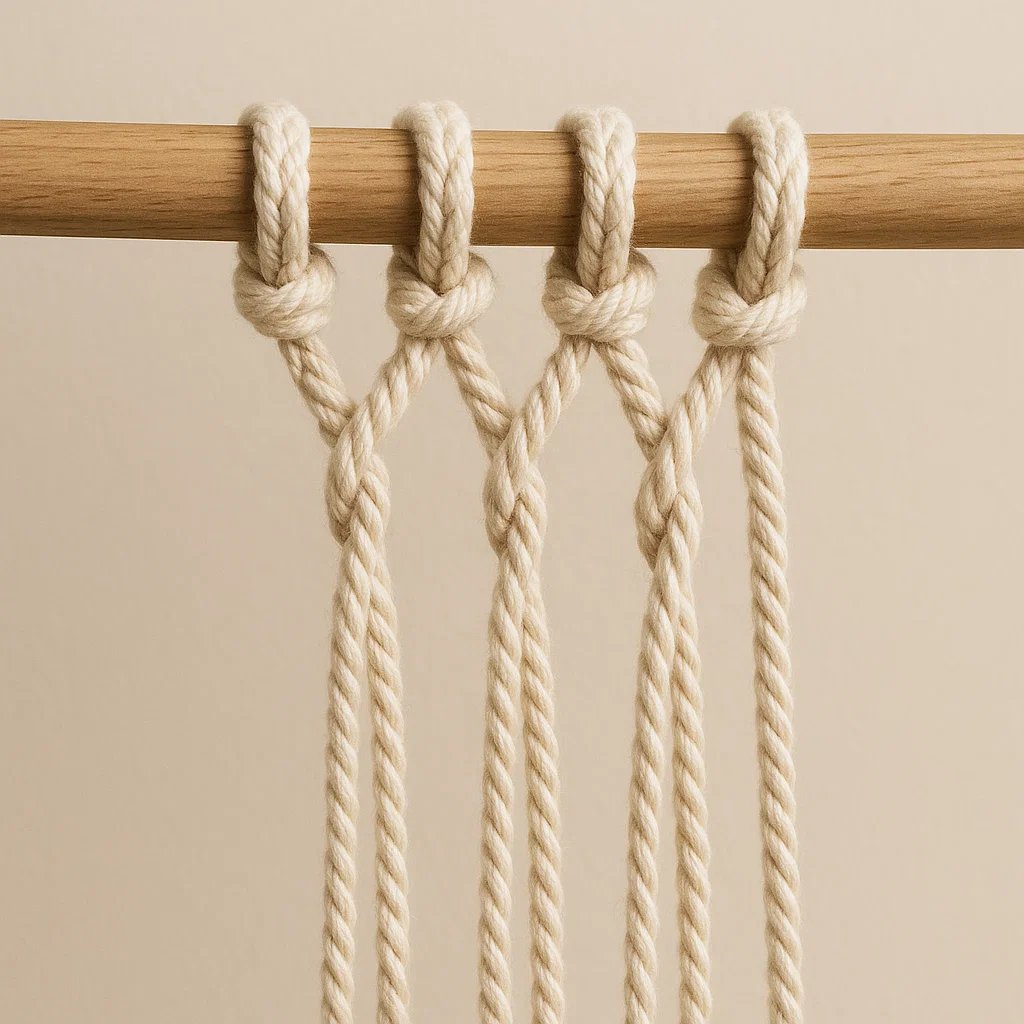
Lark’s Head Knot: This is the knot you’ll use to attach your cords to the ring or dowel.
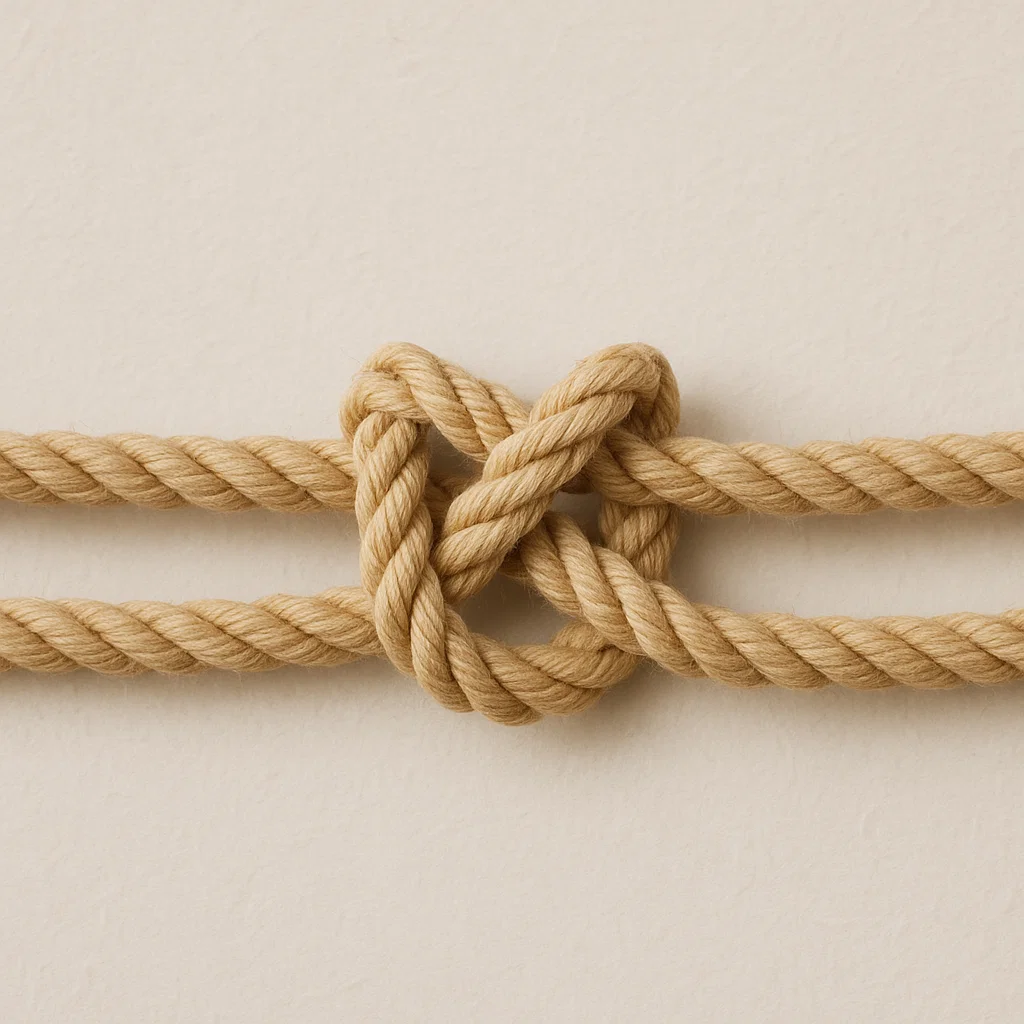
Square Knot: A classic and straightforward knot that will form the main structure of your plant hanger.
Half Hitch Knot: Used for decorative elements and creating the “legs” that hold the pot.
Step-by-Step Guide to Making Your Own Macramé Plant Hanger
Step 1: Cut Your Cords
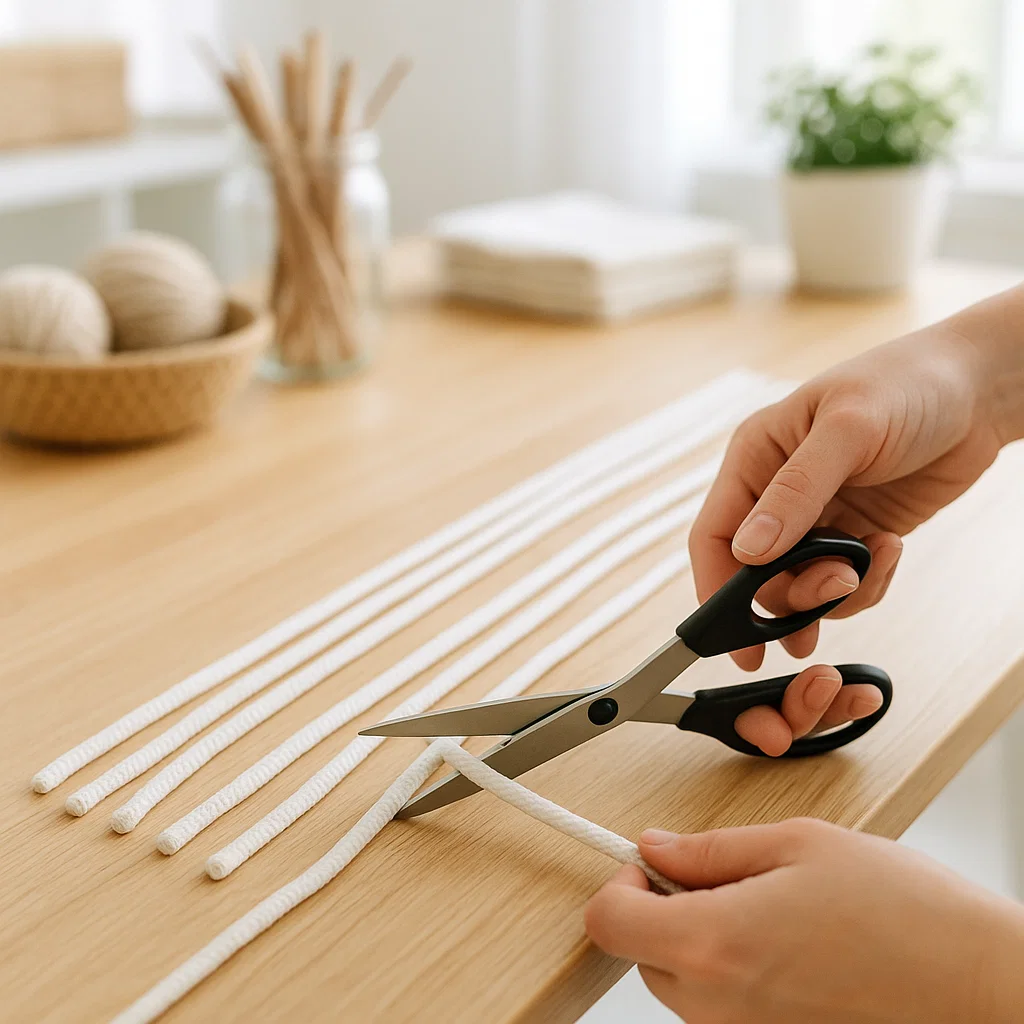
For a simple plant hanger, cut six pieces of cord, each about 4 feet long. You can adjust the length to suit your desired hanger length. The longer the cord you use, the longer your plant hanger will be.
Step 2: Attach the Cords to the Ring
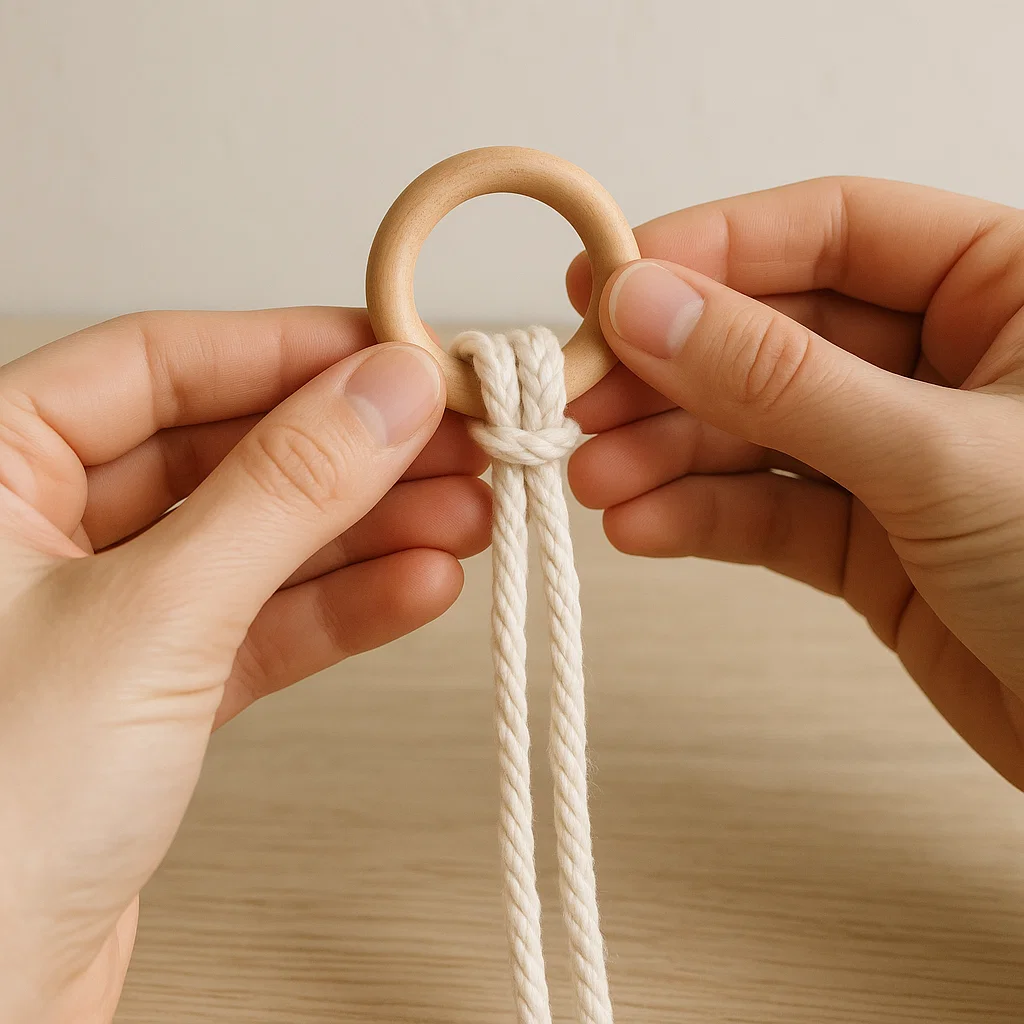
Start by folding each cord in half and securing it onto the ring using a Lark’s Head Knot. To do this:
- Fold the cord in half.
- Place the folded loop under the ring.
- Pull the ends of the cord through the loop to create a knot, attaching the cord to the ring.
Repeat this process with all six cords.
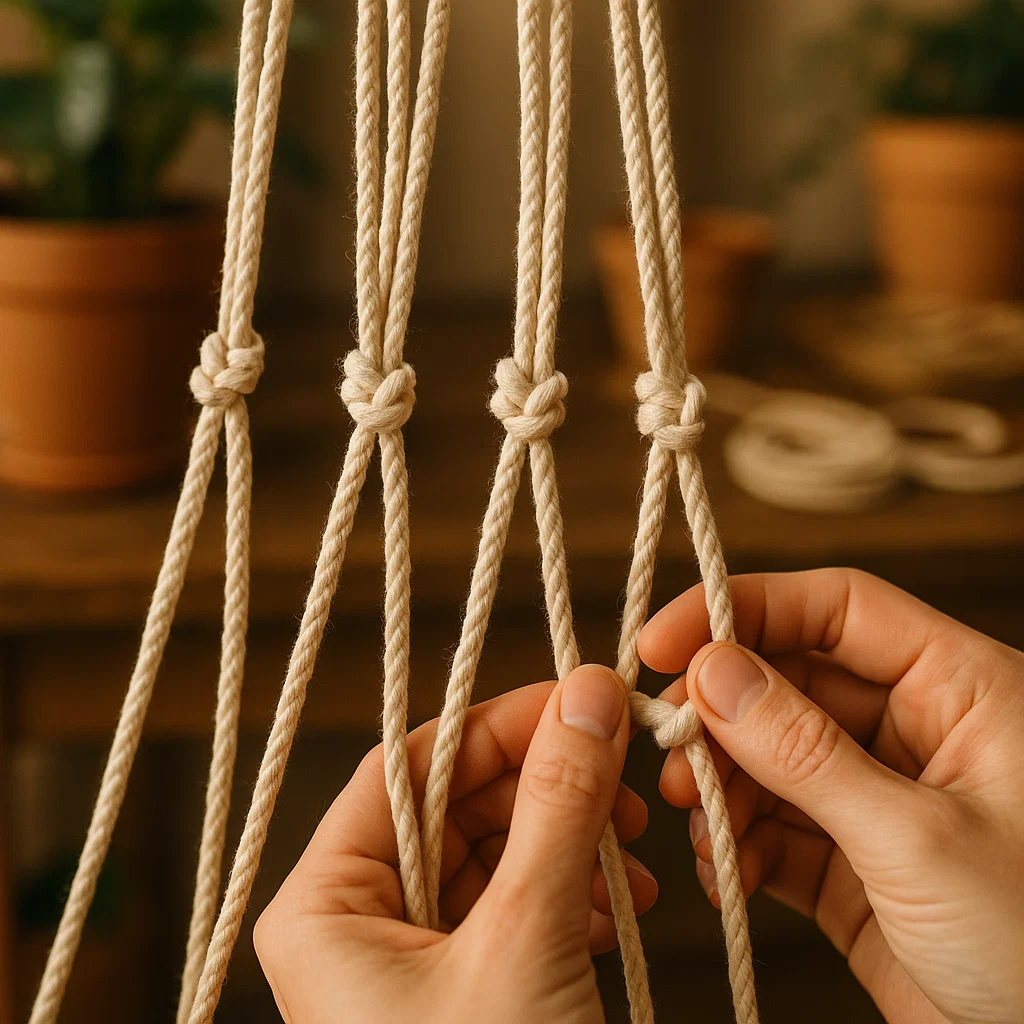
Step 3: Create the First Row of Square Knots
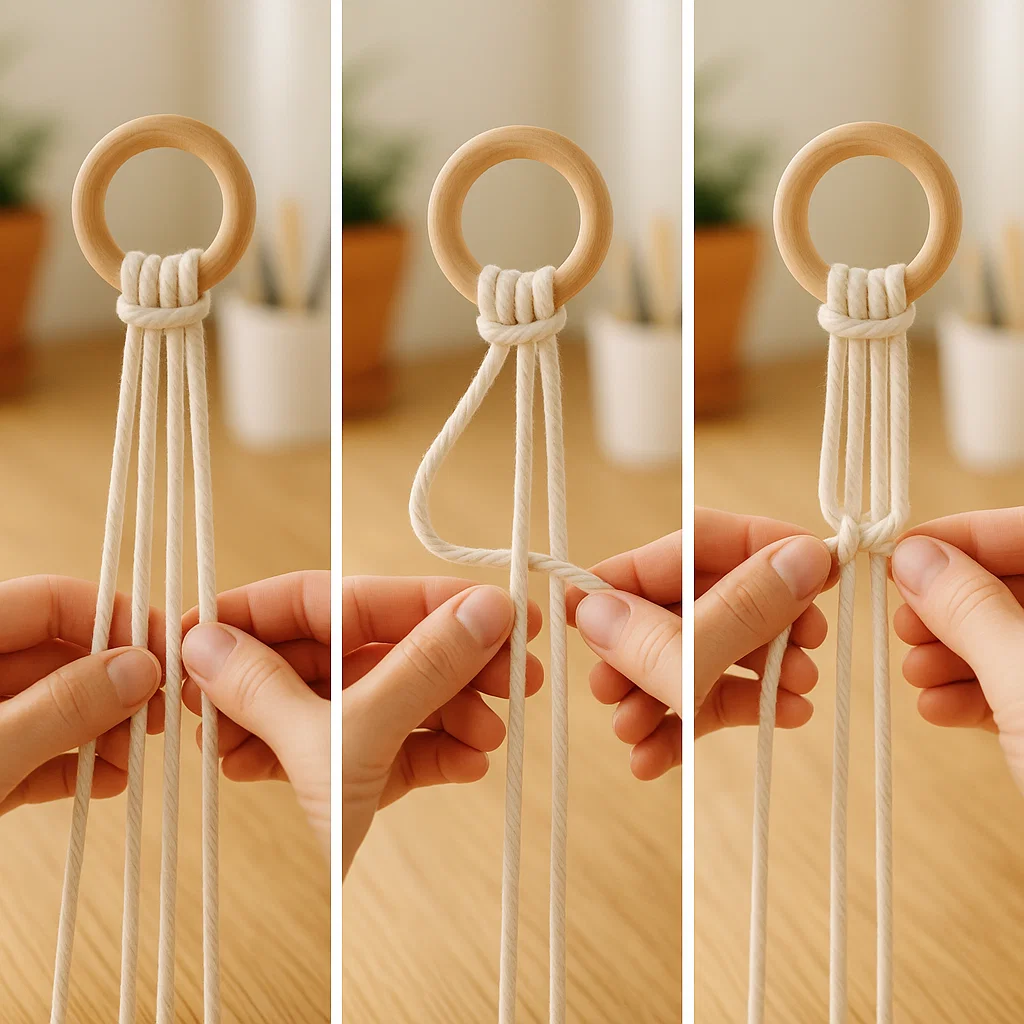
Now that your cords are attached to the ring, it’s time to create the base for your plant hanger.
- Separate the cords into pairs of 2.
- Take the outer cord of one pair and make a “4” shape.
- Pass the other cord over the “4” and under the other cords, then pull it through the loop formed by the “4.”
- Tighten the knot by pulling both cords.
- Repeat this process with the other pair of cords, creating a row of square knots.
Step 4: Create the Second Row of Square Knots
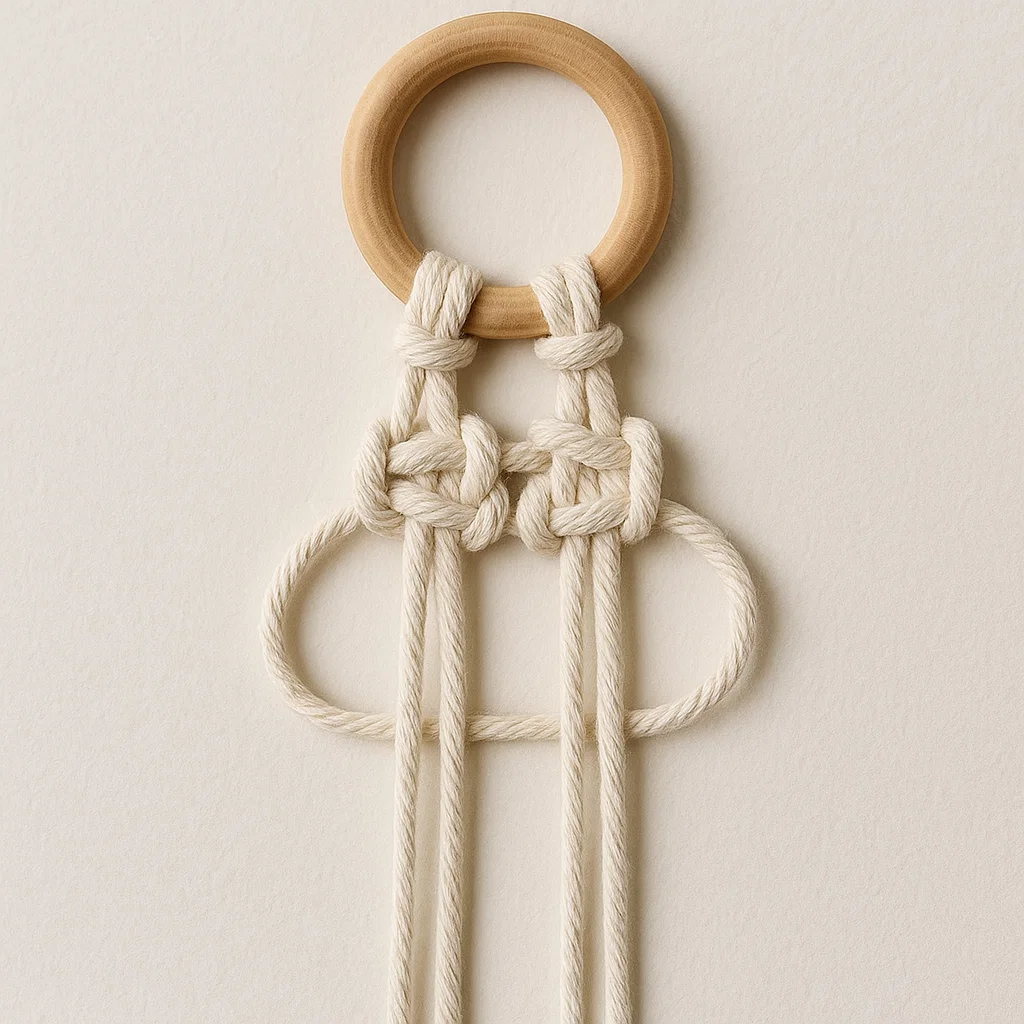
After the first row is completed, take the four outer cords and create another row of square knots. You can make as many rows as you’d like, depending on the length you want your plant hanger to be. For a shorter hanger, 2-3 rows should suffice, but if you want a longer one, feel free to add more rows.
Step 5: Make the Hanging Legs
After completing the desired number of rows, you’ll need to create the hanging legs that will hold the plant pot.
- Split the cords into three groups, each with two cords.
- Using the half hitch knot, tie each pair of cords together to form a small group of knots. The knots will hold the pot securely in place.
Step 6: Final Adjustment and Pot Placement
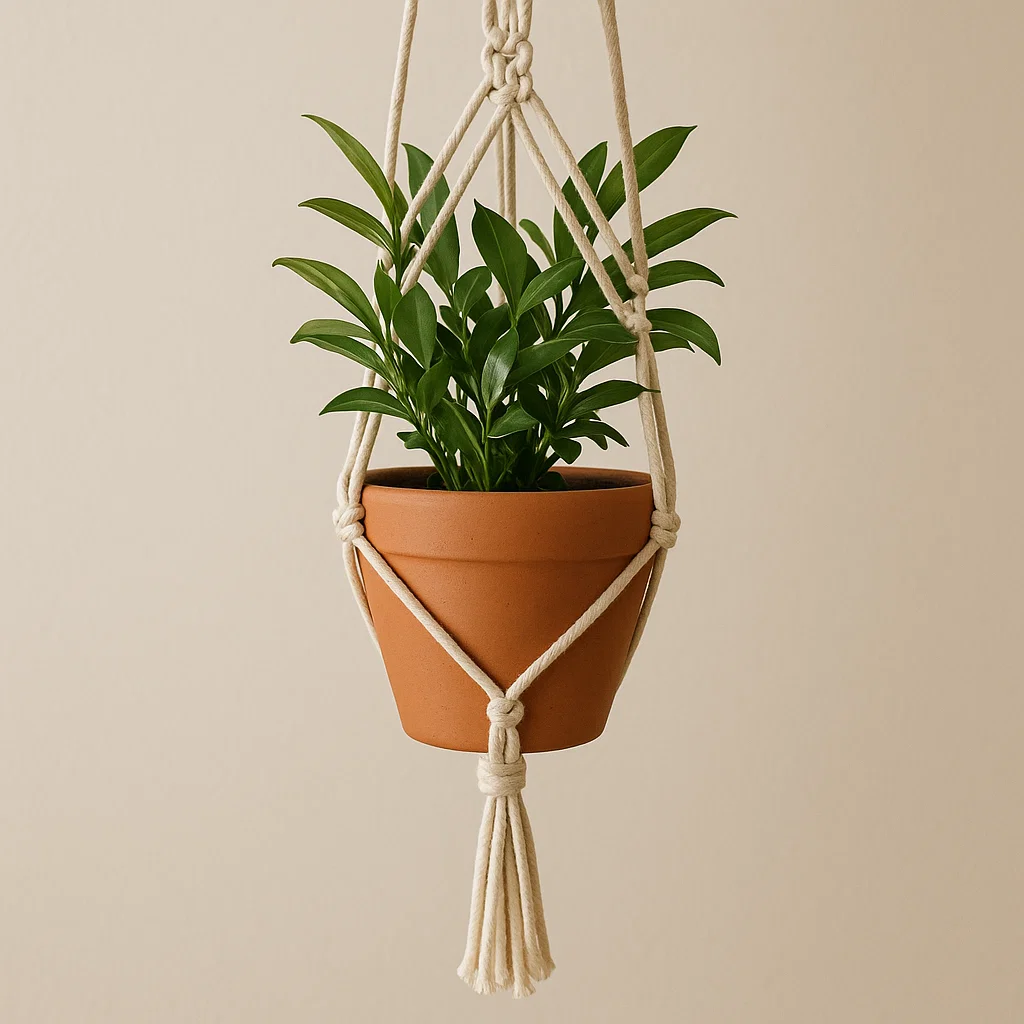
Once your knots are tied, adjust the legs to make sure they are of even length. Then, place your plant pot in the center of the knots. You can now tie the cords together below the pot to create a knot or bow to secure it in place.
Step 7: Hang Your Macramé Plant Hanger
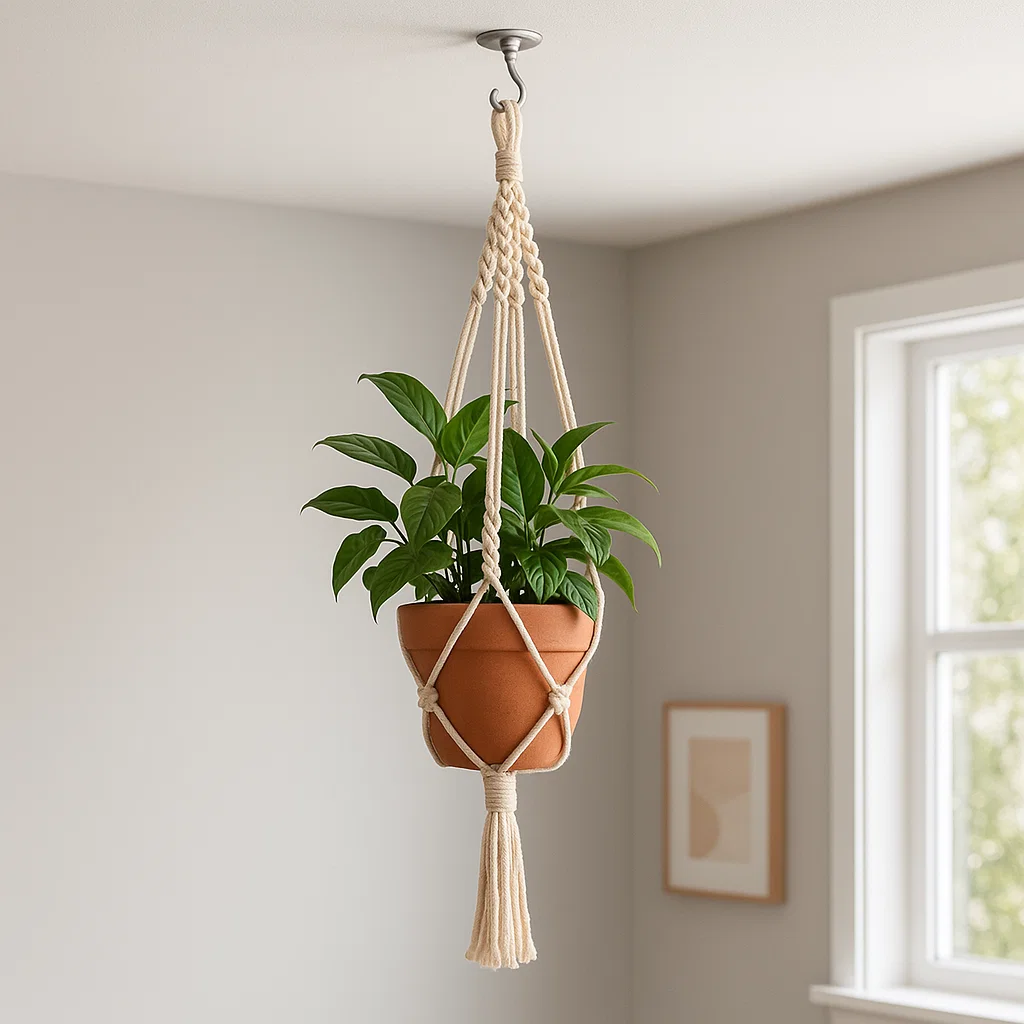
Now comes the fun part—hanging your plant! Attach a hook to the ceiling or a sturdy beam, and hang your macramé plant hanger from it. Adjust the length of the cords so that your plant pot is at the perfect height.
Tips for Customizing Your Macramé Plant Hanger
- Add Beads: For an extra touch, you can thread wooden or decorative beads onto the cords before tying the knots.
- Use Colored Cord: To add a pop of color, try experimenting with different cord colors. You can even mix and match for a unique design.
- Vary the Knots: Mix up the knots to create different patterns and textures. Try using more half-hitch knots or experiment with more complex macramé designs.
Final Thoughts: Personalize Your Space
Creating your macramé plant hanger is a rewarding and fun project that adds a personal touch to your home. Not only do you get to showcase your favorite plants beautifully, but you also get to enjoy the process of crafting something unique. Whether you’re a beginner or an experienced crafter, this simple project will help bring a touch of bohemian charm to any room.