
If you’re anything like me, you love adding personal, handmade touches to your home. There’s something about a cozy living room filled with little crafts that just makes the space feel warm and inviting. One of my favorite DIY projects has to be macrame coasters. Not only are they easy to make, but they also add a beautiful, boho-inspired charm to your home. I remember the first time I made them—I was so excited about how simple yet elegant they looked on my coffee table. They instantly made my space feel more personal and cozy.
If you’ve been searching for a simple yet rewarding DIY project that adds character to your home, DIY macrame coasters are the way to go. Let’s get started on how you can create these lovely coasters in no time!
Why Macrame Coasters?
Macrame has been making a huge comeback, and for good reason! This ancient craft of knotting strings and cords to create intricate patterns is both relaxing and rewarding. But why coasters? Coasters are functional, and when they’re handmade, they elevate the beauty of your space while serving a practical purpose. Plus, they make excellent gifts for friends and family!
The best part about macrame coasters is that you don’t need a lot of experience or fancy materials to get started. All you need is a little time, a few supplies, and some creativity. And trust me, once you start, you won’t be able to stop!
1. Materials Needed for DIY Macrame Coasters
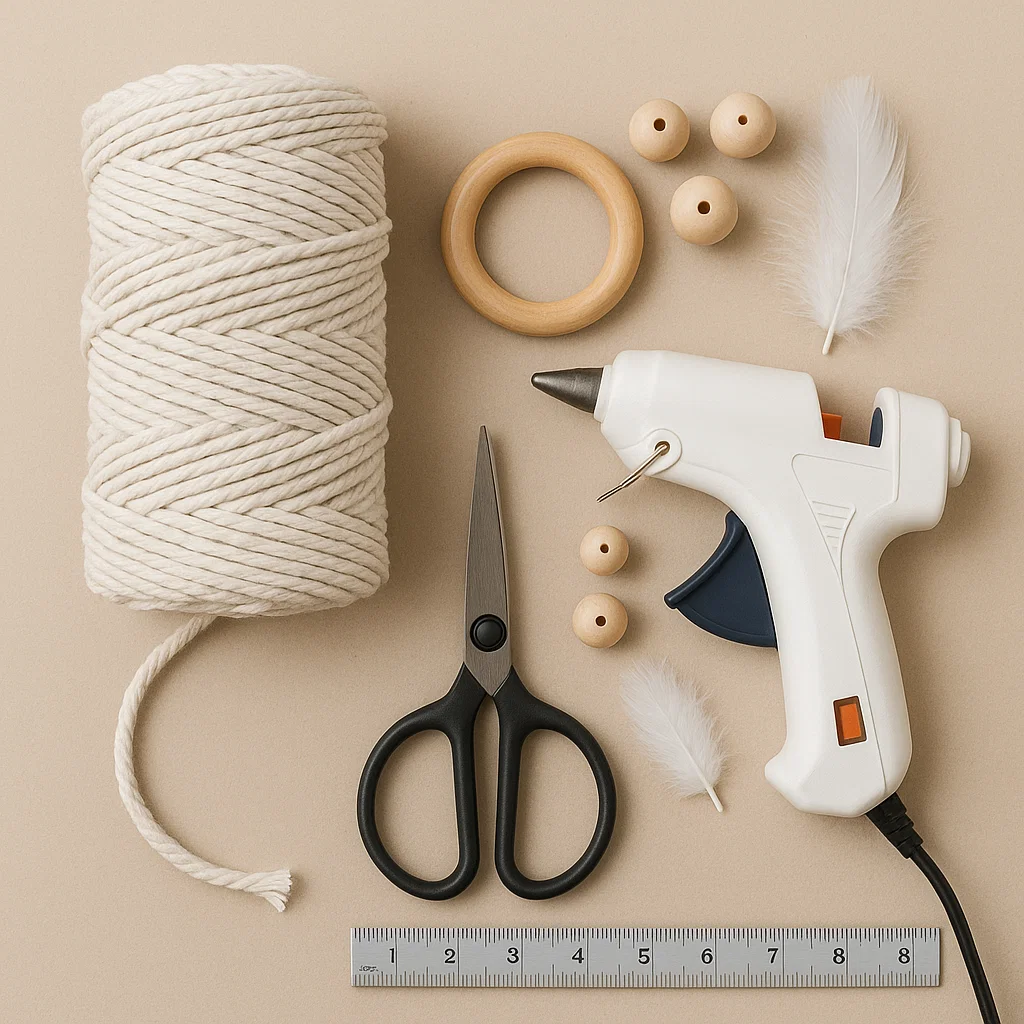
Before we dive into the steps, let’s gather everything you’ll need:
- Macrame cord (about 2-3mm thick, cotton works best)
- Scissors
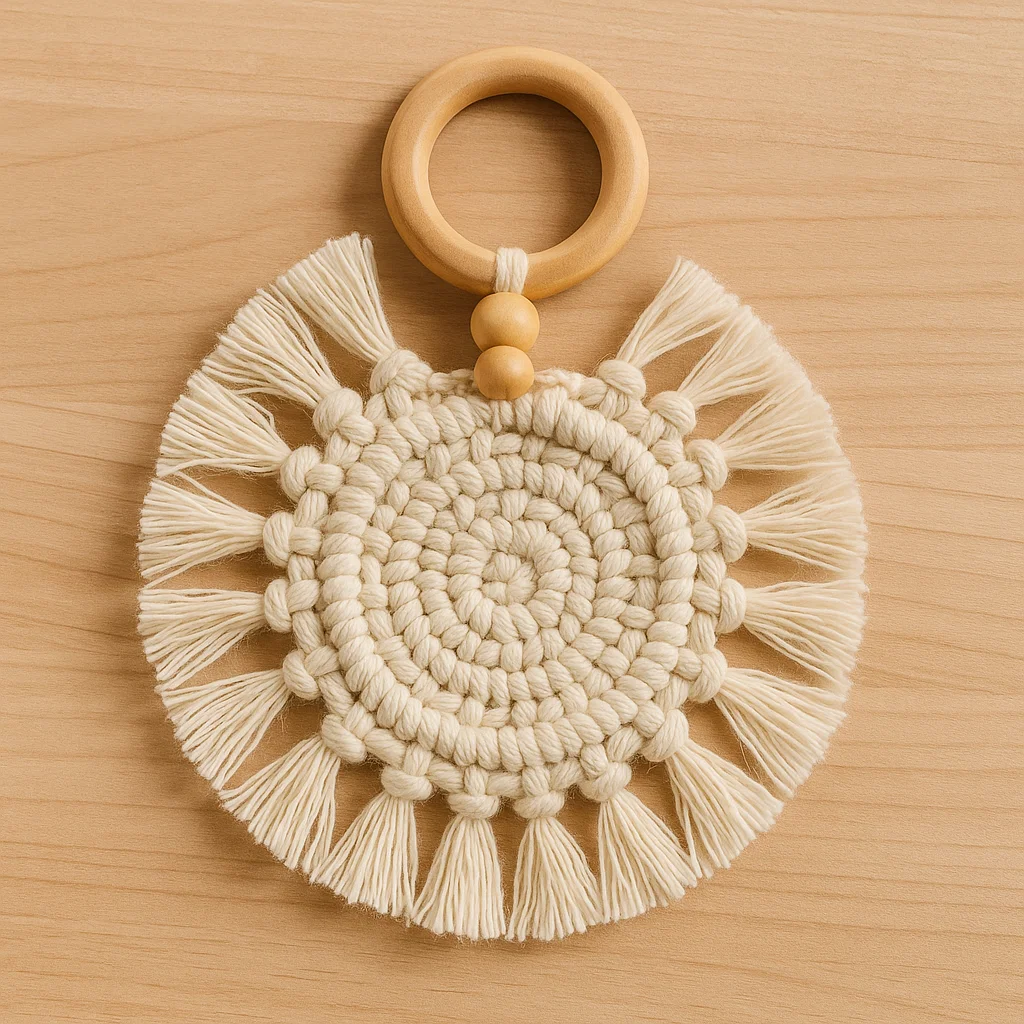
- Wooden ring or small circular base (optional for added structure)
- Measuring tape or ruler
- Hot glue gun (if you’re adding a wooden ring or base)
- Beads, feathers, or other embellishments (optional for added flair)
You can easily find these supplies at your local craft store or online, and they’re relatively inexpensive. The macrame cord is the star of the show, so choose a color that complements your home decor!
2. Step-by-Step Guide to Making Macrame Coasters
Here’s the fun part—let’s get crafting! These steps will walk you through how to make a basic macrame coaster. Don’t worry, it’s easy and relaxing!
Step 1: Cut Your Cord
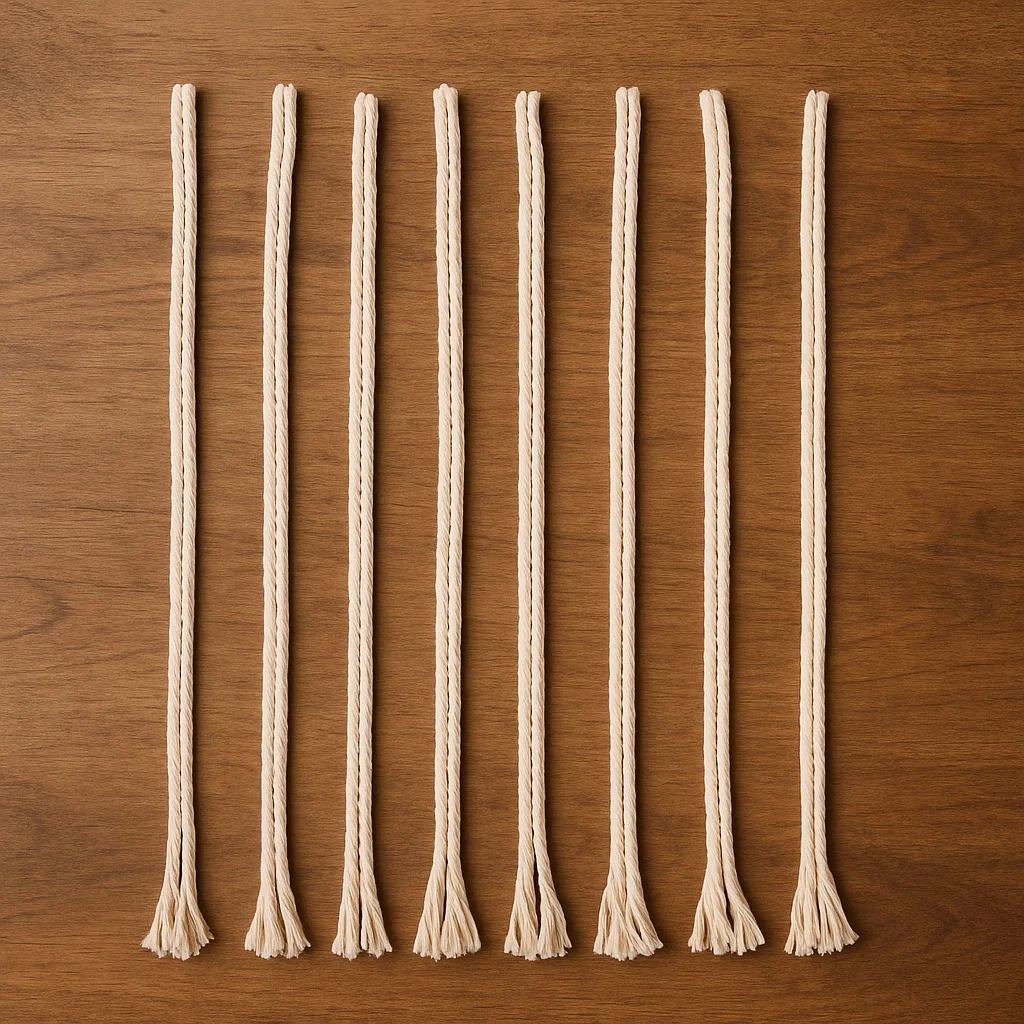
Start by cutting your macrame cord into 8-10 strands of equal length. Each strand should be about 18-24 inches long, depending on how big you want your coaster to be.
Step 2: Attach the Cord
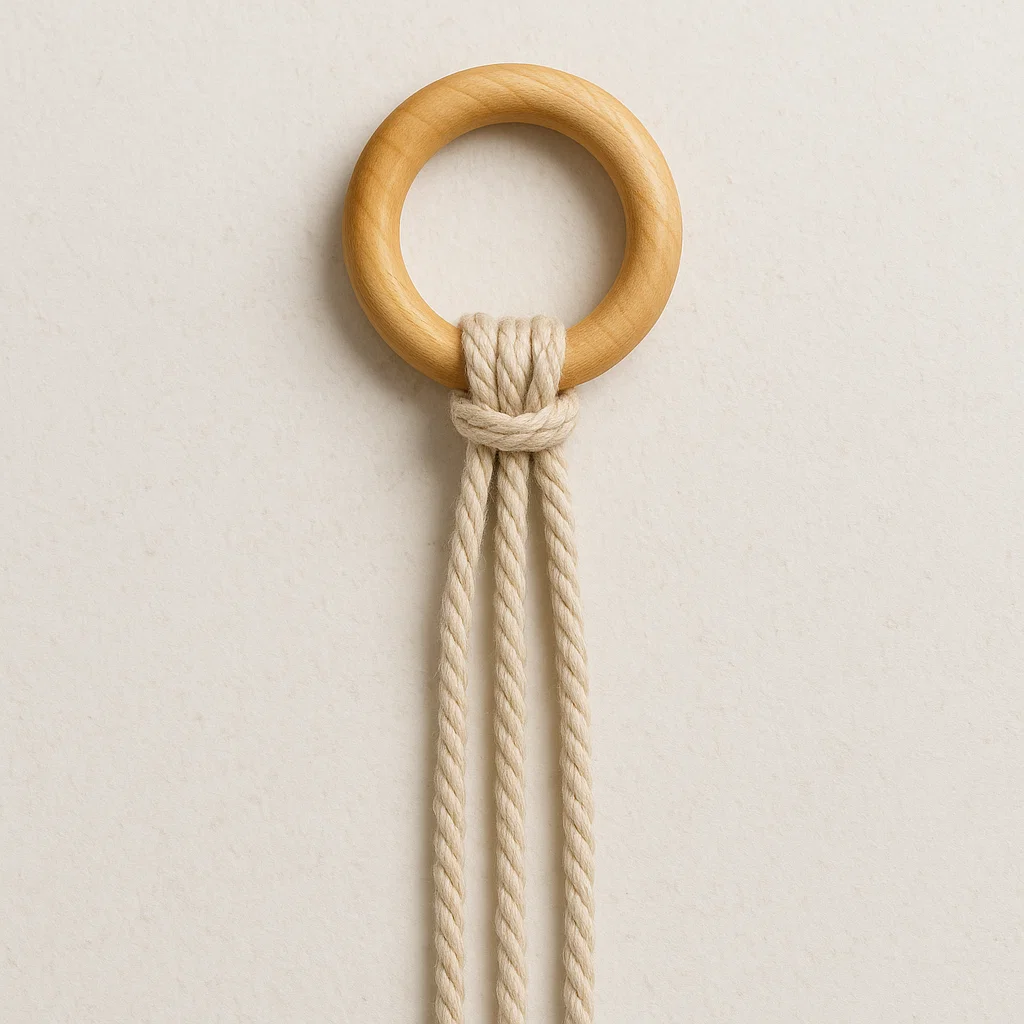
If you’re using a wooden ring, take your strands and fold them in half. Attach the folded cord to the ring by creating a lark’s head knot. To do this:
- Place the folded cord under the ring.
- Pull the loose ends of the cord over the ring and through the loop created by the fold.
- Tighten the knot.
If you’re not using a ring, simply tie a slip knot at the center of your cords to keep them in place.
Step 3: Begin Knotting
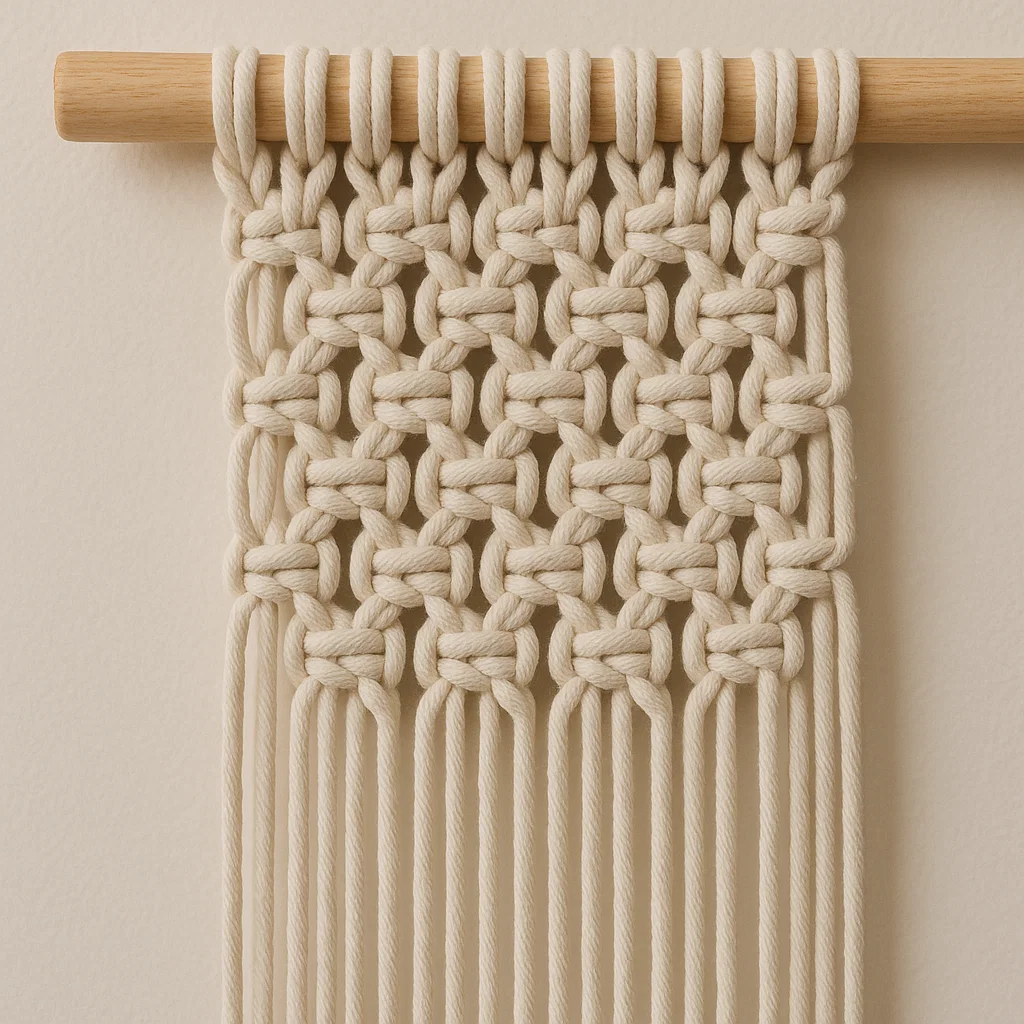
Now comes the fun part—knotting! The basic knot you’ll use is called the square knot, which creates a lovely textured pattern. Here’s how to do it:
- Take the four outermost cords (two on the left, two on the right) and start with a left knot:
- Take the left cord and cross it over the two middle cords.
- Take the right cord and cross it over the left cord, bringing it under the two middle cords, and pull it up through the left loop.
- Tighten the knot.
- Repeat the process for a right knot (mirror the previous step, starting with the right cord).
- Alternate between left and right knots until you reach the desired length. You can make a simple grid pattern or get creative with more intricate designs.
Step 4: Finish the Coaster
Once you’ve created enough knots to form the coaster, cut any excess cord to your desired length. You can leave the ends frayed for a boho look, or trim them neatly for a cleaner finish.
If you’re using a wooden ring, glue the last few knots to the ring for added security. You can also add beads or other embellishments to the cords for extra style. Once you’re happy with the result, let it dry completely before using it.
FAQs About DIY Macrame Coasters
Q1: Can I use any type of cord for macrame coasters?
Yes, you can use different types of cord, but cotton cord is the best choice as it’s soft, easy to work with, and absorbs moisture. Other cords like jute or hemp can also work for a rustic look.
Q2: Can I make a coaster without using a wooden ring?
Absolutely! The wooden ring adds structure, but if you prefer a more relaxed look, you can simply tie the cords in a slip knot at the center and continue from there.
Q3: How long will it take to make one coaster?
On average, you can expect to spend about 30-45 minutes making one coaster, depending on how detailed you want the design to be.
Q4: Can I make other items using macrame?
Definitely! Macrame is a versatile craft. You can make wall hangings, plant hangers, keychains, and even bags. The possibilities are endless!
Tips for Perfect Macrame Coasters
- Start with a Simple Design: If you’re new to macrame, stick to basic knots like square knots before trying more intricate patterns.
- Use a Tensioning Board: Keep your cords taut as you work to maintain consistency in your knots.
- Add Personal Touches: You can experiment with adding beads or other decorative elements like tassels to make your coasters unique.
- Practice Makes Perfect: Don’t worry if your first coaster isn’t perfect! Macrame is all about patience, and you’ll get better with every piece you create.
Conclusion: Craft Your Own Cozy Macrame Coasters
DIY macrame coasters are a fun, creative way to add a handmade touch to your home. With just a few materials and some basic knots, you can create a beautiful set of coasters that are both functional and stylish. They also make wonderful personalized gifts for friends and family.
So, gather your materials and start crafting these gorgeous coasters today! You’ll love how they brighten up your space and make even the most casual coffee break feel special. Whether you keep them for yourself or gift them to someone you love, macrame coasters are a perfect project for all skill levels.
Pro Tip: To make sure your coasters stay looking beautiful for a long time, occasionally dust them off or wipe them with a damp cloth to keep them clean.