
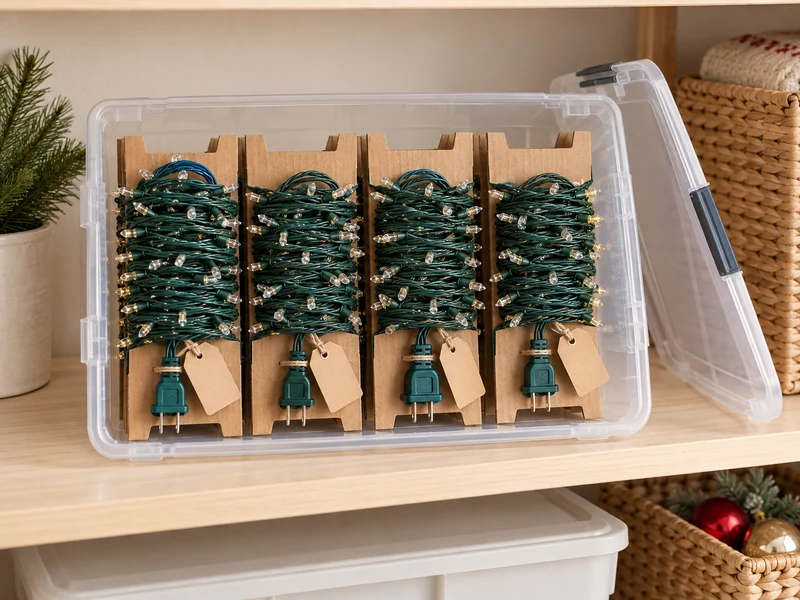
Opening the holiday-light bin should not feel like solving a knot puzzle. This simple cardboard-wrap system keeps each strand separate, protects the plug, and makes it easy to find the exact set you need next season. The method works best for standard mini LED strings and uses materials you may already have at home.
The key is to give every strand its own firm support. Instead of dropping a loose coil into a box, you will guide the wire around a notched piece of corrugated cardboard, secure both ends without stressing the cord, label the strand, and store the finished wraps upright.
Why the Cardboard Wrap Method Works
A loose coil can collapse and pass through itself while the bin is moved. That is how a tidy loop becomes a stubborn knot. A rigid wrap holds the strand in one plane, while shallow edge notches stop each row from sliding into the next. Keeping one strand per card also prevents plugs and bulbs from catching on neighboring wires.
This system is inexpensive, easy to customize, and compact enough for a small closet. It also creates a quick visual inventory: the bulb color, wire color, plug, and label remain visible without unwrapping anything.
Supplies and Suggested Measurements
- One unplugged, fully cooled mini-light strand
- One clean, dry piece of corrugated cardboard per strand
- Ruler and pencil
- Utility knife and cutting mat, or strong scissors
- Small blank tag and cotton string, or a strip of painter’s tape
- Rigid lidded plastic storage bin
For a typical mini-light strand, begin with a 12-by-8-inch cardboard rectangle. Cut two shallow V-shaped notches into each short edge. Make each notch about 1 inch wide and 1 to 1 1/2 inches deep, leaving at least 2 inches of solid cardboard between the notches. Round the card’s outside corners so they are less likely to press against bulbs or snag the wire.
These dimensions are a practical starting point, not a rule. A long strand may need a taller card, and a short strand may fit a smaller one. The finished wrap should fit inside your bin with the lid fully closed and without bending the plug.
How to Store Christmas Lights Without Tangling
Step 1: Unplug, Untangle, and Inspect the Strand
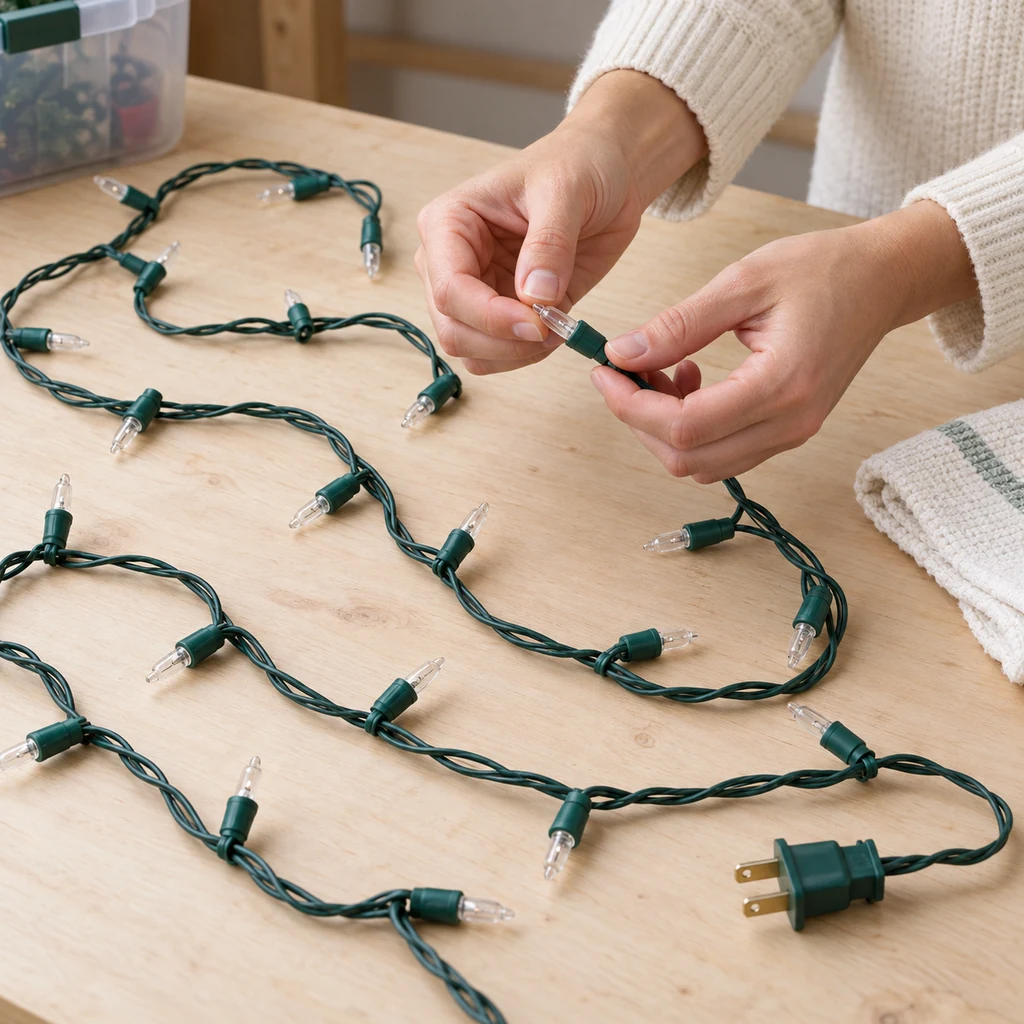
Lay one strand on a clear table and work from the plug toward the far end. Gently separate crossed sections instead of pulling on them. Check every section of wire and look closely at the plug, sockets, and bulbs. Replace missing bulbs only with the type specified for that set.
If you test the lights first, unplug them before the inspection. Handling the wire while it is disconnected keeps the process controlled, and a flat work surface makes small cracks or pinched areas easier to notice.
Step 2: Cut a Sturdy Cardboard Wrap
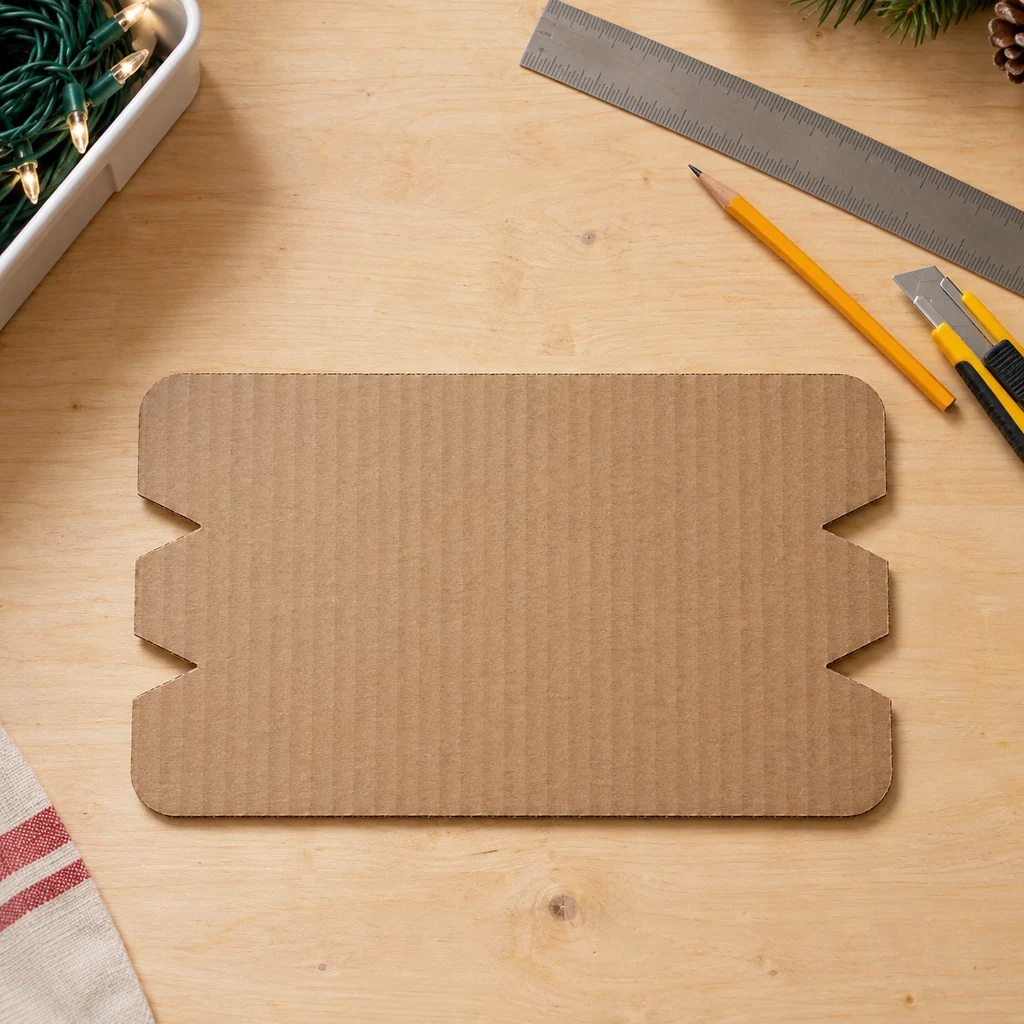
Measure and cut a 12-by-8-inch rectangle from clean corrugated cardboard. Mark two notch positions on each short side, keeping the pairs aligned. Cut the V shapes, then trim or round sharp outside corners. The notches should hold the insulated wire without pinching it.
Discard any cardboard that is damp, oily, crushed, or too flexible to stay flat. If the strand is heavy, glue two equal cardboard rectangles together and allow them to dry completely before use. Never cut the notches while lights are resting on the card.
Step 3: Anchor the Plug Without Pulling the Wire
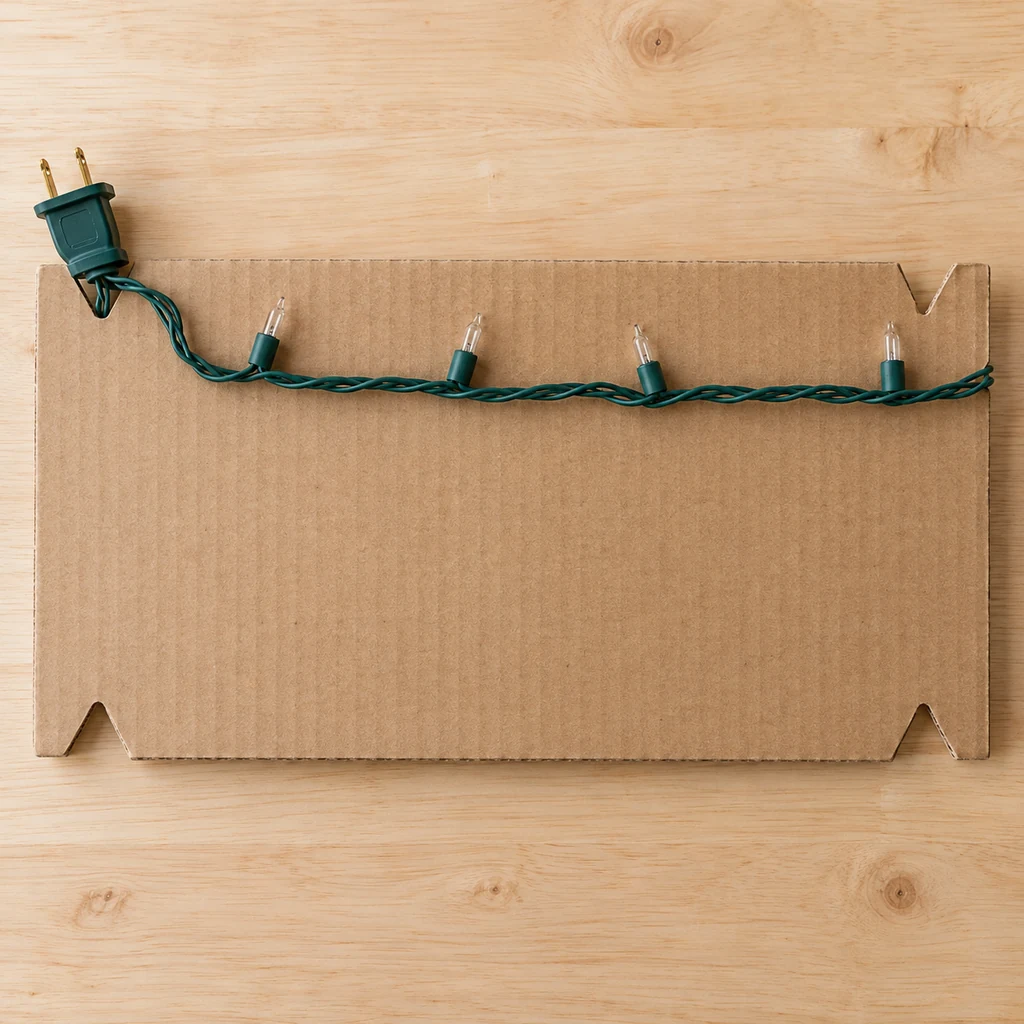
Place the plug at an upper corner and guide the insulated lead into the nearest notch. Leave a small relaxed curve between the plug and the first wrap. The notch should prevent the strand from slipping, but it should not squeeze the wire or force a tight bend at the plug body.
Keep the metal prongs facing outward where they cannot press into a bulb. If the plug does not sit securely, tie a loose cotton-string loop around the cardboard and plug body after wrapping. Avoid rubber bands, which can become brittle or compress the cord during long storage.
Step 4: Wind the Strand in Even Rows
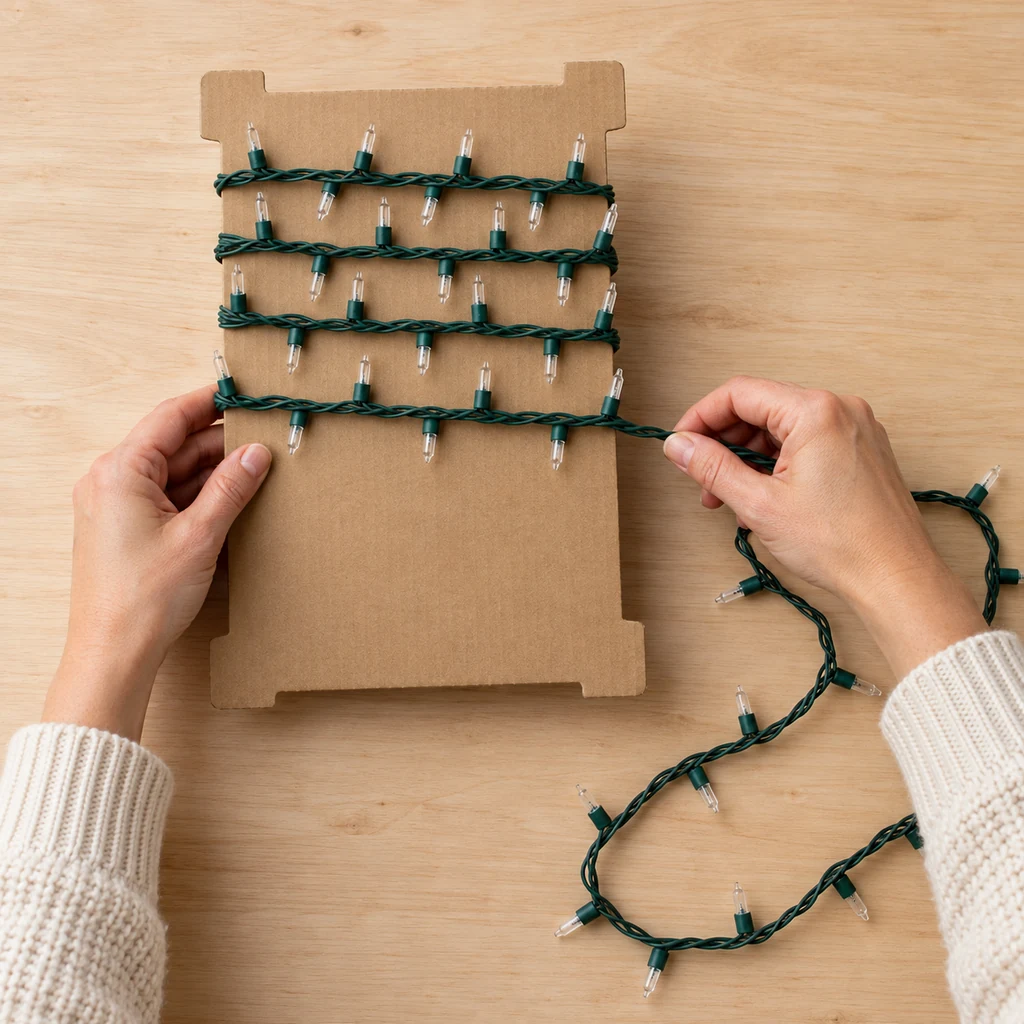
Guide the strand across the front, around the edge, and across the back in broad, even rows. Alternate between the upper and lower notch areas so the wire is distributed instead of piling up in one spot. Keep a little slack in every turn; the goal is control, not tension.
Pause whenever two bulbs land on top of each other. Shift the row slightly so sockets lie beside one another and no glass or plastic bulb is pressed beneath a cord. Never pull the strand tight enough to bow the cardboard. If the card begins to bulge or the layers become crowded, stop and move to a larger wrap.
Step 5: Secure, Label, and Store Upright
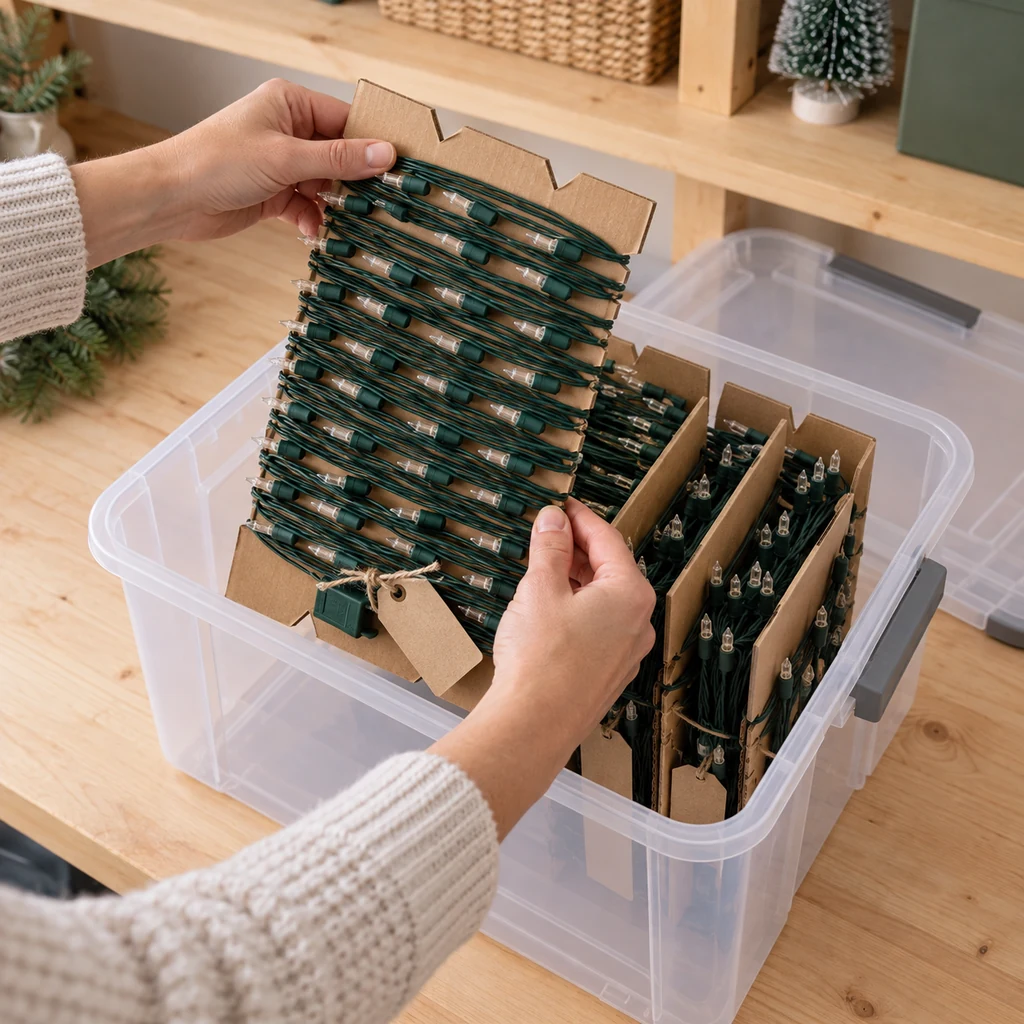
Tuck the final insulated section into an open notch without pulling on the end connector. Add a label with the strand’s location, color, length, and indoor or outdoor designation; for example, “porch rail, warm white, 100 lights, outdoor.” Blank tags are better than writing on the wire or plug.
Stand the finished cards upright in a rigid bin like file folders. Fill large empty spaces with a lightweight divider so the cards do not fall over, then close the lid without forcing it. Keep plugs and connectors away from the bin walls where an impact could crush them.
Adjust the Method for Different Light Types
Mini LED String Lights
The cardboard-wrap method is best suited to lightweight mini LEDs. Use one strand per card, relaxed rows, and a label that matches the display area. If multiple strands look identical, numbering both the card and the storage map saves time during decorating.
Large C7, C9, or Globe Bulbs
Large or replaceable bulbs need more clearance than a flat wrap provides. Follow the manufacturer’s storage directions; when appropriate, remove and separately protect fragile bulbs, then place the cord on a purpose-made reel or in a divided container. Do not stack heavy decorations on top.
Icicle and Net Lights
These sets tangle because they have many hanging or crossing sections. Fold them in wide accordion layers with tissue or clean cardboard between layers, or use the original insert if it is still intact. Forcing a net-light set around a narrow card can twist its junctions.
Battery-Operated Lights
Remove the batteries before seasonal storage unless the manufacturer specifically instructs otherwise. Label the battery type on the tag, close the empty compartment, and keep the box dry. Check for residue or corrosion before the set goes into the bin.
Common Storage Mistakes to Avoid
- Wrapping too tightly: tension at a plug or socket can damage a connection even when the outside looks fine.
- Combining several strands on one card: connectors catch, rows overlap, and the set you need is never the one on top.
- Securing the bundle with a tight rubber band: concentrated pressure can mark insulation and crush small bulbs.
- Packing lights while damp: moisture trapped in a closed bin can harm metal contacts and the cardboard support.
- Using a soft bag: bulbs and plugs have no protection when other seasonal items shift against them.
- Putting heavy boxes above the lights: a lid can flex downward even when the bin looks sturdy.
Choose a Dry, Easy-to-Reach Storage Spot
Keep the closed bin in a clean, dry indoor location away from leaks, heaters, and direct sunlight. A closet shelf is generally easier on cords and plastic parts than a place with major temperature swings. Store the light bin near other frequently used holiday supplies, but do not bury it under heavy ornament boxes.
If storage space is tight, pair this project with a broader plan for small-apartment Christmas decoration storage. For everyday charging cables, use a separate DIY cord organizer box so seasonal electrical items never become mixed with daily-use cords. You can also coordinate the bin labels with this small-closet gift-wrap storage system.
Frequently Asked Questions
How many light strands should go on one cardboard wrap?
Use one strand per card. That keeps plugs from catching and lets you remove exactly one set without disturbing the rest of the bin.
Can I use a clothes hanger instead?
A sturdy hanger can work for a short, lightweight strand, but the narrow frame may create tight turns and offers less protection. A broad notched card supports more of the wire and files neatly inside a rigid box.
Is cardboard safe for Christmas-light storage?
Clean, dry, sturdy cardboard is a practical support for lights that are unplugged and fully cooled. It is only a storage aid, not an electrical component. Replace it if it becomes damp, crushed, or contaminated.
Can outdoor lights use the same system?
Small outdoor-rated mini-light strands can use the same method after they are unplugged, cleaned according to their instructions, and completely dry. Mark the tag “outdoor” so sets do not get mixed. Use a larger reel or the original packaging for heavy-duty cords and large bulbs.
What should I do with a strand that has a frayed wire or cracked socket?
Do not pack it for reuse and do not cover the damage with ordinary tape. Follow the product maker’s guidance and local rules for safe replacement or disposal. Storing a damaged strand only postpones the problem until the busiest decorating day.
A Five-Minute Habit That Saves Next Season
The system is intentionally simple: inspect, cut, anchor, wrap, label, and file upright. Once the cards are prepared, packing each strand takes only a few minutes. Next season, the lights come out one set at a time, with the plug visible and the display location already written on the tag: no knot pile and no guessing.