
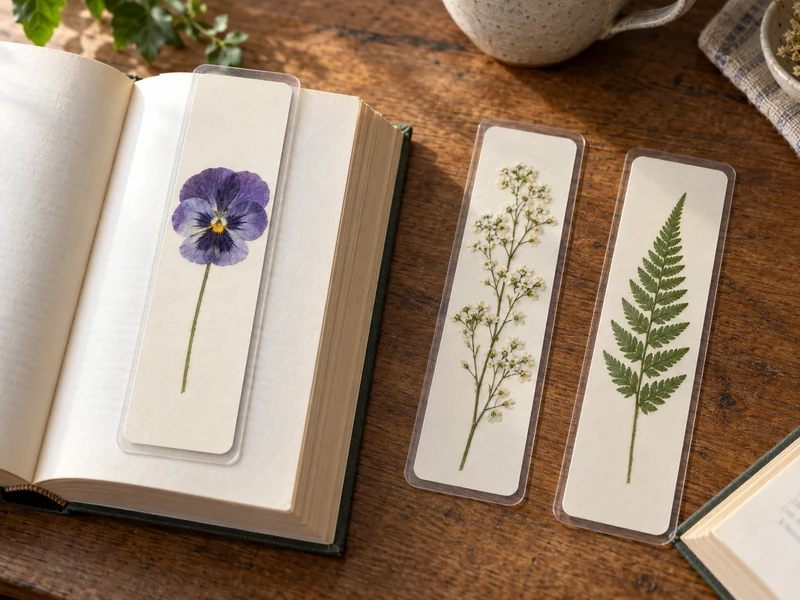
These pressed flower bookmarks use fully dried botanicals, cream cardstock, and self-adhesive clear film—no resin mixing and no heat laminator. The measured design creates a slim 2.25-by-7.25-inch bookmark with a sealed clear border that is easy to check before it goes inside a book.
The drying stage cannot be rushed. Fresh or partly damp flowers can cloud the film, stain the paper, or develop mold. Press the botanicals first, then build the bookmarks only when every petal and stem feels dry and papery.
Finished Size and Cutting Plan
| Piece | Cut size | Purpose |
|---|---|---|
| Cardstock base | 1.75 × 6.75 in | Supports the pressed botanical and keeps the bookmark thin |
| Bottom clear sheet | 2.25 × 7.25 in | Provides a 0.25-inch sealing margin around the card |
| Top clear sheet | 2.25 × 7.25 in | Meets the bottom film around all four sides |
| Finished bookmark | About 2.25 × 7.25 in | Fits most books without a bulky tassel or raised decoration |
Self-adhesive products differ. If your film is supplied as a folded pouch or has a printed application sequence, follow its directions and preserve at least a 0.125-inch continuous sealed edge. The quarter-inch plan here gives beginners more room for alignment.
Materials and Tools
- Fresh, legally gathered, naturally thin flowers or leaves
- Clean uncoated absorbent paper, such as blotting paper or plain printer paper
- Flat cardboard sheets plus a flower press, or several heavy books
- 65- to 80-pound cardstock cut into 1.75-by-6.75-inch strips
- Two self-adhesive clear laminating rectangles per bookmark, each 2.25 by 7.25 inches
- Fine tweezers
- Clear-drying paper-safe craft glue with a fine applicator
- Small burnishing card or bone folder
- Scissors or a paper trimmer
- Corner-rounding punch, optional
Use flowers from your own garden, a bouquet, or another place where you have permission to collect. Do not remove plants from national parks or other protected land, and do not handle an unknown plant that may irritate skin. Avoid pesticide-treated material for a children’s craft and wash hands after handling plant material.
Best Flowers and Leaves for a Thin Bookmark
Flat-faced pansies and violas, individual petals, alyssum, small ferns, clover leaves, and other naturally thin pieces are easier to dry than fleshy blooms. Thick rose heads, succulents, berries, and dense flower centers retain too much moisture and create a bump that the film may not seal around.
Choose specimens in good condition after dew or rain has evaporated. Keep similar thicknesses in the same pressing layer. If a bloom is too deep, separate and press the petals rather than forcing the whole flower flat.
How to Make Pressed Flower Bookmarks
Step 1 — Gather Thin Botanicals Responsibly
Pick only where you have clear permission. Select dry, unblemished pieces that are narrow enough to sit at least one-eighth inch inside the cardstock edge. Bring them indoors promptly so they do not wilt before pressing.
For the three-bookmark set shown here, use one pansy, one airy spray of tiny white flowers, and one narrow fern tip. You can use different species, but keep the same flat profile.
Step 2 — Arrange the Pressing Layers
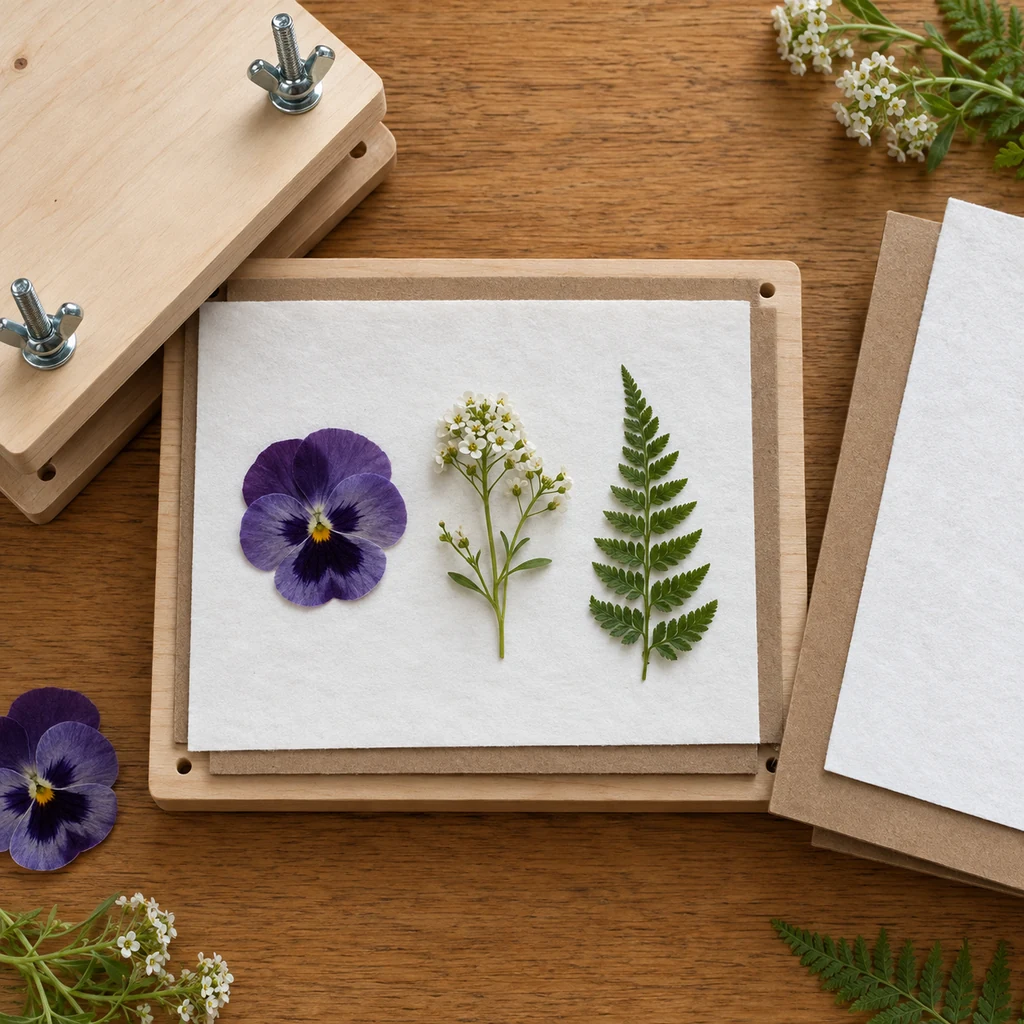
Place a flat cardboard sheet on the bottom, add clean uncoated absorbent paper, and arrange the specimens so they do not touch. Spread petals and leaflets into the position you want to see later. Cover them with a second absorbent sheet and another flat cardboard layer.
Close the flower press evenly, or place the paper sandwich inside a heavy book and stack more books on top. Protect any valued book with extra plain paper because plant pigments can transfer.
Step 3 — Dry for Two to Four Weeks
Keep the press in a warm, dry, ventilated room. Thin pieces may be ready in about two weeks, while thicker material can take closer to four. If the paper feels damp after the first week, carefully replace it with dry absorbent sheets without bending the petals.
A ready specimen feels papery and room-temperature, not cool or flexible. Discard anything with a musty smell, fuzzy growth, or damp center. Sealing a questionable flower will not stop deterioration.
Step 4 — Cut the Cardstock and Clear Film
Cut each cardstock base to 1.75 by 6.75 inches. Cut two clear rectangles per bookmark to 2.25 by 7.25 inches. Make one paper template first if you are producing a set; consistent pieces are much easier to align.
Dry-fit a card in the center of one clear rectangle. You should see about one-quarter inch of film on every side. Do not peel any backing until all pieces pass this check.
Step 5 — Build the Botanical Layout
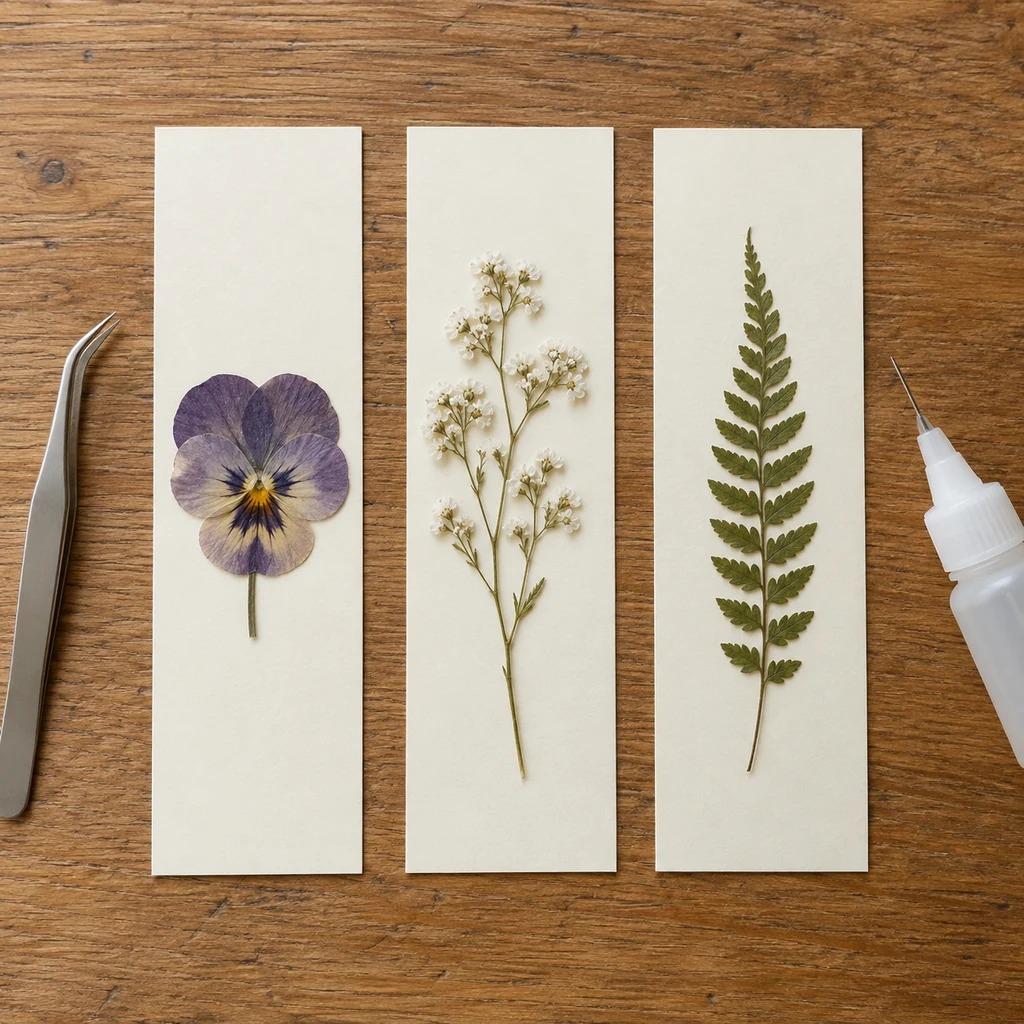
Move the pressed pieces with tweezers, not fingertips. Center one main botanical on each card and keep every petal, stem, and leaf inside the cardstock edge. A sparse design stays flatter and gives the film a broad, even surface to grip around the card.
Before gluing, photograph the arrangement with your phone. That quick reference makes it easier to rebuild the design if a light specimen shifts.
Step 6 — Tack the Flowers With Minimal Glue
Lift one section at a time and add tiny dots of clear-drying paper-safe glue to the back. Press gently with a clean scrap of release paper. The glue only needs to stop the plant from sliding while the film is applied; a wet coating can warp the card or darken delicate petals.
Allow the glue to dry fully according to its label. The surface should not feel cool, tacky, or raised before sealing.
Step 7 — Seal From One Short Edge
Place the first clear sheet adhesive-side up and center the cardstock, leaving an even quarter-inch border. Align the second sheet above it. Starting at one short end, expose and lower a small section, then burnish from the center toward the sides. Continue peeling and pressing a little at a time instead of dropping the entire sheet at once.
Check that the two clear layers touch each other around all four sides. If a large bubble reaches the botanical or the edge is misaligned, separate the film only if the manufacturer says it can be repositioned. Otherwise, remake the clear outer layer rather than cutting away the seal.
Step 8 — Trim and Round the Corners
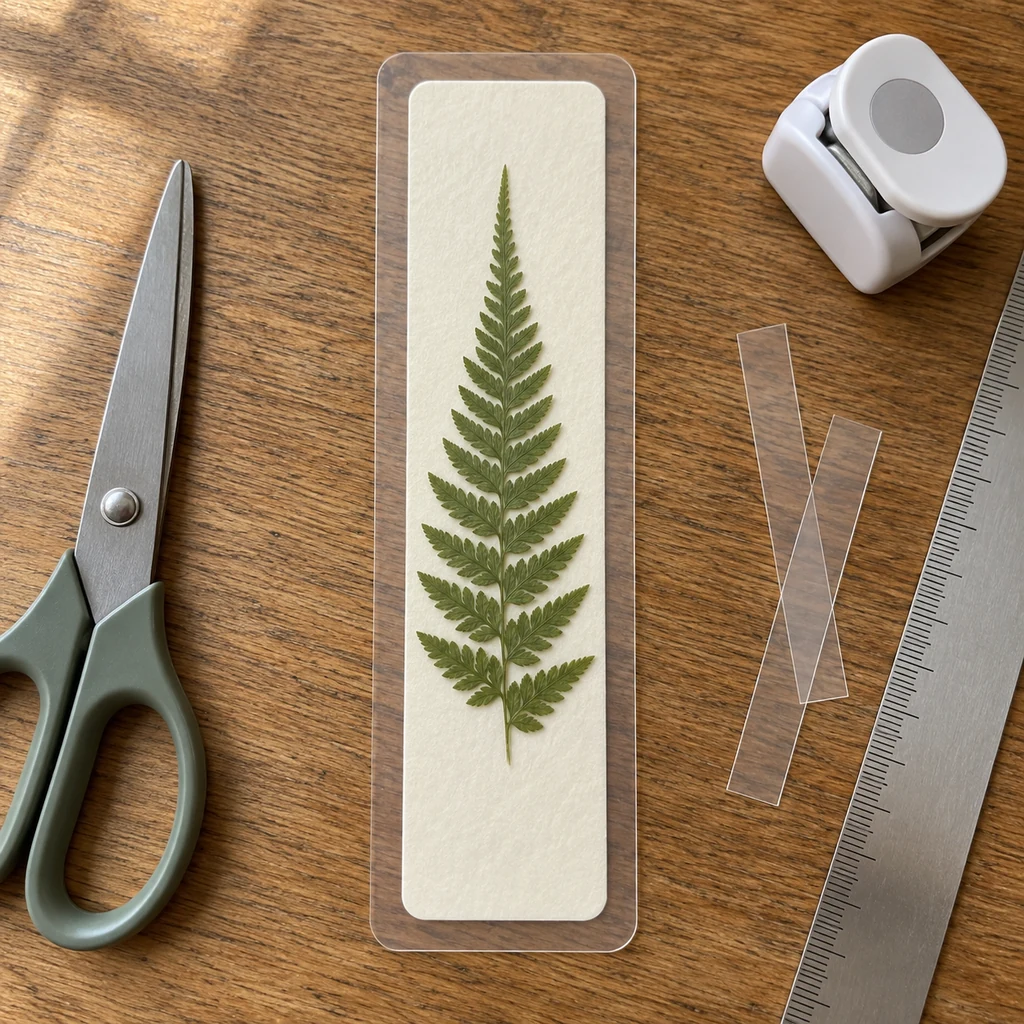
Trim only outside the joined area, preserving at least one-eighth inch of clear film on every side. The planned quarter-inch margin is easier to inspect and more forgiving. Round the four outer corners so sharp film points do not catch on pages.
Press around the entire perimeter one last time. The edge should look continuous, with no channel leading from the outside to the cardstock or plant.
Why This Method Works
- The cardstock controls thickness: thin paper supports fragile petals without creating a hard resin slab.
- The measured film creates a real seal: the top and bottom adhesive layers meet outside the card.
- Minimal glue prevents drift: tiny dry dots hold the layout while avoiding wet patches.
- Gradual burnishing pushes out air: lowering the film from one end is easier to control than placing it all at once.
This is a practical craft seal, not a promise of archival preservation. Natural flower colors can soften over time, especially in direct sun. If you want another seasonal way to use pressed blooms, try this pressed flower pumpkin.
Troubleshooting
| Problem | Likely cause | Fix |
|---|---|---|
| Cloudy patch around a flower | The plant or glue was not fully dry | Stop and remake it with a completely dry specimen; do not seal moisture inside. |
| Film lifts at the edge | The border was too narrow, dusty, or cut through | Use fresh film and preserve a continuous 0.125- to 0.25-inch seal. |
| Large air bubble | The top sheet was lowered all at once | Apply replacement film gradually from one short edge while burnishing outward. |
| Flower slides off-center | No dry tack points were used | Add two or three tiny glue dots and let them dry before sealing. |
| Bookmark feels bulky | The bloom center or stem is too thick | Use petals, a flatter species, or a thinner fern tip. |
| Brown or fuzzy plant material | Slow drying or trapped moisture | Discard it, sanitize the work surface, and press fresh thin material in dry paper. |
Three Easy Design Variations
Single Pansy
Place one flat bloom in the lower half with a short, slender stem. The open space keeps the purple shape visually strong.
Tiny Flower Column
Use one narrow branching spray or several tiny blossoms in a loose vertical line. Keep flower heads away from the card edge so the seal remains flat.
Minimal Fern
Center one tapered fern tip and remove any side leaflet that extends beyond the cardstock. For a larger translucent leaf project using a different method, see these pressed fall leaf suncatchers.
Care and Gifting
Wipe the clear surface with a dry soft cloth. Do not soak the bookmark, leave it in a humid bathroom, or store it in direct sun. Keep it flat when not in use. Because it is thicker than plain paper, avoid forcing it into a tightly bound, rare, or valuable book.
For a simple letter-writing gift, pair one bookmark with the cards and measured envelopes in this DIY pen pal stationery kit. Do not claim the bookmark is archival unless every paper, adhesive, and film product you used carries that specific manufacturer rating.
Frequently Asked Questions
Can I use fresh flowers directly in the film?
No. Fresh flowers hold moisture and are too thick. Press them until completely dry and papery before assembling the bookmark.
Do I need a heat laminator?
No. This method uses self-adhesive clear sheets. Follow the package instructions because sheet and pouch designs vary.
Can I use contact paper?
Clear contact paper may work for a casual craft, but it can be softer and more flexible than purpose-made self-laminating film. Make a sample first and confirm that its adhesive closes securely around the entire edge.
How long do flowers need to stay in the press?
Allow roughly two to four weeks depending on plant thickness and room conditions. A calendar alone is not enough: the specimen must feel dry, papery, and free of cool or flexible areas.
Will pressed flowers keep their exact color forever?
No. Natural pigments change with age and light exposure. Drying thoroughly and storing the finished bookmark away from direct sun can slow visible fading, but cannot guarantee permanent color.