
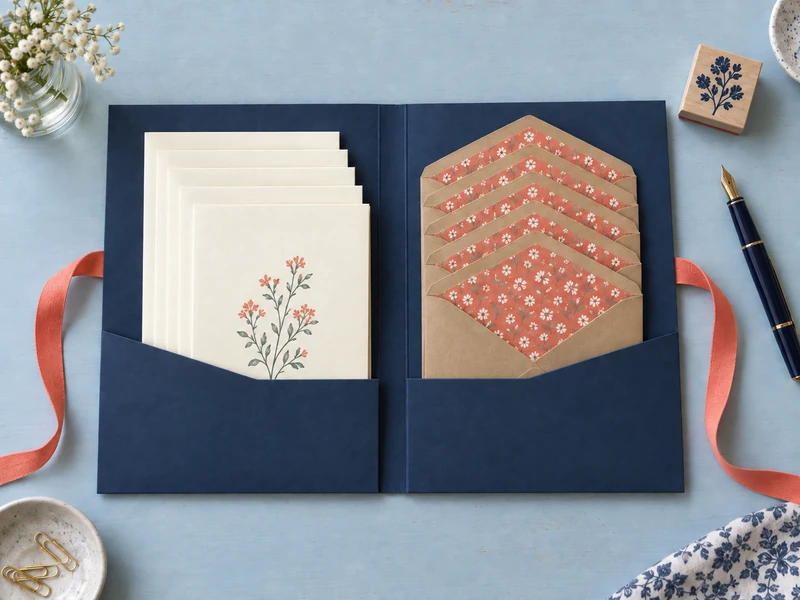
This DIY pen pal stationery kit is built around one consistent, mail-friendly size: six 4 1/2-by-6 1/4-inch folded cards and six matching 4 3/4-by-6 1/2-inch A6 envelopes. The measurements below also create a reusable two-pocket folio that holds the set without bending the cards or forcing the envelopes into place.
DIY Pen Pal Stationery Kit Materials
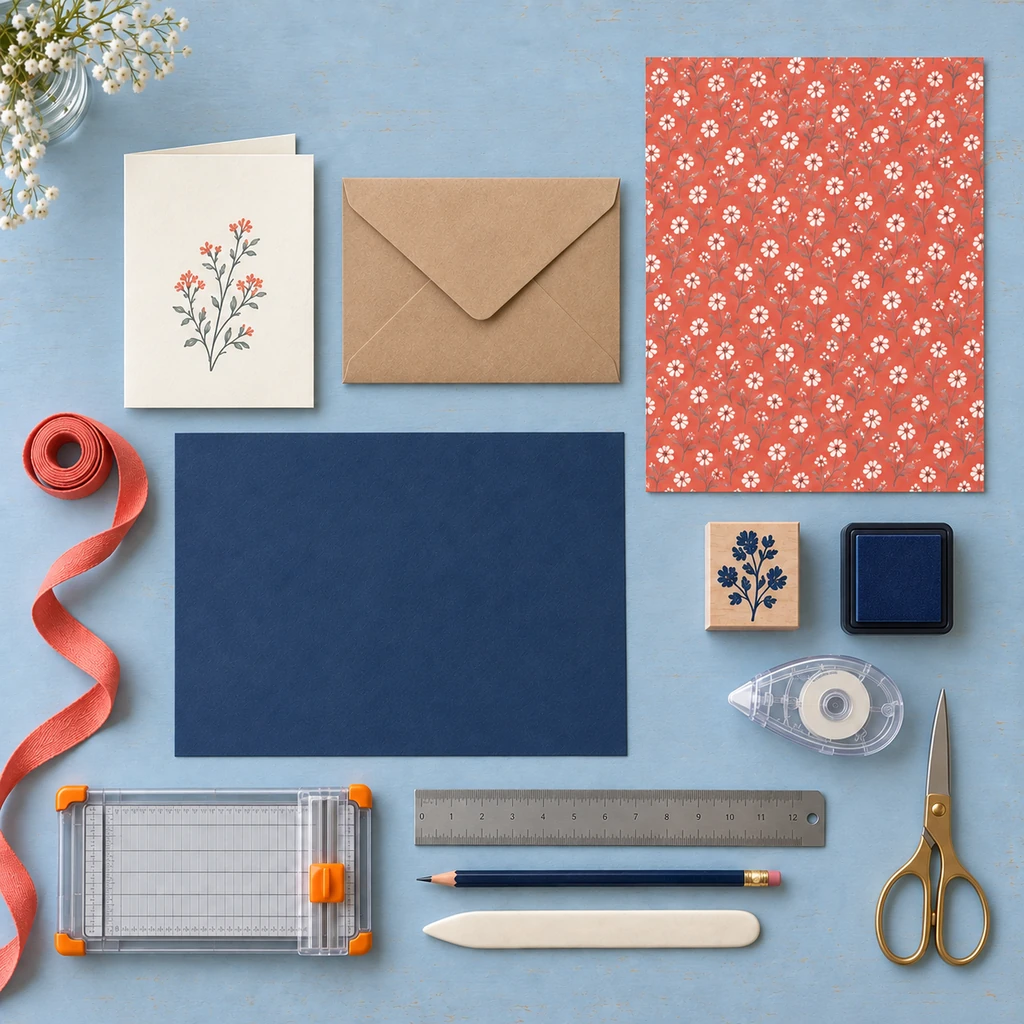
Choose one small color palette so the cards, liners, and folio feel like a coordinated set. This version uses navy, coral, cream, and warm kraft paper.
- Six blank A6 folded cards, 4 1/2 by 6 1/4 inches when folded
- Six matching A6 envelopes, 4 3/4 by 6 1/2 inches
- Six 8 1/2-by-11-inch sheets of lightweight patterned paper, one per liner
- One 12-by-18-inch sheet of 100-pound navy cover stock
- 30-inch length of 3/8-inch cotton ribbon
- Paper trimmer, metal ruler, pencil, scissors, and bone folder
- Small rubber stamp and archival ink pad, optional
- Acid-free paper adhesive or a strong glue stick
- Scrap paper and a few binder clips or small weights
Confirm the Card and Envelope Fit
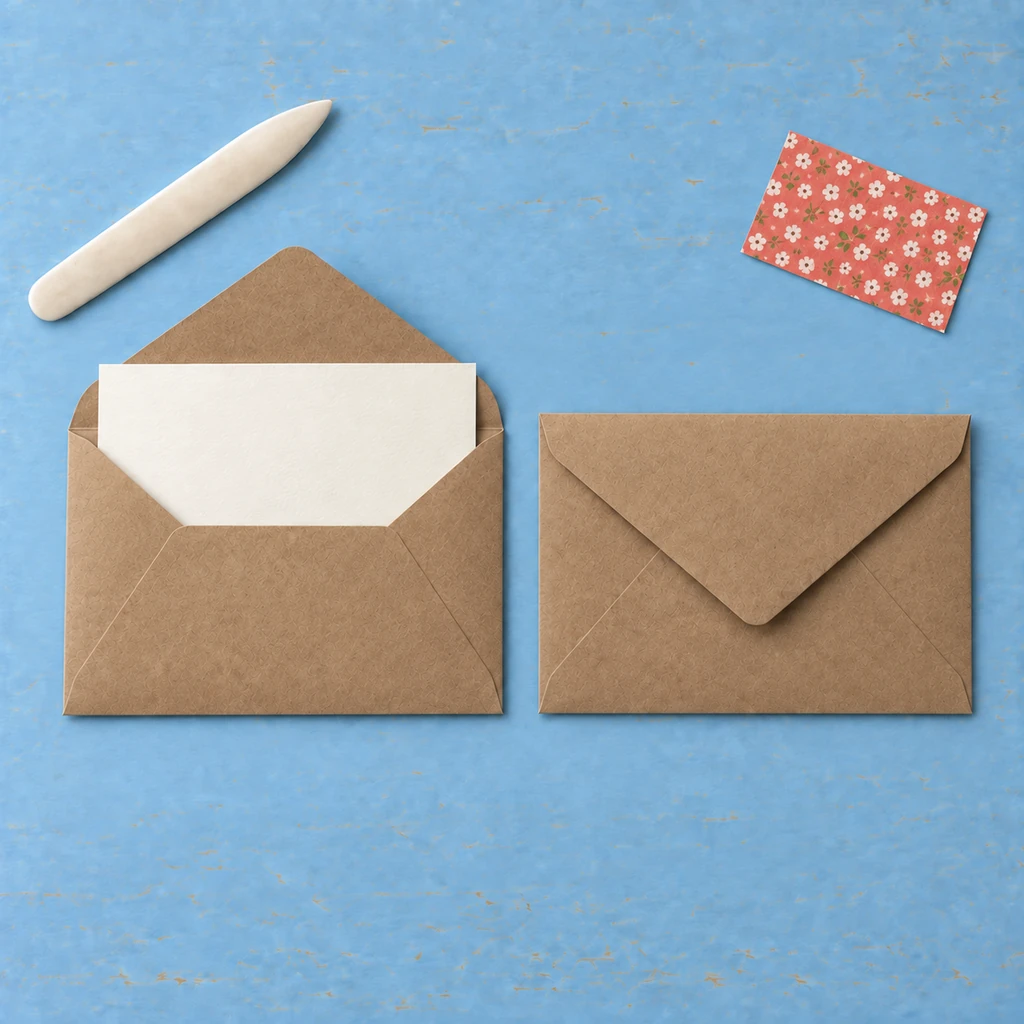
Test one folded card in one envelope before decorating the set. A 4 1/2-by-6 1/4-inch card inside a 4 3/4-by-6 1/2-inch envelope leaves about 1/8 inch of clearance on each edge. The card should slide in without bowing, and the flap should close without catching the card.
These envelope dimensions fall within standard U.S. letter-size dimensions and are rectangular rather than square. That does not guarantee a particular postage price. A liner, heavy card stock, bulky embellishment, uneven thickness, stiffness, or excess weight can change the postage required. Weigh one finished, addressed envelope and check your postal service’s current rules before mailing; readers outside the United States should use their local carrier’s limits.
Cut and Install Six Envelope Liners
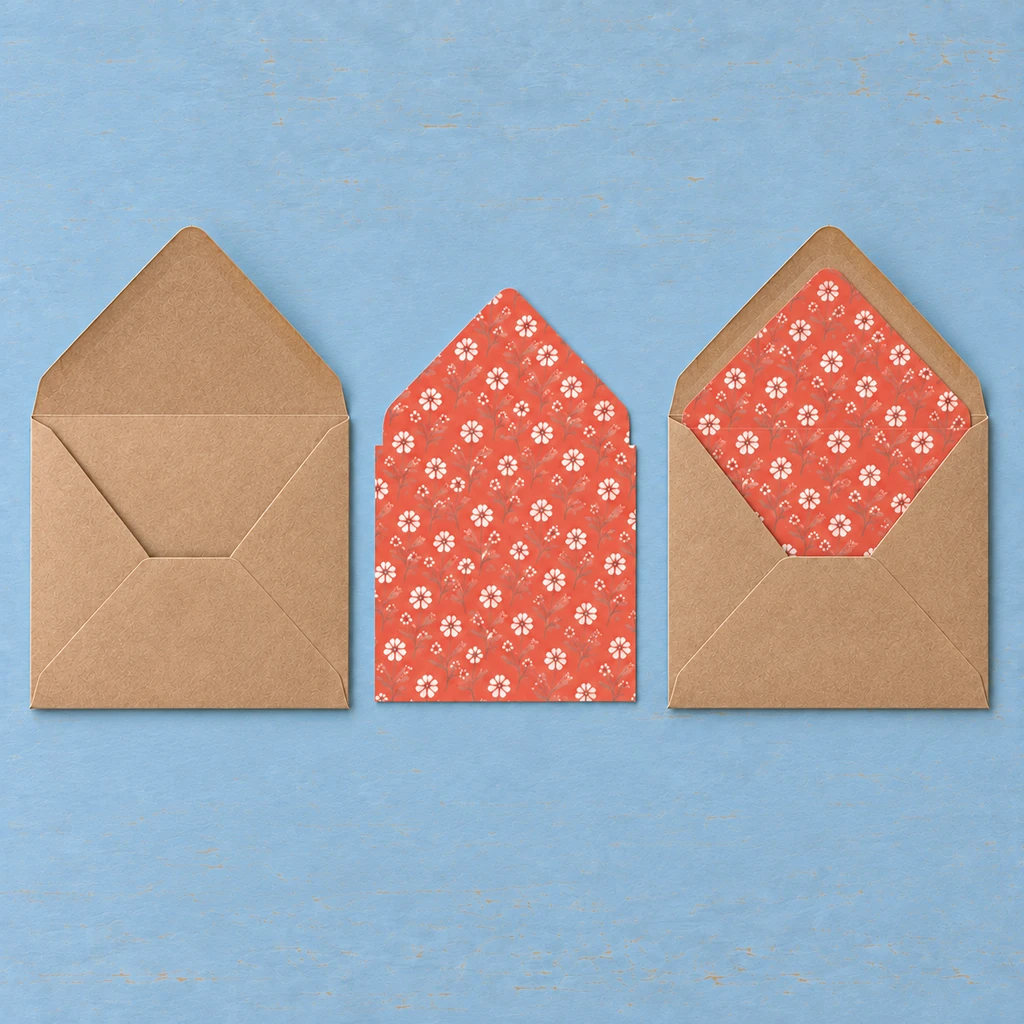
Open one envelope and place it flat on scrap paper. Trace its body and flap to make a template. Draw new cutting lines 1/8 inch inside both side edges and 3/4 inch above the original bottom edge. Cut the template and test it inside the envelope before tracing the remaining five liners.
Place the template on the back of each patterned sheet with the print running upright toward the flap. Trace and cut six liners. Slide each liner into an envelope and center it so the patterned edge sits about 1/8 inch below the flap’s sealing strip.
Close the flap over the liner and sharpen that shared crease with a bone folder. Open the flap again, lift only the section of liner above the crease, and apply a thin layer of adhesive beneath it. Press it flat. Leave the liner below the crease unglued so the envelope can flex without buckling.
Stamp the Note Cards
Place each folded card on scrap paper with the fold and opening facing the same directions. Test the stamp first, then add one small motif about 1/2 inch from the lower-left corner of every card. Keeping the position consistent makes the six cards look like a set.
Allow archival ink to dry for at least 10 minutes before stacking the cards. Follow the ink manufacturer’s ventilation and handling instructions. If you prefer a simpler finish, leave the cards blank and let the patterned liners carry the color.
Build the Two-Pocket Stationery Folio
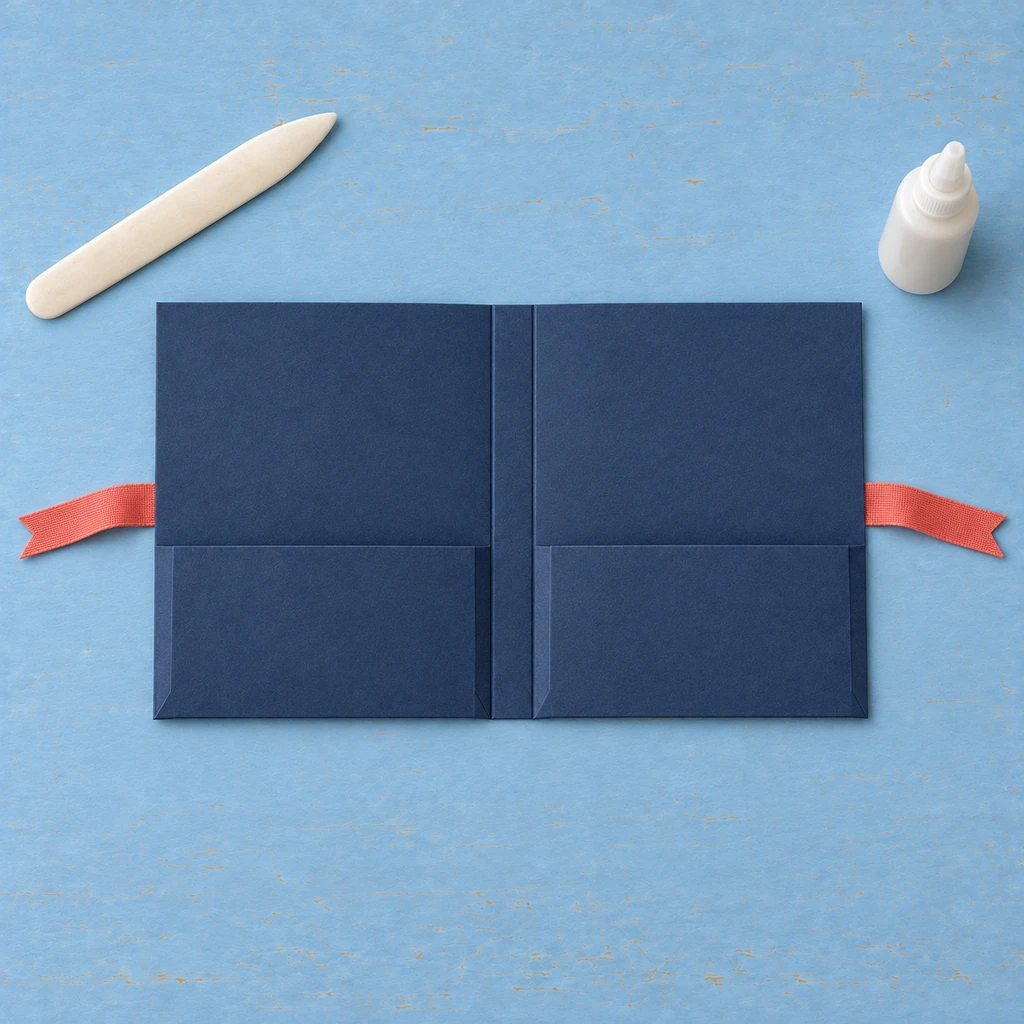
- Trim the 12-by-18-inch cover stock to a 7 1/2-by-15-inch rectangle. Keep the long offcut for the pockets.
- With the 15-inch side horizontal, score vertical lines 7 1/4 inches and 7 3/4 inches from the left edge. The 1/2-inch section between them is the spine.
- From the offcut, cut two pocket pieces measuring 7 3/4 by 4 inches.
- On each pocket piece, score 1/2 inch from the left, right, and bottom edges. Snip away the two small corner squares where the score lines cross, then fold all three tabs to the back.
- Center one pocket on each inside panel with its bottom edge aligned to the base. Glue only the folded side and bottom tabs. The finished pocket opening is about 6 3/4 inches wide, leaving enough room for a 6 1/2-inch envelope.
- Center the ribbon horizontally across the outside of the open folio. Glue the middle section to the cover and leave equal tails extending from both sides.
Place scrap paper over the pockets and hold them flat with a few books or small weights while the adhesive dries. Wait at least 30 minutes, or use the full curing time printed on your adhesive, before loading the folio.
Load, Gift, and Mail the Set
Place the six folded cards in the left pocket and the six lined envelopes in the right. Close the folio without forcing the spine. If the cover bows, remove bulky embellishments or reduce the number of pieces rather than tightening the ribbon.
Write the recipient’s name on a removable note and tuck it beneath the ribbon. Keep the envelopes blank so the recipient can address them to any correspondent. For another useful paper project, try this easy DIY wall art.
Troubleshooting
The Card Will Not Slide Into the Envelope
Measure the card while it is folded. If it is larger than 4 1/2 by 6 1/4 inches, trim or replace it. Do not force a bowed card into the envelope.
The Liner Buckles When the Flap Closes
Confirm that the liner is narrower than the envelope and that adhesive was applied only above the flap crease. A fully glued liner cannot shift as the envelope folds.
The Folio Pockets Lift at the Corners
Remove the contents, add a small amount of adhesive beneath the loose tab, and press it flat until completely cured. Avoid filling the pockets while the adhesive is still flexible.
Storage
Store the finished stationery kit flat in a dry drawer away from direct sunlight. Humidity can curl the liners and weaken water-based adhesive. When gifting the set, tie the ribbon snugly enough to keep the folio closed without bending its spine.