
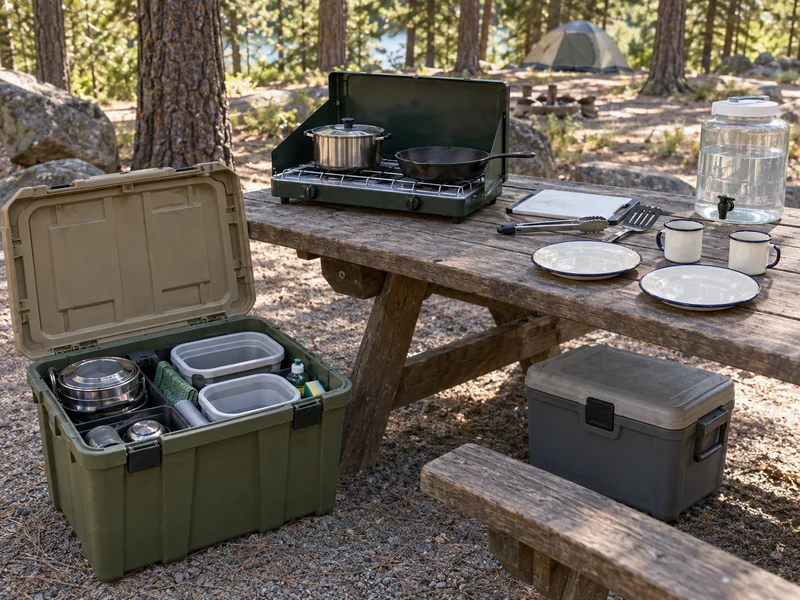
A good car camping kitchen should be ready before dinner, not assembled from six different bags. This system packs the core kitchen for two adults into one latching, 27-gallon-class tote: stove, cookware, tableware, utensils, and cleanup supplies.
The cooler, drinking water, food, and stove fuel travel separately. That boundary matters: it keeps the tote dry and organized, makes the cooler easier to manage, and prevents a fuel cylinder from becoming a space-filler among cookware. Tote interiors and camp stoves vary, so measure your actual gear before buying a box.
The newly added step photos are photorealistic AI-generated visual aids; measure your own tote and follow your equipment manuals and campground rules.
The One-Bin System at a Glance
| In the tote | Separate from the tote | Why |
|---|---|---|
| Cool, dry stove; cookware; tableware; utensils | Fuel cylinder or canister | Transport and store fuel according to its label and the stove maker’s instructions. |
| Wash basins, sponge, towel, strainer, trash bags | Food cooler | The cooler needs ice, drainage, temperature control, and frequent access. |
| Cutting board, sheathed knife, opener, food thermometer | Drinking and washing water | A separate jug is easier to refill and keeps leaks away from dry gear. |
| Empty reusable containers and dry utility pouches | Food and scented toiletries | These must follow the campground’s food-storage rules, especially in wildlife country. |
This tote is a transport and organization box, not a bear-resistant food container. If the campground provides a food locker or requires an approved bear canister, use it exactly as posted.
Gear List for Two Campers
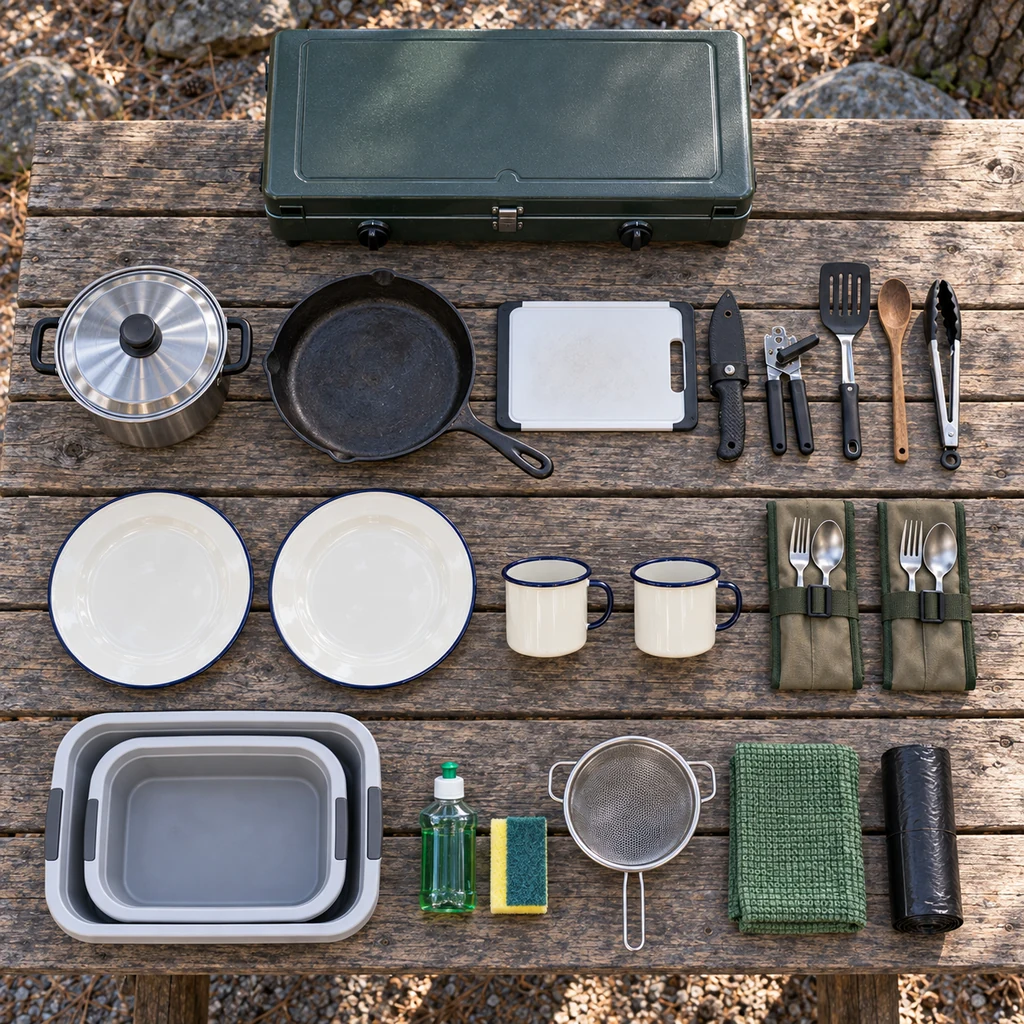
Cook
- One compact two-burner camp stove that fits the tote interior
- One 2.5- to 3-quart pot with lid and one 10-inch skillet
- One compact cutting board and one knife with a secure sheath
- One spatula, one sturdy spoon, one pair of tongs, and one can opener
- One lighter or matches in a dry pouch, stored away from fuel
- One instant-read food thermometer
Eat
- Two plates, two mugs, and two compact utensil sets
- Two reusable food containers for leftovers or prepped ingredients
Clean
- Two nesting wash basins: one for washing and one for rinsing
- Sponge, small amount of unscented biodegradable soap, and quick-dry towel
- Fine-mesh strainer for catching food scraps
- Trash bags plus one spare zip bag for a damp sponge
Before packing the kitchen, finish your broader loadout with this beginner camping gear checklist. A kitchen tote cannot replace shelter, sleep, lighting, first-aid, or weather-specific equipment.
How to Pack the Camp Kitchen Tote
Step 1 — Measure the Stove and Tote Interior
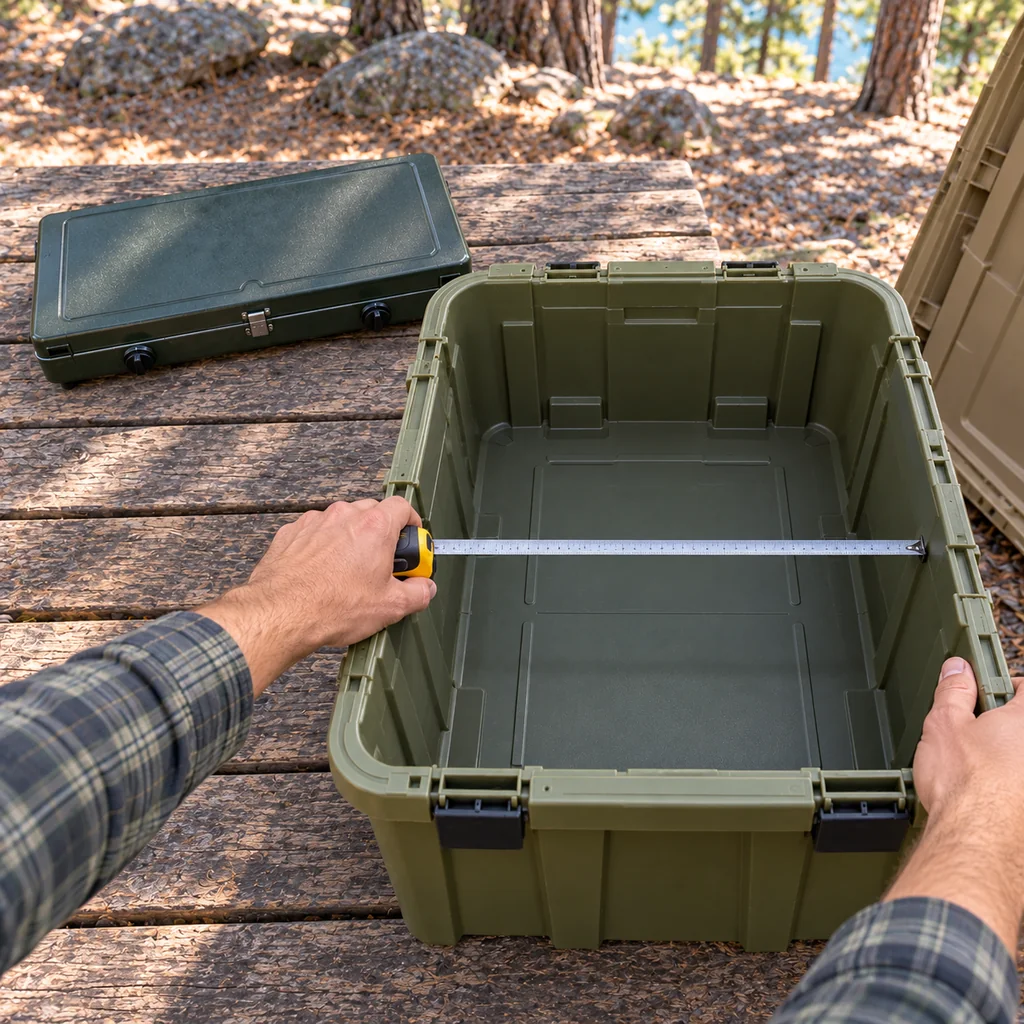
Measure the stove’s length, width, and closed height, including knobs, hinges, feet, and the fuel connection. Then measure the tote at its narrowest usable points rather than trusting its exterior capacity label. A common 27-gallon-class tote often works, but two boxes with the same advertised volume may have very different ribs, tapered walls, and lid clearance.
Leave enough room to lift the stove without scraping a control knob. If it does not fit comfortably, choose a larger tote or carry the stove separately—do not force the lid closed.
Step 2 — Run a Complete Gear Audit
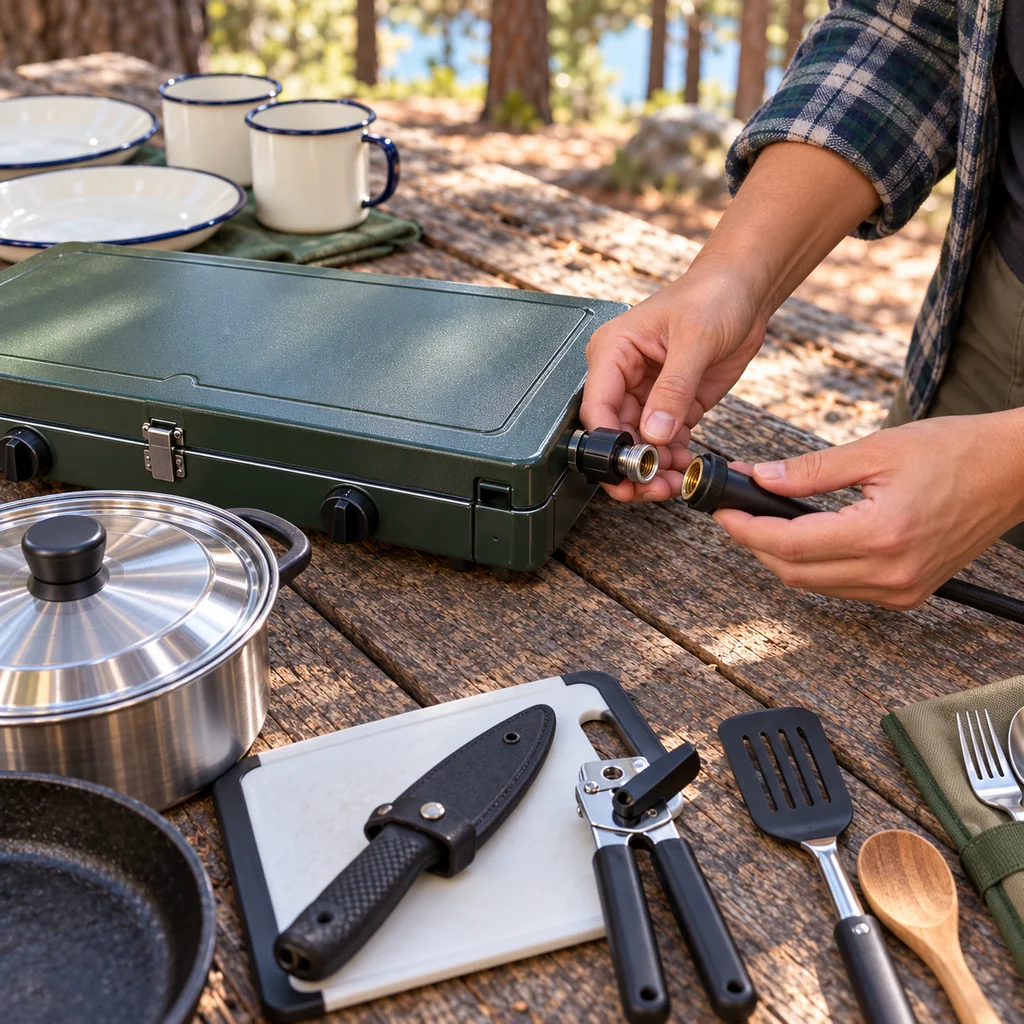
Lay every item on a table in three groups: cook, eat, and clean. Count two place settings, check that the pot lid matches, confirm the can opener works, and remove duplicate tools. Practice setting up and lighting the stove at home using its manual before the trip.
Inspect the knife sheath, stove hose or connector, and cookware handles. Replace damaged gear rather than burying it in the tote. Make a short note of consumables—soap, trash bags, matches—that need topping up after each trip.
Step 3 — Put the Cool, Dry Stove Low
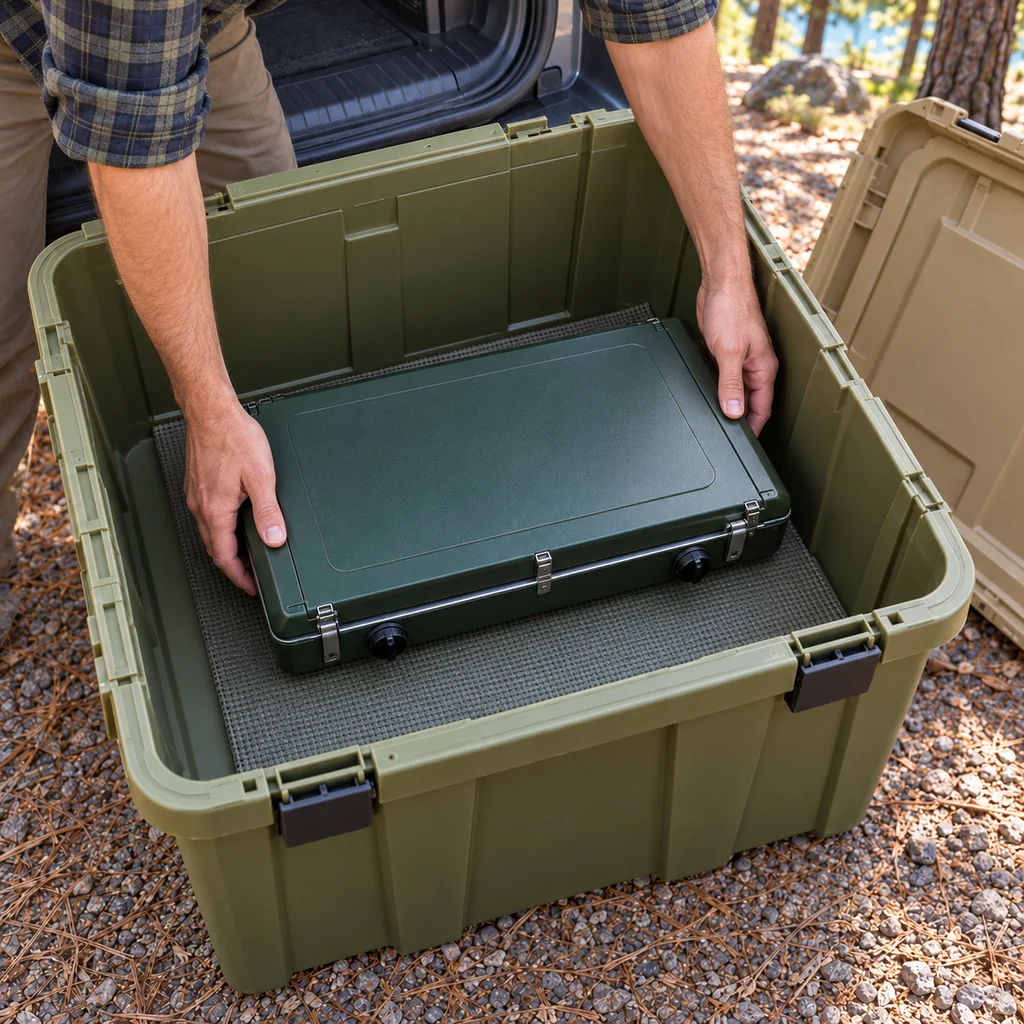
Make sure the stove is off, disconnected from fuel, completely cool, and dry. Place it flat at the bottom if the tote geometry allows. A thin washable mat can protect both the stove and box, but it should not cover vents while the stove is in use; the stove is always removed from the tote before lighting.
Never operate a fuel-burning camp stove in a tent, vehicle, camper, or other enclosed space. Use it outdoors on a stable, level surface and follow the clearances in the stove manual.
Step 4 — Nest Cookware and Mugs
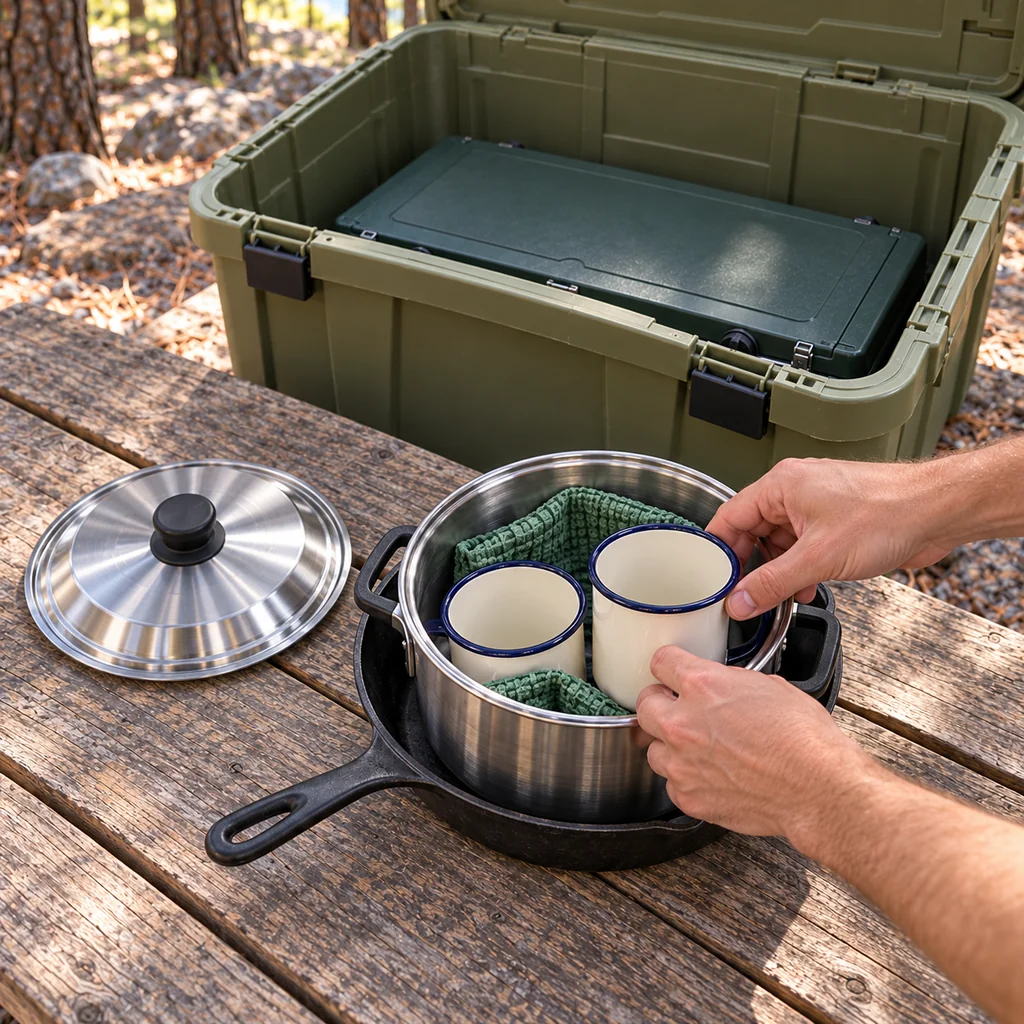
Set the pot inside the skillet, add a clean cloth to stop rattling, and place the two mugs inside the pot if they fit without stressing the handles. Turn the pot lid upside down or slide it beside the cookware. Keep the heaviest metal pieces low and near the center so the tote remains easy to carry.
Pack the knife in a secure sheath inside the utensil pouch. Do not leave a loose blade under cookware where someone might reach for it blindly.
Step 5 — Build a Contained Wash Kit
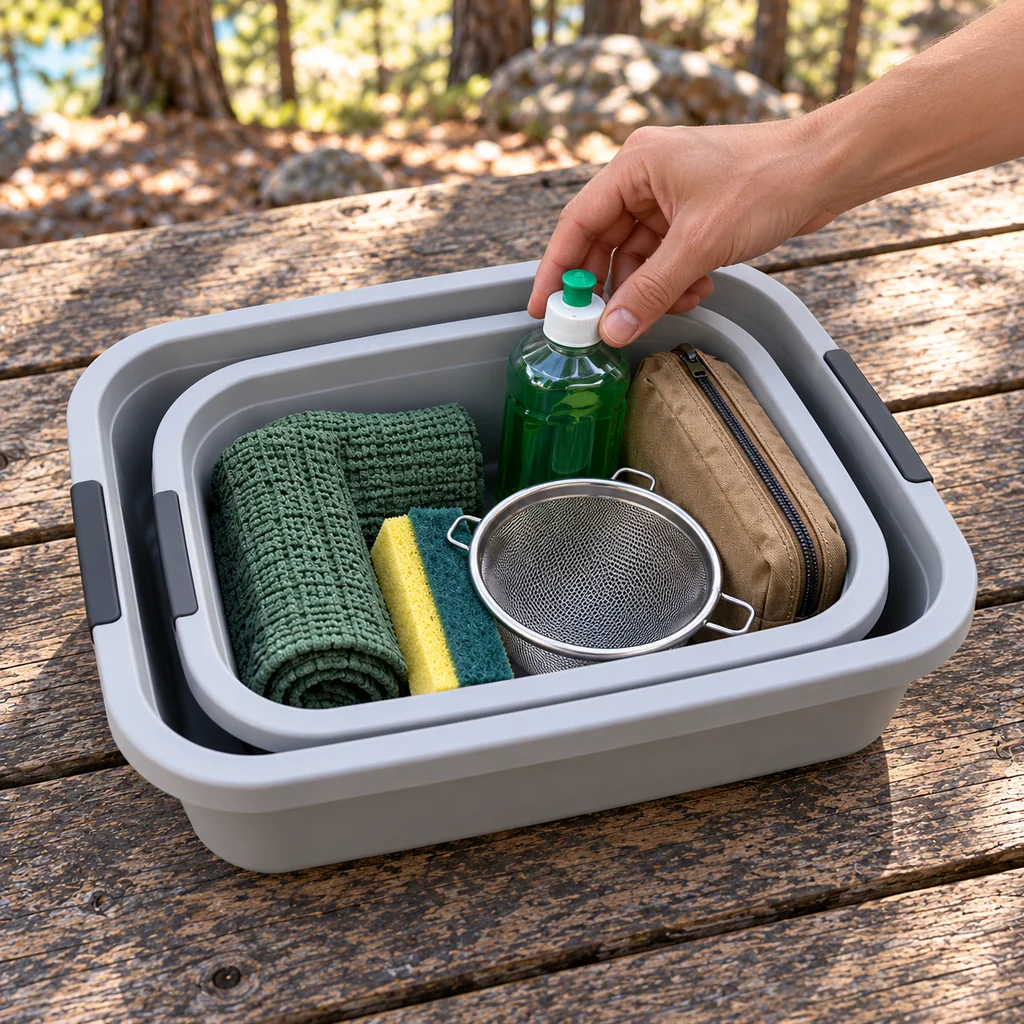
Nest the two basins and place the tightly closed soap bottle, sponge, strainer, and towel inside the top basin. A small waterproof pouch contains any residual dampness on the drive home, but dry every item fully before long-term storage to prevent odor and mildew.
Use the campground’s designated dishwashing and wastewater facility when one is provided. Otherwise, follow local rules: scrape dishes first, strain out food scraps, pack those scraps with the trash, and keep dishwater well away from lakes, streams, and campsites. Biodegradable soap still does not belong in natural water.
Step 6 — Fill Vertical Gaps and Test the Lid
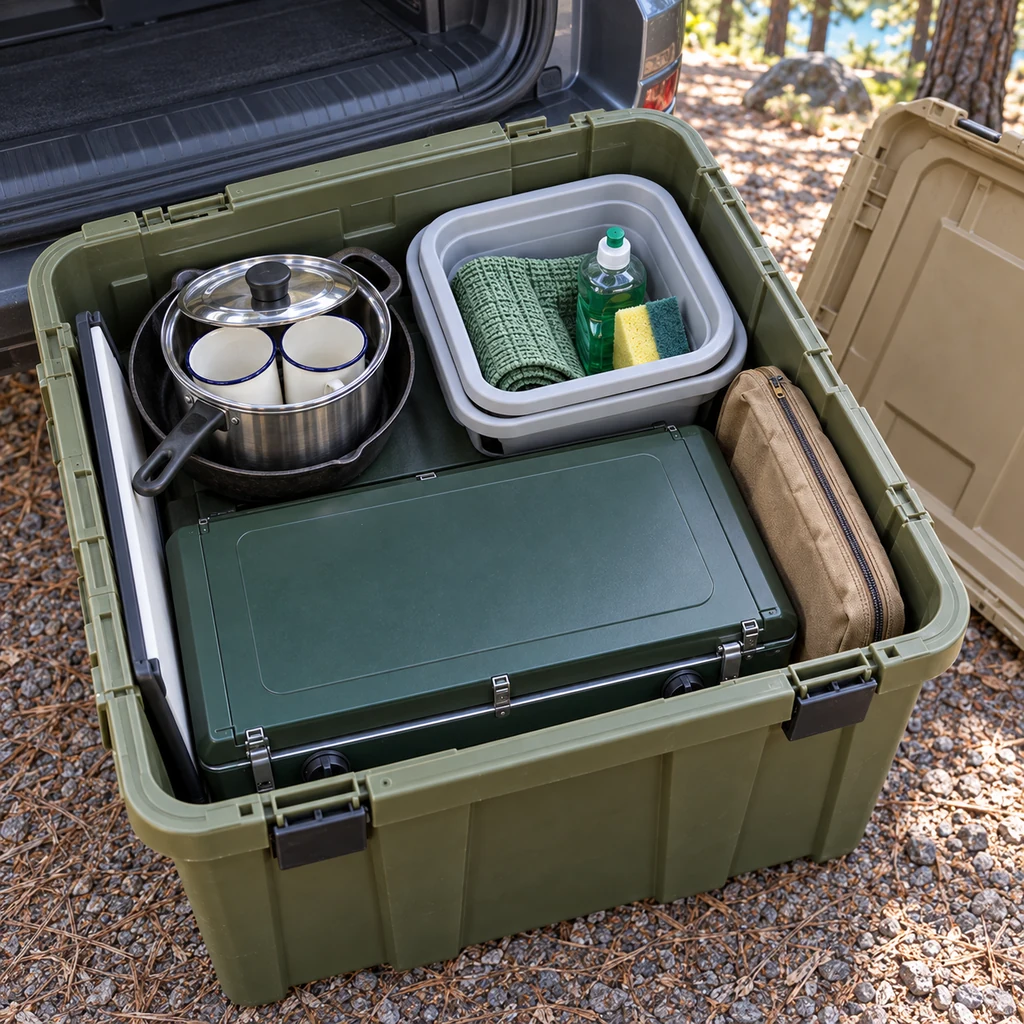
Stand the cutting board against one wall. Put utensils, lighter, matches, and thermometer into zipped pouches, then use the folded towel to stop movement around the cookware. Keep frequently used items near the top.
Close the lid without sitting on it or forcing the latches. Lift and gently rock the tote; heavy shifting means another soft divider is needed. Add a simple inventory card inside the lid so the next pack check takes less than a minute.
Step 7 — Build Three Campsite Kitchen Zones
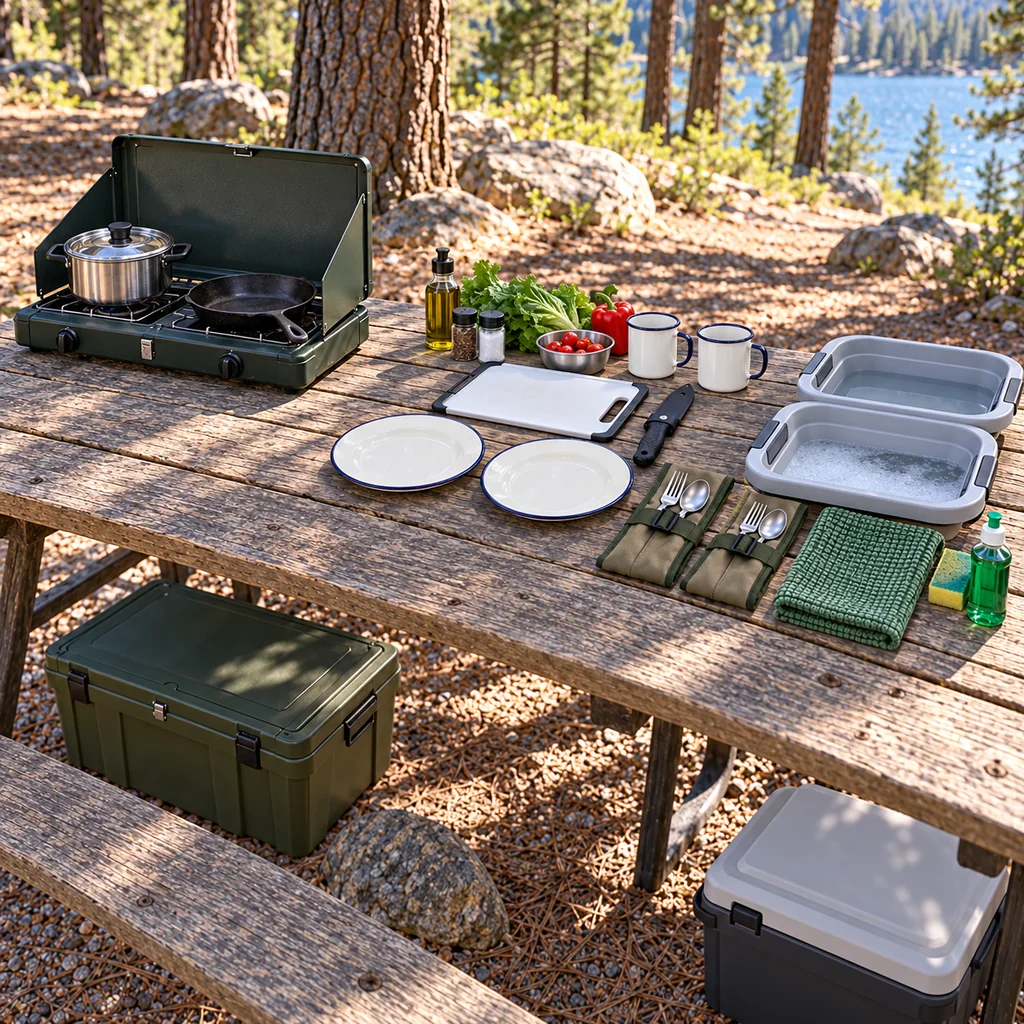
At camp, remove everything from the tote before cooking. Create a hot zone for the stove, a prep-and-serve zone for the board and clean utensils, and a wash zone at the far end of the table. Keep the cooler shaded and outside the main walking path. Arrange the rest of camp with the same logic using these beginner campsite setup zones.
Place the stove outdoors on a stable surface permitted by the campground, away from the tent, dry vegetation, table edges, and anything overhead. Keep children and pets clear. Never leave a lit stove unattended.
Step 8 — Clean, Dry, and Secure the Kitchen at Night
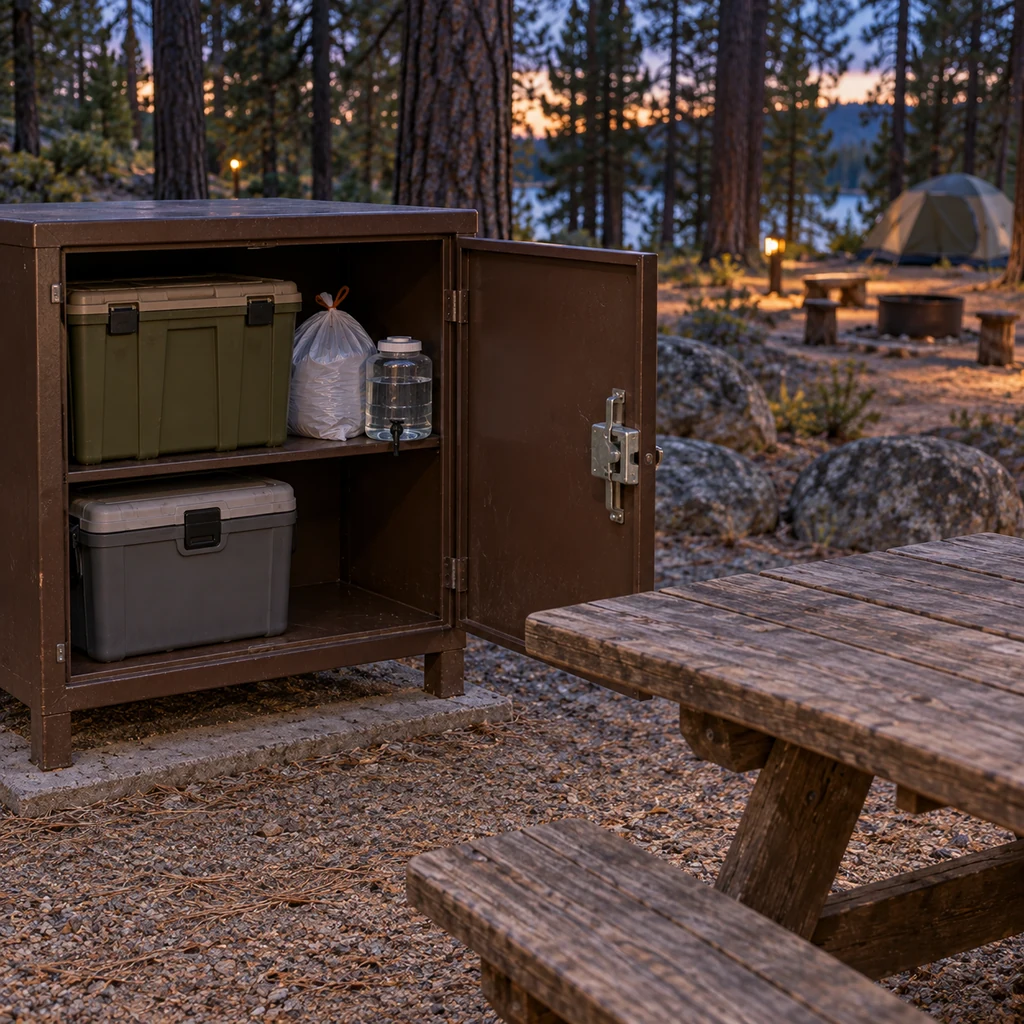
Let the stove cool completely, wipe up grease and crumbs, wash the dishes, and dry the kit before repacking. Seal trash and remove every food scrap from the table and ground.
Before bed, secure food, trash, scented items, the cooler, and cooking gear in the provided food locker or by the method required at that campground. Rules differ by location, so posted instructions take priority over a home routine. Never keep food or scented items in the tent.
A Practical Picnic-Table Layout
| Zone | Place here | Keep out |
|---|---|---|
| Hot zone | Stove, pot, skillet, heat-safe utensils | Paper towels, fuel storage, children, loose sleeves |
| Prep and serve | Cutting board, plates, clean tools, ingredients in use | Dirty wash water and raw-meat packaging |
| Wash and waste | Scrape container, wash basin, rinse basin, drying towel | Ready-to-eat food and clean serving tools |
Put the hot zone where the cook can stand securely without blocking the path to the tent or vehicle. Do not stretch the fuel connection across a walkway. If the picnic table is too small, simplify the meal rather than balancing hot cookware on the tote lid.
Keep the Cooler Safe and Separate
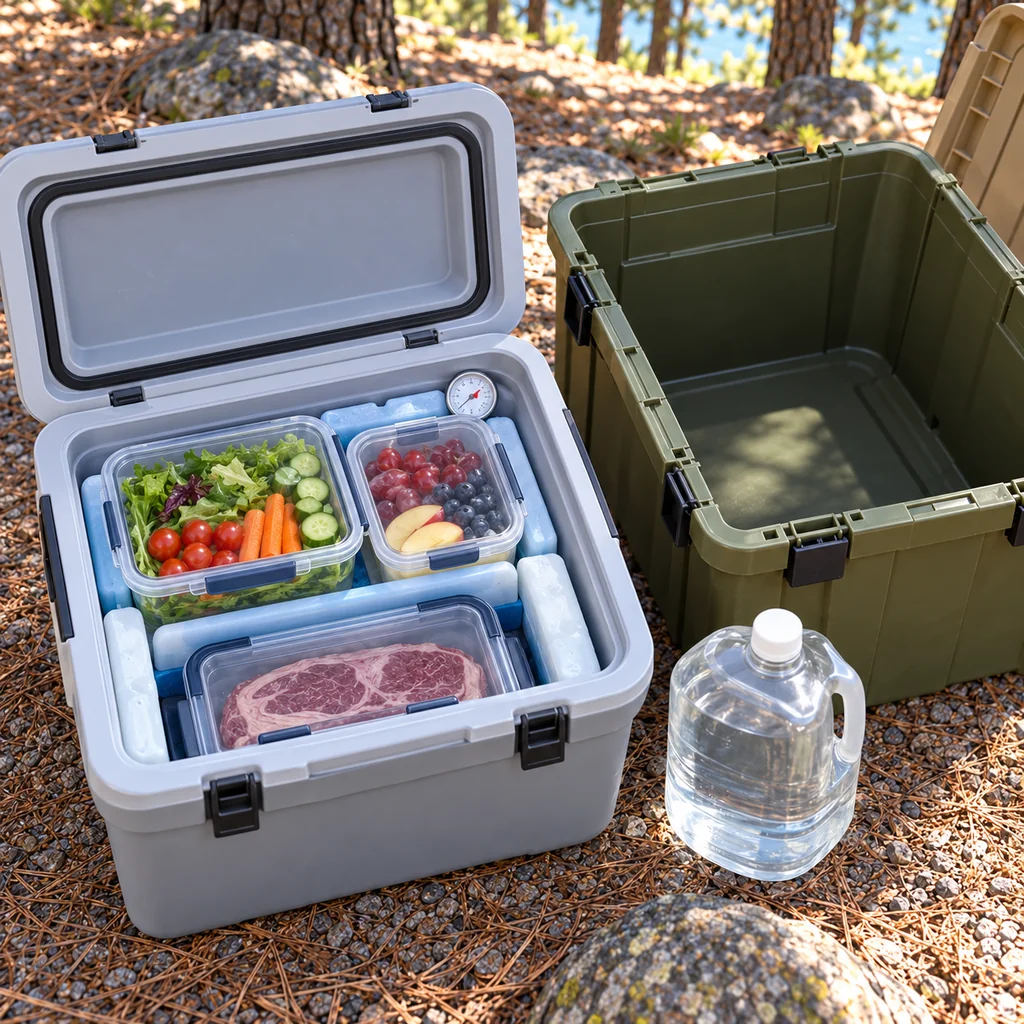
Use a cooler thermometer and keep perishable food at 40°F (4°C) or below. Pack raw meat in leakproof wrapping below ready-to-eat foods, or use a separate cooler when practical. Block ice or frozen gel packs generally last longer than loose cubes, and opening the cooler only when needed helps preserve the cold.
Perishable food should not remain above refrigeration temperature for more than two hours, or more than one hour when the air temperature is above 90°F (32°C). When uncertain, discard it; smell and appearance cannot confirm safety. Use the food thermometer rather than judging doneness by color, and follow the current safe-temperature guidance for the food you are cooking.
Water and an effective way to cook are only part of a safe first trip. Review these essential beginner camping items before leaving home.
Dishwashing Without Leaving a Mess
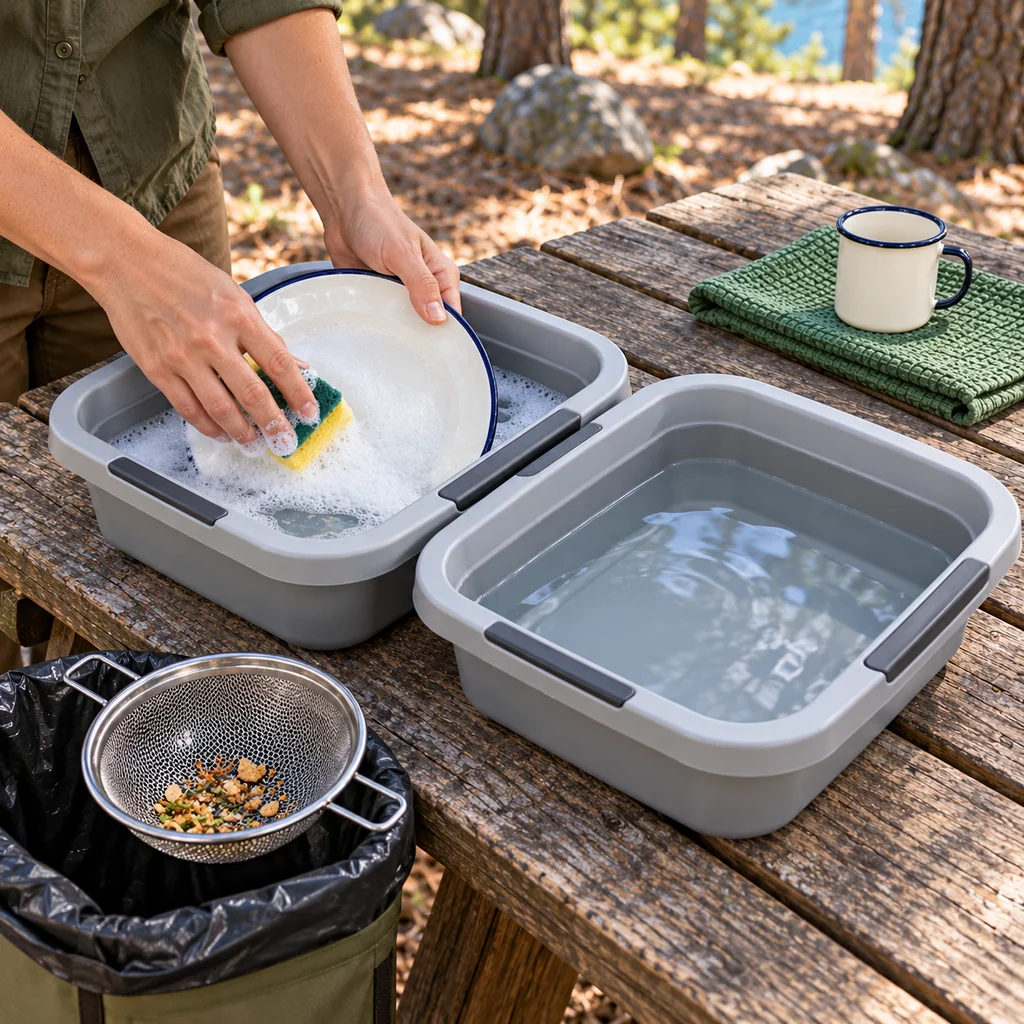
- Scrape plates thoroughly so the wash water contains as little food as possible.
- Wash in the first basin with a small amount of soap and rinse in the second.
- Strain both basins and pack the captured scraps with the trash.
- Use the campground wastewater drain when available.
- If no facility exists, check local rules before disposal. Where allowed, carry strained water at least 200 feet—about 70 adult steps—from natural water and camp, then scatter it broadly.
- Dry dishes and basins before they return to the tote.
Do not dump greasy water into a fire ring, vegetation beside the table, or a lake or stream. Local restrictions may be stricter than the general routine above.
Common Packing Problems and Fixes
- The lid will not close: remove duplicates and repack the soft pieces. Never force the lid or use a fuel container to fill a gap.
- The stove does not fit: measure again at the tote’s narrowest interior point. Carry the stove separately or choose a larger box.
- Cookware arrives greasy: scrape, wash, and dry it before storage; use a washable pouch until a greasy item can be cleaned properly.
- The tote smells damp: unpack it at home, wash the box, and air-dry every piece with the lid open.
- Small tools disappear: keep opener, lighter, thermometer, and utensils in one high-visibility zip pouch.
- The table feels crowded: return spare pieces to the tote and cook a one-pan meal. Only the current task zone needs to be open.
- Wildlife rules are unclear: ask the campground host or ranger before unpacking food. An ordinary plastic tote is not a substitute for required storage.
Adapt the Kit to Your Group
| Group | Keep | Adjust |
|---|---|---|
| Solo camper | Stove, pot, skillet, two basins, safety tools | Pack one place setting and consider one smaller pot if meals allow. |
| Two adults | The complete base system | Choose meals that share the same pot and skillet. |
| Family of four | Same stove and cleanup method if capacity is adequate | Add four place settings, a larger pot, and extra food storage; move tableware to a second small box if the lid becomes tight. |
| Group camp | Zone system and night reset | Assign separate cook, wash, and food-storage boxes rather than overloading one tote. |
Frequently Asked Questions
Does every two-burner stove fit a 27-gallon tote?
No. Capacity labels describe volume, not usable interior dimensions. Measure the stove—including knobs, feet, and hinges—and the tote at its narrowest points before purchasing.
Should the fuel canister go in the kitchen tote?
No. Keep fuel separate from cookware and transport and store it according to the fuel label, stove manual, and applicable rules. Never leave it where heat can build up.
Can food stay in the tote overnight?
Only if local rules explicitly permit that storage method, and an ordinary plastic tote is generally not bear-resistant. Use provided lockers or required approved containers for food, trash, scented items, and cooking gear.
Can I use the stove in a tent vestibule when it rains?
No. A fuel-burning stove can create deadly carbon monoxide and fire hazards in enclosed or partly enclosed spaces. Cook outdoors in a location allowed by the campground and follow the stove manual.
What should stay packed between trips?
Clean, completely dry cookware, dishes, utensils, basins, trash bags, and the inventory card can remain in the tote. Remove fuel, food, damp sponges, and anything that can leak, spoil, or attract pests.