

This botanical air-dry clay ghost garland is made for anyone who loves quiet Halloween decor but does not love finding curled, cracked ornaments on the drying board. Six slim white ghosts, each pressed with a real fern, create a soft woodland look that feels seasonal without becoming cartoonish.
The important part is not a special cutter. It is controlling thickness, hole placement, moisture loss, and the drying surface. Follow the sequence below and you will finish with six lightweight ornaments that can hang evenly on one cord instead of twisting forward or snapping at the top.
Why Air-Dry Clay Ghosts Curl
Air-dry clay shrinks as water leaves it. A thin edge dries sooner than a thick center, while one exposed face can dry faster than the face touching the board. That uneven movement is what encourages a flat ornament to cup, lift, or crack. A hot radiator, sunny window, hair dryer, or fan makes the difference more severe rather than solving it.
Use matching guide sticks to create an even slab, move the wet shapes on a rigid board, and let them dry at normal room temperature. Brand formulas vary, so the package directions always outrank a generic timetable. For one widely available example, Crayola says its Air-Dry Clay generally needs 24 hours to feel dry and 72 hours to dry completely, with size and environment changing that timing.
Materials and Tools
- 12 to 16 ounces of white air-dry clay, or enough for six ornaments
- One paper or thin-card ghost template, about 4 1/2 to 5 inches tall
- Parchment paper and one rigid, flat board or rimless tray
- A plain wooden or acrylic rolling pin
- Two matching 1/4-inch-thick wooden guide sticks
- A blunt plastic clay knife
- One clean, dry fern frond small enough to fit the lower half of a ghost
- A small rounded tool for the eyes and one drinking straw for the hanging hole
- A fine 220- to 320-grit sanding sponge
- Six to eight feet of jute twine or cotton cord
- Optional matte, water-based sealer that your clay manufacturer approves
These ornaments are decorative, not food-safe and not toys. Supervise children around clay, tools, small cutouts, sanding dust, and long cord. Work with ventilation, follow the clay and sealer labels, and keep the finished garland away from toddlers, pets, open flames, active fireplaces, stovetops, and damp outdoor locations.
Step-by-Step Instructions
1. Condition and Divide the Clay into Six Portions
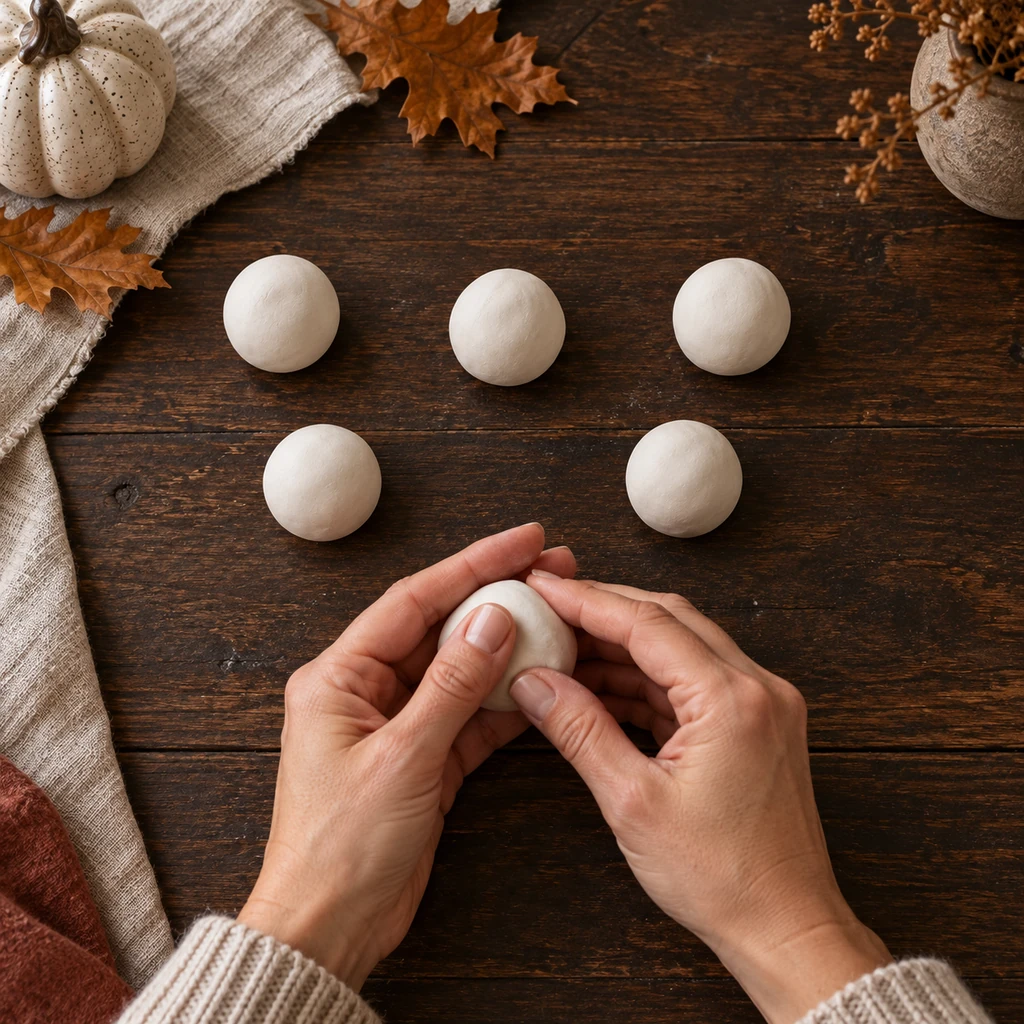
Knead only the clay you can use immediately until it feels smooth and flexible. Divide it into six similar portions before rolling; this makes the final ornaments easier to balance on the cord. Keep the other five portions sealed while you work so their surfaces do not begin drying early.
2. Roll One Even Quarter-Inch Slab
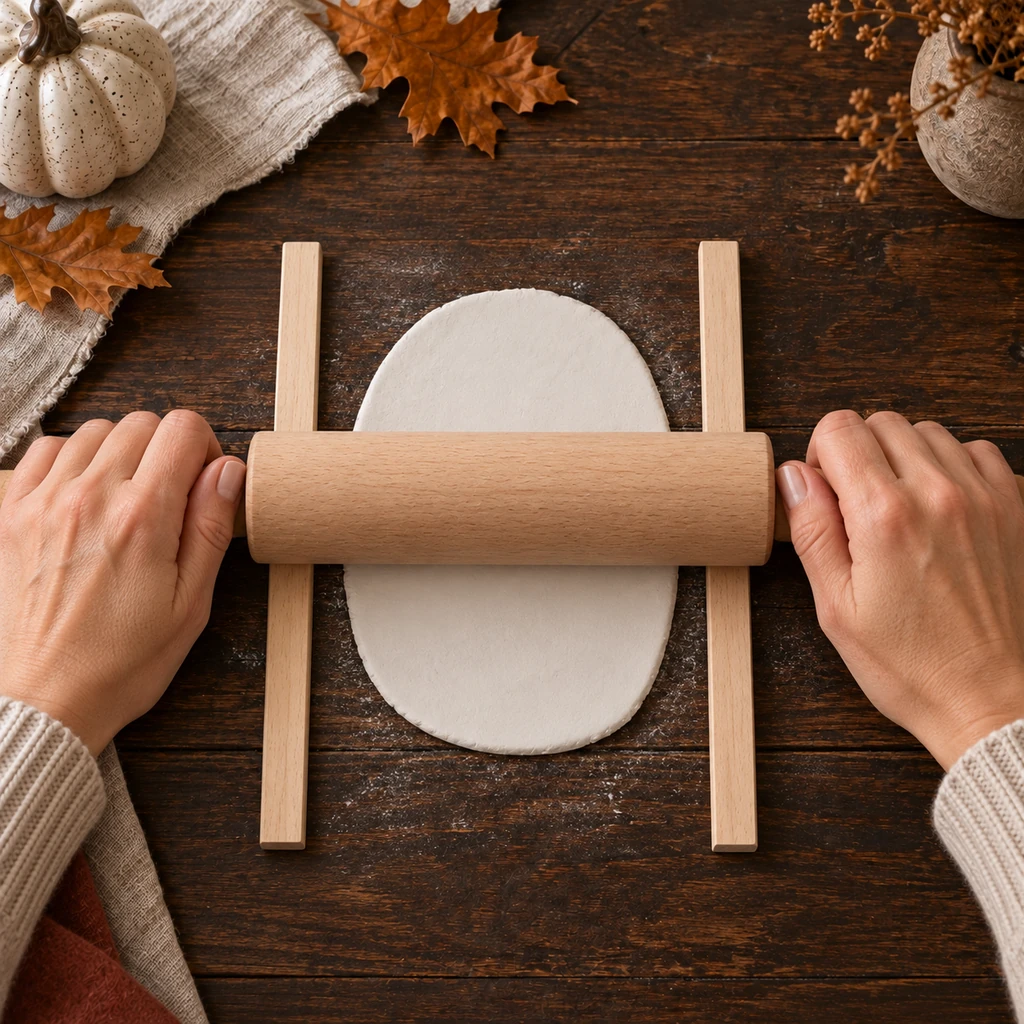
Place one portion between the two matching guide sticks and roll from the center outward. The rolling pin should ride on both sticks, which prevents the middle from staying thick while the edges become fragile. Rotate the clay once or twice without stretching it, then stop when the pin touches both guides across the entire slab.
3. Cut a Narrow Ghost Shape
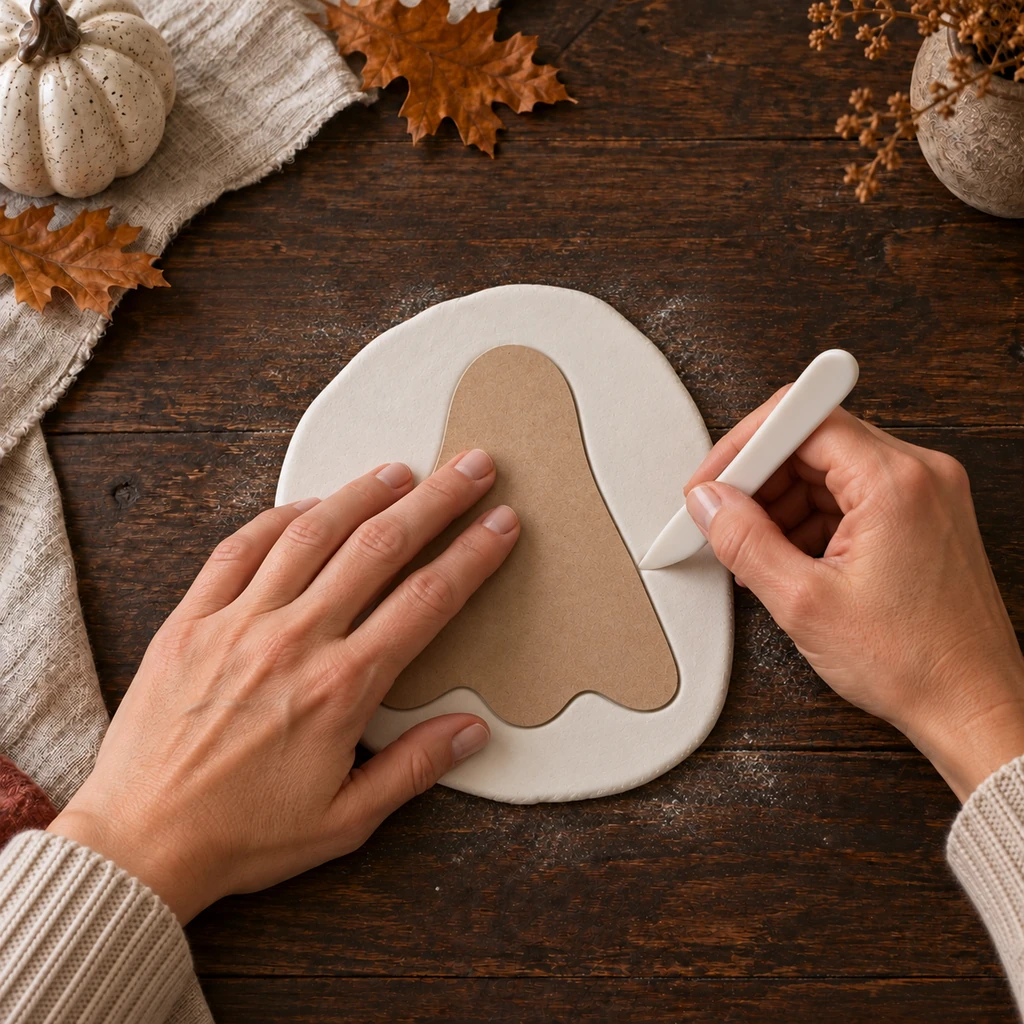
Use a simple template with a rounded head, gently widening sides, no arms, and three shallow scallops along the bottom. Hold the template flat and cut outward with the blunt plastic knife so you do not drag or compress the edge. Lift away the scrap, then smooth small burrs with a barely damp fingertip rather than adding puddles of water.
Repeat the first three steps until you have exactly six ghosts. Compare them side by side before decorating. They do not need to be identical, but similar height, thickness, and weight will make the garland hang more predictably.
4. Press the Fern Texture into the Lower Half
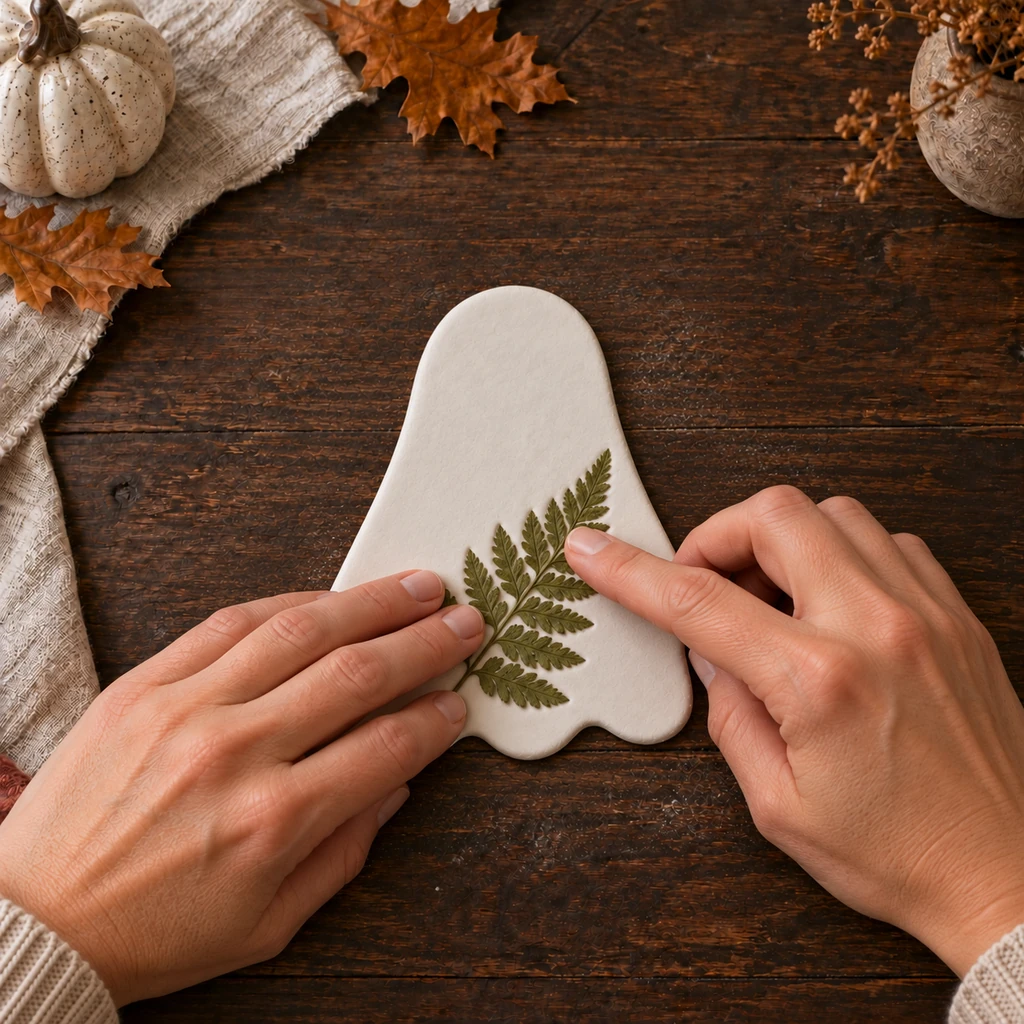
Lay one clean fern frond diagonally across the lower half of a fresh ghost. Press each leaflet gently with fingertips, then make one light pass with the rolling pin only if the stem has not registered. Do not push the fern through the clay or place its thickest stem directly beside an edge.
Using the same type and approximate size of frond on all six pieces creates a related set while natural differences keep the ornaments from looking factory-made. If a leaflet shifts, lift the fern straight up and reroll that clay portion rather than trying to hide a doubled imprint.
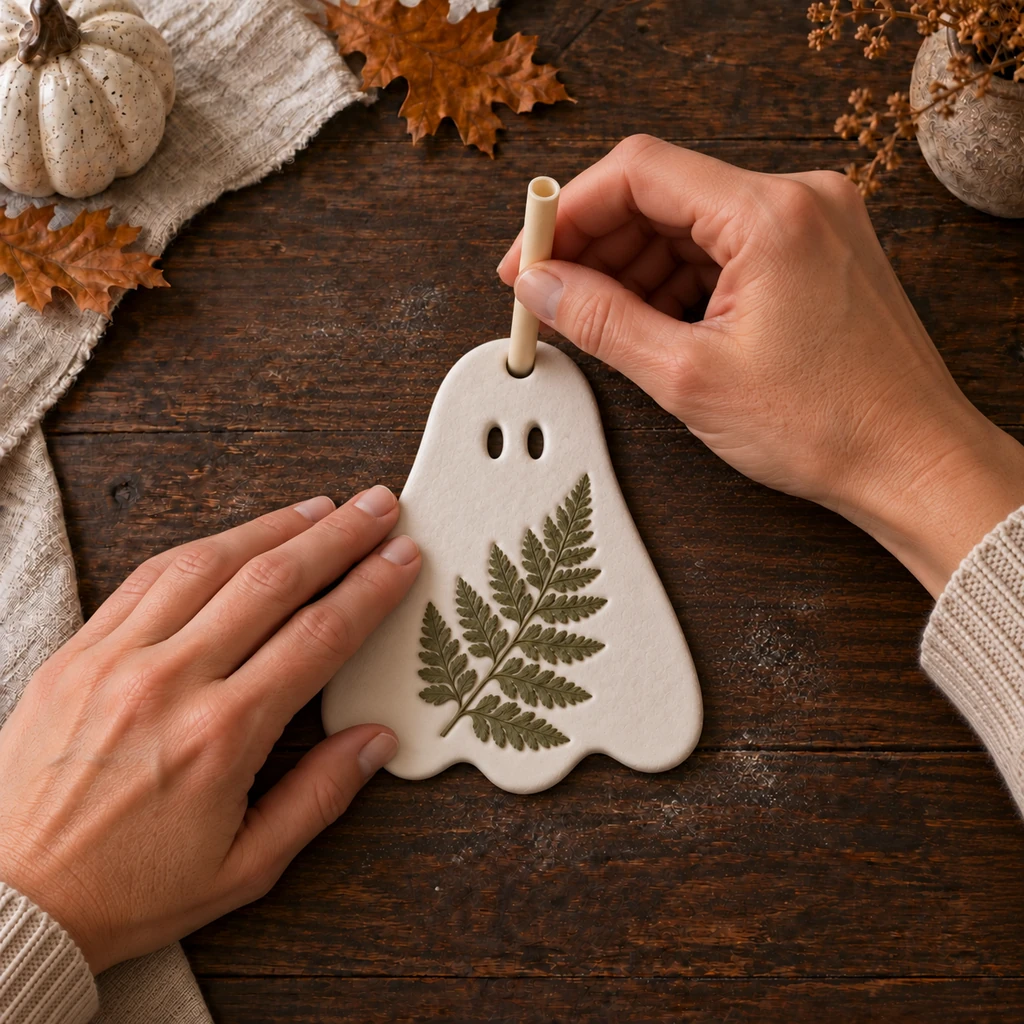
5. Add Two Eyes and One Hanging Hole
Cut exactly two small oval eyes. Keep them level and leave enough clay between them that the face does not become one large weak opening. Make one hanging hole centered near the top, leaving roughly 3/8 inch of clay between the hole and the outer edge. A clean drinking straw removes a neat plug instead of forcing clay outward.
You may make the holes while the fern is still holding the soft texture, as shown, but lift the fern carefully before drying. Turn the ghost over in your palm and smooth any raised rings around the backs of all three openings. A clean back matters because a rough hanging hole can abrade the cord.
6. Dry All Six Ghosts Flat
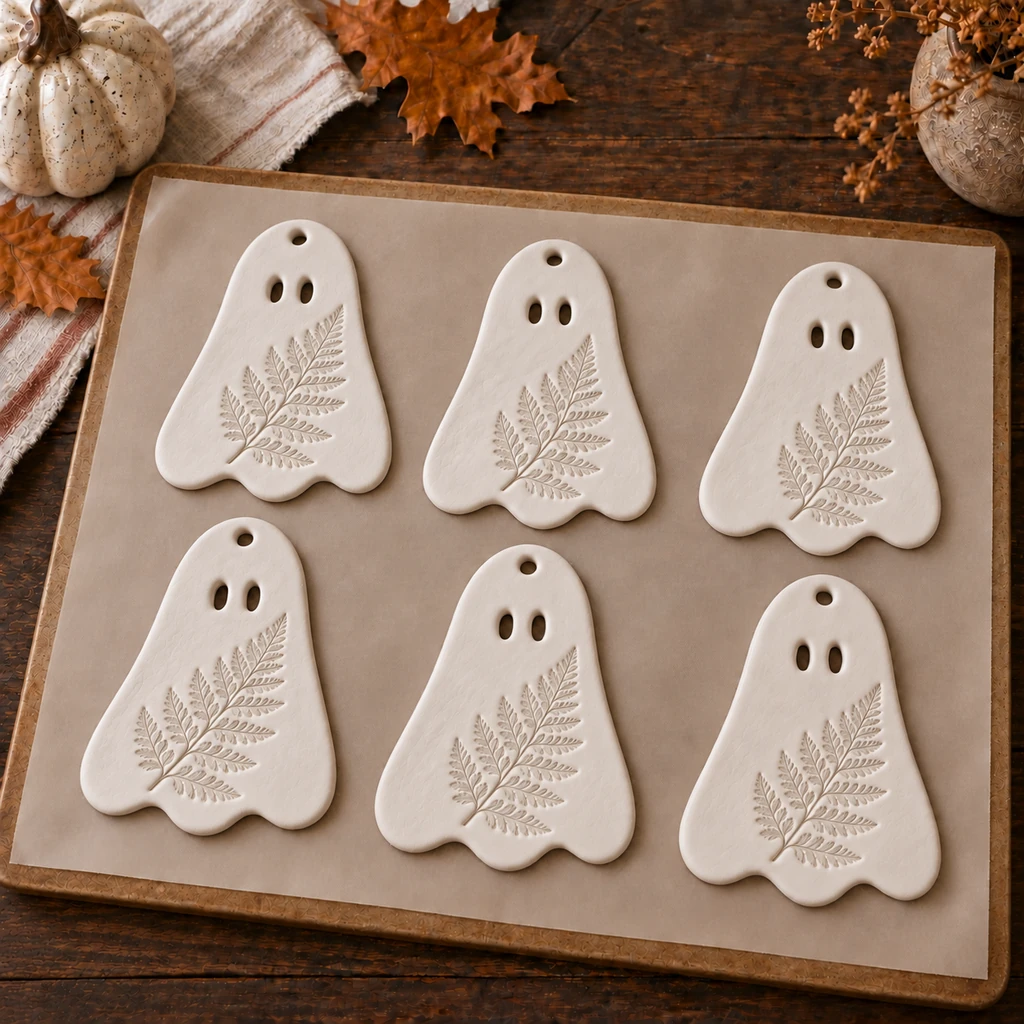
Arrange all six ghosts in one layer on parchment over a rigid, flat board. Leave air space between them and move the board to a dry room-temperature location away from sun, heaters, and strong drafts. Do not carry individual wet ghosts once they are shaped; transport the whole board so the soft clay is not bent by your fingers.
Follow your clay label for handling and total drying time. When the top feels firm but the underside is still darker or cool, turn each ornament gently onto clean parchment so the second face can continue drying. Do not sand, seal, or string a piece until it feels hard, even in color, and no longer cool from retained moisture.
7. Sand Only After the Clay Is Completely Dry
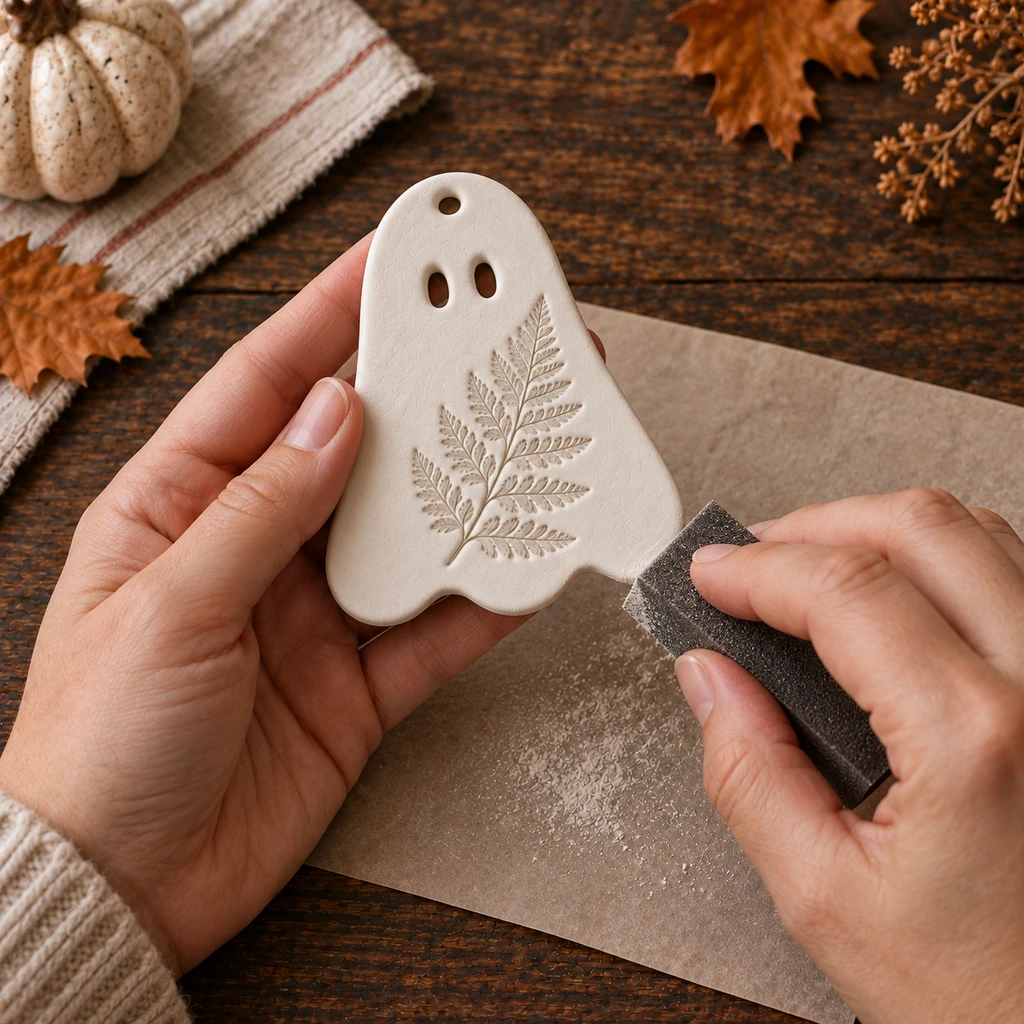
Use a fine sanding sponge on the outer edge and the backs of the openings, not across the fern relief. Make a few light passes and check frequently; aggressive sanding can flatten the scallops or enlarge the hanging hole. Catch dust on paper, ventilate the room, and use any respiratory protection specified by the product label.
If you want a wipeable matte finish, brush away every trace of dust and apply a compatible water-based sealer in thin coats. Sealer does not make air-dry clay waterproof, food-safe, or suitable for a steamy bathroom. Leaving the ghosts unsealed is also valid when they will be stored and displayed in a dry interior.
8. Thread, Space, and Hang the Six Ghosts
Lay the six ornaments in order before cutting the cord. Thread each one through its single top hole, then tie a small stopper knot on both sides so it cannot slide into its neighbor. Leave at least 12 inches of free cord at each end for adjustment, and lift the garland from both ends rather than pulling on one ornament.
Mount both ends on secure hooks appropriate for the surface. The cord should form a shallow curve, not a deep swag that makes the center pieces collide. Displaying the garland across an inactive mantel, shelf front, bookcase, or interior wall keeps it visible without exposing it to heat or weather.

How to Keep the Ghosts from Curling or Cracking
- Keep the slab even: two matching guide sticks are more reliable than judging thickness by sight.
- Use less water: a barely damp fingertip can smooth an edge; soaking one area creates uneven shrinkage.
- Protect the top hole: center it, keep a substantial bridge of clay above it, and smooth its back.
- Dry slowly: ordinary room temperature is safer than a heater, oven, hair dryer, or direct sun unless the product manufacturer explicitly instructs otherwise.
- Wait before finishing: a dry-feeling surface can hide moisture in the center, so follow the label and check color, temperature, and firmness.
If one wet ghost begins lifting at an edge, do not force it flat with a heavy object; that can trap moisture and emboss the surface. Return it to a clean flat board, reduce drafts, and let the two faces equalize gradually. If a fully dry piece has a structural crack across its top hole, remake it rather than trusting glue to hold a hanging ornament.
Substitutions & Variations
No fern is available? Use one small, flat leaf with clear veins, a sprig of rosemary, or a clean rubber texture stamp. The impression should remain in the lower half so the face reads clearly. Avoid thick, juicy leaves that release moisture or tear apart in the clay.
Cotton cord creates a softer, cleaner line than jute, while natural terracotta-colored air-dry clay gives the same shape an earthy look. You can also make smaller ornaments, but shrink the eye and hanging holes proportionally and keep the clay near the same 1/4-inch thickness. Paint is optional; when used, wait for complete drying and choose a water-based finish compatible with your brand.
Where to Hang the Garland
A dark wood shelf or inactive mantel gives the white ghosts useful contrast. An entry console, bookcase edge, or blank interior wall also works. If the background is pale, place the garland over a muted olive, rust, charcoal, or kraft-paper backdrop so the scalloped silhouettes do not disappear.
Do not hang it over candles, a working fireplace, a cooktop, or a crib. Clay pieces can break if dropped, and long cord can create an entanglement hazard. Treat the finished project as seasonal adult decor and place it beyond the reach of children and animals.
How to Store It for Next Fall
Remove the ornaments from the cord rather than folding the whole garland into a box. Put each ghost between sheets of acid-free tissue or plain unprinted paper, then store them flat in a rigid lidded container. Keep the box in a dry interior closet instead of a garage, attic, or basement where humidity and temperature change sharply.
Before rehanging, inspect the top bridge, the eye openings, and every edge. Retire any piece with a spreading crack. Dust sound ornaments with a soft dry brush; do not soak them or use a wet cleaning cloth.
More Fall Craft Ideas
Continue the neutral seasonal theme with no-sew sock pumpkins that hold their shape, a pressed-flower pumpkin without carving, or air-dry clay leaf bowls designed to resist cracking. Each project uses natural texture and calm color rather than disposable plastic decor.
Frequently Asked Questions
How long do air-dry clay ghosts take to dry?
It depends on the formula, thickness, room humidity, and airflow. Follow your package first. As a reference rather than a universal promise, Crayola reports about 24 hours to feel dry and about 72 hours to dry completely for its Air-Dry Clay.
Can I put air-dry clay in the oven?
Do not heat it unless the manufacturer’s directions explicitly allow that method. Air-dry products are formulated to cure in air, and forced heat can worsen warping or cracking.
Can I paint the ghosts?
Yes, after they are completely dry and only with a finish compatible with your clay. Thin water-based acrylic coats preserve the fern detail better than one heavy coat.
Why did a hanging hole crack?
The hole may have been too close to the edge, left rough on the back, or loaded before the center dried. Center the hole, leave about 3/8 inch of clay above it, smooth both faces, and wait for complete drying before threading.