

A dried hydrangea wreath can look lush without hiding its construction under foam, hot glue, or a mountain of filler. The secret is not using more flowers. It is choosing papery blooms, keeping workable stems, and overlapping each flower head so the next one conceals the previous attachment.
This tutorial builds one 18-inch wreath on a natural grapevine base with florist paddle wire. Dusty green, faded mauve, parchment, and muted burgundy give the arrangement depth while still reading as one calm palette. The finished wreath is intentionally organic: some grapevine remains visible, the flower faces sit at different angles, and no two sections are perfectly identical.
Why Some Hydrangea Wreaths Look Flat
A single hydrangea head is not actually one large flower. It is a branching cluster of many small florets. If every stem is pulled tight against the wreath, all those clusters point in the same direction and the finished ring resembles a pressed mat. Position some heads forward, some slightly inward, and some outward before securing the wire.
Bloom condition matters just as much. Young, freshly colored hydrangeas often contain enough moisture to wilt after cutting. Mature heads feel papery, hold their shape, and usually have shifted toward muted green, tan, or antique shades. If a bloom is damp, soft, mold-spotted, or smells musty, do not trap it inside a wreath.
Materials and Tools
- One sturdy 18-inch natural grapevine wreath
- Approximately 10 to 14 fully dried or naturally papery hydrangea heads, depending on their size
- One spool of 22- or 24-gauge florist paddle wire
- Clean bypass pruners
- Work gloves
- Wire cutters
- One length of wide linen ribbon or sturdy hanging cord
- A large table covered with a washable cloth
- Optional: several smaller hydrangea clusters reserved for gaps
Paddle wire is easier than many separate wire pieces because it can stay connected while you work around the ring. Do not substitute thin sewing thread; it can cut into dry stems and is difficult to tension evenly. Hot glue can be useful for a tiny repair, but it should not be the main structure of a wreath this size.
Before You Begin: Dryness and Safety Check
If you are drying garden flowers yourself, harvest good-quality blooms after surface moisture has evaporated. Remove foliage and dry large hydrangea heads individually with air around them. The University of Illinois Extension identifies air-drying as a straightforward preservation method and advises starting with flowers in prime condition.
Hydrangea is listed by the ASPCA as toxic to dogs, cats, and horses if ingested. Work where dropped pieces can be collected, dispose of trimmings promptly, and display the wreath beyond the reach of pets and small children. Wear gloves if your skin is sensitive, and never use dried hydrangea as an edible garnish.
Step-by-Step Instructions
1. Sort the Dried Blooms Before Cutting
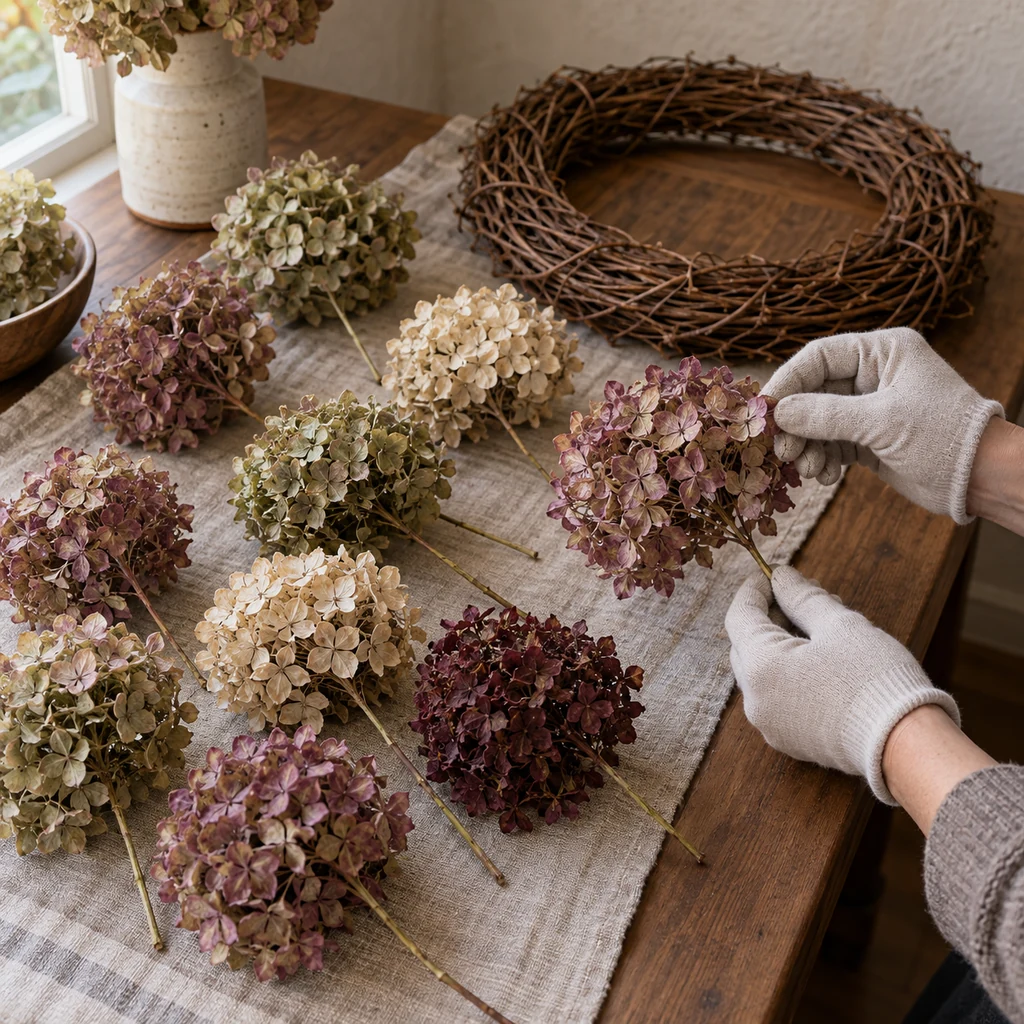
Spread the flower heads across the table and inspect them in good light. Set aside any head with dampness, fuzzy growth, a musty odor, or a stem that collapses when lightly handled. Gently flex one outer floret. A suitable dried bloom should feel papery and retain its form rather than folding like a fresh petal.
Arrange the usable heads by color and size. Reserve two or three smaller clusters for the final gap-filling stage. Place the empty wreath beside the flowers to check scale before you shorten a single stem.
2. Trim Stems to a Workable Length
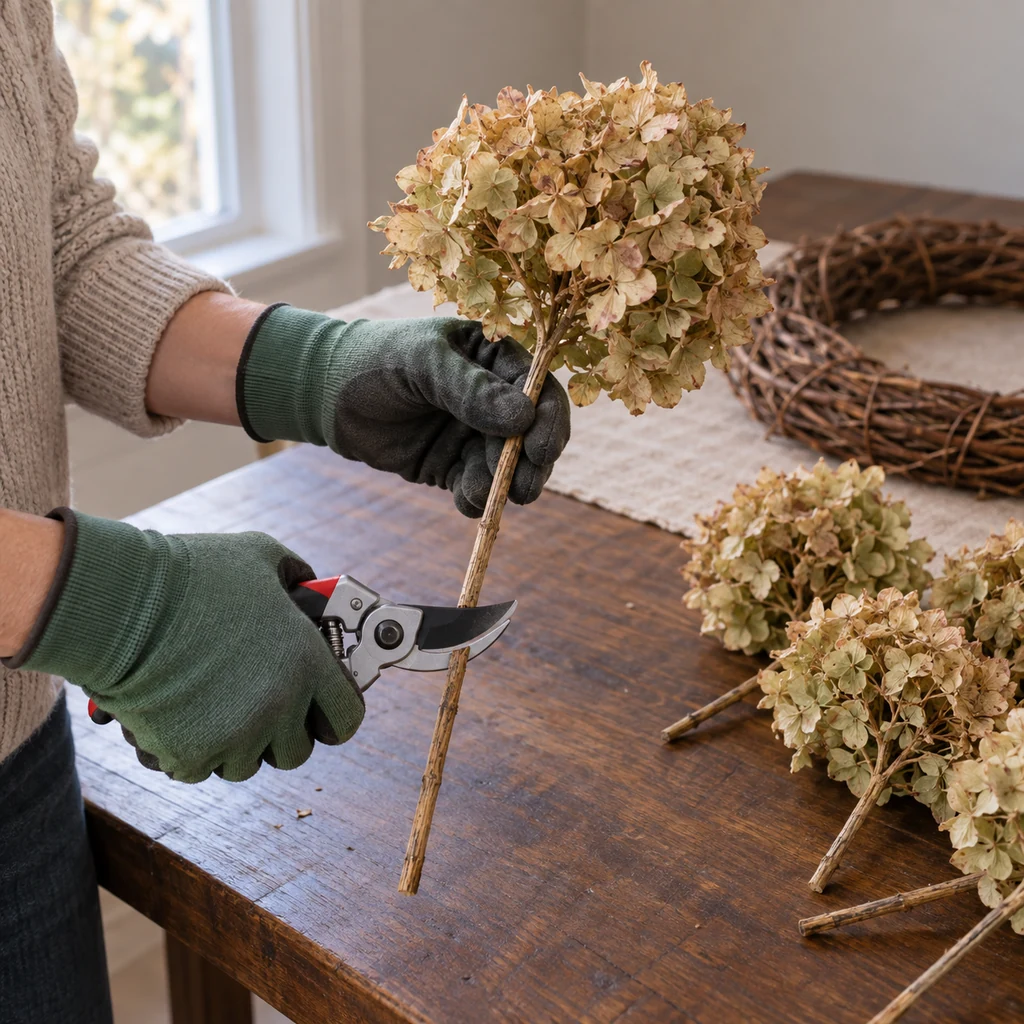
Remove all leaves, then cut the main stems to roughly 5 to 7 inches below the flower head. That length is long enough to lie along the grapevine and short enough to disappear beneath the next cluster. Use bypass pruners and cut one stem at a time, keeping your free hand above the blade.
Do not break apart every large head. Full clusters build volume quickly. Divide only the heads that naturally branch into sturdy smaller sections, and leave each section with enough stem for wiring.
3. Anchor the Paddle Wire
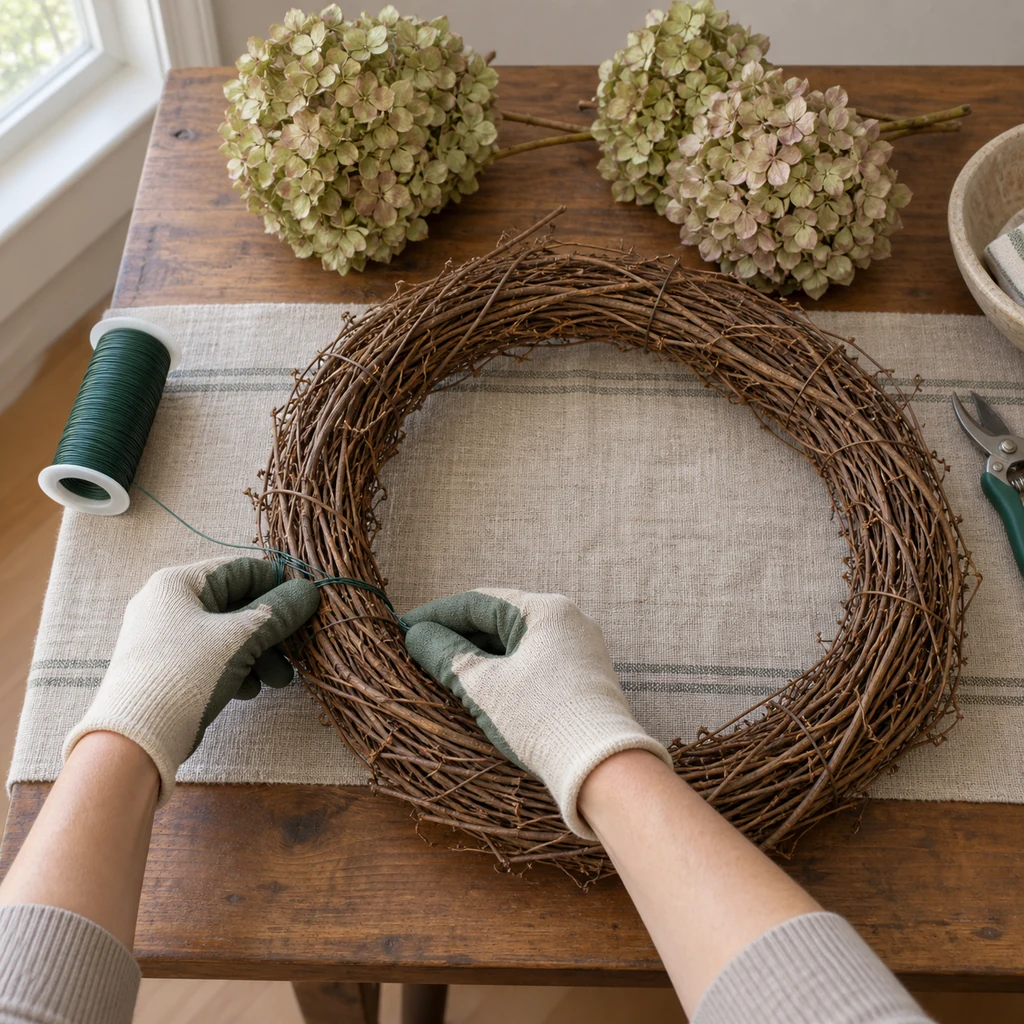
Lay the grapevine wreath flat with its best-looking side facing upward. Feed the wire end through the vines, wrap it around the base two or three times, then twist the short end back onto the working wire. Press the trimmed end down into the grapevine so it cannot scratch a hand or door.
Keep the wire attached to its spool. Place the spool outside the wreath and pass it around the ring as you add flowers. This maintains continuous tension and avoids a collection of exposed wire tails.
4. Secure the First Flower Head
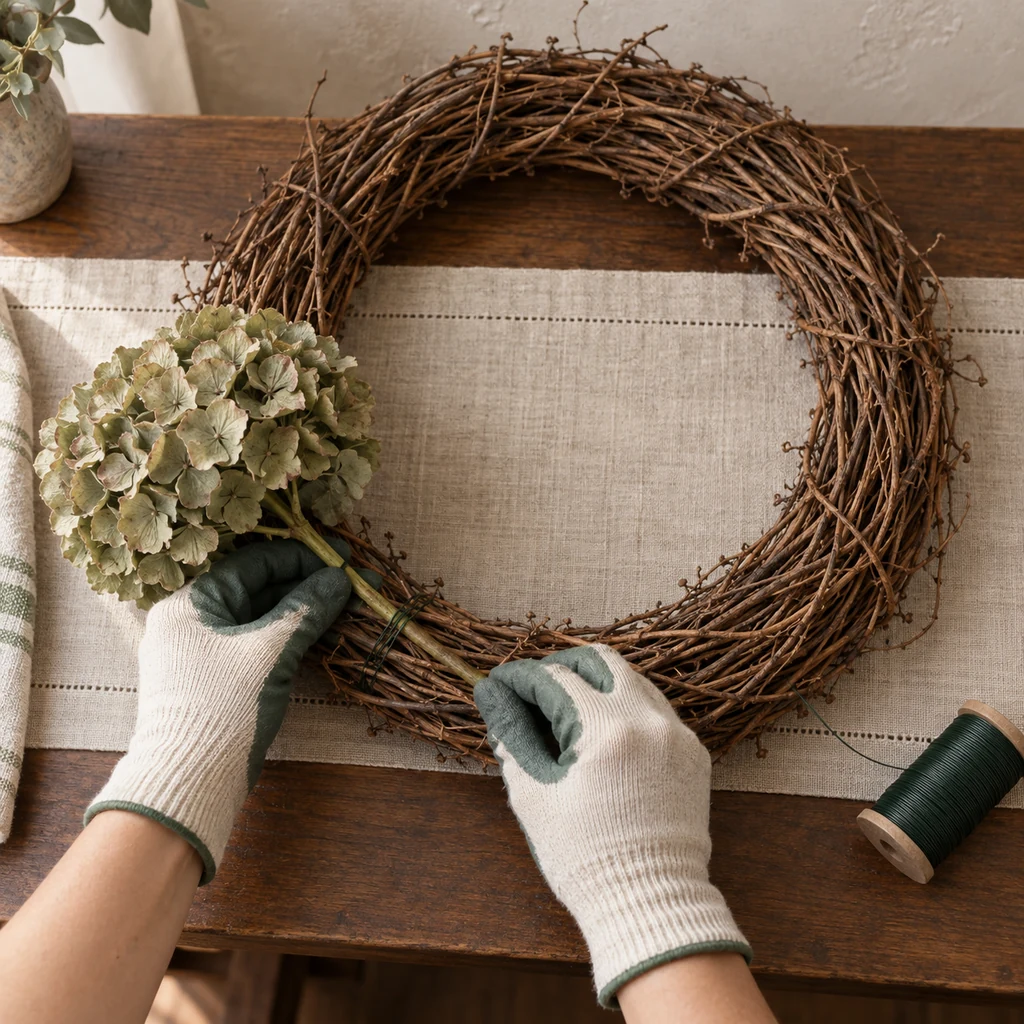
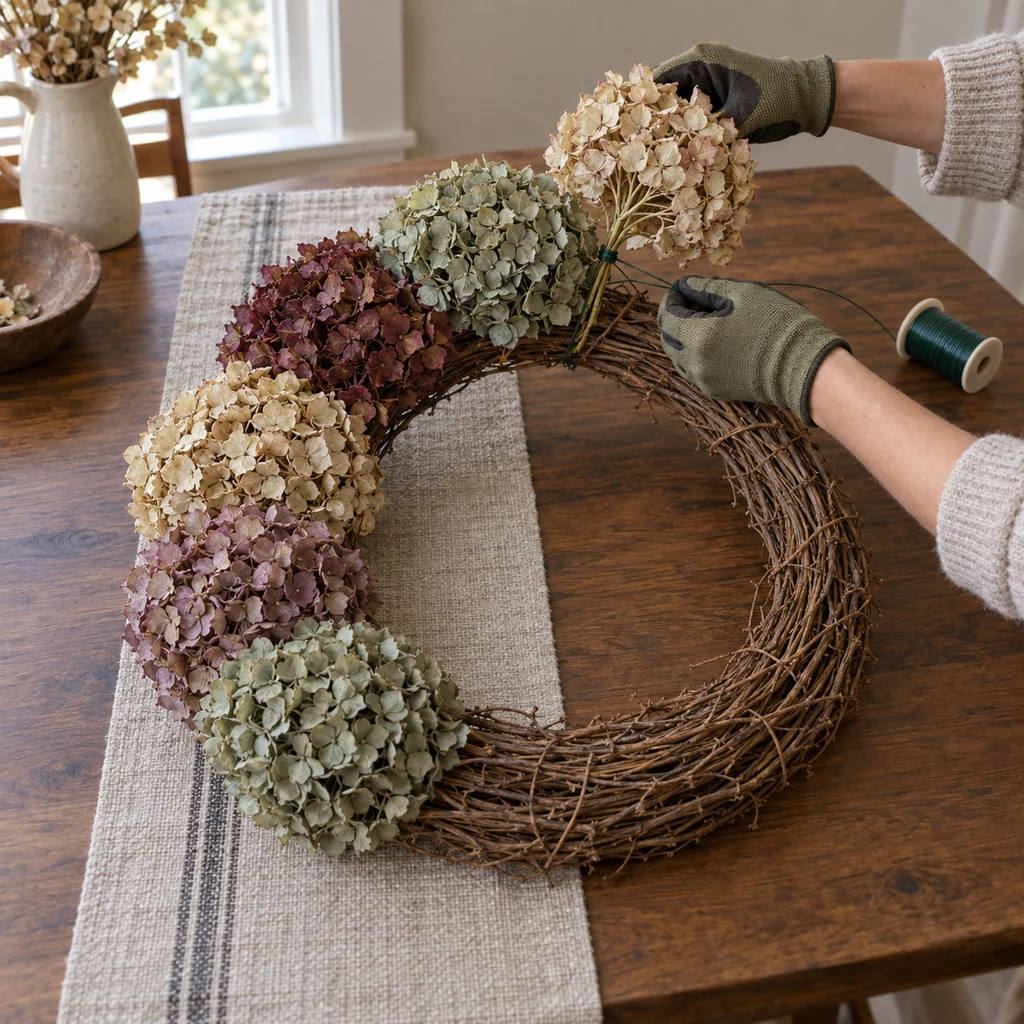
Start around the seven-o’clock position. Lay one hydrangea stem along the direction of the ring so the bloom faces slightly forward. Hold it steady and wrap the wire around both stem and wreath twice. Tighten enough to stop movement, but not so tightly that the wire slices the dry stem.
Turn the wreath upright for a moment. The first flower should project beyond the outer edge slightly while leaving the center opening visible. Adjust it now; later flowers will lock this starting position in place.
5. Overlap the Next Heads to Hide Every Stem
Place the second bloom so its florets cover the first stem and wire wraps by about one third. Rotate its face a little inward or outward. Wrap the continuous wire twice, then add the next color. Continue in the same direction rather than jumping across the ring.
Alternate large and medium heads and distribute colors irregularly. A strict green-mauve-cream repeat can look manufactured. After every three or four flowers, lift the wreath vertically and check the front, inner opening, and outside edge.
6. Fill Gaps with Smaller Clusters
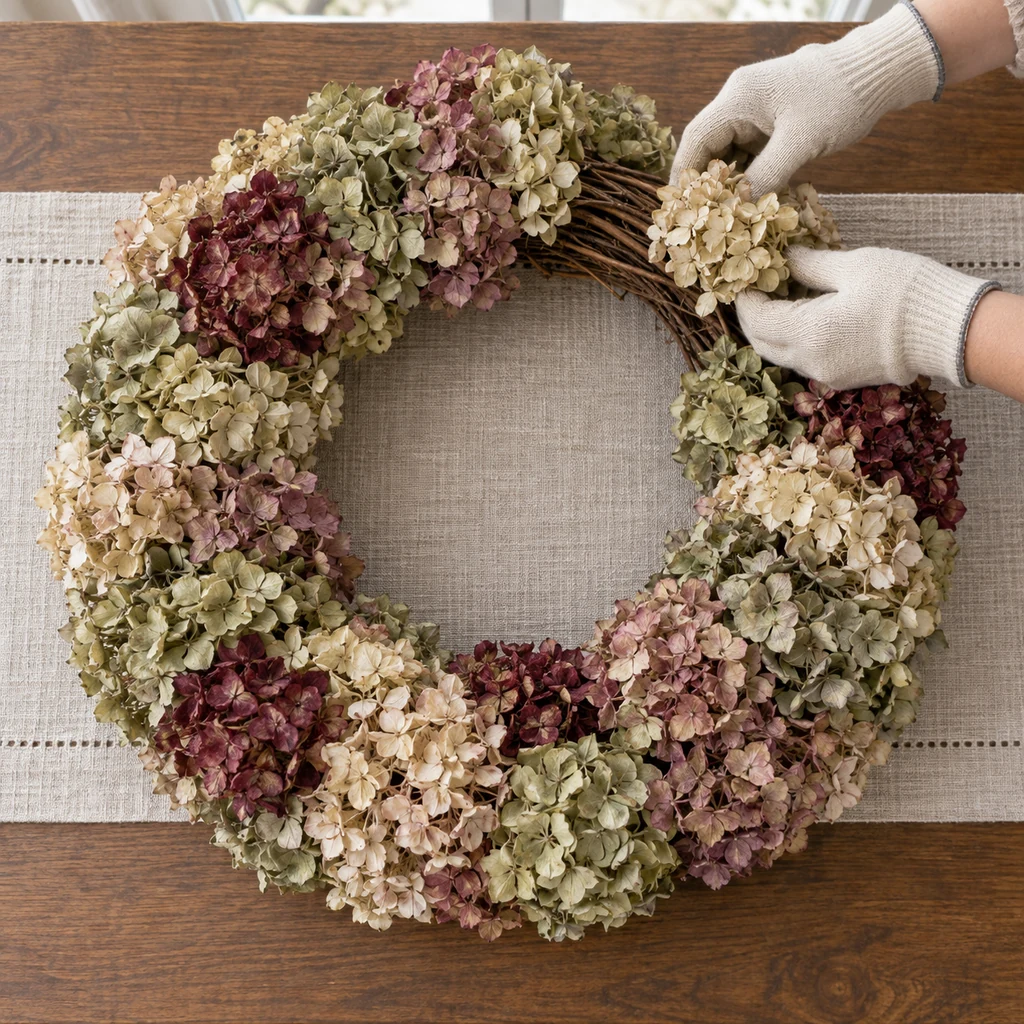
Stop before closing the final section and place the wreath upright against a plain wall. Look for visible wire, abrupt color blocks, or a palm-width hollow. Use the reserved smaller clusters to correct those areas. Slide a short stem beneath neighboring florets and catch it with the working wire or a short separate tie.
Do not force a full head into a narrow gap; it will push the surrounding blooms forward and distort the circle. It is better to use two small pieces at different angles. Keep the central opening round enough that the wreath still looks like a wreath rather than a flower disk.
7. Finish the Wire and Add a Hanging Loop
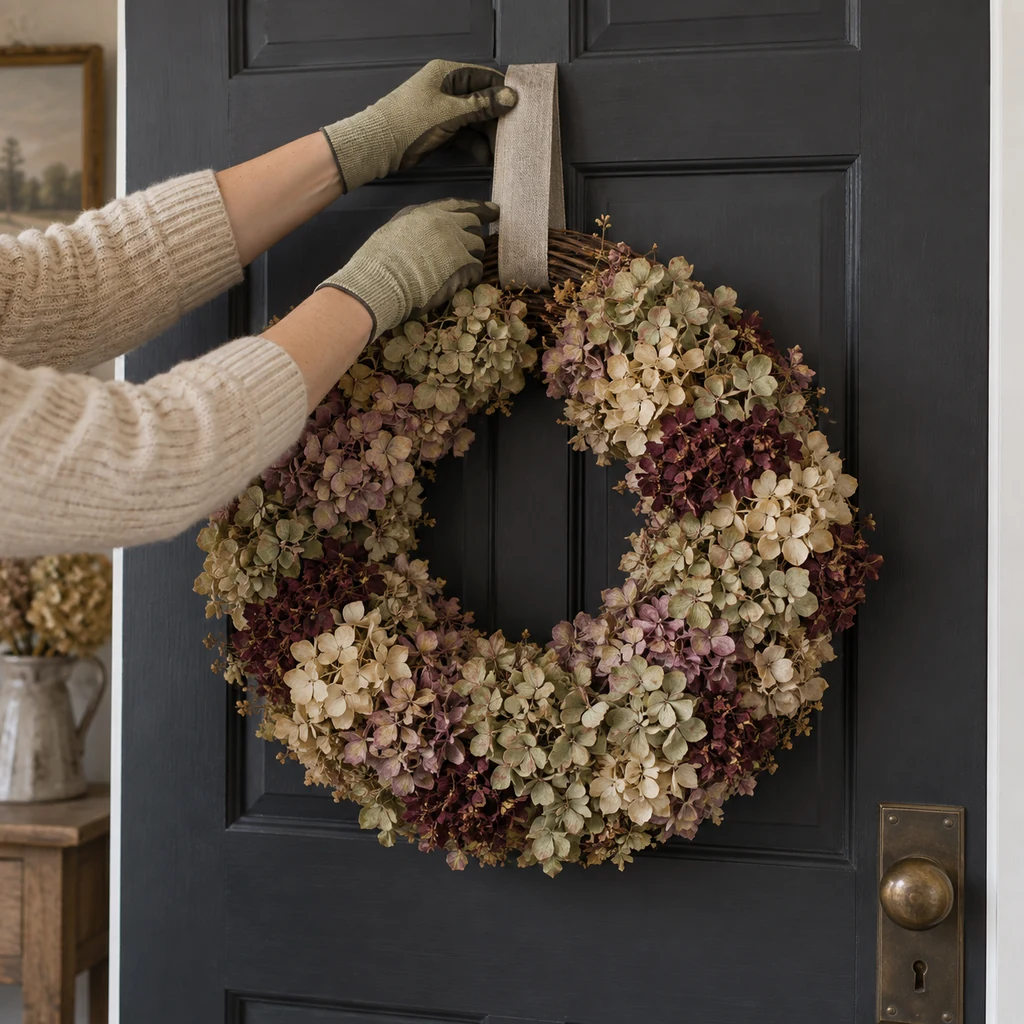
When the ring is balanced, wrap the wire around the base three times. Cut it with wire cutters, leaving a short tail, and bend that tail deep into the grapevine. Thread linen ribbon through exposed vines at the top rather than around fragile flower heads. Hang the wreath and confirm that it sits level before tying the final knot.
Use an interior door or a covered, sheltered location. Rain, bathroom humidity, direct sun, and heat vents can fade color, soften dry material, or encourage deterioration. Never hang the wreath above a candle, stove, fireplace, or other ignition source.
Substitutions & Variations
- Smaller wreath: use a 12- or 14-inch base and fewer heads, but keep the same overlapping method.
- Half wreath: cover only the lower-left half and let grapevine remain visible elsewhere. Finish both ends with smaller clusters.
- Single color: use all antique green heads and create depth by changing their angles rather than their hues.
- No garden access: purchase fully dried hydrangeas from a reputable floral supplier and inspect them before use.
- No ribbon: form a strong covered wire loop through the grapevine, checking that no sharp metal touches the door.
Common Problems and Practical Fixes
The wreath looks flat. The stems are probably too tight and every bloom faces forward. Before the next wire wrap, angle one head toward the center and the next slightly outward.
Petals keep falling. Some shedding is normal, but brittle blooms may have been harvested too early, dried too aggressively, or handled repeatedly. Work over a cloth, support each head from underneath, and stop rotating it once wired.
The final section looks bulky. The last full head is too large for the remaining space. Remove it and use two smaller clusters, tucking their stems in opposite directions.
The ring turns on its ribbon. The loop is not centered over the wreath’s weight. Move it slightly toward the heavier side and test again before tightening the knot.
How to Store the Wreath
After the season, place the wreath in a rigid box wide enough that the blooms do not touch the sides. Support the grapevine base with crumpled acid-free tissue rather than packing material pressed onto the flowers. Store it in a dry, dark, temperature-stable closet—not a damp basement, hot attic, or garage.
Inspect it before displaying it again. Discard material that has developed dampness, mold, pests, or an unusual odor. A dried botanical wreath is not permanent, and honest storage expectations are better than promising it will last forever.
What to Make Next
For another natural fall project, make real-leaf printed tea towels. The dried orange and bay leaf garland uses a similarly muted palette, while the botanical moth shadow box turns pressed fern fronds into framed wall art.
Frequently Asked Questions
Should I spray the flowers with hairspray?
It is optional, not essential. Hairspray can change color, attract dust, create odor, and is not formulated as an archival floral coating. If you choose a product made for dried flowers, test it on one spare cluster and follow its ventilation and safety directions.
Can this wreath hang outdoors?
Only in a reliably covered, dry, shaded position. Wind, rain, condensation, and direct sunlight shorten the useful display life. An indoor door is the safer choice.
How many hydrangea heads are needed?
For an 18-inch full wreath, 10 to 14 mature heads is a reasonable starting range, but bloom diameter varies. Lay the uncut heads around the base first and keep several smaller clusters for gaps.