

A soft sock pumpkin should look plump, not like a tied laundry ball. The difference comes from three small choices: use a sock with enough stretch, place a sealed weight flat in the base, and tighten the outside twine gradually instead of pulling one section as hard as possible.
This no-sew method turns one clean crew sock into a stable tabletop pumpkin without rice, beans, a sewing machine, or an open flame. Make one in about 20 minutes, then repeat the same measurements in rust, cream, and olive for a simple autumn grouping.
What You’re Making
The finished pumpkin is approximately 5 to 6 inches wide and 4 inches tall, depending on the sock and how firmly it is filled. A small sealed pouch of aquarium gravel gives the base weight without putting edible dry goods inside the decoration. Polyester fiberfill creates the volume, while one continuous length of thin jute twine forms eight rounded ribs.
This is an indoor seasonal decoration, not a toy. Keep the gravel pouch sealed, trim loose twine ends, and display the pumpkin away from babies, pets, candles, heaters, and damp windowsills.
Materials for One Medium Sock Pumpkin
- One clean adult crew sock with a closed toe, preferably ribbed knit
- About 2 to 3 cups of polyester fiberfill, added gradually
- About 1/3 cup of clean aquarium gravel in a small, fully sealed zip-top pouch
- One strong elastic band
- About 6 feet of thin jute twine or strong cotton cord
- One dry twig, approximately 2 inches long and about 1/2 inch thick
- Fabric scissors
- Optional: a short extra piece of twine for a curled tendril
Choose the sock carefully: A medium-weight ribbed sock stretches without becoming transparent and naturally emphasizes the pumpkin sections. Very thin socks may show the filling, while heavily padded athletic socks can become bulky at the gathered top.
Step-by-Step Instructions
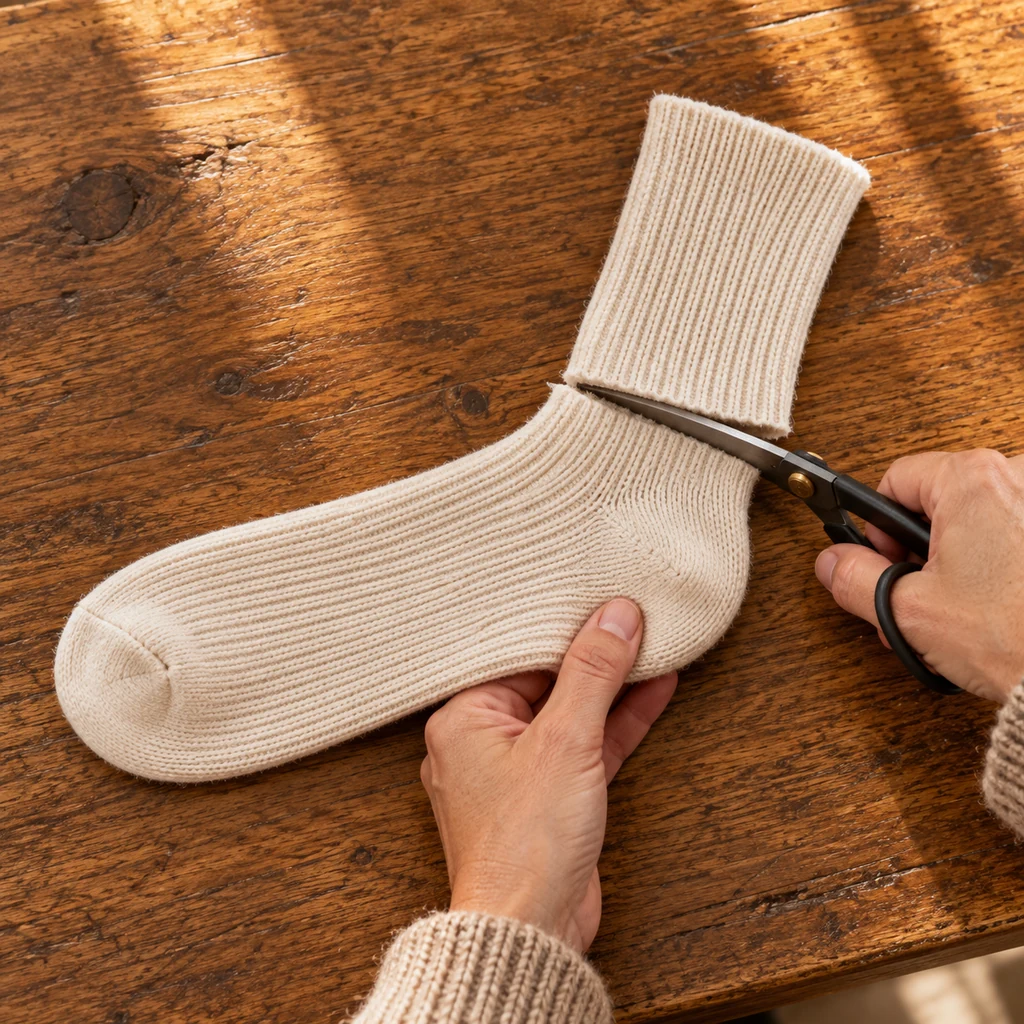
1. Cut the Sock Above the Heel
Lay the sock flat with the heel facing up. Cut straight across approximately one inch above the top of the heel. Keep the closed-toe section; this becomes the pumpkin body. The upper cuff can be saved as a cleaning rag or used to make a smaller coordinating pumpkin if one end is securely closed.
Do not cut at the ankle cuff. Keeping a little fabric above the heel gives you enough material to gather around the future stem without leaving an oversized fabric tower.
2. Add a Sealed Weight and Fiberfill
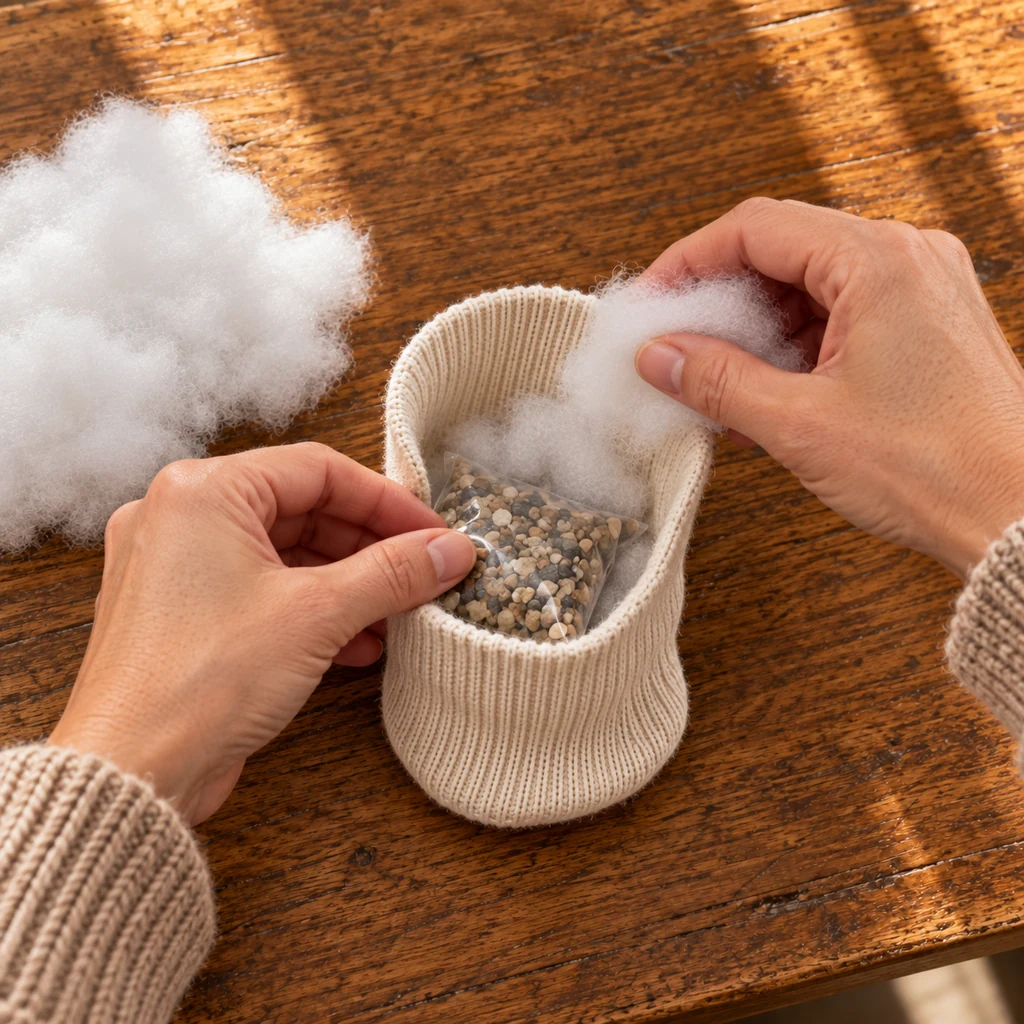
Put the aquarium gravel in a small zip-top pouch, press out excess air, and close it completely. Place the sealed pouch flat inside the sock toe. This weight should form a thin pad rather than a hard lump. If the pouch is large, fold the empty plastic around the gravel before setting it in place.
Add fiberfill around the pouch first, then continue upward. Pull off small handfuls and distribute them evenly. Stop when the sock looks generously full but can still be pressed down with both hands. Overstuffing makes the outside twine difficult to tighten and can create narrow, unnatural ribs.
3. Close the Top and Shape a Low Mound
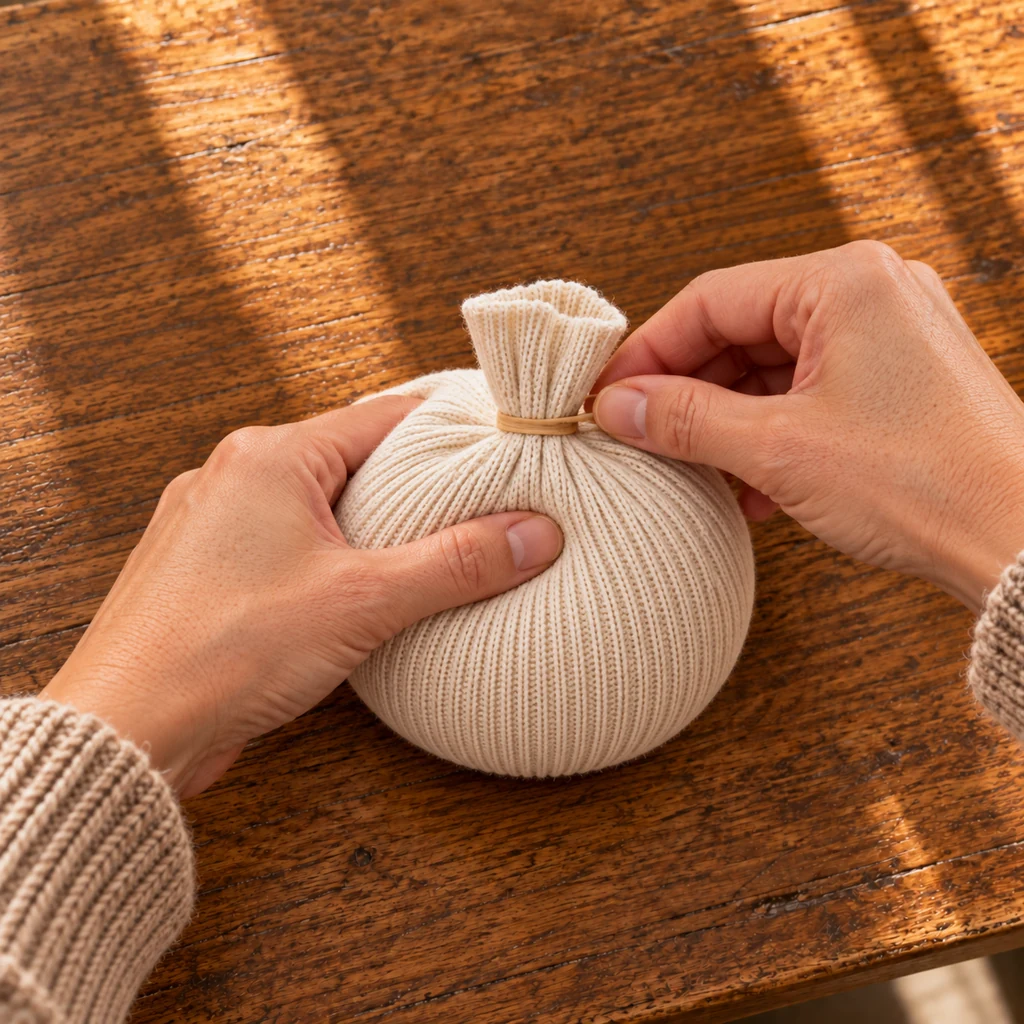
Gather the open sock fabric directly above the filling and wrap a strong elastic around it several times. Leave a short tail above the band. Press the top center downward with one palm while spreading the sides outward with the other hand. The body should become wider than it is tall.
Set it on the table and check the base. If it rocks, lift the filling slightly and flatten the sealed pouch inside the toe. If one side looks hollow, massage a little fiberfill toward that area before adding the external twine.
4. Wrap One Continuous Cord to Make Eight Ribs
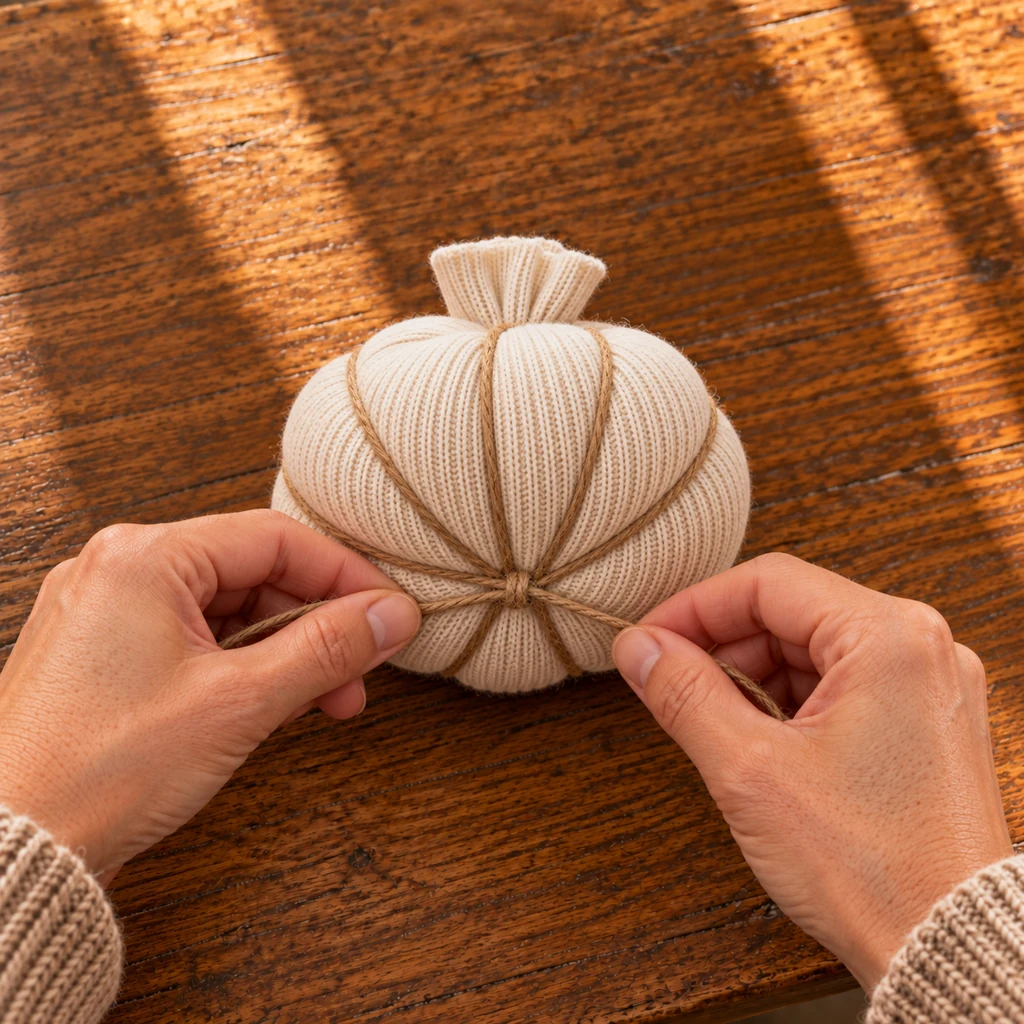
Keep the pumpkin upright and slide the midpoint of the six-foot twine length beneath its bottom. Bring the two ends up opposite sides and cross them once beside the gathered top. Holding that crossing in place, rotate the pumpkin 90 degrees and take both ends down opposite sides to cross at the bottom. Rotate the pumpkin 45 degrees, bring the ends back to the top, cross again, then rotate 90 degrees and carry the ends to the bottom for the final knot. Four cord lines around the body create eight sections.
Tighten each pass only until a rounded groove appears. Work around the pumpkin a second time to balance the tension, then tie a firm double knot at the bottom center. This gradual approach prevents one deep groove beside several loose ones. Turn the pumpkin upright and massage the filling between the cords until the ribs look full and evenly spaced.
5. Tuck the Fabric Tail Around the Twig Stem
Fold the raw fabric edge inward so it is hidden. Push the dry twig gently into the gathered opening; it should sit against the filling without piercing the sealed gravel pouch at the base. Wrap a short length of twine around the folded fabric and twig base, then tie it securely behind the stem.
For a simple tendril, dampen a separate short piece of jute twine, wind it around a pencil, and let it dry before sliding it off. Tuck one end beneath the stem wrap. Skip this detail if the cord will be within reach of a young child or pet.
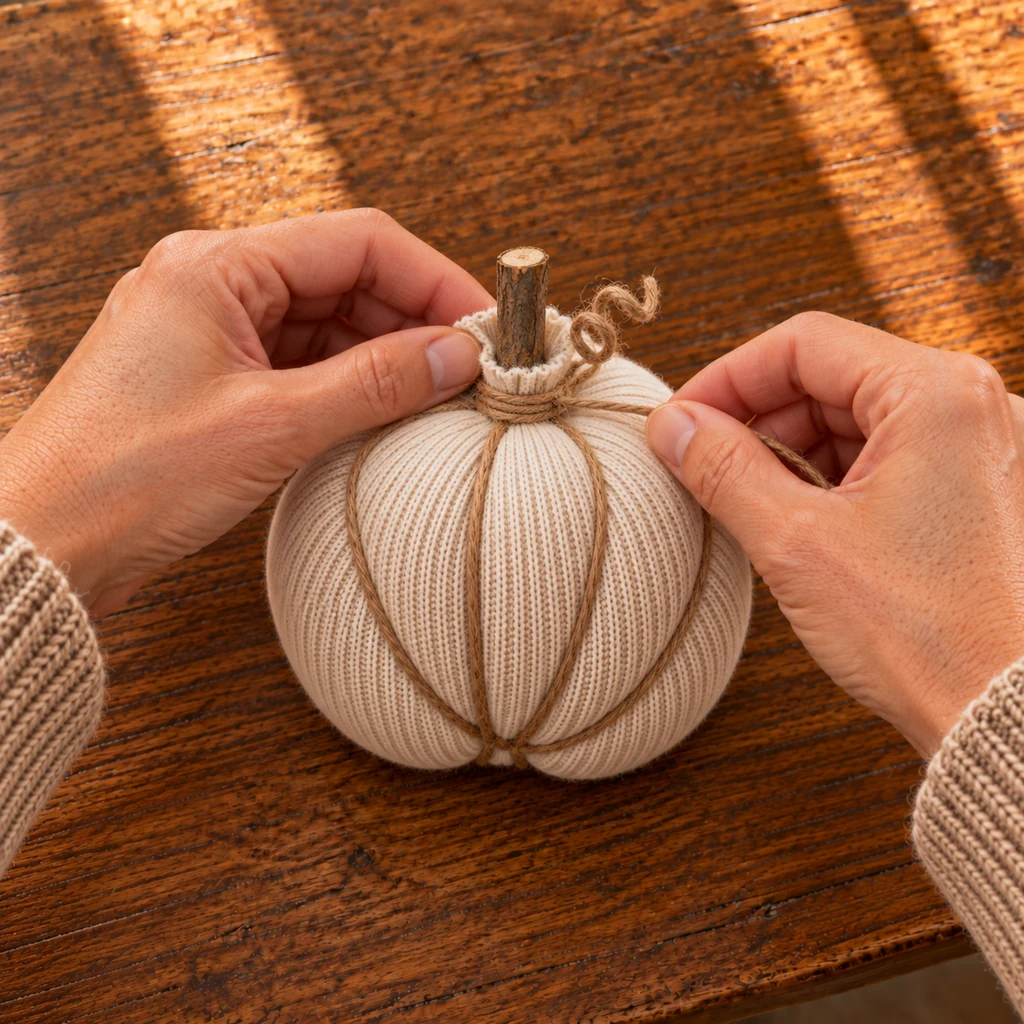
6. Make the Final Shape Adjustments
Place the pumpkin on a level surface and rotate it slowly. Pull the body outward wherever it looks too tall, press the top around the stem to deepen the center, and redistribute fiberfill with your fingertips. The weighted base should remain flat and hidden.
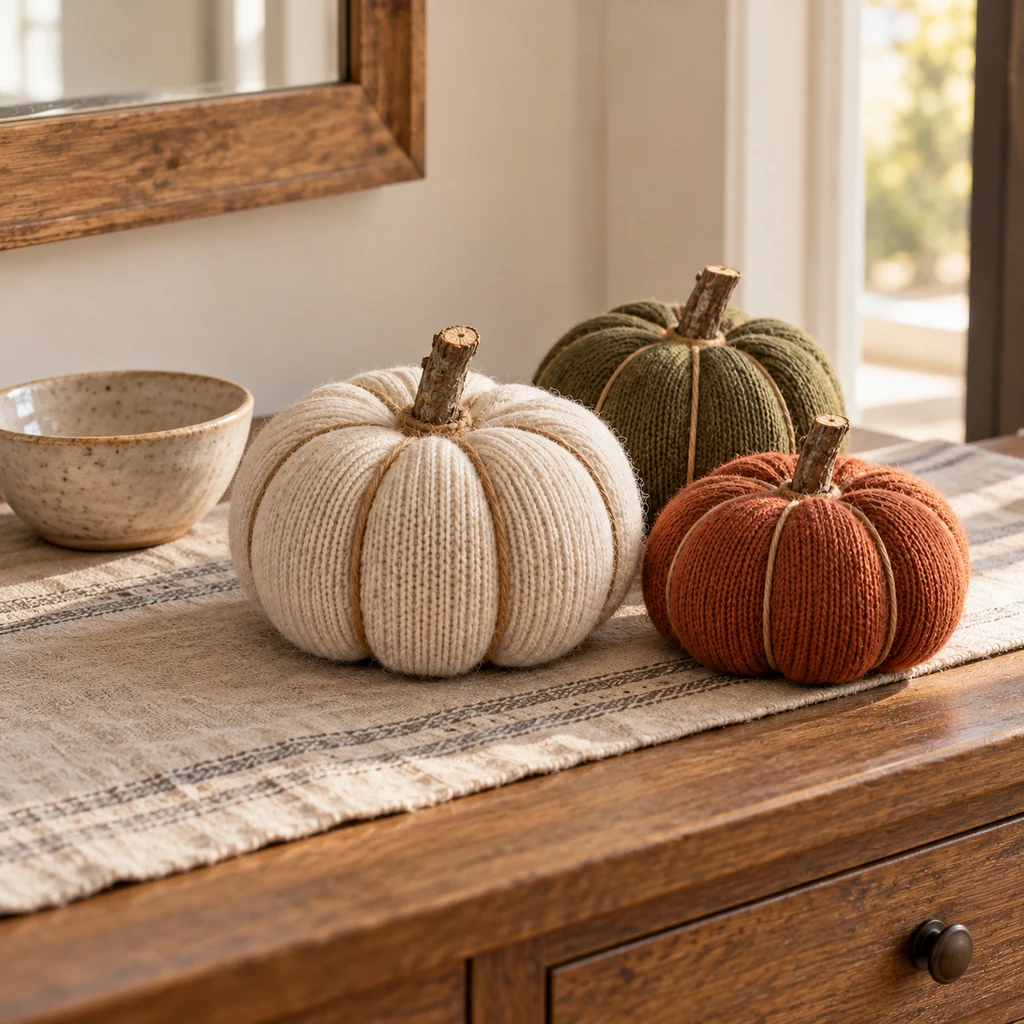
When making a group, vary the sock length and filling amount rather than pulling the twine dramatically tighter. A small pumpkin beside a medium one creates visual contrast while keeping the same soft, rounded construction.
Why This Version Holds Its Shape
The sealed gravel pouch lowers the center of gravity, so the pumpkin is less likely to roll or lean. Fiberfill remains springy enough to redistribute after the ribs are tied. The sock’s existing toe seam closes the base without sewing, and the single continuous twine length keeps all eight sections connected.
The proportion also matters. A 5-to-6-inch-wide body with a 2-inch stem reads as a pumpkin without becoming top-heavy. If the decoration keeps standing too tall, remove a handful of filling rather than forcing the twine tighter.
Substitutions & Variations
- No aquarium gravel: Use clean glass floral pebbles inside a fully sealed pouch. Avoid sharp stones that may puncture the plastic or sock.
- No polyester fiberfill: Use small, clean fabric scraps cut into narrow pieces. Distribute them carefully so the surface does not become lumpy.
- No jute: Waxed cotton cord or strong cotton kitchen twine can form the ribs. Avoid thin thread that may cut into the knit.
- No twig: Roll a narrow strip of kraft paper into a firm tube and wrap it with twine.
- Different sizes: Use a child-size sock for a small pumpkin or a longer adult sock for a larger one, adjusting the sealed weight and filling proportionally.
Common Problems and Quick Fixes
The pumpkin looks like a ball: Remove some filling, press the center down, and work the sides outward before retightening the twine.
The ribs are uneven: Loosen the final knot and rebalance all four cord passes. Do not solve one shallow groove by pulling only that section extremely tight.
The pumpkin leans: The sealed weight may be folded or off-center. Open the elastic, flatten the pouch in the toe, and replace the fiberfill around it.
The stem wobbles: Shorten the twig and wrap the folded sock tail more firmly around its base. A long or heavy branch will overpower the soft body.
Where to Display Sock Pumpkins
Group three on an entryway console, a bookshelf, or the center of a dining table where they will not be handled constantly. A neutral runner helps the knit texture stand out without adding clutter. Keep the display dry and well away from real candles or cooking heat; battery-operated lights may be placed nearby without touching the fabric.
For another natural-material autumn project, make the pressed fall leaf suncatchers. If you prefer framed botanical crafts, the botanical moth shadow-box guide uses pressed foliage in a completely different way.
Frequently Asked Questions
Can I fill a sock pumpkin with rice?
Rice is commonly used in fabric crafts, but an inedible sealed gravel weight avoids putting pantry food inside a seasonal decoration and is less attractive to pests. Keep any small filling material completely sealed and inaccessible.
Do I need hot glue?
No. A tight elastic closes the body, the external cord creates the ribs, and a second twine wrap can secure the folded fabric around the twig. If you choose to use an adhesive, follow its label and allow it to cure away from children and pets.
Can children make this project?
Children can help choose colors and shape the filled sock, but an adult should cut the fabric, prepare the sealed gravel pouch, tighten the cord, and manage all small parts. The finished pumpkin is decoration rather than a child’s toy.