

Air-dry clay leaf bowls often crack for reasons that have little to do with artistic skill. A slab that is too thin, an unsupported pointed edge, or a surface that dries faster than the center can split an otherwise beautiful piece. The dependable approach is to keep the clay evenly thick, shape it over a gentle curve, and slow the first stage of drying.
This guide makes one shallow maple-leaf trinket bowl approximately seven inches wide. The same method can be repeated with other sturdy leaves, but the finished pieces remain decorative. Air-dry clay and craft sealer do not automatically make a dish food-safe, waterproof, heatproof, or suitable for candles.
What You’re Making
The finished bowl has a clear leaf silhouette, readable veins, and a softly lifted rim rather than steep walls. That shallow profile matters because it puts less stress on the clay while it shrinks. The bowl can hold dry, lightweight items such as wrapped notes, keys, or hair clips, provided the clay manufacturer permits that use.
Set aside about 45 minutes for shaping, then allow at least two to four days for drying before sanding or sealing. Humidity, clay brand, thickness, and airflow can all change the timing. Treat the manufacturer’s directions as the final authority.
Materials for One Medium Leaf Bowl
- Approximately 12 ounces of fresh air-dry clay
- One sturdy, freshly collected maple leaf, about seven inches wide
- Parchment paper or a smooth reusable craft mat
- A smooth rolling pin
- Two quarter-inch-thick wooden guide strips
- A craft knife or clay cutting tool
- A small cup of clean water and a soft brush
- One gently rounded bowl to use as a mold
- Plastic wrap to protect the mold
- A large loose plastic bag for controlled drying
- Fine-grit sanding sponge, used only after full drying
- Water-based craft sealer compatible with your clay
Choose the leaf carefully: Use a flexible leaf with strong veins and no brittle tips. Avoid unknown plants that may irritate skin, and wash your hands after handling outdoor material. A dry, crumbling leaf will not press cleanly and can become embedded in the clay.
Step-by-Step Instructions
1. Condition and Roll an Even Clay Slab
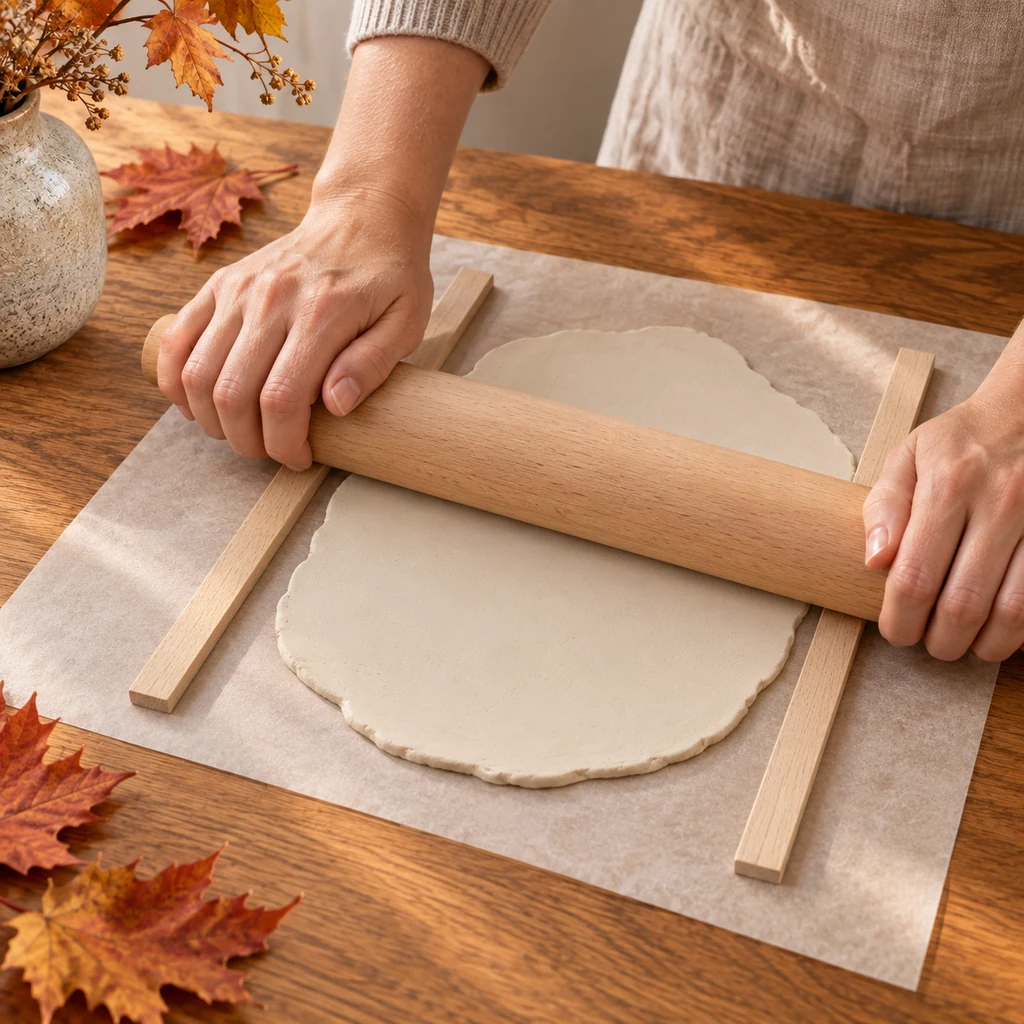
Knead the clay with clean hands only until it feels uniform and pliable. Place it between the two wooden guide strips on parchment. Roll from the center outward, allowing the rolling pin to ride on both guides. Stop when the entire slab is approximately one quarter inch thick and large enough to leave a margin around the leaf.
Avoid repeatedly folding the slab because that can trap air and create hidden weak points. If the surface begins to dry while you work, smooth it with barely damp fingertips rather than soaking it. Excess water can make one region shrink differently from another.
2. Press the Leaf Veins Without Thinning the Clay
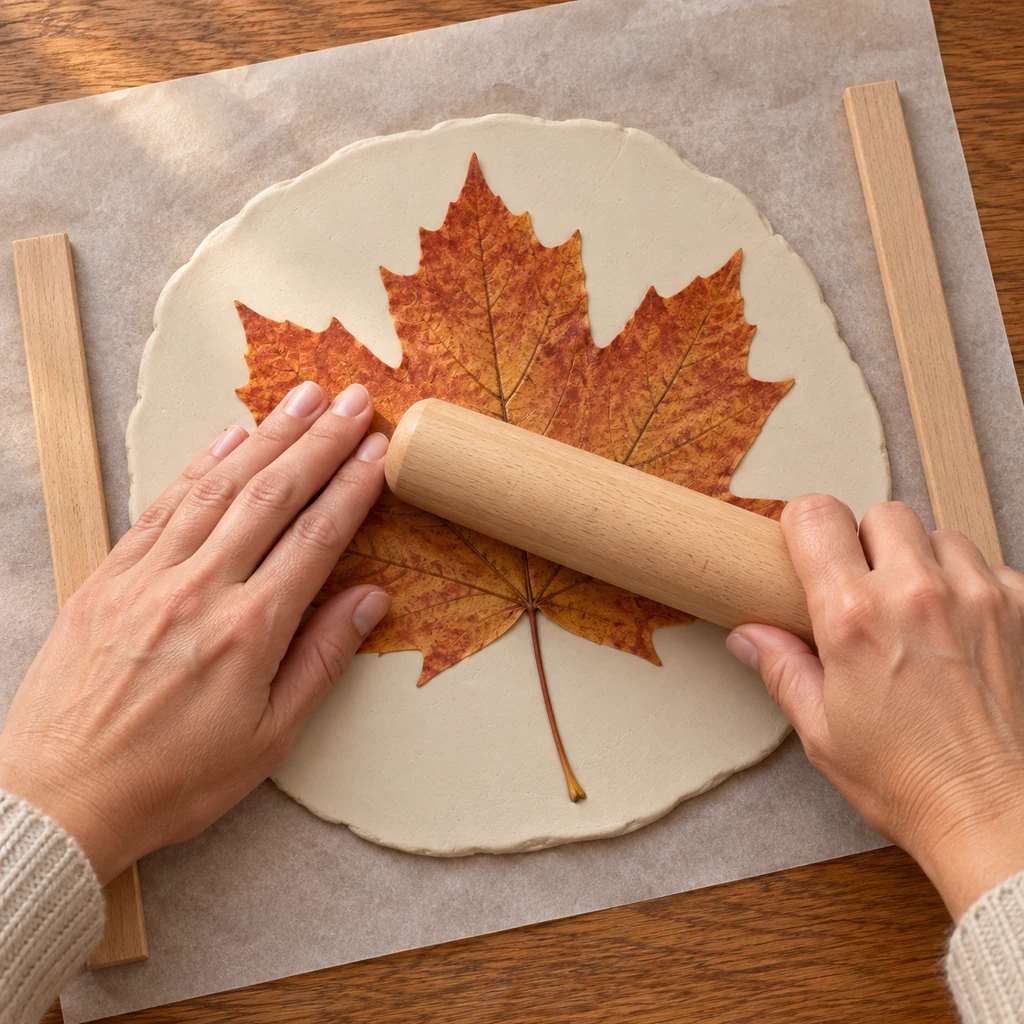
Place the leaf with its strongly veined underside against the clay. Cover it with a clean piece of parchment or roll directly over the top with very light pressure. Make one pass from the center toward each outer section. The goal is to transfer the veins, not compress the slab into a thin sheet.
Lift one corner to check the impression. If the main veins are visible, stop. Repeated heavy rolling may stretch the clay and weaken the points. If the leaf sticks, peel it back slowly in the direction of the veins instead of pulling straight upward.
3. Cut the Outline and Smooth Every Tip
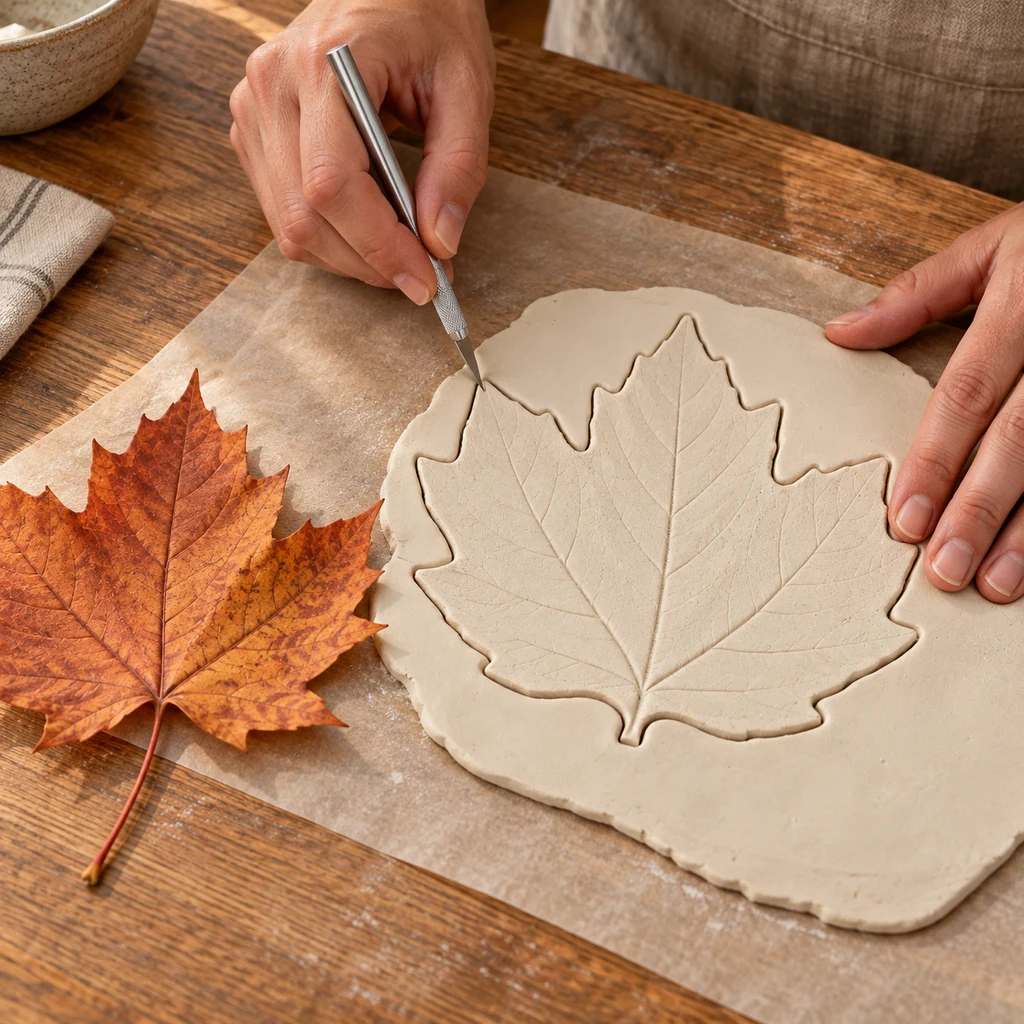
Remove the leaf and cut around the impressed silhouette with a craft knife held vertically. Turn the parchment as you work instead of dragging the clay. Remove the excess clay in small sections so the narrow points are not stretched.
Dip a soft brush in water, blot it almost dry, and run it around the cut edge. Support each point from beneath while rounding sharp burrs with a fingertip. Keep the leaf shape recognizable, but do not leave needle-thin tips; those are the first areas likely to chip or dry too quickly.
4. Drape the Leaf Over a Protected Mold
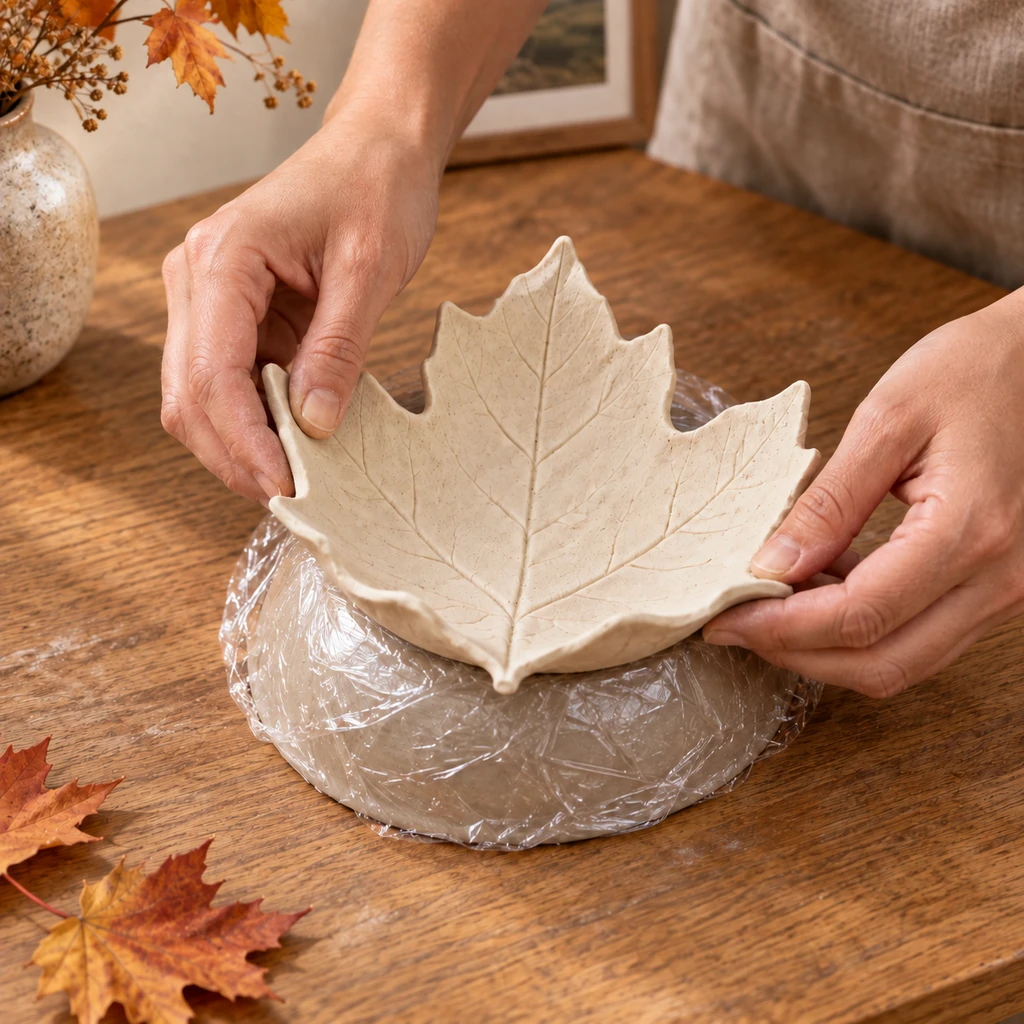
Cover the outside of a gently rounded bowl with smooth plastic wrap. Slide both hands beneath the parchment and transfer the clay leaf onto the inverted mold with the veined side facing up. Center the thick middle vein over the highest point.
Ease the outer lobes downward only until a shallow bowl forms. Do not force every tip to touch the mold. Check from all sides and support any drooping point with a small loose wad of plastic wrap. Steep bends concentrate stress and are more likely to crack during shrinkage.
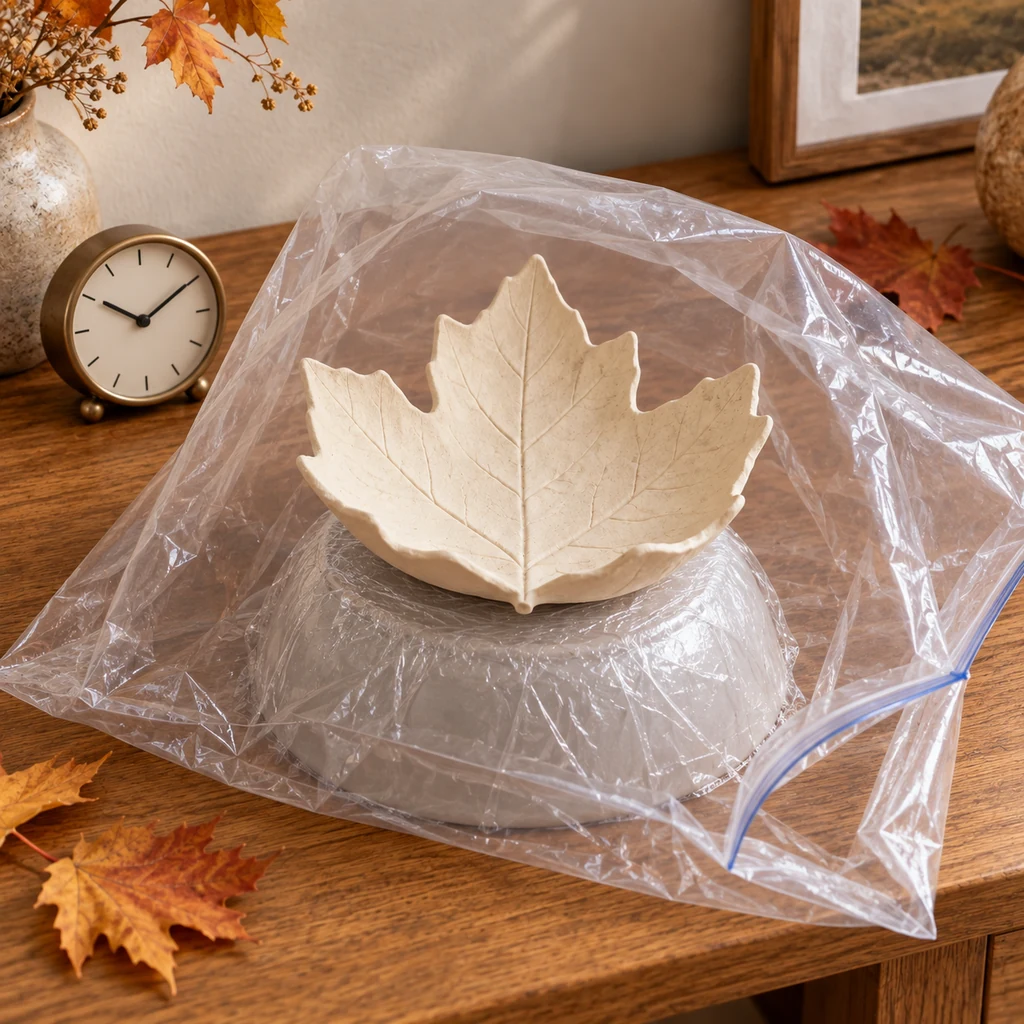
5. Slow the First Drying Stage
Place the molded leaf in a level area away from direct sun, heaters, fans, and open windows. Tent a large plastic bag loosely over the project, leaving gaps near the table so moisture can escape gradually. Do not seal wet clay in an airtight bag.
After roughly 12 to 24 hours, check the manufacturer’s guidance and test an inconspicuous edge. When the leaf holds its curve without flexing, carefully lift it from the mold. Set it upright on a soft cloth or rack so air reaches both sides. Rotate it periodically and continue drying until its color and firmness are uniform.
6. Sand Lightly and Apply a Compatible Sealer
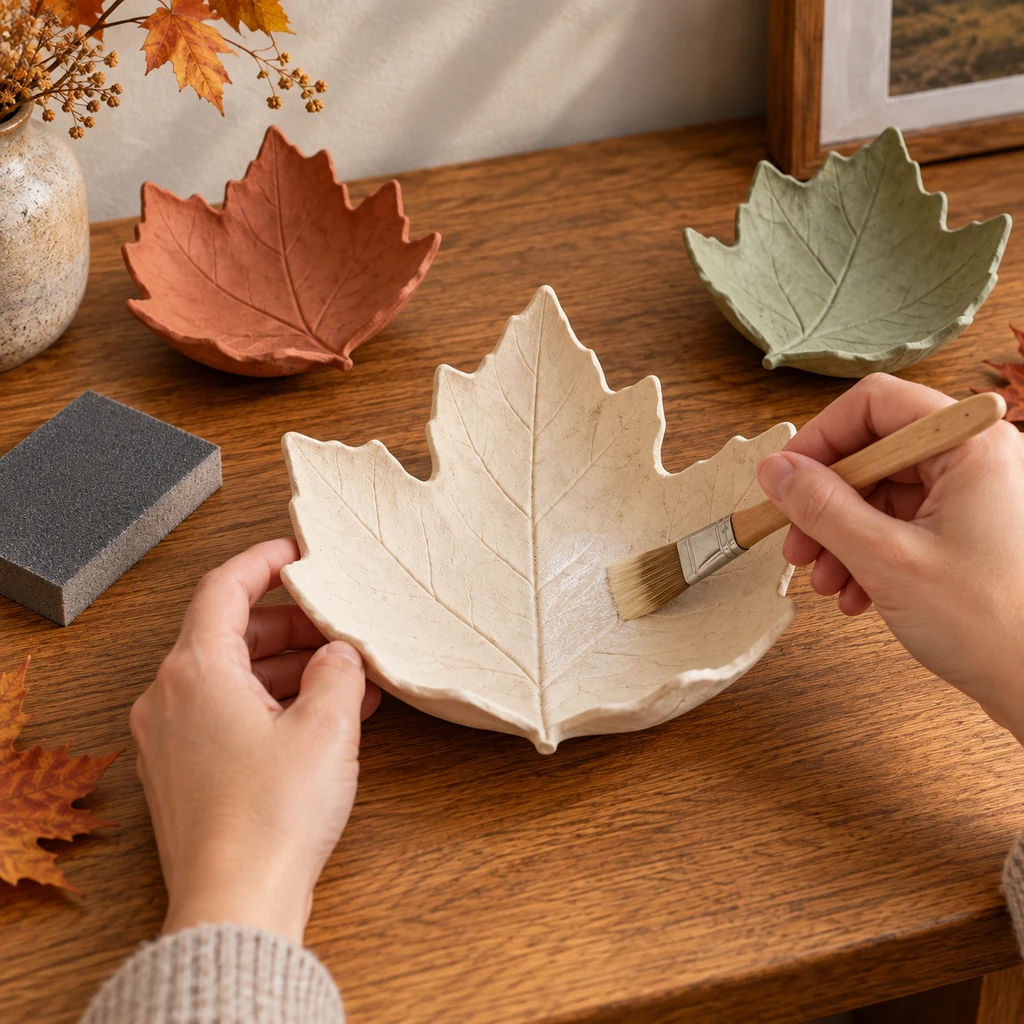
Wait until the bowl is completely dry before sanding. Wear appropriate dust protection, work in ventilation, and follow the clay maker’s safety instructions. Use a fine-grit sanding sponge only on rough outer edges and the underside. Keep it away from the detailed veins.
Remove all dust with a dry soft brush. Apply a thin coat of compatible water-based sealer to one side, allow it to dry as directed, then seal the other side. Several thin coats are safer than one heavy wet coat. Let the finish cure fully before displaying the bowl.
Why This Method Reduces Cracking
The wooden guides prevent thin areas, especially around the leaf points. The shallow mold avoids sharp bends, and the loose plastic tent slows evaporation from the exposed surface. Removing the piece from the mold only after it can support itself lets the underside finish drying instead of trapping moisture.
No method can guarantee that every air-dry clay formula will behave identically. If a brand specifies a different thickness, drying schedule, or sealer, follow that label. Small surface lines that appear while the clay is still workable can sometimes be blended with a tiny amount of the same clay, but a structural split is better remade than disguised.
Substitutions & Variations
- No maple leaf: Try a flexible sycamore, grape, or other broad non-irritating leaf with strong veins.
- No guide strips: Use two identical quarter-inch wooden dowels positioned outside the clay.
- No craft knife: A clay needle tool can work if it cuts cleanly without dragging the points.
- Colored bowls: Tint separate clay portions or use compatible craft paint only after the clay is fully dry.
- Smaller dishes: Choose a smaller leaf and a shallower mold; keep the clay thickness consistent.
Common Problems and Quick Fixes
The tips curl upward: They dried faster than the center. During the early stage, support them on the mold and keep the plastic tent loose but present.
The center stays damp: The clay may be too thick or the mold may be blocking airflow. Wait until the piece holds its curve, remove it carefully, and continue drying with air reaching both sides.
The veins look faint: Use the strongly veined underside of a fresh leaf and make one controlled rolling pass. Pressing after the outline is cut can distort the edges.
The bowl rocks on the table: The lowest point shifted on the mold. Add small clear felt pads beneath the fully cured piece rather than sanding deeply into the clay.
How to Use and Store the Bowls
Display the bowls on a dry console, shelf, or dresser. Keep them away from sinks, steam, direct heat, pets, and young children. Do not use them for food, water, burning candles, incense, or hot objects unless a tested product system explicitly states that those uses are safe.
For a coordinated autumn display, place them near the chunky yarn pumpkin wreath or the no-sew sock pumpkins. Wrap each bowl separately in plain tissue for storage and never stack a heavy object on the raised points.
Frequently Asked Questions
Can I put food in an air-dry clay leaf bowl?
Not by default. Craft clay and a general-purpose sealer do not automatically create a food-safe surface. Use the finished bowl as decoration unless the complete clay-and-finish system is specifically approved for food contact.
Can I dry it faster with a heater or hair dryer?
Rapid heat can dry the surface before the interior and increase warping or cracks. Air-dry the piece according to its label in a stable room away from concentrated heat and strong airflow.
Will sealer make the bowl waterproof?
A craft sealer may improve surface resistance, but it does not necessarily make air-dry clay waterproof or suitable for liquids. Keep the bowl dry and follow the sealer manufacturer’s stated limitations.