

Paper bag stars look almost effortless when they are hanging on a wall. The frustrating part usually happens earlier: the points lean, the layers slide out of line, or the final seam gets glued shut so the decoration can never be stored flat.
This method uses nine identical kraft lunch bags, one repeatable glue pattern, and three removable binder clips. The clips are the useful twist. They close the star firmly for display, then release so the entire piece folds back into a slim stack instead of occupying half a storage box.
Why Paper Bag Stars Turn Out Crooked
A paper star is a series of repeated folds. A small alignment error on one bag is multiplied around the circle, which is why a stack that looks “close enough” can open into a visibly lopsided star. Keep every closed bottom facing the same way and align both long edges before pressing each glued layer.
Glue placement matters just as much. A thin T joins the center and bottom of one bag to the next while leaving the side gussets free to expand. Glue near a long edge can lock a gusset closed; a heavy puddle can soak the kraft paper and make a stiff, rippled ray. The cleanest result comes from a narrow, continuous bead rather than a broad painted layer.
Materials and Tools
- 9 identical, unused flat kraft paper lunch bags
- White PVA or clear-drying craft glue suitable for paper
- Ruler
- Pencil
- Sturdy craft scissors
- 3 matching mini binder clips
- Cotton cord
- A secure wall hook appropriate for the surface
- A clean board and a light book for pressing, optional
Use dry, undamaged bags from one package; even bags sold under the same description can have slightly different proportions. An adult should make the stacked cuts because several paper layers resist more than one sheet. Keep fingers behind the blades, use glue according to its label, and treat the finished star as decoration rather than a toy.
Step-by-Step Instructions
1. Count and Orient Exactly Nine Bags
Lay out all nine bags before opening the glue. Position them with the flat face upward, the closed folded bottoms toward you, and the open mouths pointing away. Check that every bag has the same width, height, and bottom-gusset depth.
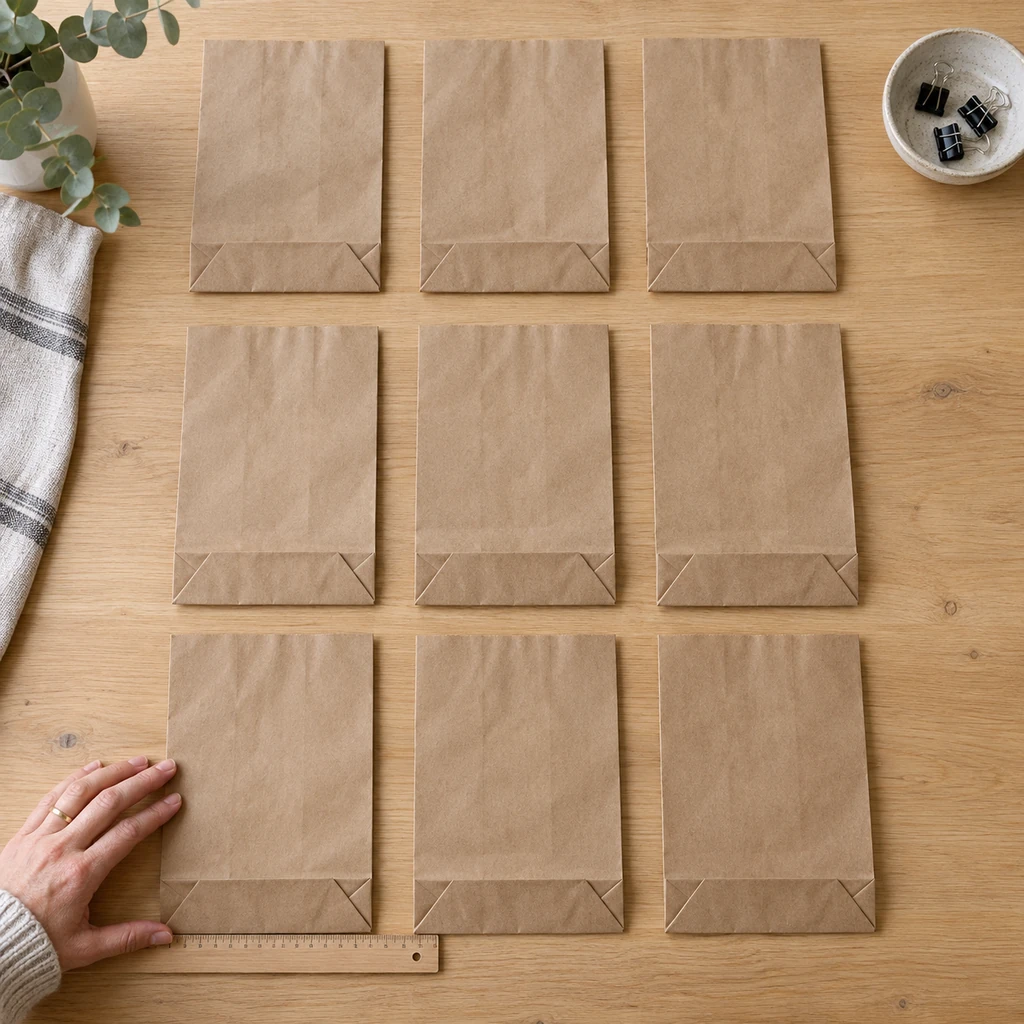
Set one bag at the center of the work surface and square it against a ruler. This becomes the reference layer. Keeping the other eight visible makes it harder to lose count once the stack begins to grow.
2. Apply One Thin T of Glue
Run a thin vertical bead down the center of the first bag, stopping just short of the open edge. Add one horizontal bead across the closed bottom fold. Together, those two lines form a capital T when the bottom of the bag is nearest you.
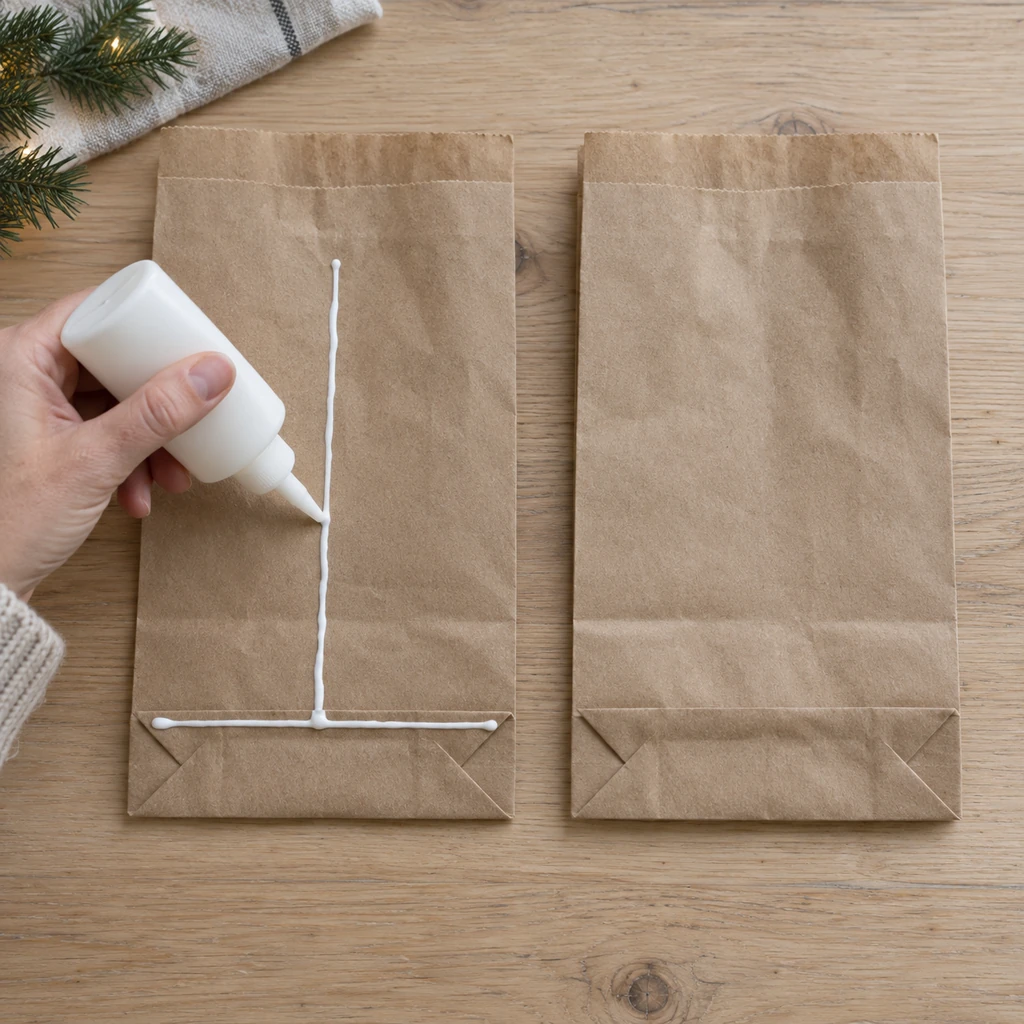
Do not outline the bag and do not spread glue into the folded sides. Those folds need to open later. If the glue bead is much wider than a shoelace, wipe away the excess before adding the next layer.
3. Stack Every Bag in the Same Direction
Place a second bag directly on the glued first bag with its closed bottom in the same position. Align the two long edges and the bottom fold, then smooth from the center outward with flat palms. Repeat the same T of glue on the new top bag and continue until all nine are stacked.
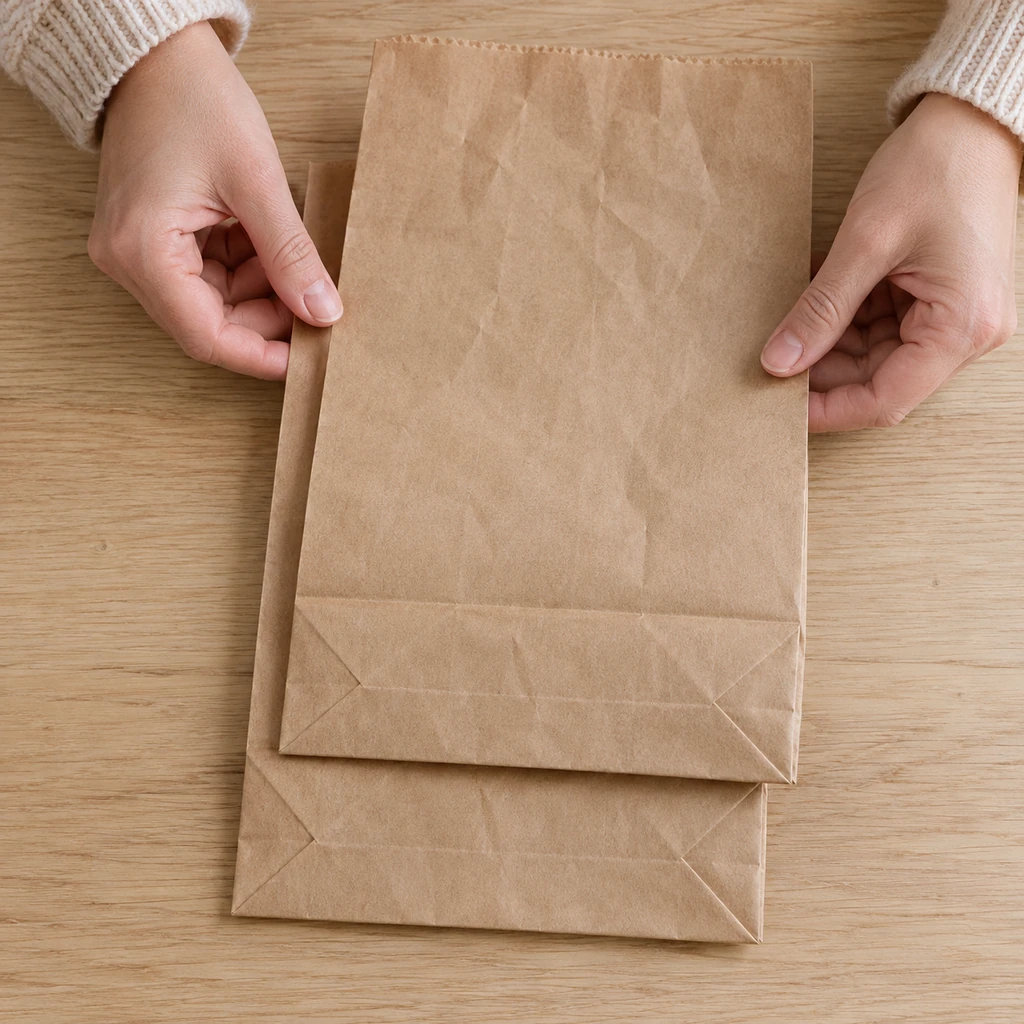
Do not add glue to the exposed face of the ninth bag. Place a clean board and a light book over the stack so the joins dry flat, then wait for the full drying time stated on the glue label. Cutting or opening damp layers is a common cause of tearing.
4. Cut One Centered Point and Two Matching Notches
Mark the midpoint of the open edge on the top bag. Cut from each upper corner to that mark to create one centered point. Next, make one shallow triangular notch in each long side at the same height. Keep both notches above the bottom gusset and make them mirror each other.
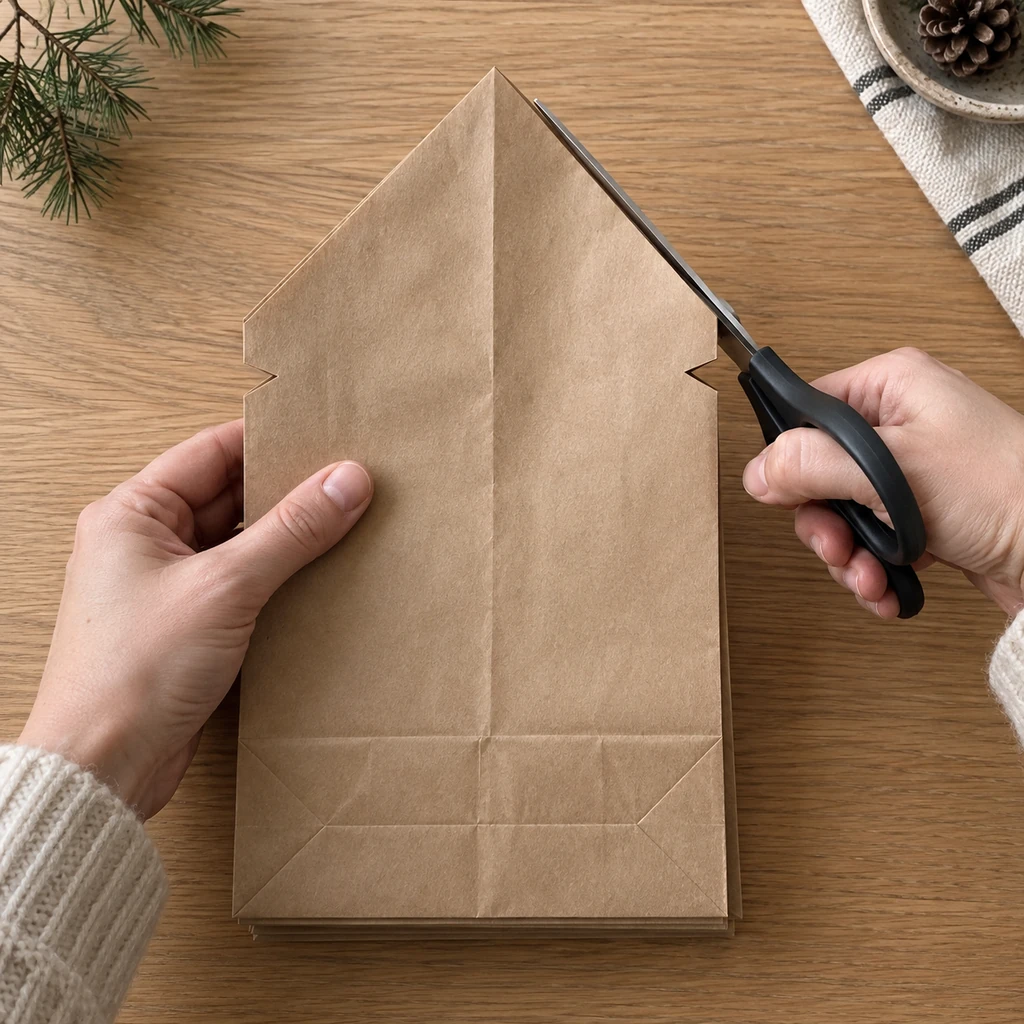
Cut slowly and rotate the stack instead of twisting the scissors through a tight angle. Deep notches may remove too much structure and make the paper split when opened. If the stack is too thick to control, cut half the layers, use the cut edge as a template for the remaining layers, and realign them carefully.
5. Test-Open the Star Before Closing the Seam
Lift the first and last faces and fan the stack around its joined bottom edge. Move gradually rather than pulling the two faces straight apart. The folds should spread into a circle and the two unglued outer faces should meet without sharp tension.
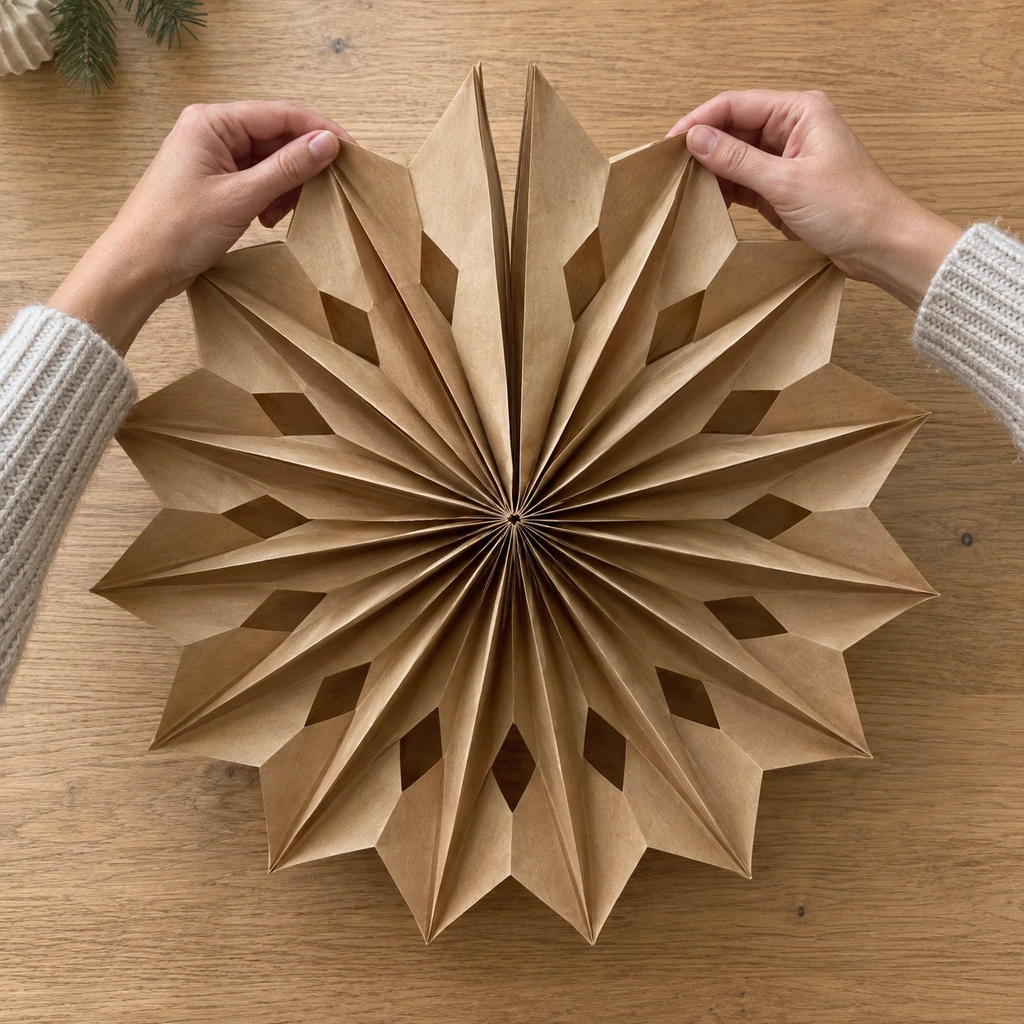
This guide uses nine bags of the proportions shown. If a different brand leaves a wide gap, do not force the paper or stretch the folds. Close the stack, add one matching bag with the same T-glue method, let it dry, and test again. Bag dimensions—not decorative ambition—determine whether nine or ten layers close comfortably.
6. Close the Final Seam with Three Removable Clips
Bring the first and last faces together and clip them at three points: near the outer tip, halfway down the straight seam, and close to the center. Each clip must capture both outer faces fully. The seam should lie straight, with no paper folded into the jaws.
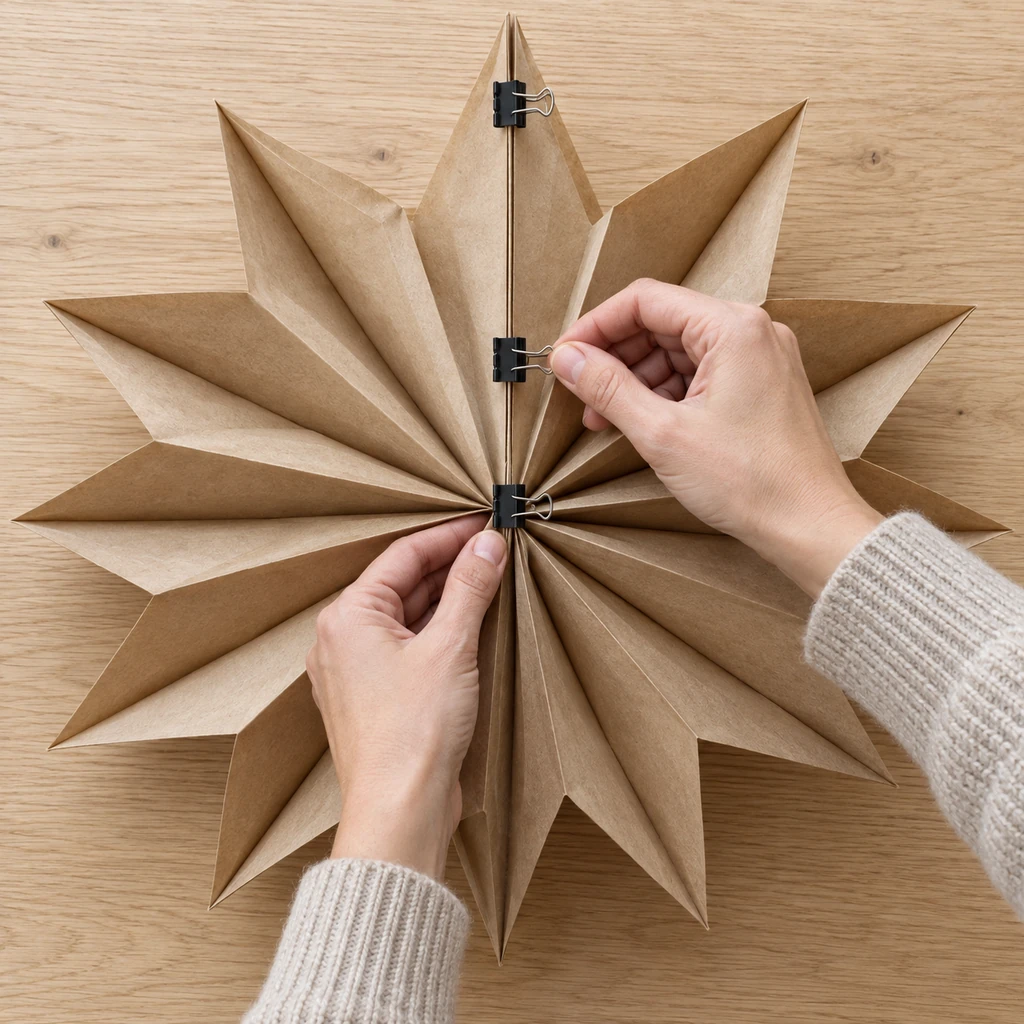
Turn the black clip bodies toward the back of the star so they stay hidden from the front. This closure is more storage-friendly than gluing the final seam, and it also lets you reopen the star if one fold needs to be eased into position.
7. Hang from the Upper Rear Clip
Tie the cotton cord through the wire handle of the upper rear clip, not through a cut paper point. The clip carries the light load across two paper faces while the pointed ray remains decorative. Tug the knot gently over the worktable before lifting the star to the wall.
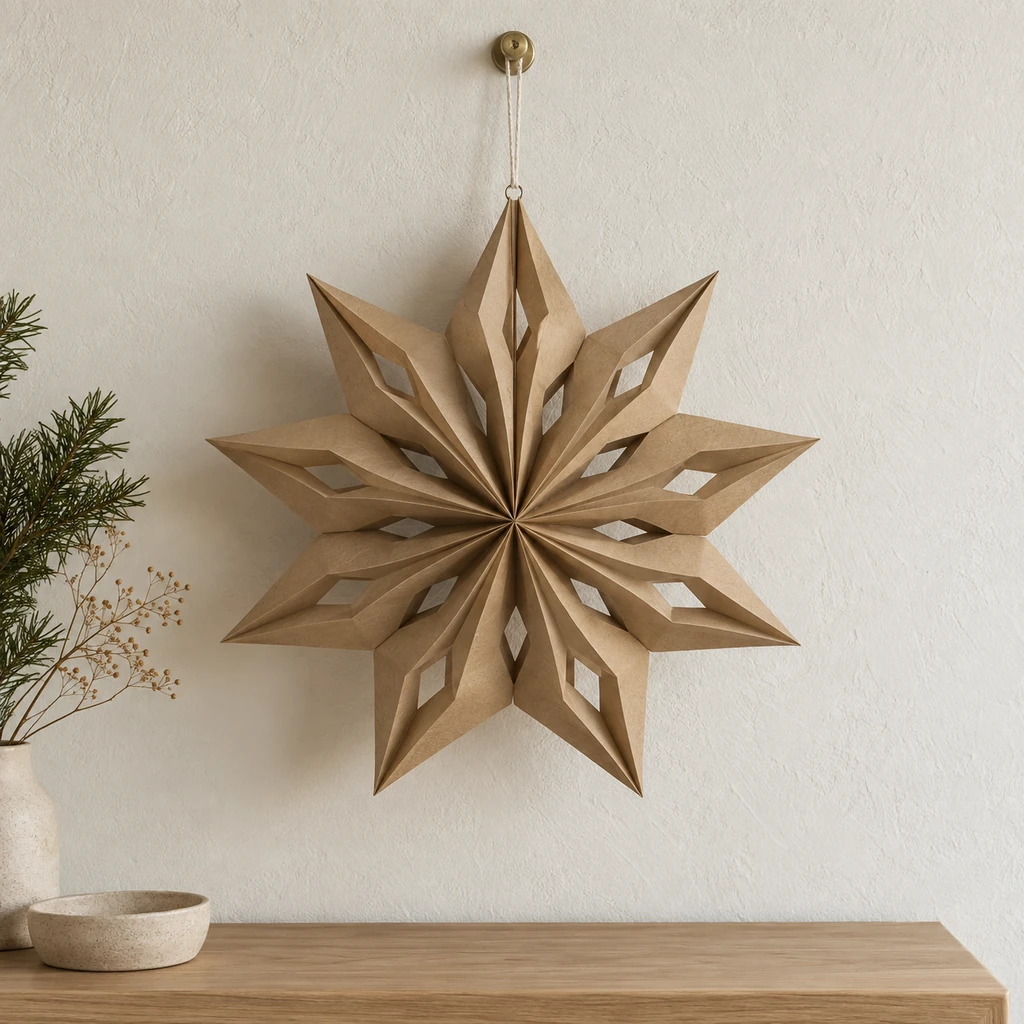
Use a hook made for the wall material and the decoration’s weight. Keep the star dry, clear of candles, heaters, cooking steam, and hot light bulbs. Long, accessible cords can create a strangulation hazard for young children, so display the cord well out of their reach.
8. Unclip and Collapse It Flat
When the season is over, take the star down and support it on a table. Untie the cord, remove all three clips, and bring the outer faces together slowly. The folds should return to a narrow stack without being crushed.
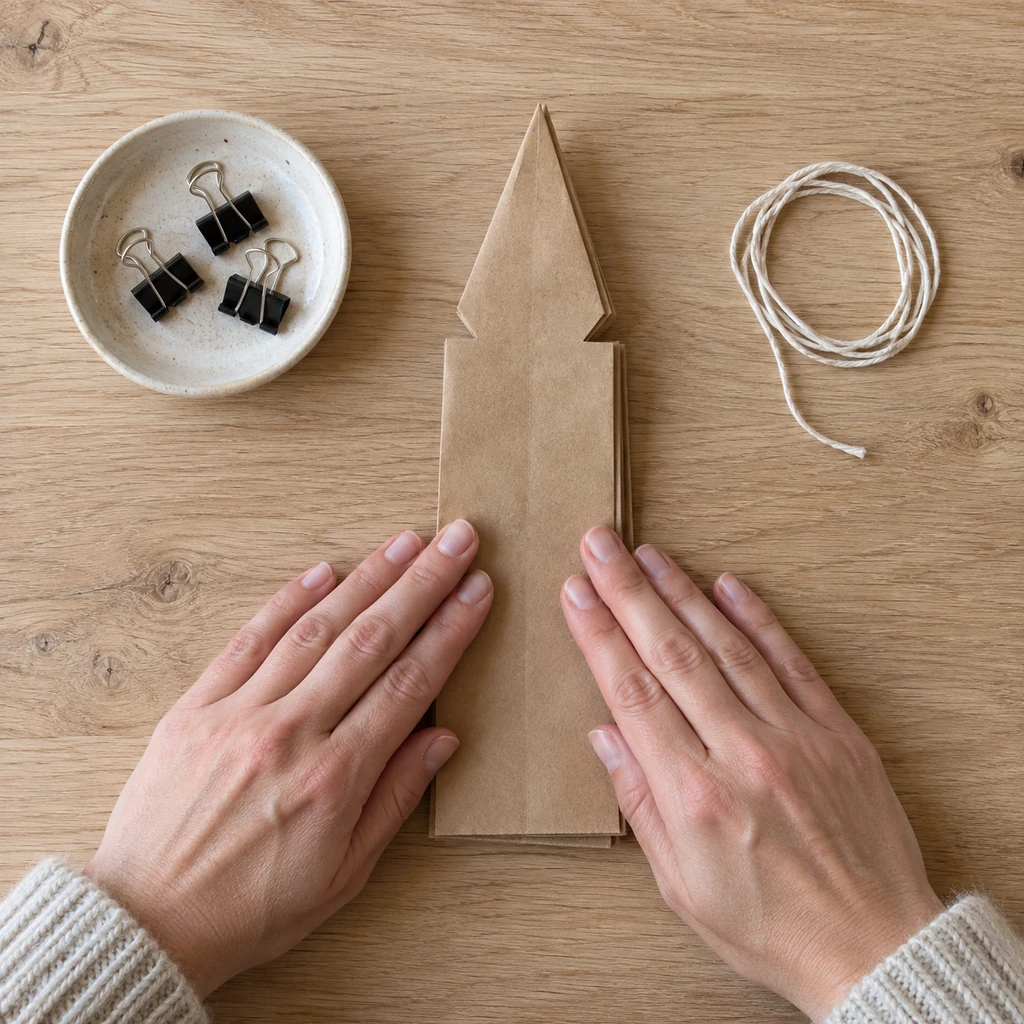
Store the flat star in a rigid folder or shallow box so heavier decorations cannot bend the point. Keep the cord and three clips in a small envelope with it. A dry indoor closet is better than a humid basement, garage, or attic where paper can absorb moisture or become brittle.
Pre-Hang Checklist
- All eight internal glued joins feel completely dry.
- The center point and two side notches repeat evenly around the star.
- The final seam closes without pulling or buckling.
- Exactly three clips are seated across both outer faces.
- The cord is tied to the upper clip’s wire handle, not the paper.
- The wall hook is secure and appropriate for the surface.
- The paper and cord are away from heat, moisture, children, and pets.
Common Problems and Practical Fixes
The Star Twists Instead of Lying Flat
One bag may be reversed, or one bottom fold may sit higher than the others. Close the star and inspect the stack edge-on. A reversed layer cannot be corrected after the internal joins dry; replacing the stack is more reliable than forcing the paper into shape.
The Rays Look Uneven
Check the original cut stack. An off-center top point or unequal side notches repeats around the whole star. For a future star, measure the midpoint and notch height on the top bag, then cut both sides from the same reference marks.
The Paper Tears at a Notch
The notch may be too deep, the glue may still be damp, or the star may have been pulled open instead of fanned. Stop opening as soon as a split appears. A small paper patch on the hidden back may stabilize a minor tear, but a split that reaches the center fold is unlikely to hold safely.
The Final Seam Keeps Popping Open
Confirm that all three clips capture both faces rather than one thin fold. If the faces meet only under strong tension, the problem is not clip strength; the bag proportions need an additional layer. Close the stack and follow the optional tenth-bag correction in Step 5.
The Star Will Not Fan Open
Look for glue that reached a side gusset. A sealed gusset blocks expansion and should not be torn apart. On the next stack, keep the horizontal glue line on the closed bottom and the vertical line in the center, leaving both long edges clean.
Substitutions & Variations
White paper lunch bags make a crisp winter version; natural kraft bags suit a neutral, handmade display. Smaller bags create smaller stars, but their proportions may require a different layer count, so dry-fan the stack before committing to the final seam. Never mix widths or gusset depths within one star.
For a simpler shape, omit the side notches and cut only the centered point. For softer rays, round the open corners rather than meeting them at a sharp point. Make every decorative cut through the full, firmly aligned stack so the pattern repeats predictably.
Where to Hang Paper Bag Stars
A plain wall gives the cut pattern enough contrast to read from across the room. A group of three works well when one star is noticeably larger and the cords finish at different heights. Leave breathing room around every outer point rather than overlapping the stars.
Avoid placing paper stars directly above a stove, sink, humidifier, radiator, fireplace, candle, or hot bulb. Do not suspend them where a door, ceiling fan, or strong vent can repeatedly strike or twist the paper. The safest-looking display is also the calmest one: a secure hook, a short cord, and open wall space.
How to Store the Stars Flat
Do not press the expanded star into a box. Release the seam first, guide the folds closed in their original direction, and place the flat stack between two clean sheets of plain paper. A rigid art portfolio, document box, or shallow lidded container protects the pointed cut edge better than a soft bag.
Label the small clip-and-cord envelope for this specific star. When you reopen it next season, fan it slowly on a table and check the glued joins before hanging. If the paper feels damp, brittle, or torn, keep it as a template rather than displaying it overhead.
More Natural Seasonal Crafts
Continue the handmade look with a dried orange and bay leaf garland with moisture checks, flat-drying air-clay ornaments, or a no-carve pressed-flower pumpkin. Each guide focuses on the structural step that makes the finished decoration easier to display or store.
Frequently Asked Questions
How many paper bags make one star?
Nine identical lunch bags make the star shown in this guide. Because bag width and gusset depth vary, another package may need ten. Test the opening before closing the final seam and add one matching layer only if the faces cannot meet without force.
Can I use hot glue?
A thin paper-safe PVA glue is easier to control and dries flatter. Hot glue can create thick ridges, adds burn risk, and may prevent the folds from closing neatly. Whatever adhesive you choose, follow its label and let every join dry completely before cutting.
Can the same paper star be reused?
Yes, if the final seam is clipped rather than glued and the paper remains dry and undamaged. Remove the clips, collapse the folds gently, and protect the cut point in a rigid container.
Can lights be placed inside the star?
This tutorial does not include lights. Paper can ignite or discolor near heat, and extra hardware can strain the folds. Display the star away from candles, hot bulbs, heaters, and other heat sources.
Safety Source
The U.S. Consumer Product Safety Commission warns that accessible window-covering cords can strangle young children. Although this lightweight craft is not a window covering, the same cautious household principle supports keeping its hanging cord short and completely out of a child’s reach: CPSC Go Cordless safety guidance.