
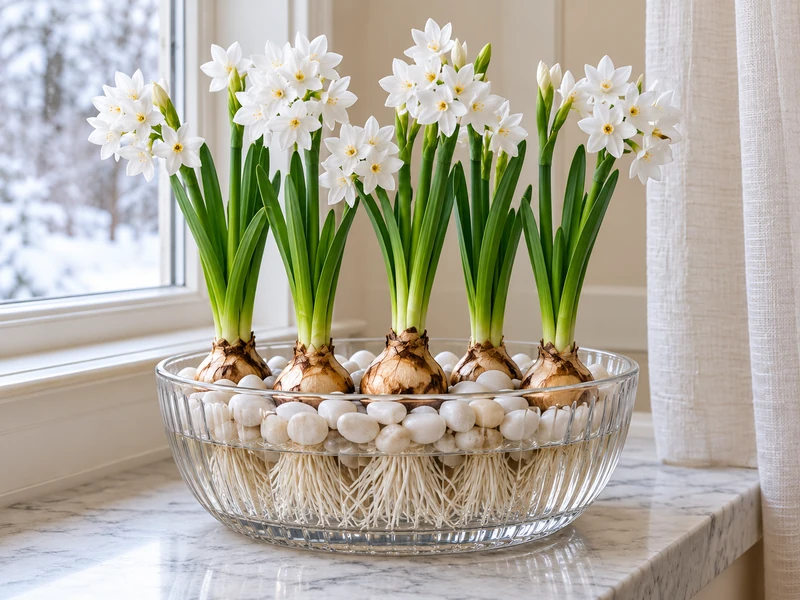
Paperwhites can turn a bowl of pebbles into a fragrant indoor flower display in only a few weeks. The method is simple, but one detail decides whether the bulbs grow clean roots or soften and rot: the water should feed the roots without soaking the bulb bodies.
This guide uses five bulbs in one shallow glass bowl. It covers the correct water line, the rooting stage, light and temperature changes, and a discreet support that keeps the flower stems upright as the clusters become heavy.
Why Growing Paperwhites in Water Works
Paperwhite narcissus bulbs already store the energy required for their first indoor bloom, so they do not need soil or fertilizer. Unlike many spring-flowering bulbs, paperwhites do not require a long chilling period before they can flower indoors.
Pebbles hold the bulbs upright and give the roots a protected space to spread. The water belongs below the bulb bases, not around them. Once roots extend into the wet stones, they can take up moisture while the papery bulbs remain dry and firm.
Materials
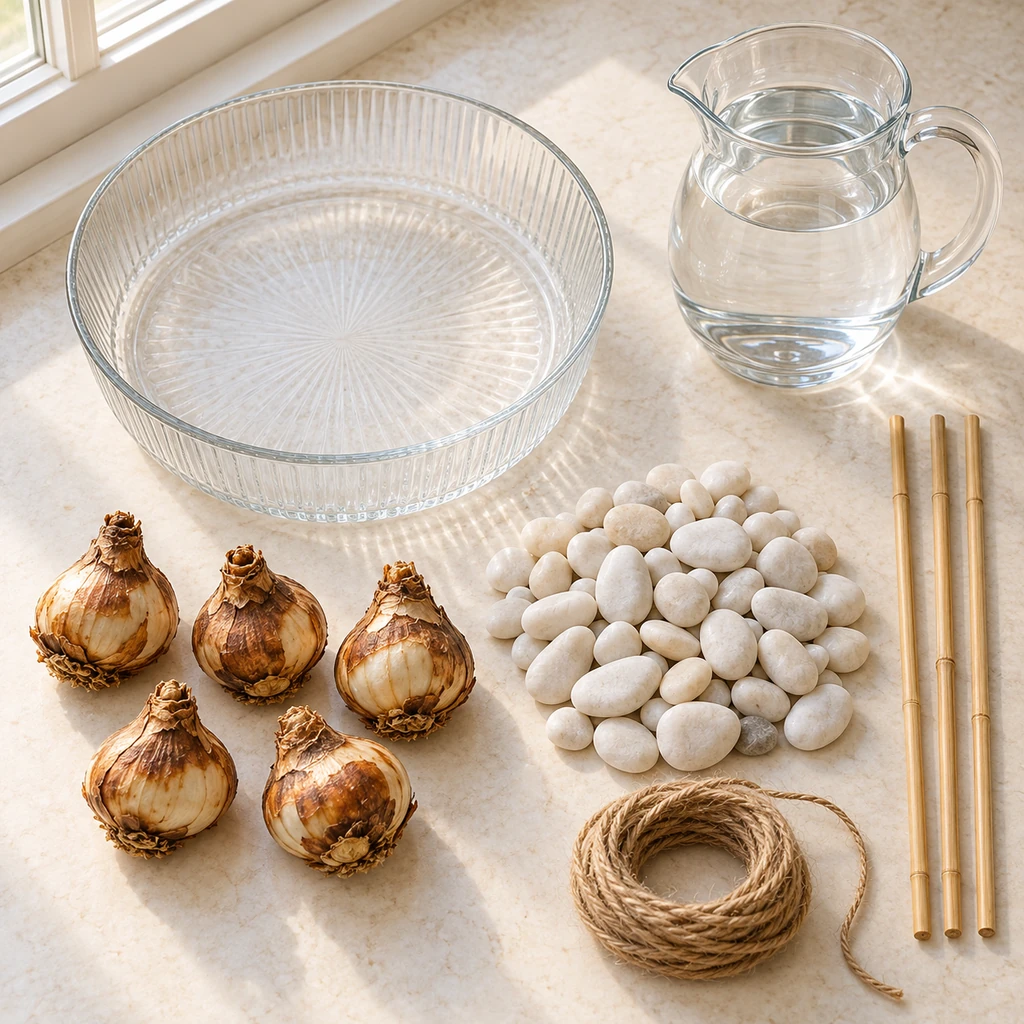
- 5 firm paperwhite narcissus bulbs with no soft spots or visible mold
- 1 shallow, watertight glass bowl, about 8 inches wide and at least 3 inches deep
- Enough washed pebbles to make a 2–3-inch layer
- Room-temperature water
- 3 slender bamboo stakes, optional but helpful before buds open
- Natural jute twine or soft plant tie
Choose a bowl that will not leak and is heavy enough to balance tall stems. Clear glass makes water-level checks easier. Rinse dusty pebbles until the water runs clear, then drain them before assembly.
Step-by-Step Instructions
Step 1: Inspect the bulbs and prepare the bowl
Choose bulbs that feel firm and heavy for their size. Dry, loose outer skin is normal; wet patches, deep softness, fuzzy growth, or a sour smell are not. Wipe the bowl clean and add 2–3 inches of rinsed pebbles.
Keep narcissus bulbs and the growing-water bowl away from children and pets that may chew or drink from them. The bulbs are not edible.
Step 2: Anchor five bulbs upright
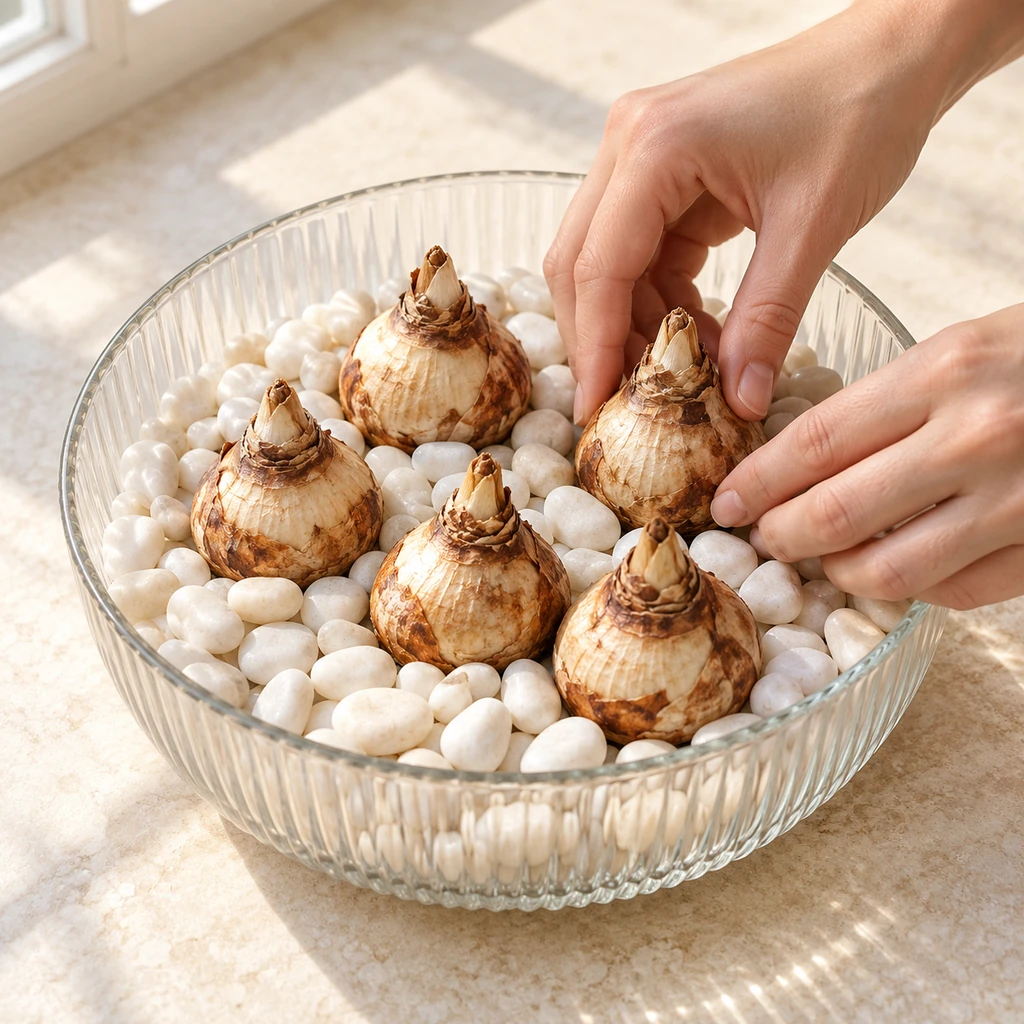
Set the bulbs close together with the pointed ends facing up. Press only the lower third of each bulb into the pebbles, then tuck extra stones around the sides. The stones should stop the bulbs from rocking without burying their shoulders.
Step 3: Set the water below the bulb bases
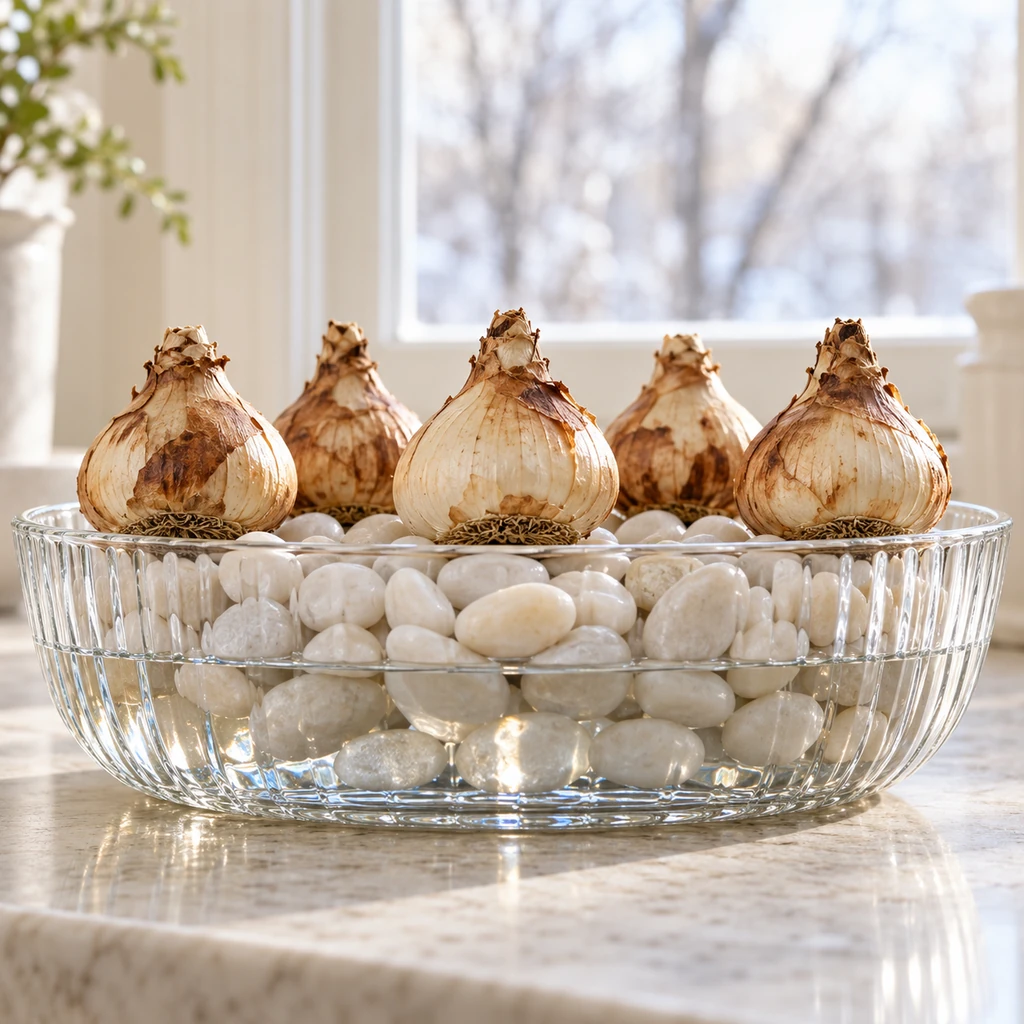
Pour water slowly down the inside edge of the bowl so the stones are not displaced. Stop when the water line sits about 1/8–1/4 inch below the flat bases of the bulbs. The dry gap is small but important: developing roots will reach down into the moisture, while the bulbs stay out of standing water.
Check from the side rather than looking only from above. If water touches a bulb body, remove a little with a turkey baster or carefully tip it out before placing the bowl.
Step 4: Establish roots in a cool, dim place
Place the bowl in a cool location around 45–55°F (7–13°C) with little direct light for about 2–3 weeks. Check the water every few days and restore it to the original level below the bulb bases. Do not pour water over the bulbs.
The bowl is ready for brighter conditions when healthy white roots fill the spaces between the stones and the green shoots are about 3 inches tall. A clear container lets you confirm both signs without lifting the bulbs and disturbing new roots.
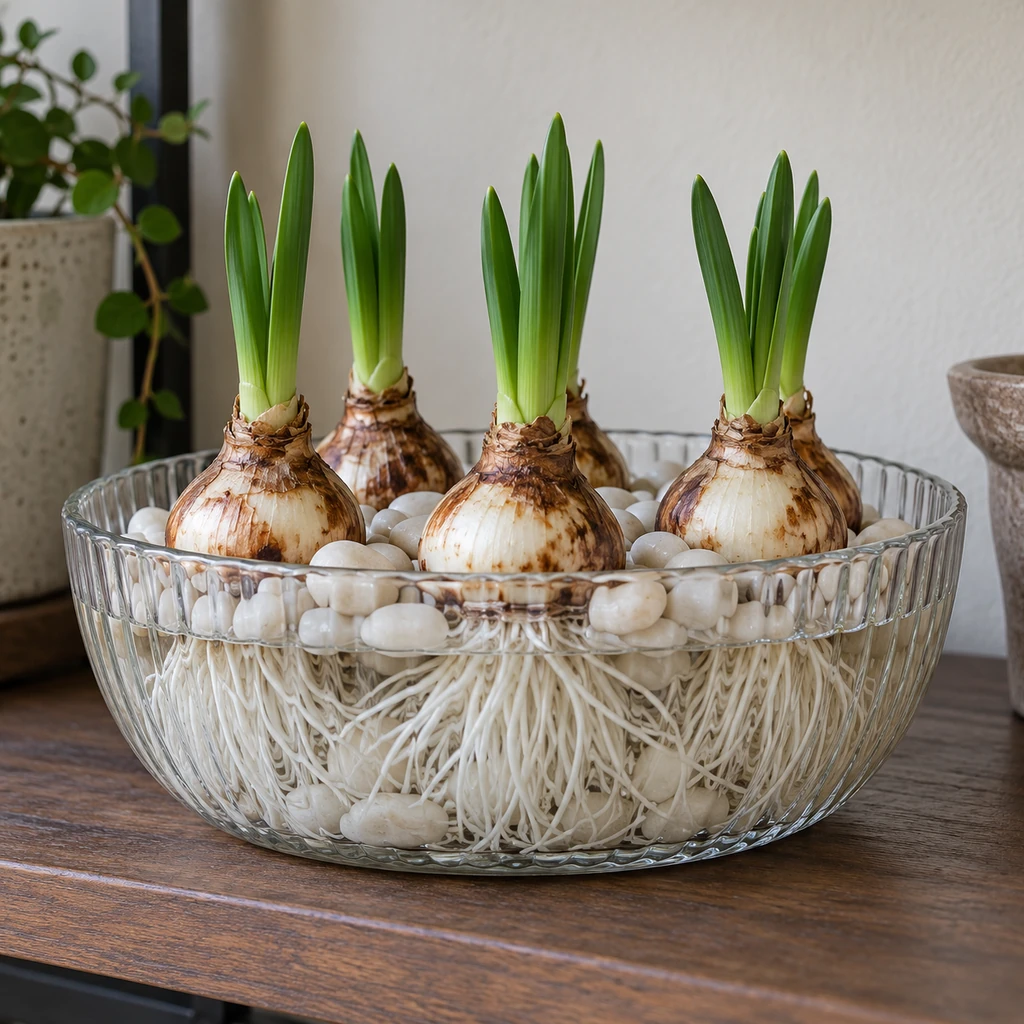
Step 5: Move to bright, cool light and rotate
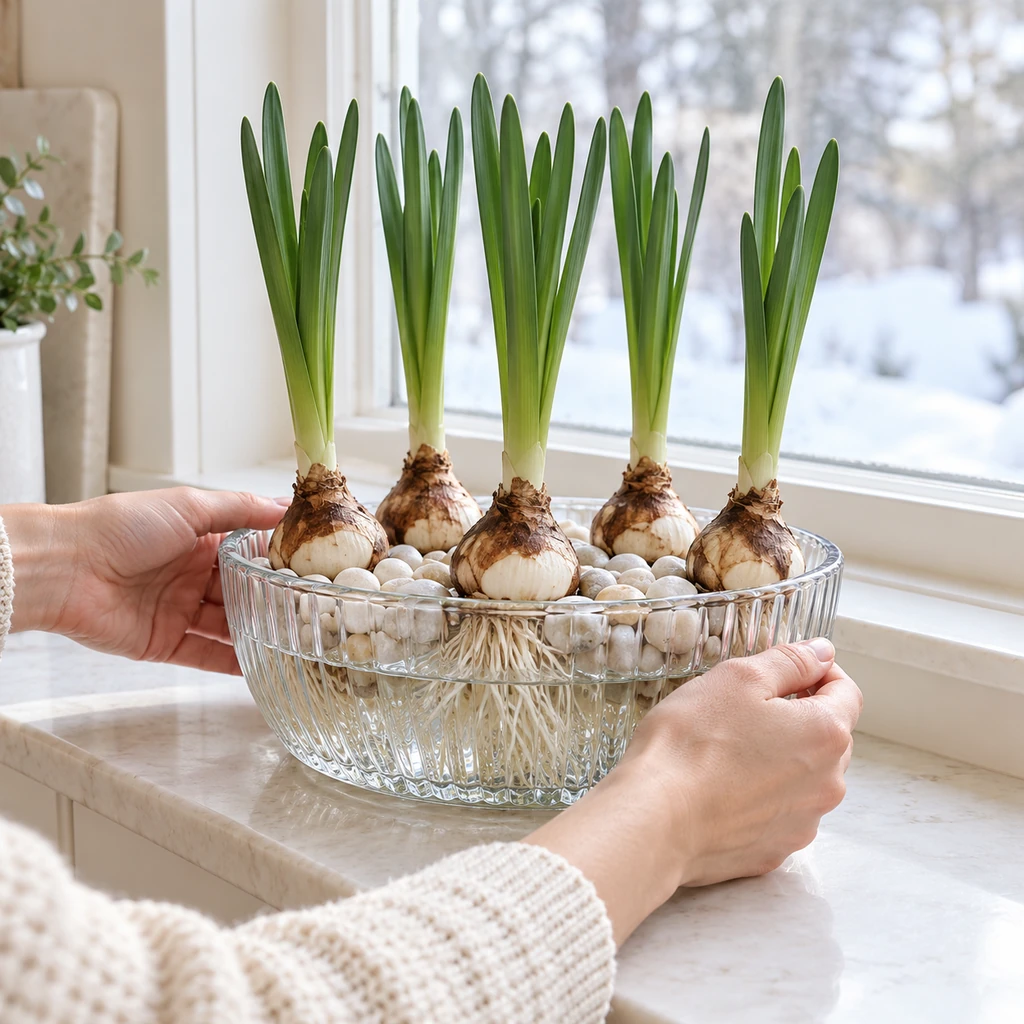
Move the rooted bowl to a bright window where daytime temperatures are approximately 60–70°F (16–21°C). Bright light and cooler room temperatures encourage sturdier growth than a hot, dim corner. Keep foliage away from freezing glass and direct blasts from a heater.
Rotate the bowl a quarter turn every day or two so the stems do not lean continuously toward one side of the window. Continue topping up only to the original water line.
Step 6: Support stems before the buds open
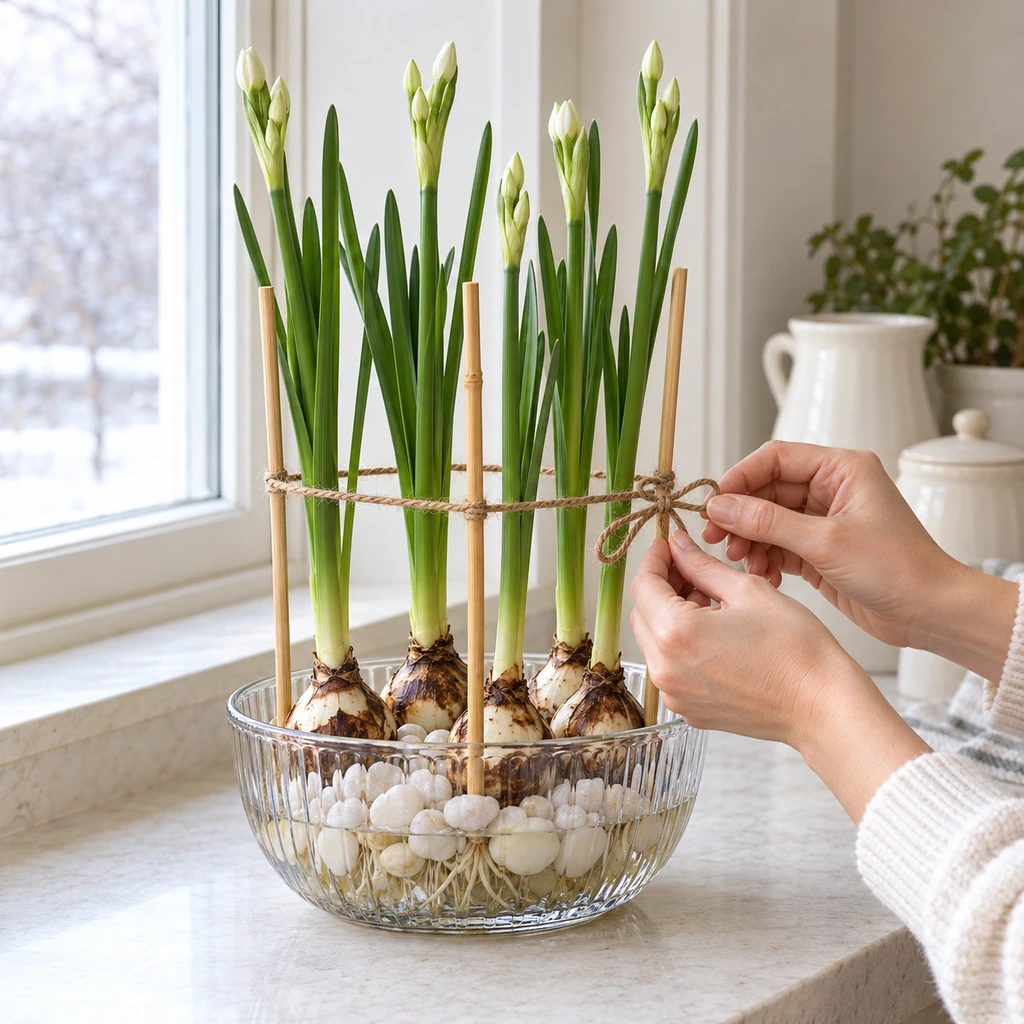
Paperwhites can reach 12–20 inches and often need support. Add three slender stakes around the inside edge of the bowl before the flower clusters fully open. Tie one loose loop of soft twine around the stakes and stems at roughly mid-height.
The loop should guide the group without cinching individual leaves. Leave enough room for a finger between the twine and the stems. If the flower heads continue leaning, add a second loose loop a few inches higher rather than tightening the first one.
How Long Paperwhites Take to Bloom
Most paperwhites bloom roughly 3–6 weeks after planting, although cultivar, bulb condition, and room temperature affect the schedule. Warmer rooms can speed growth but also encourage taller, weaker stems. If you want flowers for a specific date, plant more than one bowl about two weeks apart rather than relying on one exact bloom day.
When buds begin opening, move the bowl out of strong direct sun and keep it in a bright, cool position. Cooler conditions generally help the flowers last longer. Continue maintaining the water below the bulbs; a flowering plant still does not need its bulb body submerged.
Paperwhite Troubleshooting
The bulb is soft or smells unpleasant
Remove the affected bulb promptly. Check whether the water has been touching the bulb bodies, lower the water line if necessary, and inspect the remaining bulbs. A bulb that has become soft and rotten will not be restored by drying the surface.
Roots are brown and slimy
Healthy new roots are usually pale or white. Cloudy, stale water and decaying roots indicate poor conditions. Remove loose decayed material without tearing healthy roots, rinse the accessible glass edge, and replace the water while keeping it below the bulbs.
Stems are tall and leaning
Move the bowl to brighter, cooler light, rotate it regularly, and add the three-stake support. Do not expect rotation alone to straighten flower stalks that are already heavily bent.
Leaves grow but flower buds do not appear
Give the bulbs time, keep the water steady, and confirm that the bowl is receiving bright light after rooting. Weak, damaged, or improperly stored bulbs may fail to bloom even when they produce foliage.
After the Flowers Fade
Paperwhites forced in water usually exhaust much of their stored energy and are not reliable for a second indoor forcing. Remove faded flower stalks, then discard or compost the spent bulbs where local conditions and composting rules permit. Do not store soft or moldy bulbs with healthy garden material.
For another winter-flowering project, use the diagnostic guide for Christmas cactus bud drop. If you want a spring container for outdoors, the bulb lasagna pot guide explains how to layer cold-hardy bulbs in soil.
Frequently Asked Questions
Do paperwhite bulbs need soil?
No. They can bloom with their roots growing through wet pebbles, provided the bulb bodies remain above the water. Soil is another valid method, but it is not required for the first indoor bloom.
Do paperwhites need to be chilled first?
No. Paperwhite narcissus do not require the long cold treatment needed by many tulips, hyacinths, and other spring bulbs.
How often should I add water?
Check every few days. Add only enough to restore the original line below the bulb bases. Evaporation varies with temperature, sun, bowl size, and indoor humidity, so a fixed weekly schedule is unreliable.
Can I reuse the same decorative bowl?
Yes. After the display is finished, remove all roots and organic debris, wash the bowl and pebbles thoroughly, and let everything dry before storing or using it for another planting.
Quick Success Checklist
- Use five firm, dry bulbs in an 8-inch watertight bowl.
- Anchor only the lower third of each bulb in 2–3 inches of clean pebbles.
- Keep water 1/8–1/4 inch below every bulb base.
- Root in a cool, dim place until shoots reach about 3 inches.
- Move to bright, cool light and rotate every day or two.
- Support tall stems loosely before the flower clusters fully open.
- Move blooming paperwhites out of strong direct sun.