
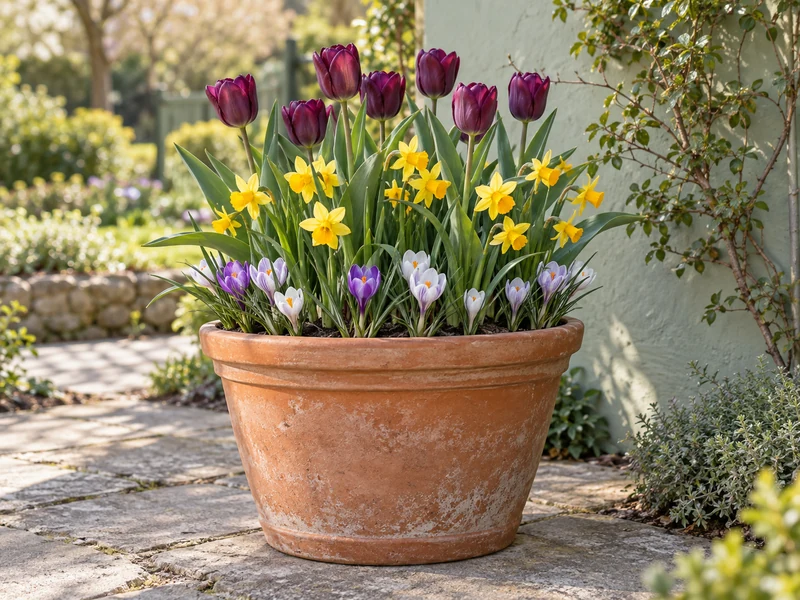
A bulb lasagna pot packs several planting depths into one container: large tulips at the bottom, miniature daffodils in the middle, and small crocus corms near the top. For the 14-inch-wide, 14-inch-deep plan below, use 7 tulips, 7 miniature daffodils, and 15–18 crocuses.
The layers save surface space; they do not force the bulbs to bloom in a particular order. Choose cultivars with early, midseason, or late bloom dates on their packages if you want a planned sequence or overlap. Local weather still affects the timing.
Bulb Lasagna Pot Plan at a Glance
| Layer | Bulbs | Position |
|---|---|---|
| Deepest | 7 full-size tulips | On about 4 inches of mix, points up |
| Middle | 7 miniature daffodils | About 2 inches of mix above tulips, offset |
| Top | 15–18 crocus corms | About 2 inches of mix above daffodils, offset |
| Finish | Potting mix | Cover top layer by about 3 inches; leave a 1-inch watering gap |
Bulb sizes vary. Treat the package planting depth as the final authority and adjust the soil thicknesses while keeping the container rim gap. If the specified depths cannot fit, use a deeper pot or remove one layer.
What You Need
- One frost-resistant container about 14 inches wide and at least 14 inches deep, with open drainage holes
- Enough fresh, free-draining container mix to fill it—never heavy garden soil
- 7 firm, dry full-size tulip bulbs
- 7 firm miniature daffodil bulbs
- 15–18 firm crocus corms
- Hand trowel, watering can, and gardening gloves
- Optional: smooth-edged hardware cloth and four clips where squirrels or chipmunks dig
Reject bulbs that are soft, wet, badly damaged, or moldy. Spring bulbs are not food, and several commonly used bulbs can cause illness if eaten. Wear gloves, wash your hands, and keep bulbs, scraps, and planted pots away from children and pets.
Step-by-Step Instructions
Step 1 — Check the Pot and Drainage
Confirm that water runs freely from the drainage holes before adding mix. Cover a large hole with a loose pottery shard or a small piece of mesh only if mix would wash out; do not block it. Skip the gravel layer—potting mix should extend to the base so water can move through the same porous medium.
Set the empty pot where it can stay for winter. A filled 14-inch terracotta container is heavy and more fragile when moved in freezing weather.
Step 2 — Add the Base and Place the Tulips
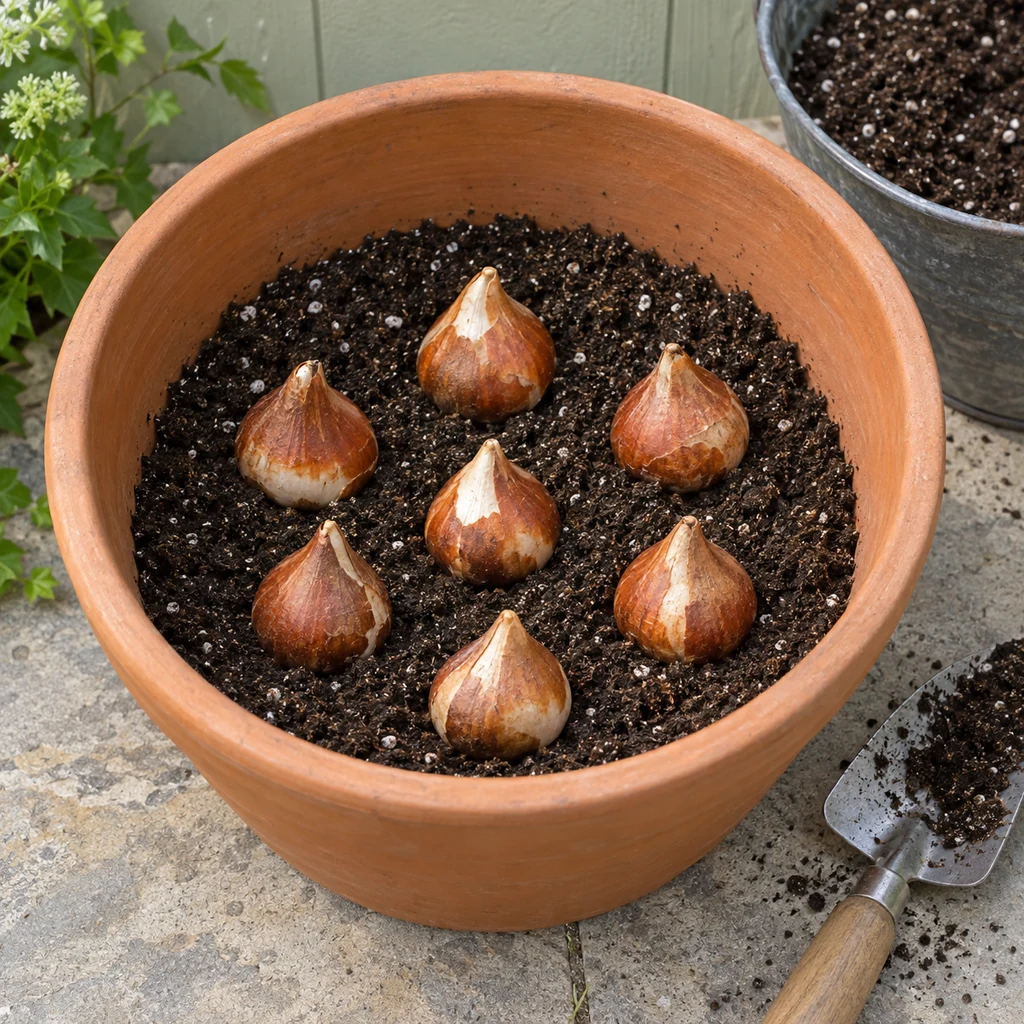
Add about 4 inches of lightly settled container mix. Arrange seven tulip bulbs with their flat root plates down and pointed noses up. Space them closely for impact, but do not let the bulbs touch one another or the pot wall.
Do not press the bulbs hard into the mix. Gentle contact is enough. If a bulb has a less obvious point, place it on its side rather than damaging the base while guessing.
Step 3 — Cover and Add the Daffodils
Add about 2 inches of mix over the tulips and level it gently without compacting. Position seven miniature daffodil bulbs point-up. Offset them from the tulips below so no bulb sits directly over another.
Use miniature daffodils rather than full-height types in this 14-inch plan. Their shorter stems are better scaled to a container and less likely to dominate the lower crocuses visually.
Step 4 — Add the Crocus Layer
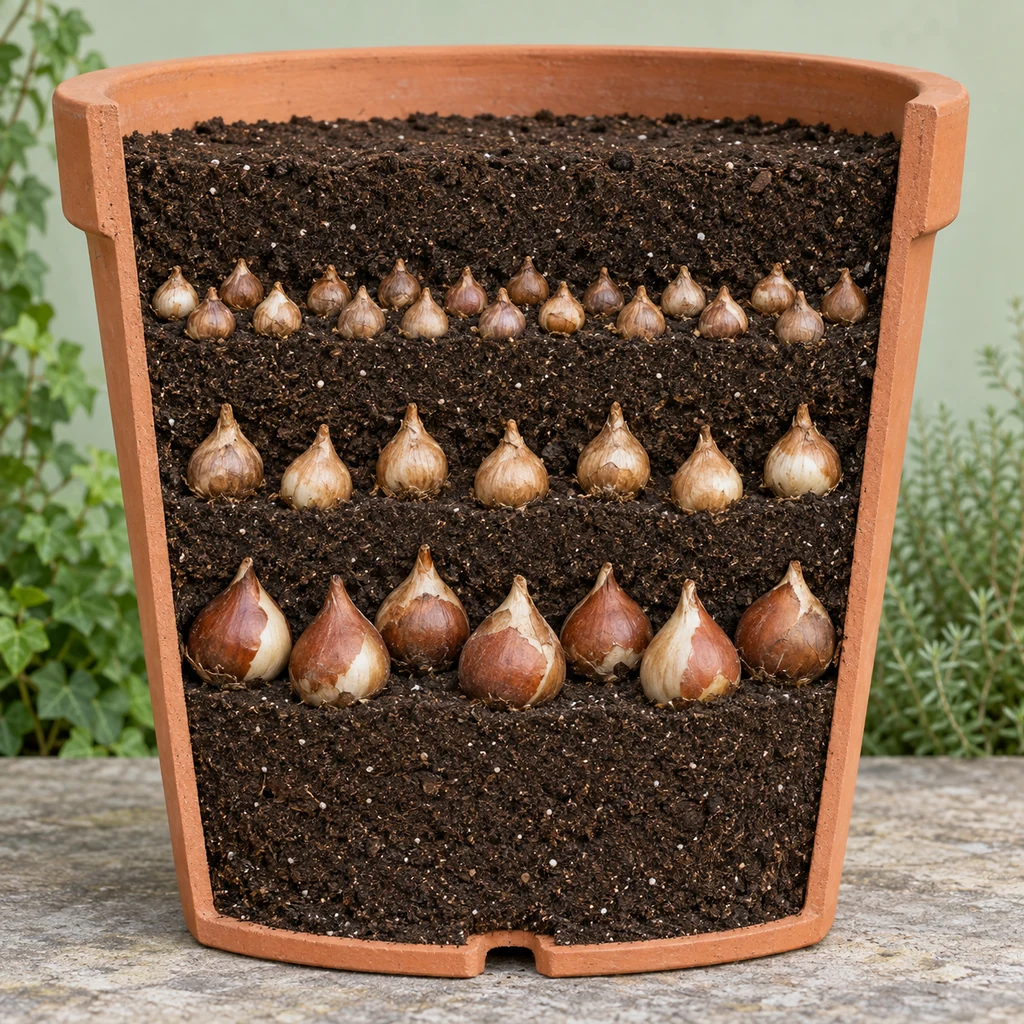
Cover the daffodils with roughly 2 inches of mix. Arrange 15–18 crocus corms across the surface with their growing tips upward, leaving a little space between them and offsetting them from the middle layer.
Finish with about 3 inches of mix, or the depth stated on the crocus package. Stop approximately 1 inch below the rim so water can pool briefly and soak in instead of running over the sides.
Step 5 — Water Once and Let It Drain
Water slowly until excess comes from the drainage holes. This settles the mix around the bulbs. Empty any saucer after drainage; dormant bulbs should not sit in standing water.
After the first watering, check moisture during prolonged dry weather. The mix should not become bone-dry, but constant saturation can rot bulbs. Once shoots appear, monitor more often because actively growing plants use water faster.
Step 6 — Protect the Surface if Animals Dig
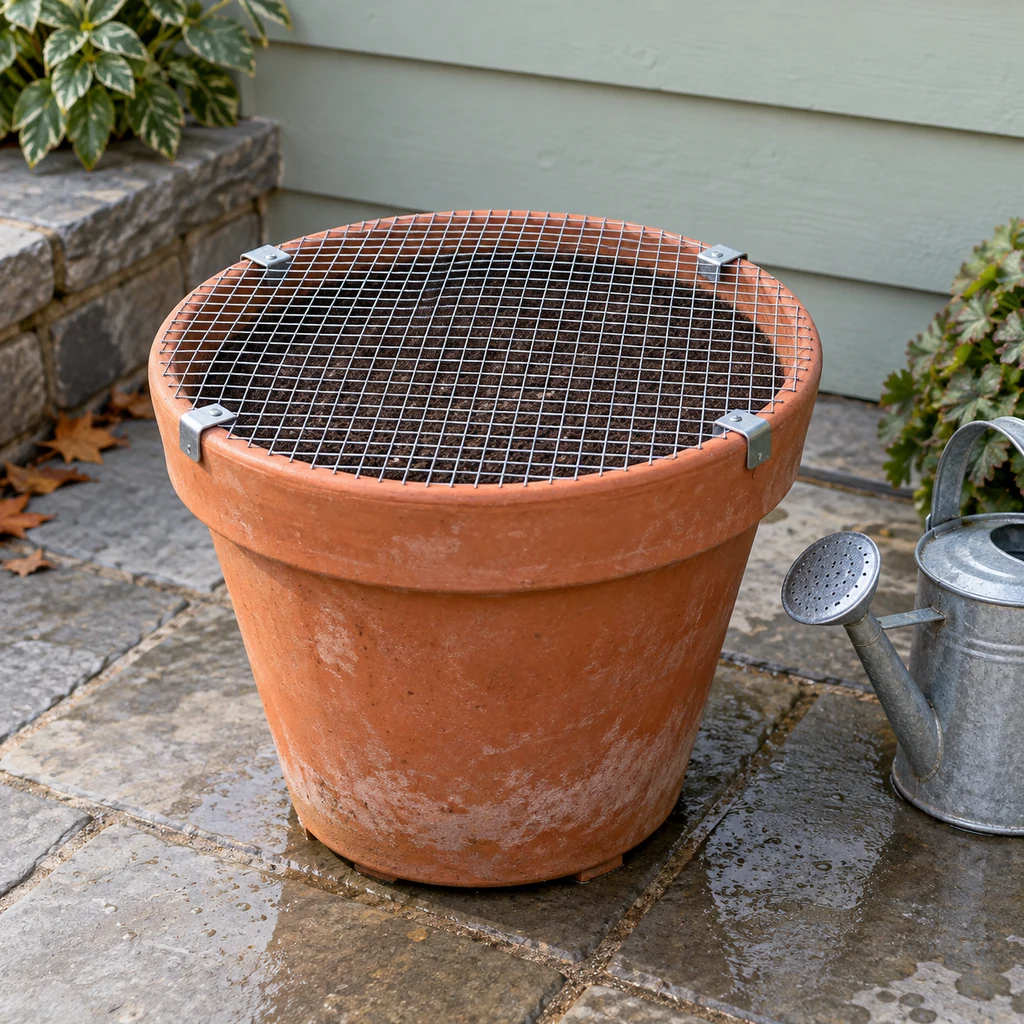
Where squirrels or chipmunks disturb pots, cover the surface with a fitted piece of hardware cloth and secure it so wind cannot lift it. Fold or cap every cut edge, and keep sharp wire away from hands, paws, and walkways.
Remove the guard as soon as shoots approach it. The mesh is a temporary barrier, not a support for growing stems.
Step 7 — Give the Pot a Cold but Drained Winter
Place the pot outdoors in a bright, sheltered position where winter rain cannot keep the mix waterlogged. Raise it on pot feet if the drainage holes would otherwise sit flat against paving. Avoid a heated indoor room; hardy spring bulbs need an extended cold period.
Container roots experience colder swings than bulbs in the ground. In regions with severe freezes, protect the pot according to local guidance—such as grouping and insulating containers or using an unheated protected space that stays cold without repeated hard freeze-thaw cycles. The correct treatment depends on climate, bulb hardiness, and pot material.
How to Choose Bulbs for a Better Display
Coordinate Bloom Windows, Not Just Colors
Read the package for early-, mid-, or late-spring bloom timing. Choose overlapping windows if you want the three flower types visible together, or staggered windows for a longer succession. A bulb planted deeper does not automatically flower later.
Match Height to the Container
Keep the tallest flowers in the deepest layer and use shorter types above them. For this plan, full-size tulips form the back height, miniature daffodils create the middle, and low crocuses fill the rim.
Choose Healthy Bulbs
Firm, dry bulbs with intact bases have the best starting condition. A little loose papery skin is normal. Soft spots, wet decay, strong odor, or extensive mold are reasons to discard a bulb before it can affect neighbors.
Common Bulb Lasagna Mistakes
- Using a shallow pot: compressing three layers sacrifices the planting depths the bulbs need.
- Blocking drainage: decorative cachepots and full saucers can keep the mix saturated.
- Stacking bulbs directly: offset each layer so emerging shoots have clearer routes upward.
- Forcing the count: if your bulbs are large, use fewer instead of making them touch.
- Assuming depth controls bloom time: cultivar and weather are the main timing tools.
- Moving a frozen terracotta pot: wet, frozen clay is vulnerable to cracking; position and protect it before severe weather.
Spring and Post-Bloom Care
Once shoots emerge, move the container into the light conditions recommended for the chosen varieties and keep the mix evenly moist without flooding it. Turn the pot occasionally if growth leans strongly toward one side.
After flowering, remove faded blooms but leave green foliage intact. The leaves recharge the bulbs. Continue watering as needed until the foliage yellows naturally, then reduce water. You can move the untidy pot out of view or transplant suitable bulbs into the garden after the foliage matures. If you are expanding the bed, the planting principles in the peony planting guide reinforce the same essentials: suitable depth, drainage, and an undisturbed site.
For routine checks across your collection, use these beginner plant care fundamentals. If travel overlaps with active spring growth, plan moisture before leaving with the vacation watering guide.
Frequently Asked Questions
When should I plant a bulb lasagna pot?
Plant hardy spring-flowering bulbs in fall, after conditions cool but before the potting mix freezes solid. Exact timing varies by climate, so use local planting guidance and the bulb packages.
Can the bulbs touch?
Close spacing creates a fuller first-season display, but the bulbs should not be pressed against one another or the pot wall. Reduce the count if your bulbs are larger than those used in this plan.
Do I need gravel in the bottom?
No. Use a pot with open drainage holes and a free-draining container mix. A loose shard or small mesh piece can keep mix from escaping a large hole, but a thick gravel layer reduces usable root space.
Will every flower bloom at the same time?
Not necessarily. Layering controls planting depth and makes efficient use of space. Cultivar bloom windows and weather determine whether the flowers overlap.
Can I reuse the bulbs next year?
Possibly, but performance varies by bulb type, climate, and aftercare. Let foliage die back naturally so bulbs can store energy. Then either keep the container under suitable conditions or move appropriate bulbs into a well-drained garden bed.