
A round tablecloth already has the finished outer edge that is hardest to make on a tree skirt. Cut one small opening and one back slit, protect those new edges from fraying, and it can wrap around the stand without a sewing machine or a paper pattern. This version is designed for a medium-size indoor tree and keeps the stand accessible for adjustments.
Measure your tree stand and test the edge treatment on a hidden scrap before cutting the tablecloth.
What You Need and How to Size It
- One round, pre-hemmed woven cotton tablecloth, about 60 inches across for the example shown
- Tape measure, washable fabric chalk, a small plate or round cardboard template, and sharp fabric scissors
- A fabric-edge fray preventer suitable for your cloth, plus a scrap of the same fabric for testing
- A protected flat work surface and a piece of scrap cardboard or wax paper under the cut edges while the treatment dries
A 60-inch tablecloth gives a skirt with roughly a 30-inch reach from the center. Before choosing one, measure the free floor around your tree: the finished cloth should not block a walkway, door swing, floor vent, or the stand controls. Use a woven fabric whose care label permits the cleaning you expect. Avoid slippery plastic-backed cloth, heavy fringe, and an outer edge that will catch under the stand. Prewash and dry only if the care label allows it; a pressed, flat cloth is easier to mark accurately.
For an artificial tree, measure the trunk or upper stand post at the height where the fabric will sit. For a live tree, also measure the watering opening: the center cutout must leave the reservoir accessible. The National Fire Protection Association’s tree safety guidance calls for checking the water daily and keeping the tree away from heat sources. Do not let any skirt cover a power strip, damaged light cord, or heat vent.
How to Turn a Round Tablecloth Into a No-Sew Tree Skirt
Step 1: Lay Out the Tablecloth and Measure the Stand
Spread the tablecloth wrong side up on a clean floor or large table and smooth it without stretching. Confirm that the factory hem runs continuously around the circle. Place the measured stand dimension beside the cloth and choose a center opening that clears the post and any access you need. In the example, a six-inch opening is a starting point for a slim artificial-tree post; enlarge it for a wider post or live-tree watering reservoir. Cut small first because a too-large hole cannot be undone.
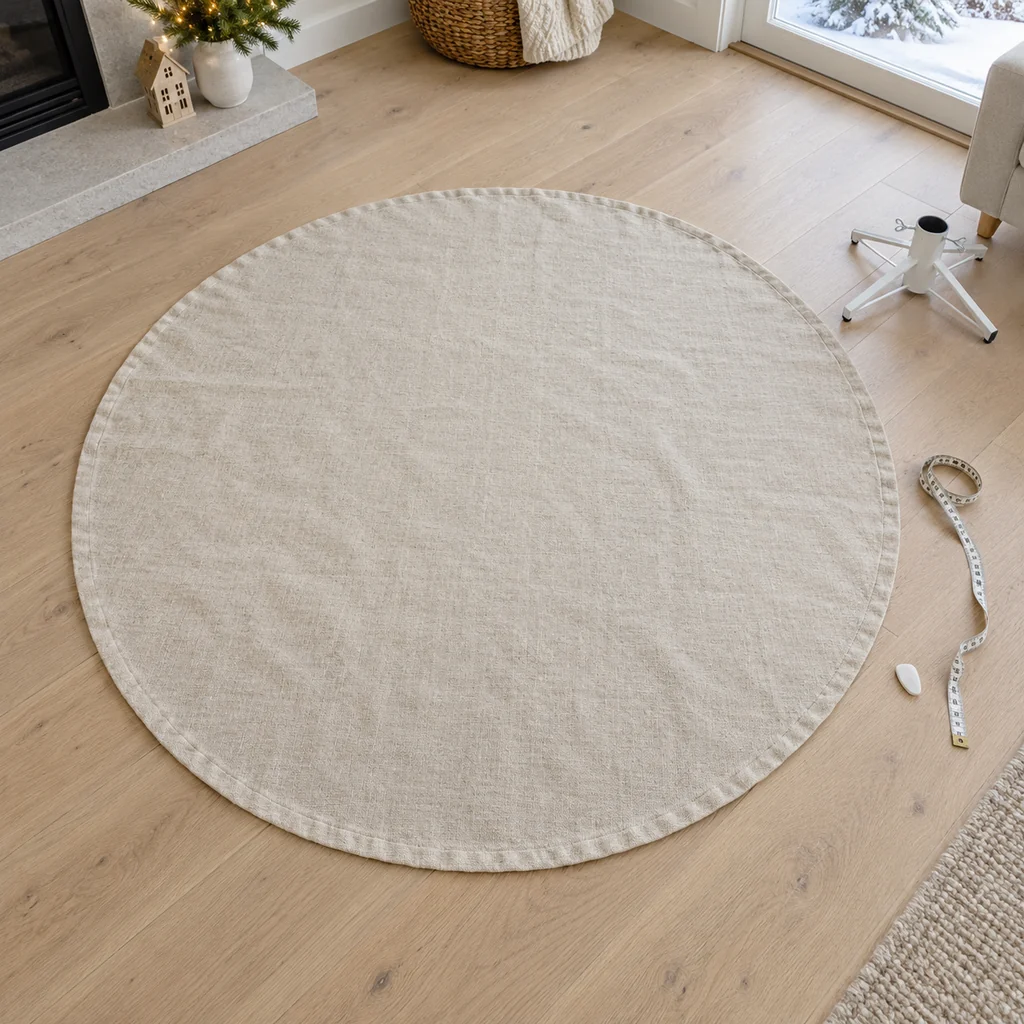
Step 2: Fold Into Quarters and Mark the Center Opening
Fold the circle in half and then in half again, keeping the outer hems aligned. The pointed corner where both folds meet is the exact center. From that point, measure the radius of your planned opening along both folded edges and draw a smooth quarter-circle with fabric chalk. For a six-inch opening, the radius is three inches. A small plate or cardboard template can help make the curve even, but check its size with the tape measure.
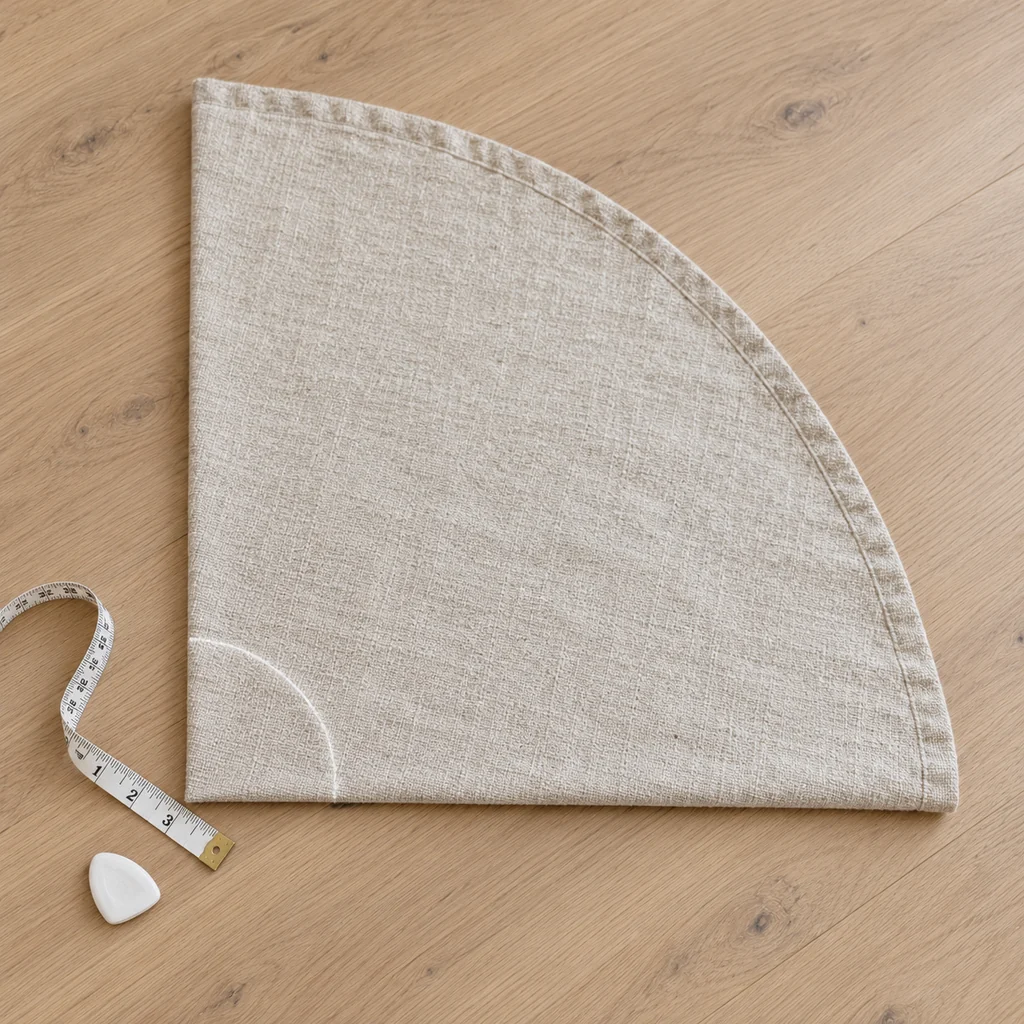
Step 3: Unfold and Mark One Back Slit
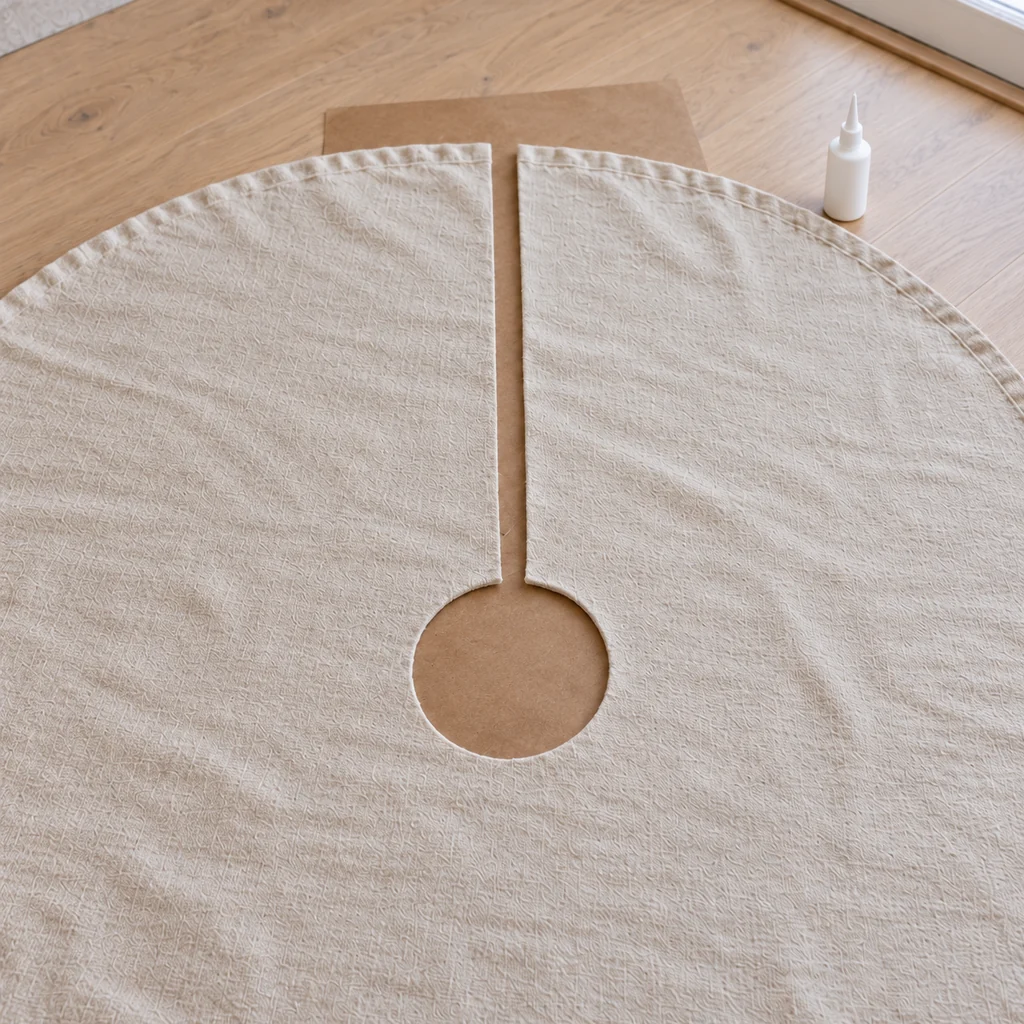
Open the cloth flat again. Check that the four quarter-arcs form one centered circle. From the edge of that circle, draw a straight line to the outer hem at the point that will sit behind the tree. This single radial slit lets the skirt wrap around an already assembled stand. Do not mark a second slit or cut all the way across the tablecloth. Lay the cloth under the tree for a dry fit before cutting if you are unsure where the back should be.
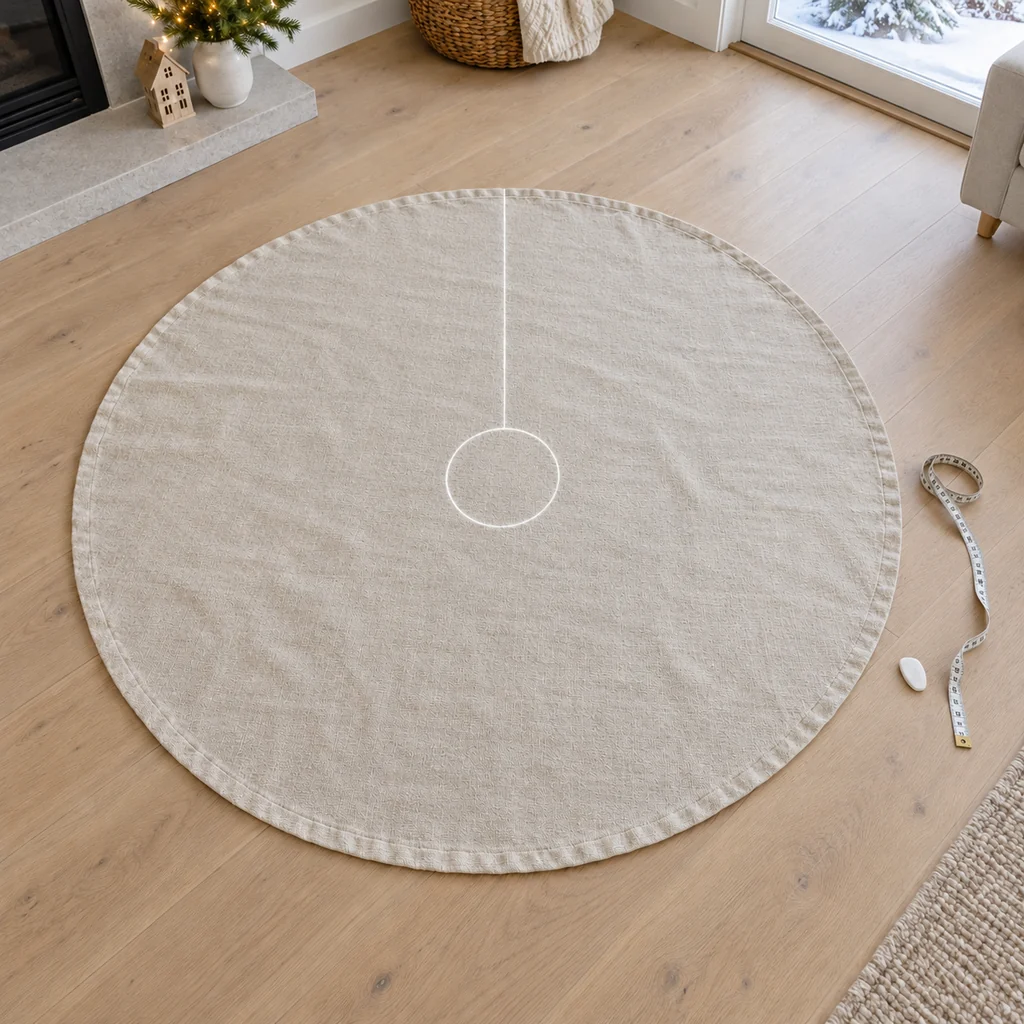
Step 4: Cut the Center and the Single Slit
Refold the cloth into quarters and cut carefully along the small chalk arc through the folded layers. Unfold and check the opening against the stand; trim only if needed. Then cut the marked straight line from the outer edge to the opening. Use long, steady scissor strokes so the two slit edges stay smooth, and keep the finished outer hem intact everywhere else. The result should be one round piece with a center hole and one opening at the back.
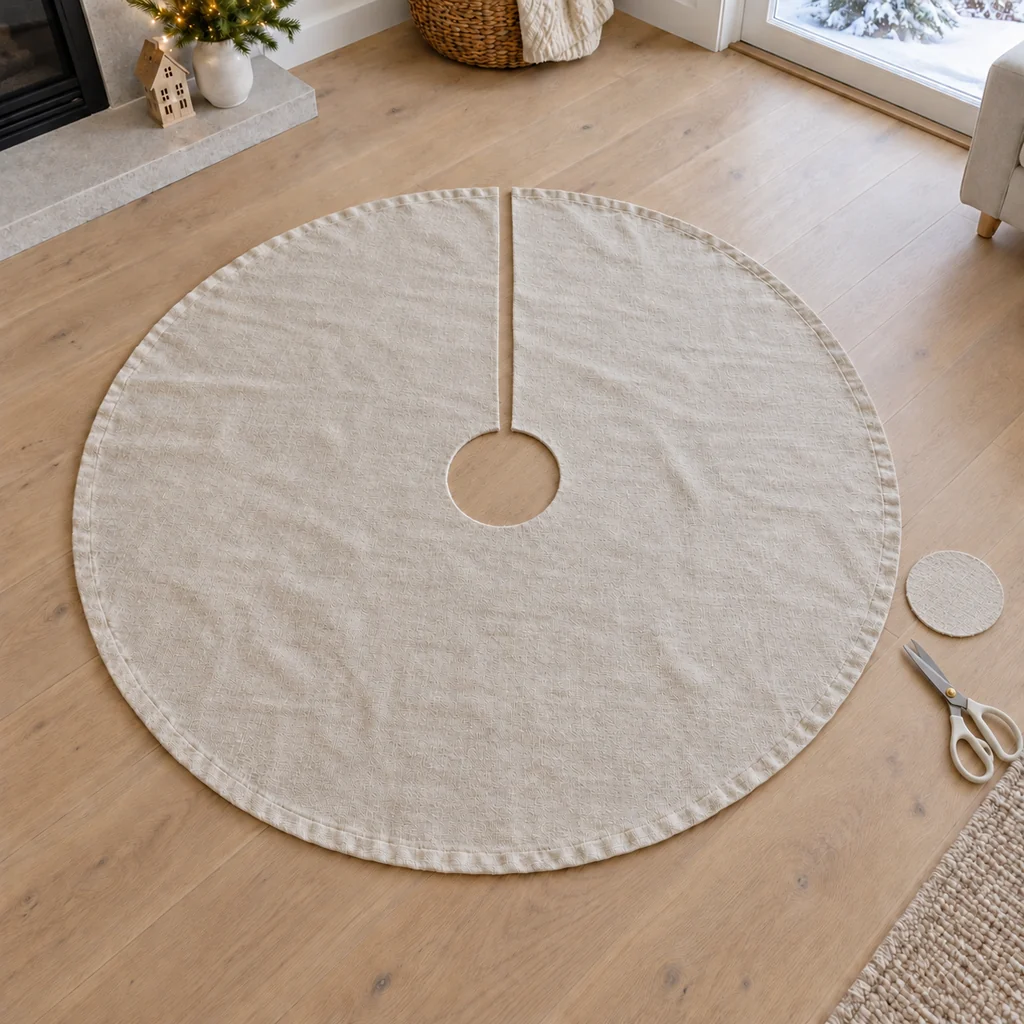
Step 5: Seal the New Raw Edges and Let Them Dry
Test the fray preventer on the offcut first; some products darken or stiffen fabric. Put a protective sheet under the new inner circle and both sides of the slit. Apply a narrow, controlled line only to those cut edges, following the product label, and let the cloth dry fully before moving it. Do not glue the two slit edges together. A colorless edge-sealing liquid is intended for self-cut fabric edges; the Prym product guidance describes this use. If your cloth ravels badly even after a test, choose a tighter woven tablecloth rather than leaving a loose fringe near the stand.
Step 6: Wrap the Skirt Around the Tree and Check the Fit
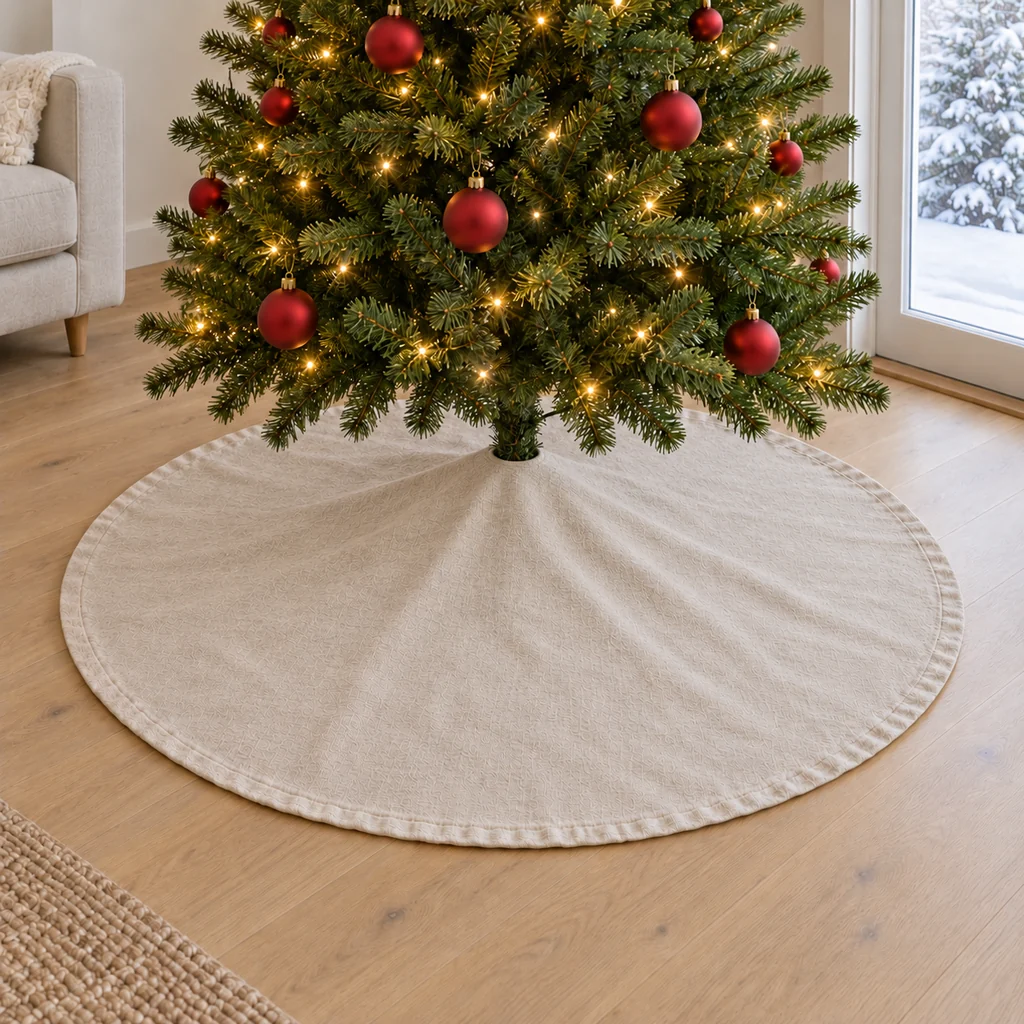
Once dry, open the slit and slide the cloth around the trunk or stand post. Place the cut edges toward the back and overlap them slightly so the front forms an unbroken circle. Smooth the cloth outward from the center; its original hem should rest flat on the floor instead of being tucked under a stand foot. Keep a live-tree watering port visible and reachable. Route light cords away from the skirt’s cut edge and never cover a power strip or heat vent. Step back and adjust the overlap until the front looks balanced.
Fit Fixes and Storage
- The middle hole is too tight: Remove the skirt and trim a little at a time. Never force it around a trunk or watering opening.
- The slit gaps open: Move both edges toward the back and overlap them more. If there is not enough fabric to overlap, a wider tablecloth will fit better.
- The outer edge ripples: Check that the tablecloth is fully dry, the stand is not sitting on the hem, and no cord is pulling it upward.
- The new cut frays: Let the edge treatment cure as its label directs and test another application on an offcut before touching the visible skirt.
After the season, clean according to the tablecloth’s care label and the edge-treatment instructions. Let it dry completely, then fold along the original quarter folds for flat storage. For more handmade holiday details, see our folded fabric pinecone ornaments. If wrapping supplies are spreading across the room, the temporary gift wrapping station keeps that separate project contained.