
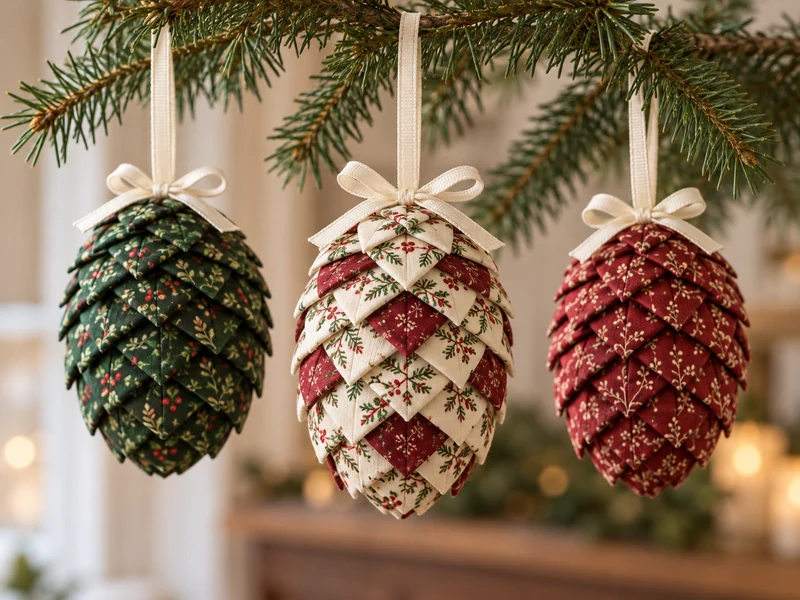
Turn small cotton scraps into dimensional Christmas ornaments without threading a needle. These folded fabric pinecones are built on lightweight foam eggs, one pinned triangle at a time, so the finished surface looks layered and full instead of flat or patchy.
The secret is consistent cutting and staggered placement. Start at the narrow end, keep every row level, and let each new fabric point hide the pins in the row before it. The method is repetitive rather than difficult, which makes it a satisfying project for a quiet craft afternoon.
Why This No-Sew Ornament Method Works
- Uniform squares create uniform scales: a simple cardboard template keeps every folded piece the same size.
- Staggered rows hide the hardware: each new point sits between two points in the previous row and covers their pinheads.
- A foam egg provides the silhouette: there is no wire frame to build and no curved fabric seam to sew.
- The color pattern is easy to control: alternate fabrics by row for stripes, or mix them gradually for a scrappy look.
Materials
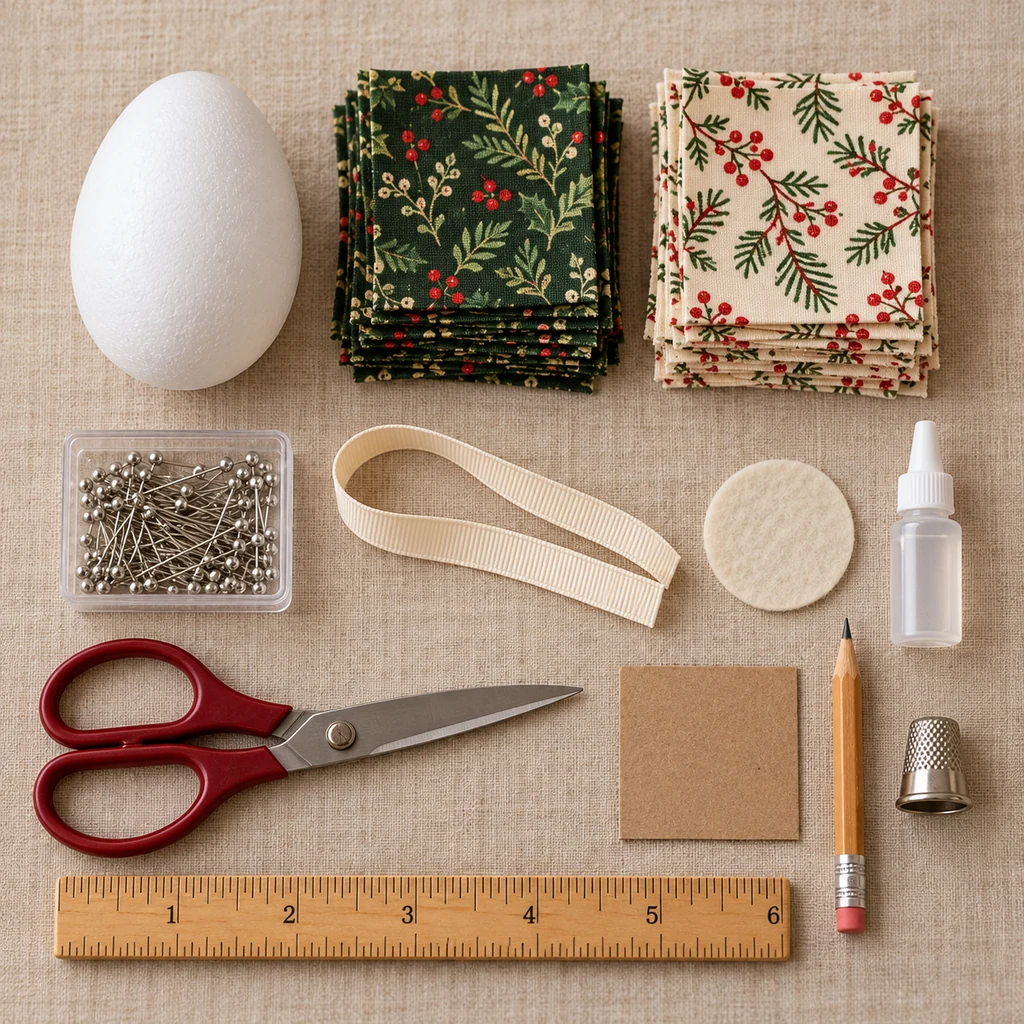
- One 3 × 4-inch (7.5 × 10 cm) egg-shaped craft foam form
- About 60–70 cotton fabric squares, each 2 × 2 inches (5 × 5 cm)
- Approximately 120–150 short straight pins with flat heads
- 10 inches (25 cm) of 3/8-inch (1 cm) grosgrain ribbon
- One 1 1/2-inch (4 cm) felt circle
- Two U-shaped floral pins
- A small amount of clear-drying craft glue that is compatible with foam
- Fabric scissors
- Ruler and pencil or removable fabric marker
- 2-inch square cardboard template
- Metal thimble
The exact number of squares depends on the foam form and how tightly the rows overlap. Cut ten extra squares before you begin. Quilting cotton is easier to fold than heavy upholstery fabric, slippery satin, or loosely woven material that frays quickly.
Before You Start: Pin Safety
This is an adult craft because it uses many sharp pins. Work over a tray, count loose pins before and after the project, and use a thimble when pressing them into dense foam. Keep the unfinished ornament, loose pins, ribbon, and small decorations away from children and pets.
The finished ornament is decorative, not a toy. Inspect it before each season and retire it if fabric loosens or a pin begins to lift. Use only glue labeled safe for craft foam; solvent-based adhesives can damage the form.
How to Make Folded Fabric Pinecone Ornaments
Step 1 — Cut 60–70 Uniform Fabric Squares
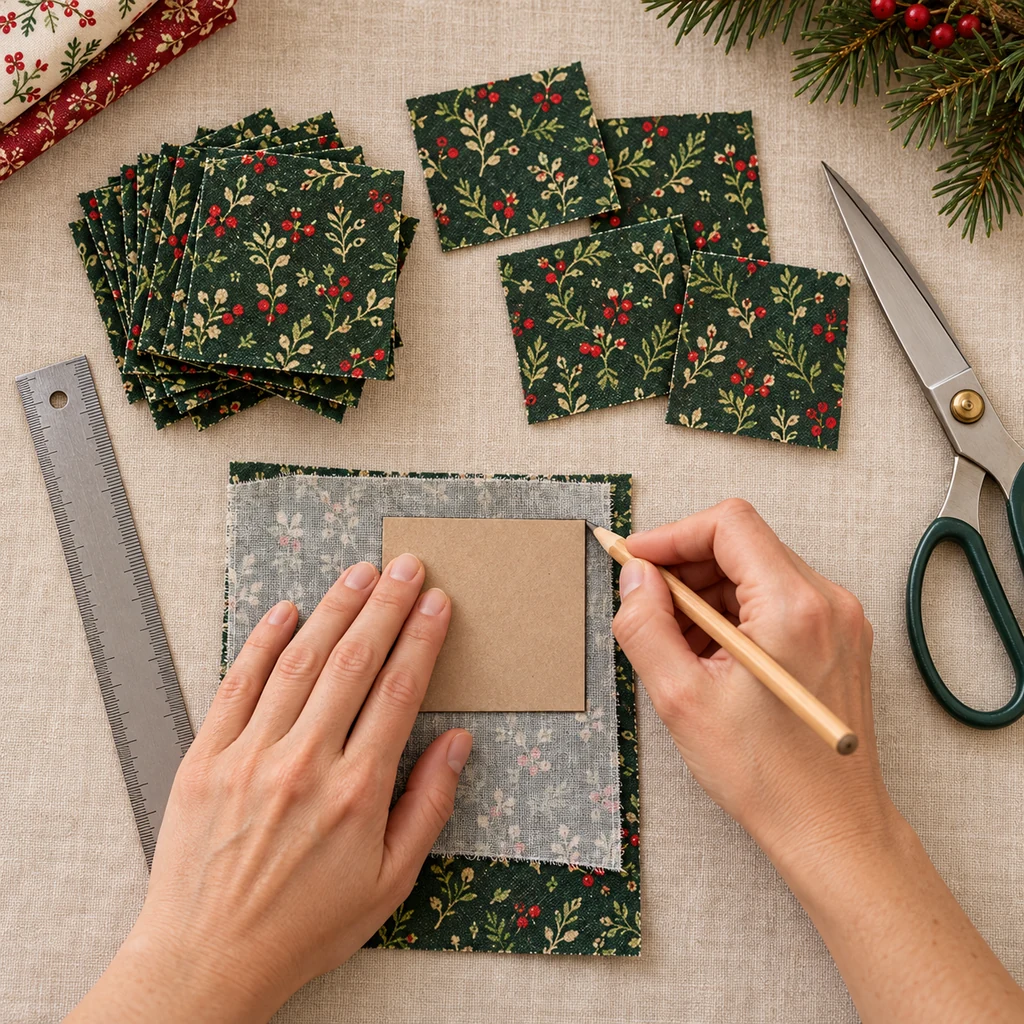
Press the fabric flat before measuring. Trace the 2-inch template on the wrong side, then cut directly on the lines. A 3 × 4-inch foam egg usually takes 60–70 squares; a wider form may need more.
For the cleanest striped pattern, divide the pieces evenly between two fabrics. Keep the squares in separate stacks and check that none are noticeably smaller. Even a 1/4-inch difference becomes visible once several rows are aligned.
Step 2 — Fold Every Square Into a Pointed Unit
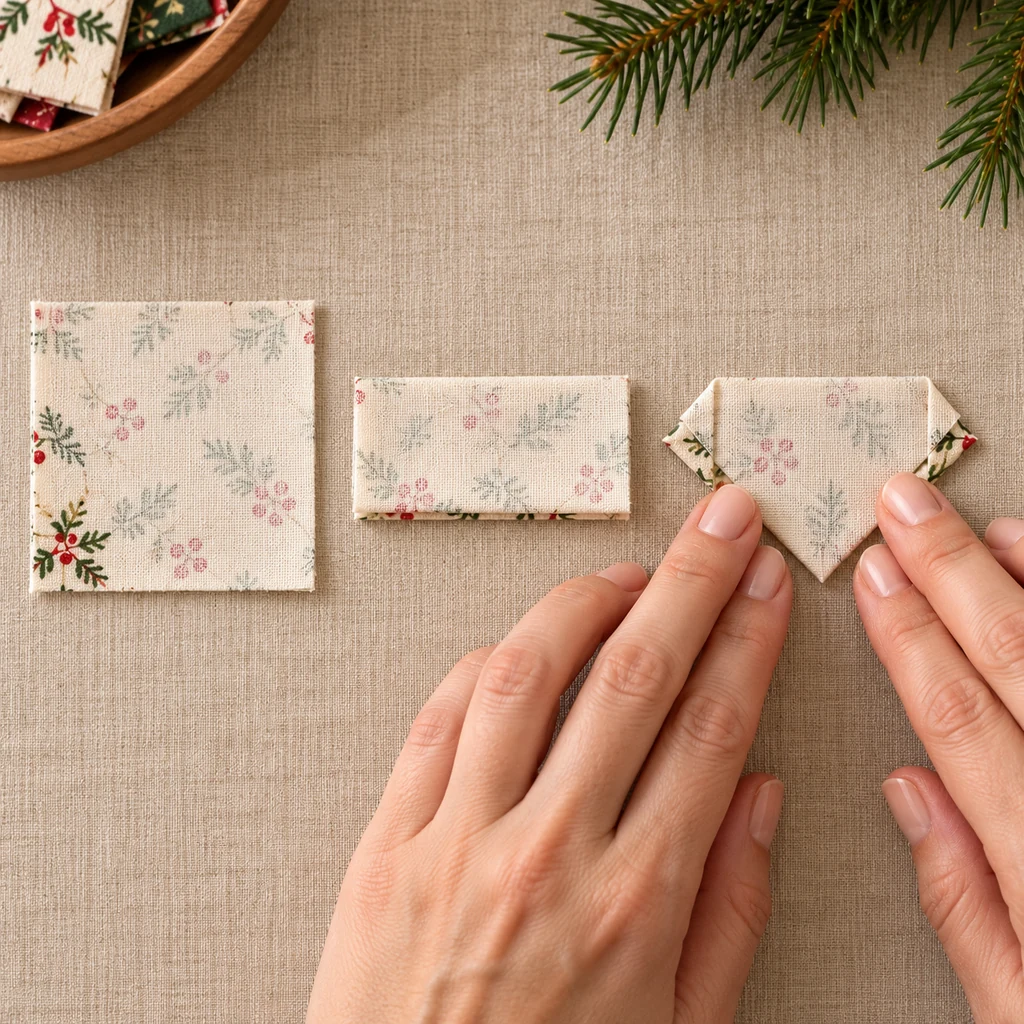
Place a square wrong-side up. Fold it in half horizontally, keeping the raw edges together. Bring the upper-left and upper-right corners down toward the midpoint of the lower edge to create a centered point. Finger-press the folds firmly.
Make the full stack before pinning. All pointed units should face the same way, with the folded layers on the back and the clean point at the bottom. If one piece twists or its point sits off-center, unfold it and correct it now.
Step 3 — Cap the Narrow Tip and Build the First Ring
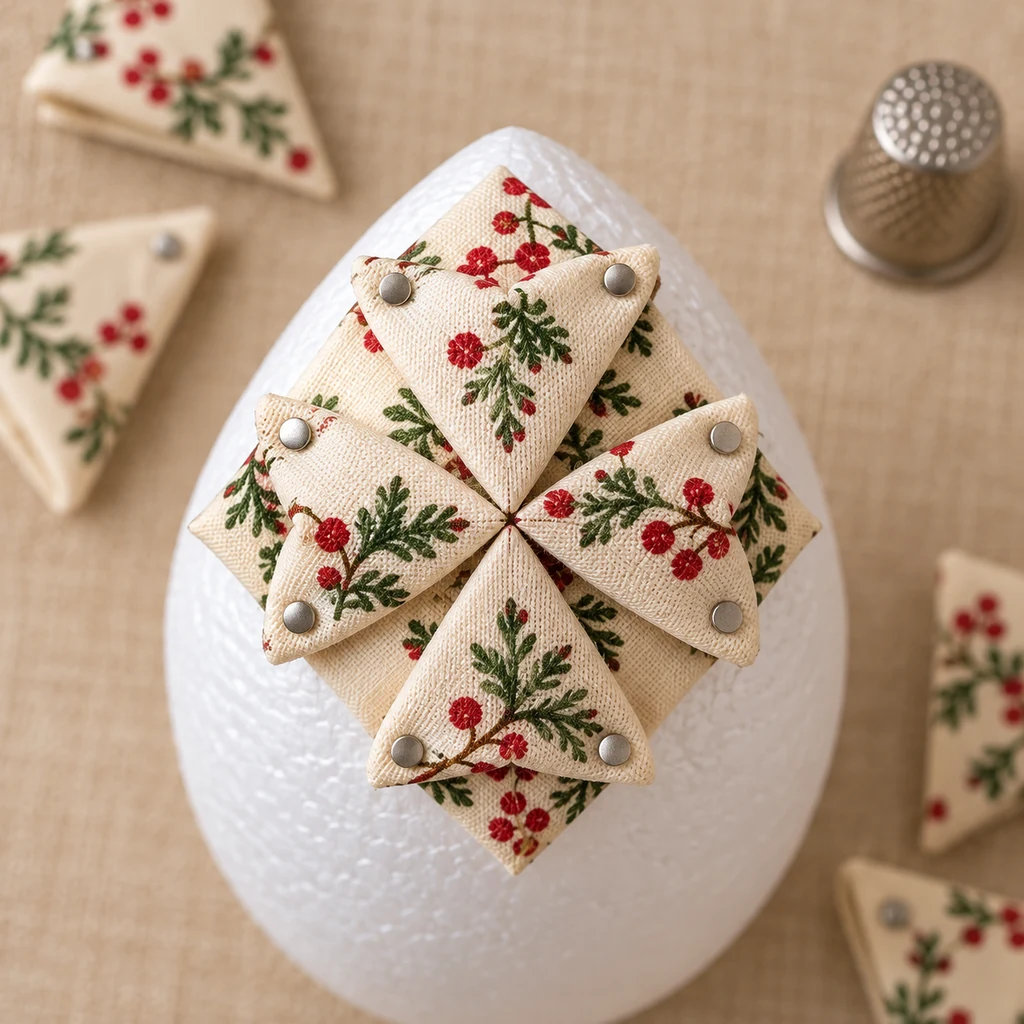
Lay one flat fabric square over the narrow end of the foam egg and pin its four corners. This cap prevents white foam from showing through the tiny opening where the first points meet.
Arrange four folded units at equal intervals around the tip. Aim all four points toward the same center and keep them at the same height. Pin each unit through its two folded upper corners. The units should meet without piling into a bulky knot.
Step 4 — Add Level, Staggered Rows
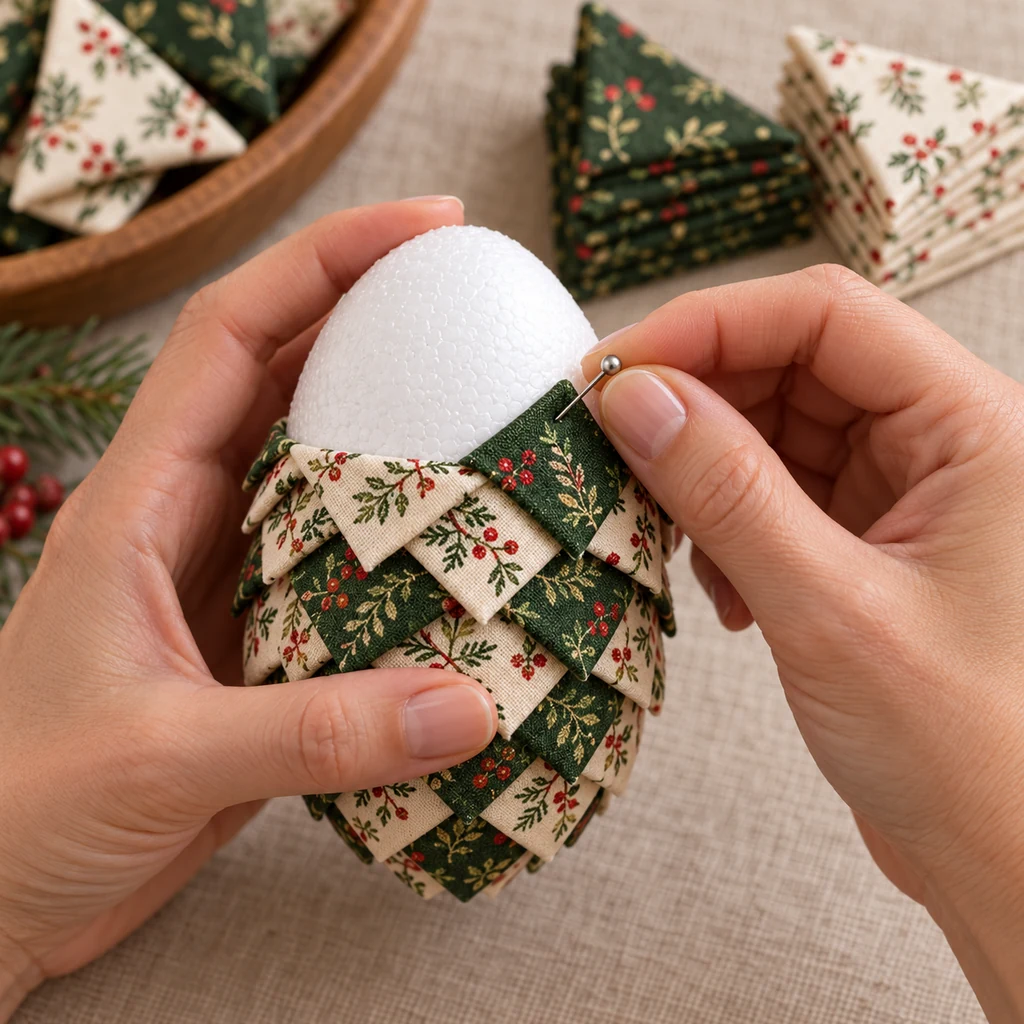
Start the second row about 1/2 inch (1.3 cm) below the first. Place each new point between two points in the row above, then secure the two upper corners. The lower point should cover the pinheads beneath it.
Continue toward the wide end, rotating the ornament after every piece instead of reaching across it. Check the row from all sides before moving down. If a row begins to spiral, remove the last few pins and reset them; adding more crooked pieces will exaggerate the problem.
The form becomes wider near the middle, so a row may need an additional folded unit. Add that piece gradually rather than leaving one large gap. Near the wide end, move the rows slightly closer together so the final edge remains easy to cover.
Step 5 — Close the Wide End and Add the Hanging Loop
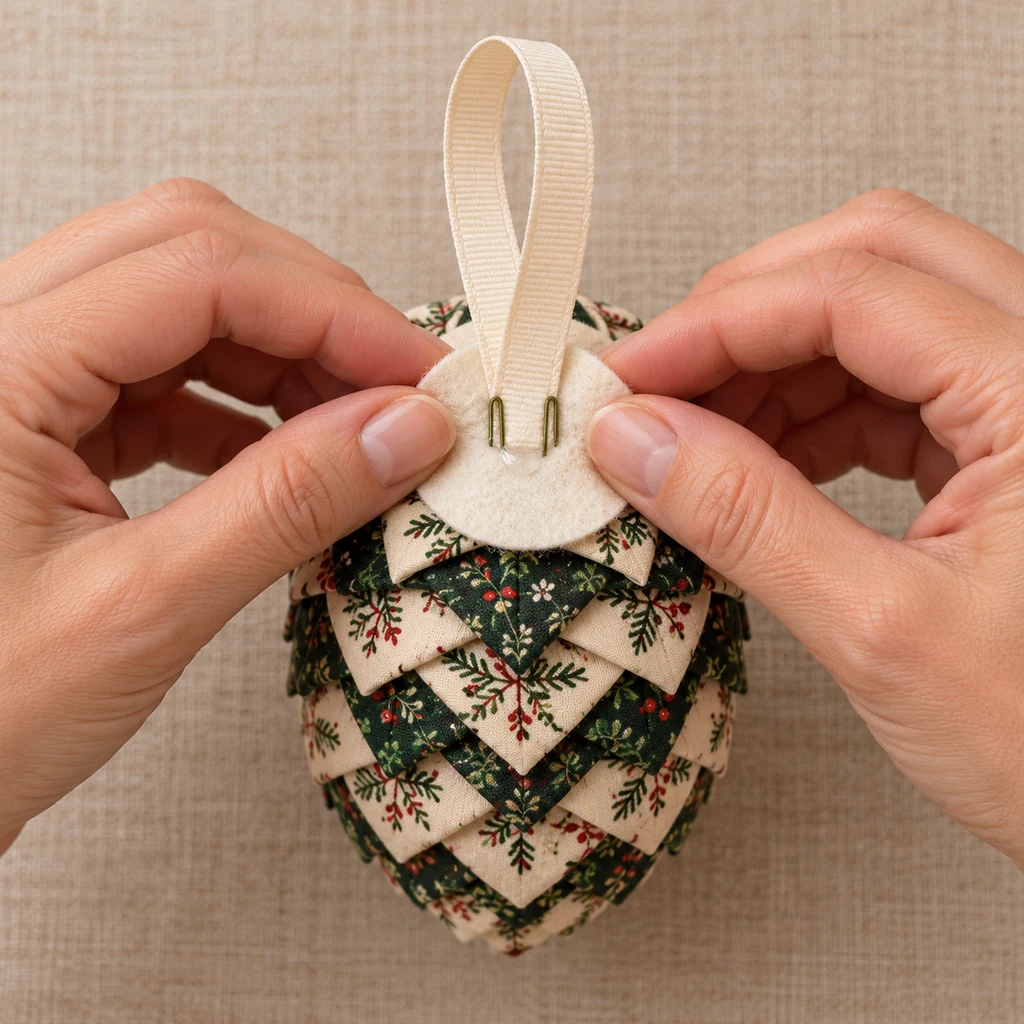
Continue the staggered pattern until the remaining opening is smaller than the felt circle. Trim the circle only if it can still cover every raw edge and visible pinhead.
Fold the ribbon in half to make one loop. Place both cut ends together at the center of the wide base and secure them with two U-shaped floral pins angled in opposite directions. Apply a thin film of foam-safe craft glue under the felt circle, position it over the ribbon ends and final fabric edges, and press gently.
Let the adhesive cure for the full time on its label before hanging the ornament. Do not rely on glue alone for the ribbon; the mechanical anchor provided by the floral pins carries the ornament’s weight.
Step 6 — Inspect the Ornament Before Hanging
Run a fingertip lightly over the surface without pushing under the folds. Every pinhead should sit flat and be covered by the next row. Tug the ribbon gently over a padded table. If the felt cap lifts or the loop shifts, remove it and rebuild the attachment instead of adding glue around the outside.
Hang the ornament where it will not be handled repeatedly. Store it in a rigid box with tissue between ornaments so the folded points are not crushed.
How to Keep the Rows Straight
- Mark four guide lines: draw faint pencil lines from tip to base at quarter points on the foam before covering it.
- Finish one complete row at a time: do not start the next row until the first and last points meet evenly.
- Measure the drop: use approximately 1/2 inch between rows, adjusting only slightly around the widest area.
- Rotate the form: turning the ornament keeps your working angle consistent.
- Step back often: view the piece upright every two rows to catch a spiral early.
Common Problems and Fixes
White Foam Shows Between the Points
The rows are too far apart or the pieces are not centered. Move the loose row upward until its points overlap the pinheads above. If the gap is only at the starting tip, lift the first ring and add a slightly larger flat fabric cap underneath.
The Ornament Looks Uneven on One Side
Count the folded units in the current row and compare the spacing around the form. Remove and redistribute that row while the pinheads are still accessible. Do not try to disguise a wide gap with one oversized piece.
The Fabric Frays at the Edges
Use tightly woven quilting cotton and sharp scissors. Mild edge fraying can be hidden beneath the next row, but heavily unraveling pieces should be replaced. Liquid fray products can darken fabric or react with foam, so test them on scraps away from the form.
The Ribbon Loop Feels Loose
Remove the felt cap and re-anchor both ribbon ends with two floral pins set at opposing angles. Confirm that the glue is foam-safe and fully cured. Never hang the ornament while the adhesive is still tacky.
Fabric and Color Variations
Use two small-scale prints for clear alternating rows, three solids for an ombre effect, or coordinated scraps for a patchwork pinecone. Large motifs tend to disappear inside the small folds, so choose tiny botanicals, dots, checks, or tone-on-tone patterns.
For another soft holiday project, try these no-sew felt mushroom ornaments. You can also pair the pinecones with paper bag stars that store flat, or use leftover cotton for reusable no-sew gift bags.
Frequently Asked Questions
Can I use a foam ball instead of an egg?
Yes, but the result will look like a quilted ball rather than a pinecone. The egg shape supplies the tapered silhouette, so it is the better form for this project.
Can I make this without straight pins?
This construction depends on pins to hold precise folds against a curved surface. Glue-only versions can shift while drying and may leave stiff, visible ridges. If sharp pins are unsuitable for your household, choose a different ornament method rather than hiding an insecure substitute inside the fabric.
How long does one ornament take?
Allow about 90 minutes to two hours for cutting, folding, and pinning your first 3 × 4-inch ornament, plus the adhesive’s labeled curing time. Making the folded pieces in batches speeds up later ornaments.
How should I store folded fabric ornaments?
Place each ornament in a small rigid box or divided ornament container. Add loose tissue around it without pressing down on the points, and keep the box dry and away from heat that could deform the foam.