
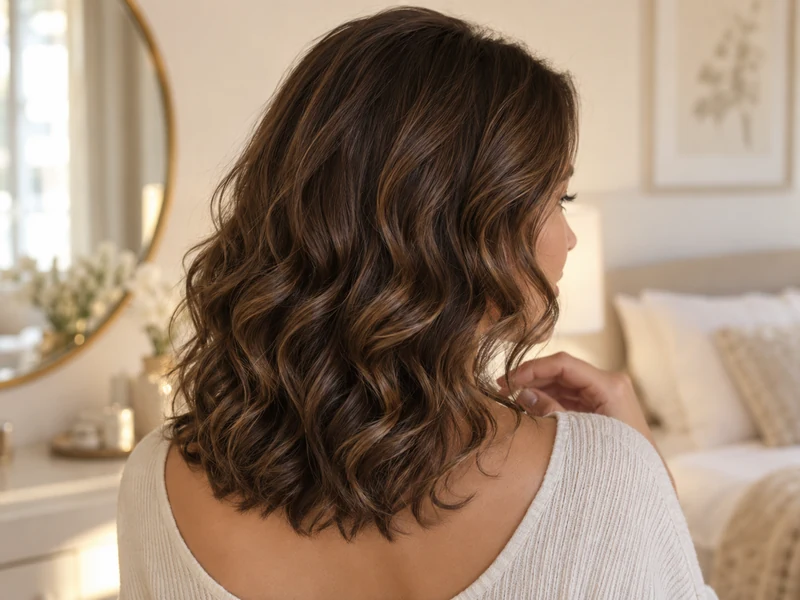
Heatless sock curls work best when each section stays flat, the ends are tucked smoothly, and the elastic secures the sock bundle instead of pinching the hair. This four-sock method creates soft waves while avoiding the two most common problems: a hard crease at the ends and uncomfortable pulling at the scalp.
Start with dry or nearly dry hair. If your hair needs moisture to hold a shape, mist only the lengths until they are barely damp—not wet. Results vary with hair texture, length, products, humidity, and the time the curls are allowed to set.
Why Sock Curls Get Creases
A crease usually comes from one of four things: a small elastic pressed directly against the hair, bunched-up ends, crossed strands in the wrap, or taking the curl down before the hair is completely dry. The solution is to wrap a wide, flat ribbon of hair, keep the final two inches smooth, and fasten a satin scrunchie around the sock-and-hair bundle.
Uneven curls have a similar cause. Sections that differ greatly in size or dampness set at different speeds. Four balanced sections make the result easier to repeat.
What You Need
- Four clean, soft crew socks of similar thickness and length
- Four satin or fabric-covered scrunchies
- A comb or detangling tool appropriate for your hair texture
- A spray bottle for a very light mist, if needed
- Optional: a small amount of lightweight mousse or styling foam
- Optional: a satin pillowcase for an overnight set
Use socks long enough for your hair to spiral down without stacking several layers in one spot. Avoid tiny uncovered elastics, which can create dents and snag the ends.
Heatless Sock Curls: Step-by-Step
Step 1 — Start With Dry or Nearly Dry Hair
Detangle gently using the method that suits your texture. Hair is more vulnerable to breakage when wet, so begin with dry hair or hair that is about 90–95% dry. If your hair will not hold a heatless shape when fully dry, lightly mist the mid-lengths and ends. They should feel barely damp, never saturated.
Distribute a small amount of lightweight mousse through the lengths if you need extra hold. Too much product can keep a dense section damp and make the finished wave stiff.
Step 2 — Divide the Hair Into Four Loose Sections
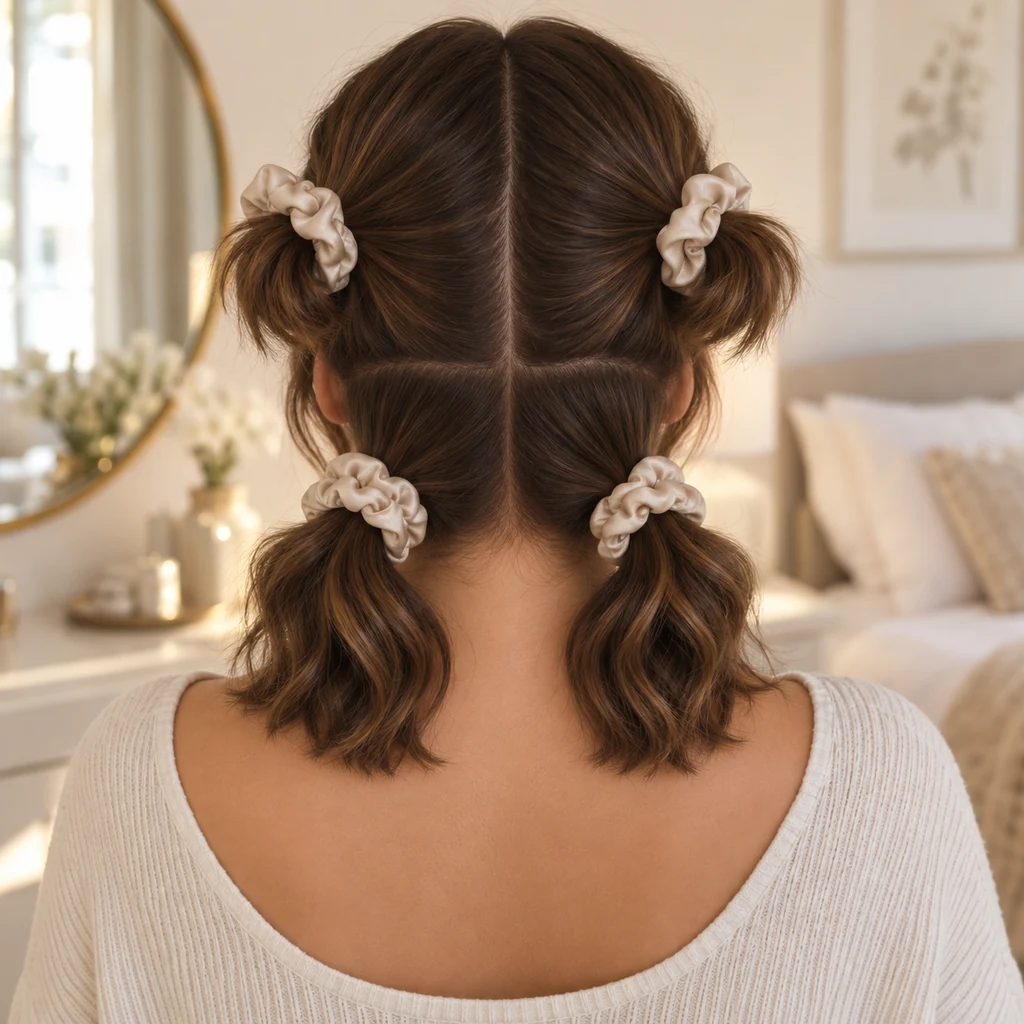
Make a center part from the hairline to the nape. Add a second, horizontal part from one side to the other, creating two upper sections and two lower sections. Secure each section loosely with a satin scrunchie while you work.
The sections do not need to be mathematically perfect, but their density should feel similar. If your hair is very thick and one section would form a bulky roll, use six socks instead of forcing too much hair around four.
Step 3 — Position the First Sock
Release one front section. Hold a sock vertically beside it, with the toe near the scalp and the cuff pointing toward the ends. Begin one or two inches away from the scalp for a softer root and a more comfortable set.
You can hold the sock in place with one hand while the other guides the hair. Do not clip it tightly to the roots; the setup should never pull the hairline.
Step 4 — Wrap a Flat Spiral Away From the Face
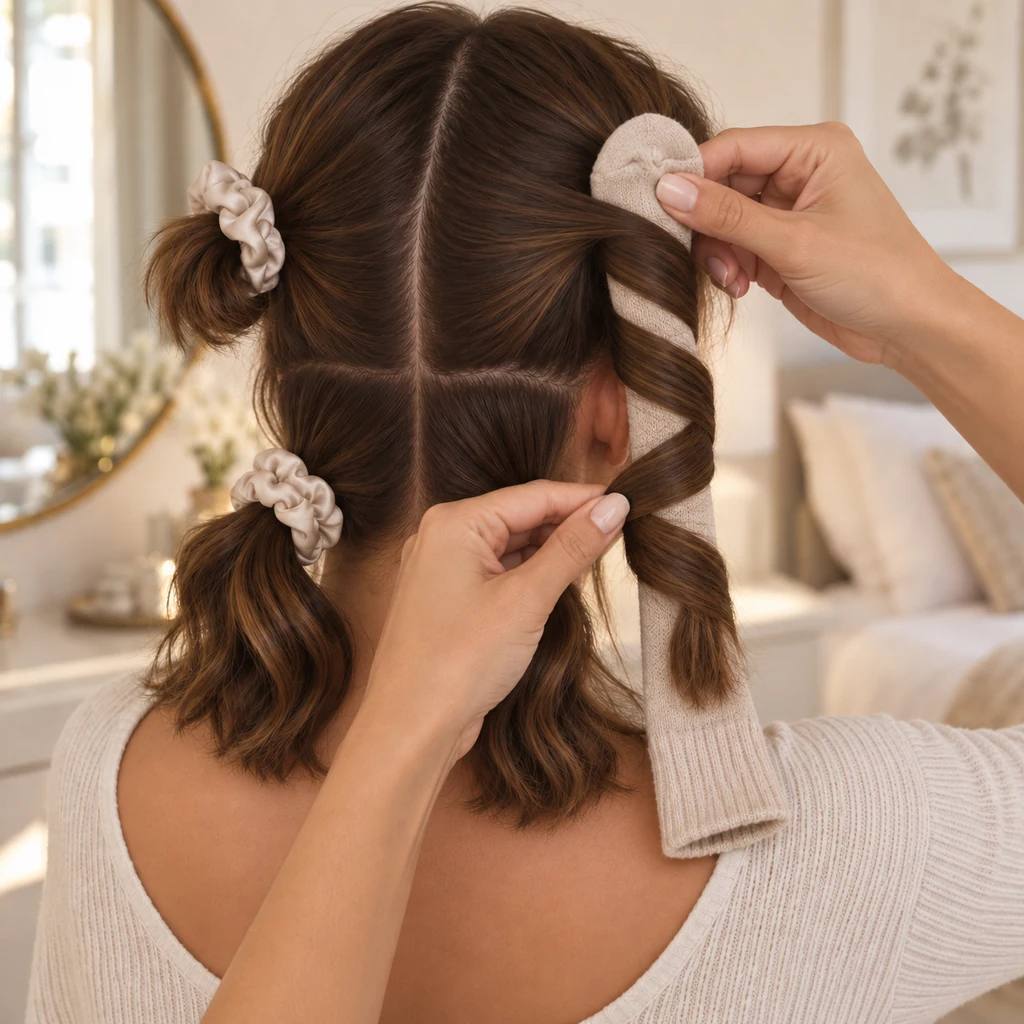
Spread the section into a flat ribbon and wrap it away from the face in an even spiral. Move downward after each turn so the hair does not overlap itself repeatedly. Keep the tension steady but gentle.
When you reach the final two inches, smooth the ends flat against the sock instead of folding them sharply. This small detail prevents the hook-shaped ends and elastic dents that make sock curls look creased.
Step 5 — Secure the Bundle, Not the Hair
Place a satin scrunchie around the sock and the wrapped hair together, just below the ends. The fabric should hold the roll without pressing a narrow line directly into the hair. If the sock is very loose, tie its ends once around the bundle without pulling the knot toward the scalp.
Step 6 — Repeat Without Scalp Tension
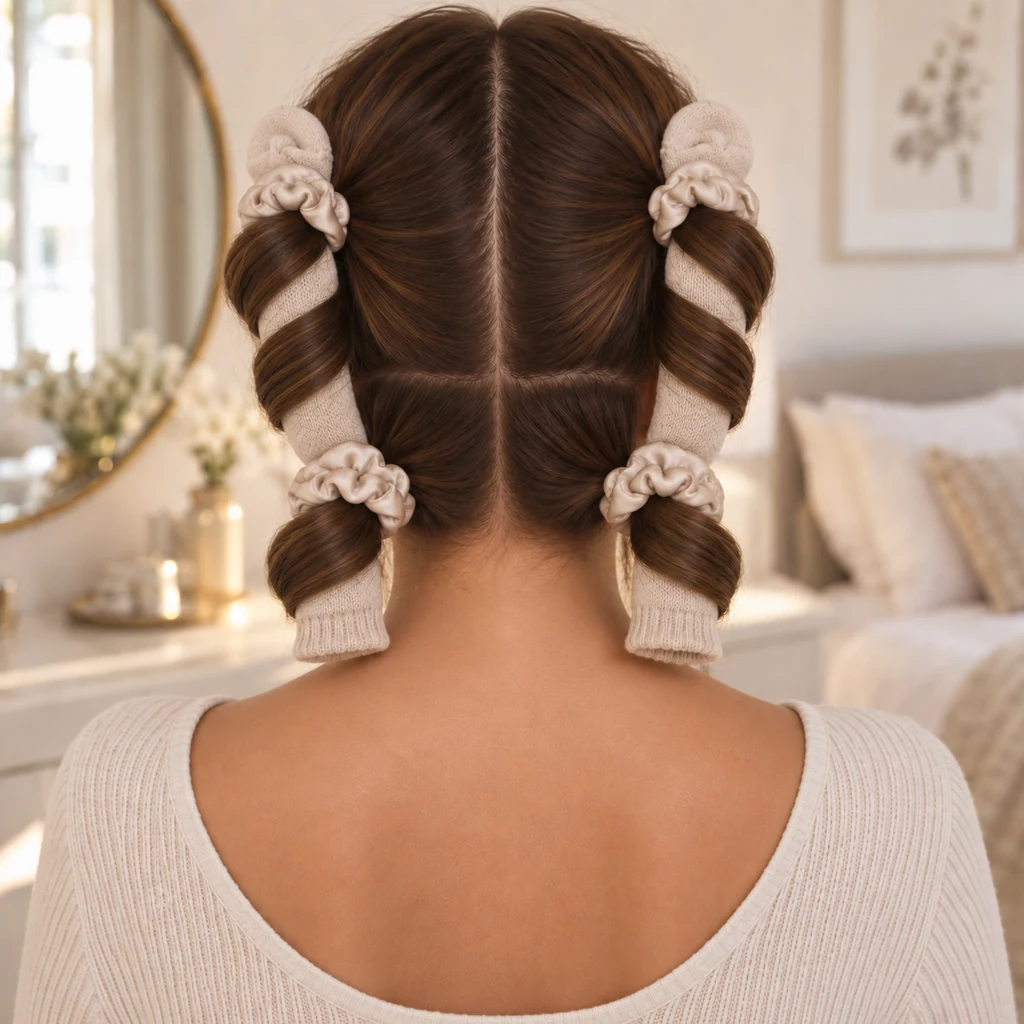
Wrap the remaining three sections the same way. Direct the front sections away from the face for an open shape. Use the same spiral spacing and similar tension on each sock.
Check comfort before leaving the set in place. If you feel pain, stinging, numbness, a headache, or visible pulling at the roots, remove that bundle and redo it more loosely. A heatless style should not hurt.
Step 7 — Let the Hair Dry Completely
Leave the curls undisturbed until every section is fully dry. Four to eight hours is a useful planning range, but dense hair, large sections, product, and humidity can require more time. Check the thickest part of a lower bundle rather than judging by the exposed ends.
A daytime set is the safest option if your hair is more than barely damp. If you wear the socks overnight, the hair and scalp should be essentially dry before bed. Sleeping with wet hair can increase friction and breakage, and a damp scalp may stay uncomfortable for hours.
Step 8 — Unwrap and Separate Gently
Remove each scrunchie and unwind the hair from the bottom upward; do not pull the sock straight out. Let the four curls rest for a minute, then separate them with your fingers. For softer waves, divide each curl into two or three pieces.
Avoid brushing immediately, which can turn fresh definition into frizz. If the roots look too uniform, loosen them lightly with fingertips. For more everyday no-heat options, see these easy heatless hairstyles.
Four Details That Prevent Sock-Curl Creases
- Lay the ends flat: smooth the last two inches against the sock instead of folding or crumpling them.
- Keep elastics off bare hair: secure the combined sock-and-hair bundle with a fabric-covered scrunchie.
- Use an even downward spiral: crossed strands and thick overlaps create ridges and slow drying.
- Wait until fully dry: a cool or damp center will drop quickly and may hold an unintended bend.
Adjust the Method for Your Hair
| Hair behavior | Best adjustment | Avoid |
|---|---|---|
| Fine or easily weighed down | Use almost-dry hair, very little mousse, and four smaller sections | Heavy creams or soaking the hair |
| Thick or dense | Set during the day; use six socks if four bundles are too bulky | Taking the set down while the center is damp |
| Very straight or resistant | Use a light mist and flexible-hold mousse; make slightly smaller sections | Adding more tension at the scalp |
| Wavy | Follow the natural bend and use four even sections | Brushing the finished curls immediately |
| Curly or coily | Detangle according to your normal routine and wrap gently from a stretched or smoothed state if desired | Dry brushing or forcing a tight wrap |
Hair above chin length may not complete enough turns around a crew sock. In that case, smaller foam rollers or another short-hair method will be easier to secure without tension.
Troubleshooting Sock Curls
The Ends Have a Dent
Move the scrunchie so it surrounds the sock bundle rather than the bare ends. On the next set, smooth the ends flat and continue wrapping until they are completely supported.
The Curls Fall Within an Hour
Confirm that the center of each wrap was dry before removal. Then try slightly smaller sections or a little more lightweight mousse. More product is not always better; a damp, coated center often drops faster.
One Side Is Tighter
Match the section size, spiral spacing, moisture level, and tension from side to side. A smaller or more tightly wound section produces a tighter curl.
The Roots Look Flat
Start the wrap one to two inches from the scalp rather than dragging the section downward before the first turn. After removal, separate the roots gently with fingertips. For a quick second-day option, try one of these easy claw clip hairstyles.
The Result Is Frizzy
Use less water, detangle more gently, keep every wrap flat, and separate with fingers only after the curl has settled. Frizz can also increase when the hair is unwrapped before it is dry.
Frequently Asked Questions
Can I do sock curls on completely dry hair?
Yes. Fine, porous, or naturally shape-holding hair may set well when dry, especially with a small amount of lightweight styling foam. Resistant hair may need a very light mist through the lengths.
How many socks should I use?
Four works well for many people with shoulder-length or longer hair. Use six if your hair is very dense or if a four-section bundle is too thick to dry completely. Larger sections make looser waves; smaller sections make more defined curls.
Should I roll the socks up like donuts?
No. For this method, keep each sock long and vertical so the hair can travel downward in a flat spiral. Rolling the sock into a compact shape encourages overlapping layers and bulky bends.
How long do sock curls last?
Hold time depends on texture, weather, products, and how completely the hair dried. A light styling foam and smaller sections can improve hold, but no heatless method gives the same duration for every head of hair.
Are sock curls better than a curling iron?
They solve a different problem. Sock curls avoid hot-tool exposure and can set while you do other things, but they need more time and produce less predictable results. When you want controlled hot-tool curls instead, follow a heat-protective routine such as this soft flat-iron curl guide.