
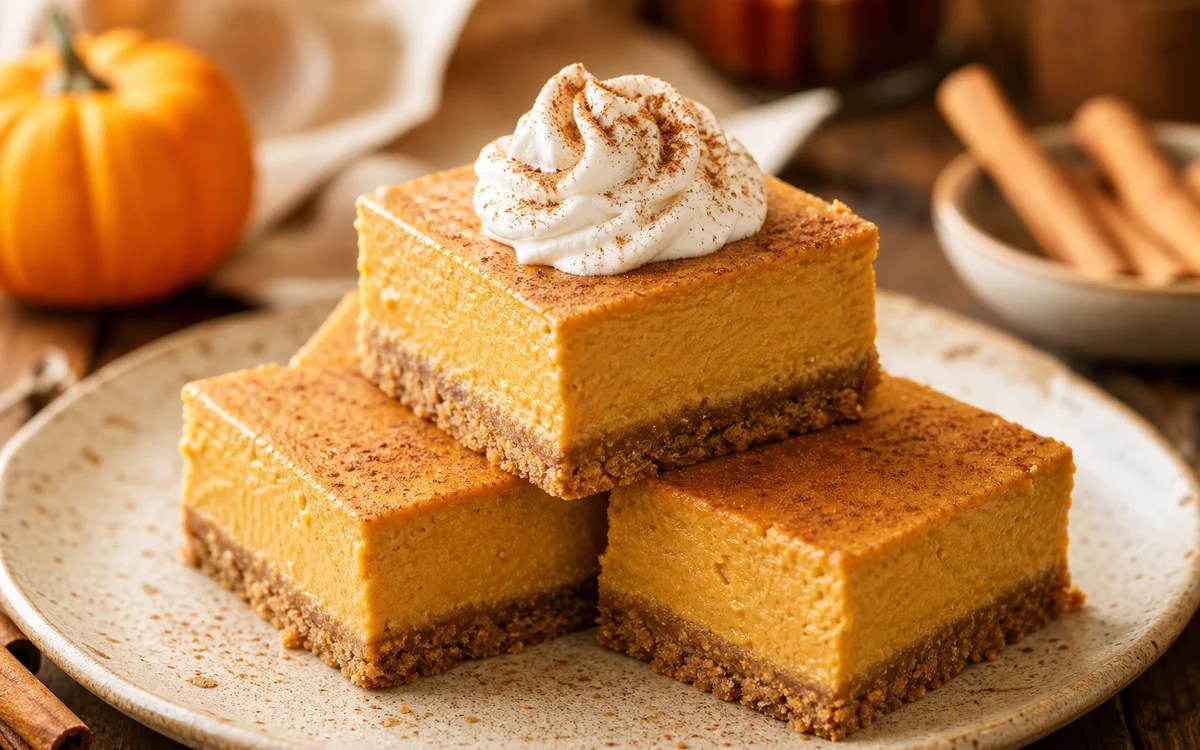
There is a specific weekend every October when the light goes gold in my kitchen and I get the itch to bake something with pumpkin in it. For years that meant a full cheesecake, which is lovely but fussy, or a pumpkin pie that never quite feeds a crowd. Then I started making pumpkin cheesecake bars, and honestly I have not looked back. They give you everything you love about a rich, spiced cheesecake, but baked in a simple 9×13 pan, chilled, and sliced into neat squares you can hand out at a party without a single fork-related crisis.
RECIPE CARD
Pumpkin Cheesecake Bars
Timing and serving details are shown only when they are available in the original recipe.
Ingredients
- 2 cups graham cracker crumbs (about 15 full sheets)
- 1/3 cup granulated sugar
- 1/2 teaspoon ground cinnamon
- 1/4 teaspoon salt
- 7 tablespoons unsalted butter, melted
- 16 oz (two 8 oz blocks) full-fat cream cheese, softened to room temperature
- 1 cup pure pumpkin puree (not pumpkin pie filling)
- 3/4 cup granulated sugar
- 1/4 cup packed light brown sugar
- 2 large eggs, room temperature
- 1/4 cup sour cream, room temperature
- 1 tablespoon all-purpose flour
- 2 teaspoons pure vanilla extract
- 1 1/2 teaspoons ground cinnamon
- 1/2 teaspoon ground ginger
- 1/4 teaspoon ground nutmeg
- 1/8 teaspoon ground cloves
Quick Method
Condensed overview. Use Full Instructions for the complete method, timing and doneness details.
- Start by preheating your oven to 325°F and lining your 9x13 pan with parchment paper, leaving an overhang on the two long sides. That…
- Make and press the graham cracker crust: In a medium bowl, stir together the graham cracker crumbs, sugar, cinnamon, and salt. Pour in the melted butter and mix until the crumbs…
- Mix the pumpkin cheesecake filling: In a large bowl, beat the softened cream cheese on medium speed until completely smooth and creamy, about 2 minutes. Scrape down the sides,…
- Assemble and pour over the crust: Pour the pumpkin cheesecake filling over the warm baked crust. Use a rubber spatula to spread it into an even layer all the way…
- Bake until just set: Bake at 325°F for 40 to 48 minutes. You are looking for edges that are set and slightly puffed, with a center that still…
- Cool and chill: Remove the pan to a wire rack and let it cool to room temperature, about 1 hour. Then cover loosely and refrigerate for at…
- Slice and serve: Once fully chilled, use the parchment handles to lift the whole slab onto a cutting board. For bakery-clean edges, use a sharp knife dipped…
The first time I brought a tray of these to a friendsgiving, they disappeared before the turkey was carved. That is the magic of a good pumpkin dessert bar: buttery graham cracker crust on the bottom, silky pumpkin cheesecake on top, and just enough warm spice to make the whole room smell like fall. This is the fall dessert recipe I make on repeat, and I have baked it enough times to know exactly where people go wrong. I will walk you through all of it so yours come out perfect the very first time.
If you have been intimidated by cheesecake before, take a breath. These are genuinely easy cheesecake bars. No springform pan, no complicated water bath required, and the bar format is far more forgiving than a tall round cheesecake. Let me show you how it is done.
At a Glance
- Prep time: 20 minutes
- Chill time: 4 hours (or overnight)
- Bake time: 45 minutes
- Total time: about 5 hours 5 minutes (mostly hands-off chilling)
- Serves: 16 to 24 bars
- Skill level: Easy to intermediate
- Pan size: 9×13 inch baking pan
Why You’ll Love These Pumpkin Cheesecake Bars
- Crowd-friendly: One 9×13 pan yields up to two dozen bars, which is perfect for potlucks, holidays, and bake sales.
- Make-ahead friendly: They actually taste better the next day, so you can bake them the day before your event.
- No springform pan needed: Just a regular baking pan lined with parchment.
- That crust: Buttery, slightly salty graham cracker crust that holds together beautifully under the creamy filling.
- Warm fall spice: Real cinnamon, ginger, nutmeg, and clove, not a flat one-note pumpkin flavor.
- Portable and neat: Bars slice cleanly and travel far better than a fragile whole cheesecake.
Ingredients
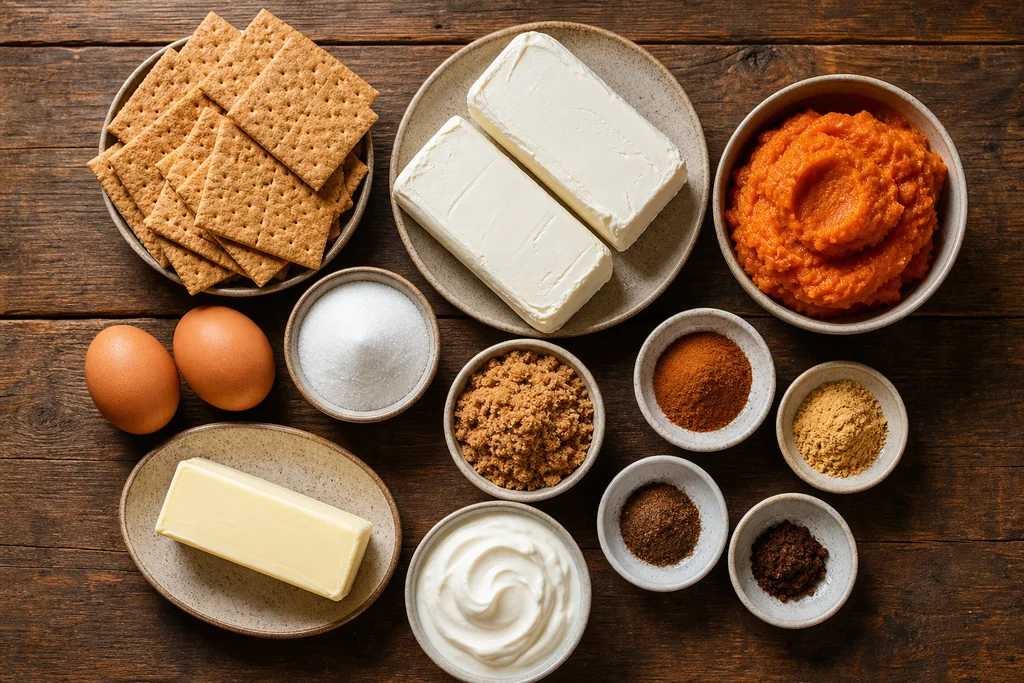
Everything here is easy to find at a regular grocery store. Measure it all out before you start; cheesecake batter comes together fast and you do not want to be hunting for the nutmeg mid-mix.
For the Graham Cracker Crust
- 2 cups graham cracker crumbs (about 15 full sheets)
- 1/3 cup granulated sugar
- 1/2 teaspoon ground cinnamon
- 1/4 teaspoon salt
- 7 tablespoons unsalted butter, melted
For the Pumpkin Cheesecake Filling
- 16 oz (two 8 oz blocks) full-fat cream cheese, softened to room temperature
- 1 cup pure pumpkin puree (not pumpkin pie filling)
- 3/4 cup granulated sugar
- 1/4 cup packed light brown sugar
- 2 large eggs, room temperature
- 1/4 cup sour cream, room temperature
- 1 tablespoon all-purpose flour
- 2 teaspoons pure vanilla extract
- 1 1/2 teaspoons ground cinnamon
- 1/2 teaspoon ground ginger
- 1/4 teaspoon ground nutmeg
- 1/8 teaspoon ground cloves
- 1/4 teaspoon salt
Pro tip: Room temperature cream cheese is not optional, it is the single most important step for a smooth, lump-free filling. Set your cream cheese, eggs, and sour cream on the counter about an hour before you bake. Cold cream cheese never fully blends and leaves you with tiny white lumps that no amount of mixing will fix.
Equipment
- 9×13 inch baking pan
- Parchment paper
- Large mixing bowl
- Electric hand mixer or stand mixer
- Medium bowl for the crust
- Measuring cups and spoons
- Flat-bottomed glass or measuring cup (for pressing the crust)
- Rubber spatula
Step-by-Step Instructions
Start by preheating your oven to 325°F and lining your 9×13 pan with parchment paper, leaving an overhang on the two long sides. That overhang becomes handles later, letting you lift the whole slab out for clean slicing.
Step 1: Make and press the graham cracker crust
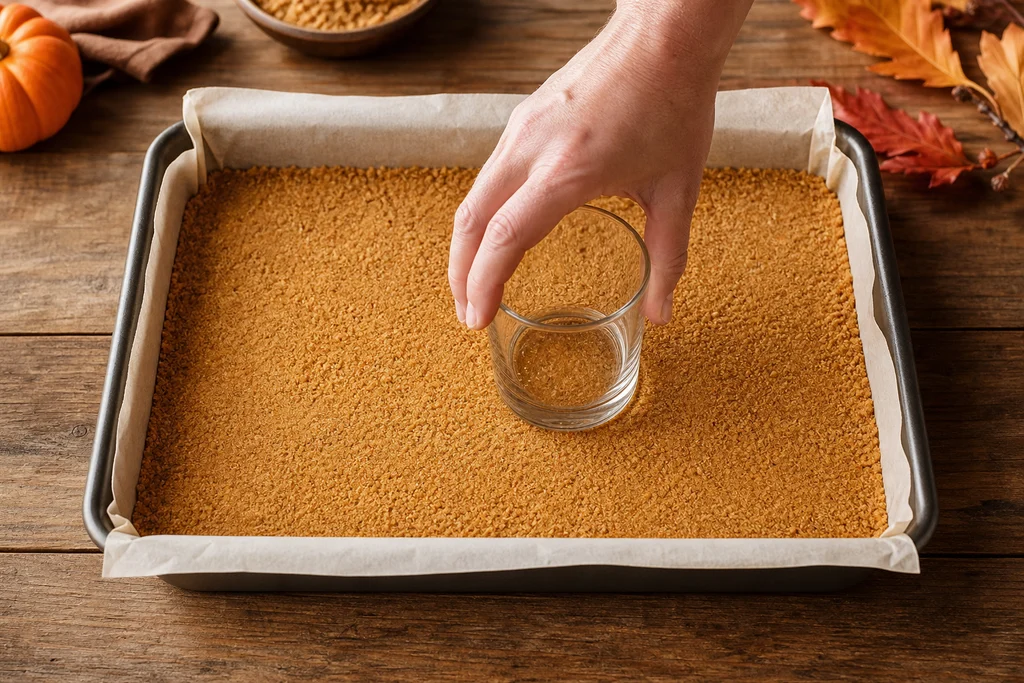
In a medium bowl, stir together the graham cracker crumbs, sugar, cinnamon, and salt. Pour in the melted butter and mix until the crumbs look like damp sand and hold together when you pinch them. Tip the mixture into your lined pan and spread it evenly. Use the flat bottom of a glass or measuring cup to press it firmly and compactly across the entire pan. Press hard: a well-compacted crust is what keeps your bars from falling apart. Bake the crust alone for 10 minutes, then set it aside while you make the filling. Leave the oven on.
Step 2: Mix the pumpkin cheesecake filling
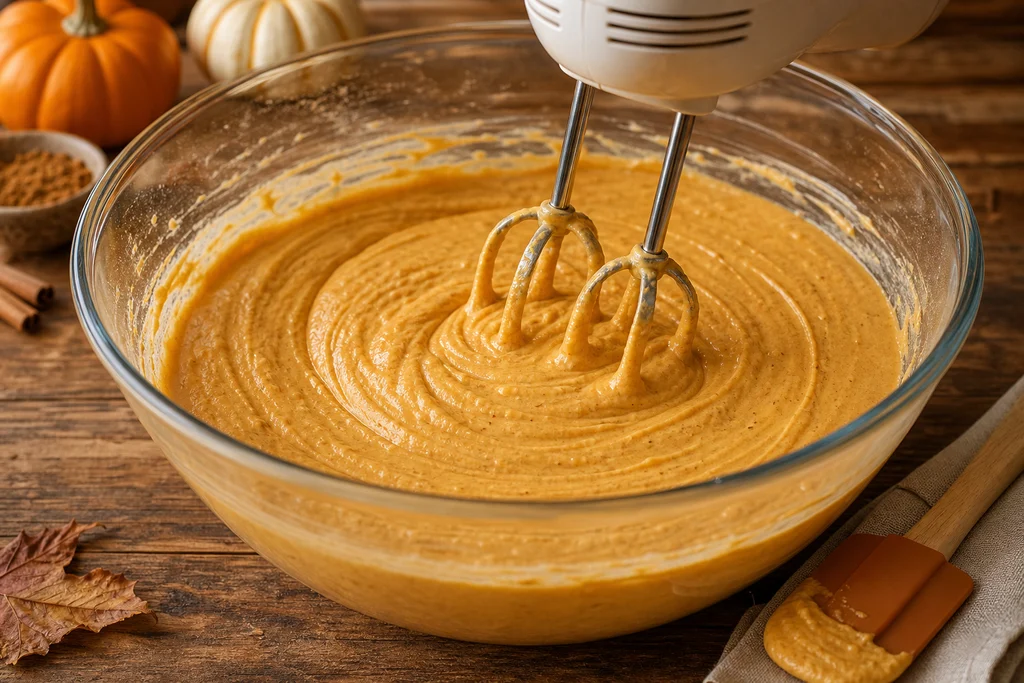
In a large bowl, beat the softened cream cheese on medium speed until completely smooth and creamy, about 2 minutes. Scrape down the sides, then add both sugars and beat again until fluffy. Add the pumpkin puree, sour cream, vanilla, flour, cinnamon, ginger, nutmeg, cloves, and salt, and mix on low until just combined. Finally, add the eggs one at a time, mixing on low speed only until each disappears into the batter. Do not overbeat once the eggs go in; whipping too much air into the batter is a leading cause of cracks.
Step 3: Assemble and pour over the crust
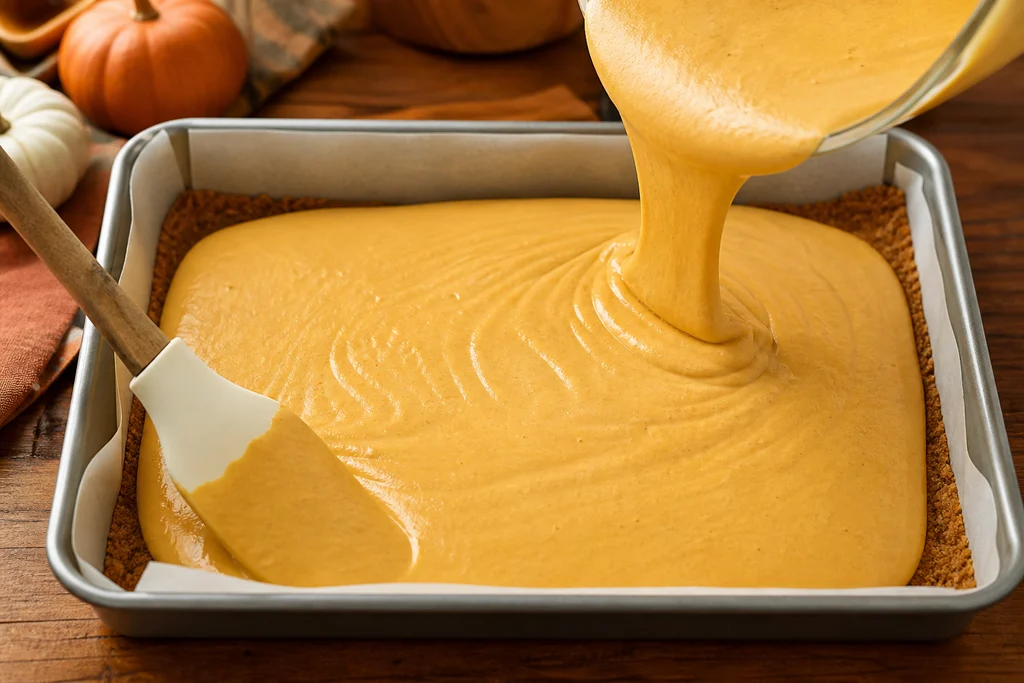
Pour the pumpkin cheesecake filling over the warm baked crust. Use a rubber spatula to spread it into an even layer all the way to the corners. Give the pan a gentle tap on the counter a couple of times to release any large air bubbles trapped near the surface. Smooth the top one more time so your bars bake up flat and pretty.
Step 4: Bake until just set
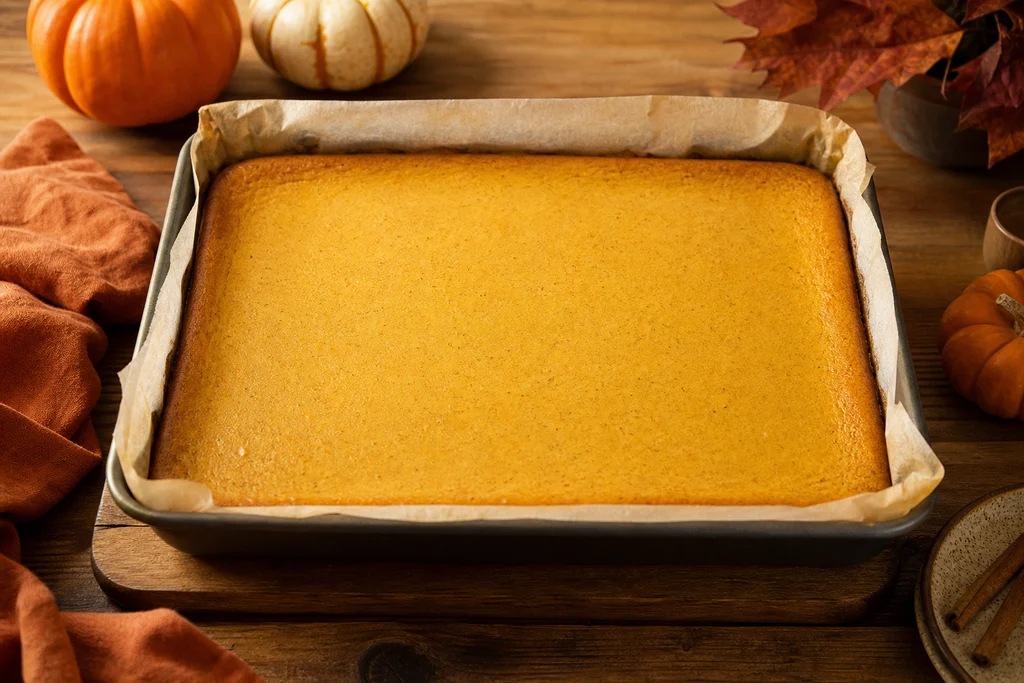
Bake at 325°F for 40 to 48 minutes. You are looking for edges that are set and slightly puffed, with a center that still has a gentle jiggle when you nudge the pan, similar to set gelatin. It should not look wet or liquidy, but it should not be firm and cracked either. The residual heat will finish cooking the center as it cools. When it is ready, turn off the oven, crack the door open, and let the cheesecake sit inside for 15 minutes to cool gradually.
Step 5: Cool and chill
Remove the pan to a wire rack and let it cool to room temperature, about 1 hour. Then cover loosely and refrigerate for at least 4 hours, though overnight is best. This chilling step is non-negotiable: it is what sets the filling into that dense, sliceable cheesecake texture. Warm cheesecake bars will slump and smear no matter how well you baked them.
Step 6: Slice and serve
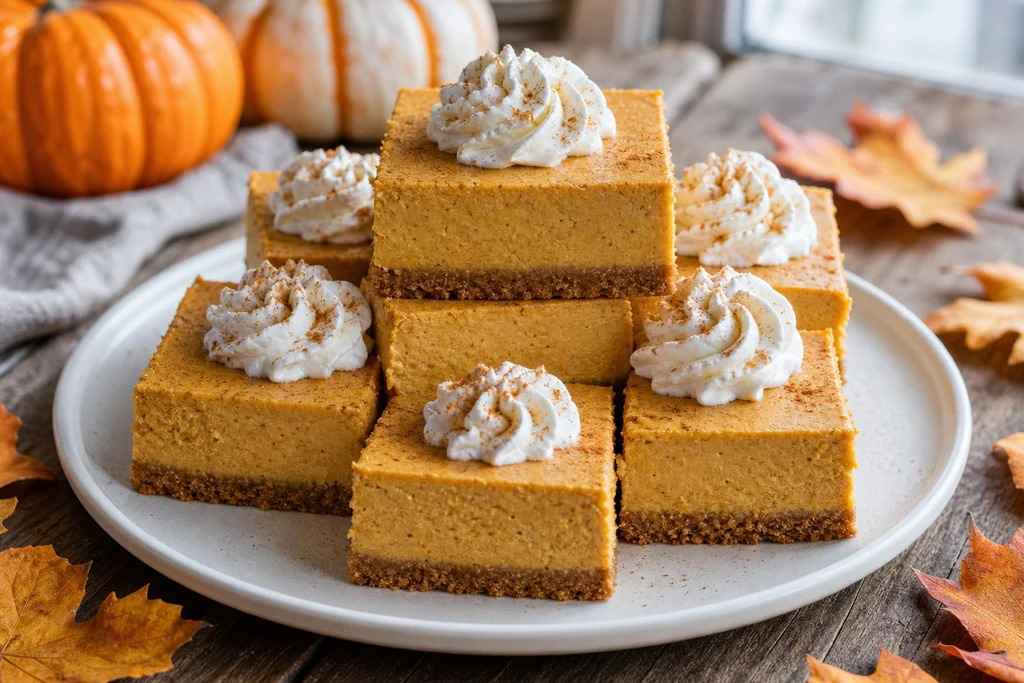
Once fully chilled, use the parchment handles to lift the whole slab onto a cutting board. For bakery-clean edges, use a sharp knife dipped in hot water and wiped dry between each cut. Slice into 16 generous bars or 24 smaller squares. Finish with a swirl of whipped cream and a dusting of cinnamon just before serving.
Tips for the Best Pumpkin Cheesecake Bars
- Blot your pumpkin: Canned pumpkin can be watery. Pat the measured puree with a paper towel to remove excess moisture for a firmer, less soggy filling.
- Everything at room temperature: Cream cheese, eggs, and sour cream should all sit out first. Cold ingredients equal lumps.
- Mix on low once eggs are in: Too much air is the enemy of a smooth top.
- Do not overbake: A slight jiggle in the center is exactly right. It firms up in the fridge.
- Be patient with chilling: The bars are not done until they are cold. Rushing this ruins the texture.
- Clean knife, every cut: Hot water plus a dry wipe gives you sharp, professional slices.
Storage, Freezing, and Make-Ahead
Refrigerator: Store the bars in an airtight container in the fridge for up to 5 days. They keep their texture beautifully and, if anything, the flavor deepens after a day.
Make-ahead: These are a dream to prep in advance. Bake and chill them a full day before you need them, then slice and garnish right before serving.
Freezing: Pumpkin cheesecake bars freeze wonderfully. Slice them first, then wrap each bar in plastic wrap and tuck them into a freezer-safe container or zip-top bag. They keep for up to 2 months. Thaw overnight in the fridge, and add fresh whipped cream after thawing rather than before.
Substitutions and Variations
- Gingersnap crust: Swap the graham crumbs for crushed gingersnap cookies for a spicier, deeper base that pairs gorgeously with pumpkin.
- Gluten-free: Use gluten-free graham crackers or gluten-free gingersnaps, and swap the tablespoon of flour for cornstarch.
- Caramel drizzle: A ribbon of salted caramel over the chilled bars turns these into a genuine showstopper.
- Mini bars: Cut smaller squares for a dessert table where guests want just a bite or two.
- Spice level: Prefer a bolder flavor? Bump the cinnamon to 2 teaspoons or add an extra pinch of ginger. Want it mellow? Use a store-bought pumpkin pie spice blend at 2 teaspoons total.
- Pecan crunch: Fold 1/2 cup of chopped toasted pecans into the crust for texture.
Serving Suggestions
These bars are lovely all on their own, but a little extra never hurts. Top each square with lightly sweetened whipped cream and a dusting of cinnamon, or add a drizzle of caramel and a sprinkle of toasted pecans. They are wonderful alongside a mug of hot spiced cider, a strong cup of coffee, or a small glass of bourbon for the grown-up table. For a holiday dessert spread, arrange them next to a plate of cookies and a bowl of fresh berries so there is something for everyone.
Frequently Asked Questions
Can I use canned pumpkin, and is it different from pumpkin pie filling?
Use pure pumpkin puree, which is 100 percent cooked pumpkin with nothing added. Pumpkin pie filling is already sweetened and heavily spiced, so it will throw off the sugar and spice balance in this recipe. Always check the label; the two cans often sit right next to each other.
Why did my cheesecake crack?
Cracks usually come from three things: overbeating the batter after adding the eggs, overbaking, or cooling too fast. Mix on low once the eggs go in, pull the pan while the center still jiggles slightly, and let it cool gradually in the turned-off oven. The good news is that with bars, a little crack is easy to hide under whipped cream.
How do I know when the bars are set?
The edges should look set and slightly puffed while the center still wobbles gently like soft gelatin when you nudge the pan. It should not look wet or soupy. If the whole surface is firm and starting to crack, it is slightly overbaked, though it will still taste great.
Do I need a water bath?
No. One of the best things about the bar format is that you can skip the water bath entirely. The shallower layer bakes evenly, and cooling in the turned-off oven plus a proper chill gives you a smooth, creamy result without the hassle of wrapping a pan in foil.
How far ahead can I make them?
You can bake them up to 2 days ahead and keep them covered in the fridge, or freeze them for up to 2 months. In fact, making them the day before is ideal, since the flavor and texture are best after a good long chill.
Can I freeze pumpkin cheesecake bars?
Yes, and they freeze beautifully. Slice them first, wrap each bar individually, and store in a freezer-safe container for up to 2 months. Thaw overnight in the refrigerator and add any whipped cream or garnish after thawing.
Final Thoughts
These pumpkin cheesecake bars have earned their spot as my go-to fall dessert, and I have a feeling they will do the same in your kitchen. They are creamy, warmly spiced, easy to transport, and forgiving enough for beginners while still impressing a crowd. Best of all, one simple 9×13 pan feeds a whole gathering with barely any fuss.
If you give these a try, I would love to hear how they turned out. Leave a comment below with your favorite variation, whether that is a gingersnap crust or an extra drizzle of caramel, and let me know if you added your own twist. Happy baking, and enjoy every last buttery, spiced bite.