If you’ve ever found yourself craving a warm, flavorful side dish that’s quick, easy, and oh-so-delicious, you’re in for a treat. Golden Garlic Instant Pot Potatoes are exactly what you need! I remember the first time I tried making these—they were a complete game-changer for me. After a long day, the last thing I wanted was to spend hours in the kitchen, but these golden, garlicky potatoes came together in just 20 minutes. Let me tell you, my family devoured them faster than I could serve!
So, why not bring a little flavor-packed joy to your dinner table with this simple yet stunning dish?
Why Choose Golden Garlic Instant Pot Potatoes?
Potatoes are already a beloved side dish, but when combined with garlic and prepared in the Instant Pot, they take on a whole new level of flavor. If you’re short on time but don’t want to sacrifice taste, this is your go-to recipe! The Instant Pot makes cooking faster, while the golden garlic gives the potatoes a mouthwatering aroma and richness.
In this post, I’ll show you how to make these Golden Garlic Instant Pot Potatoes and share some tips and tricks to get them just right every time.
Ingredients for Golden Garlic Instant Pot Potatoes
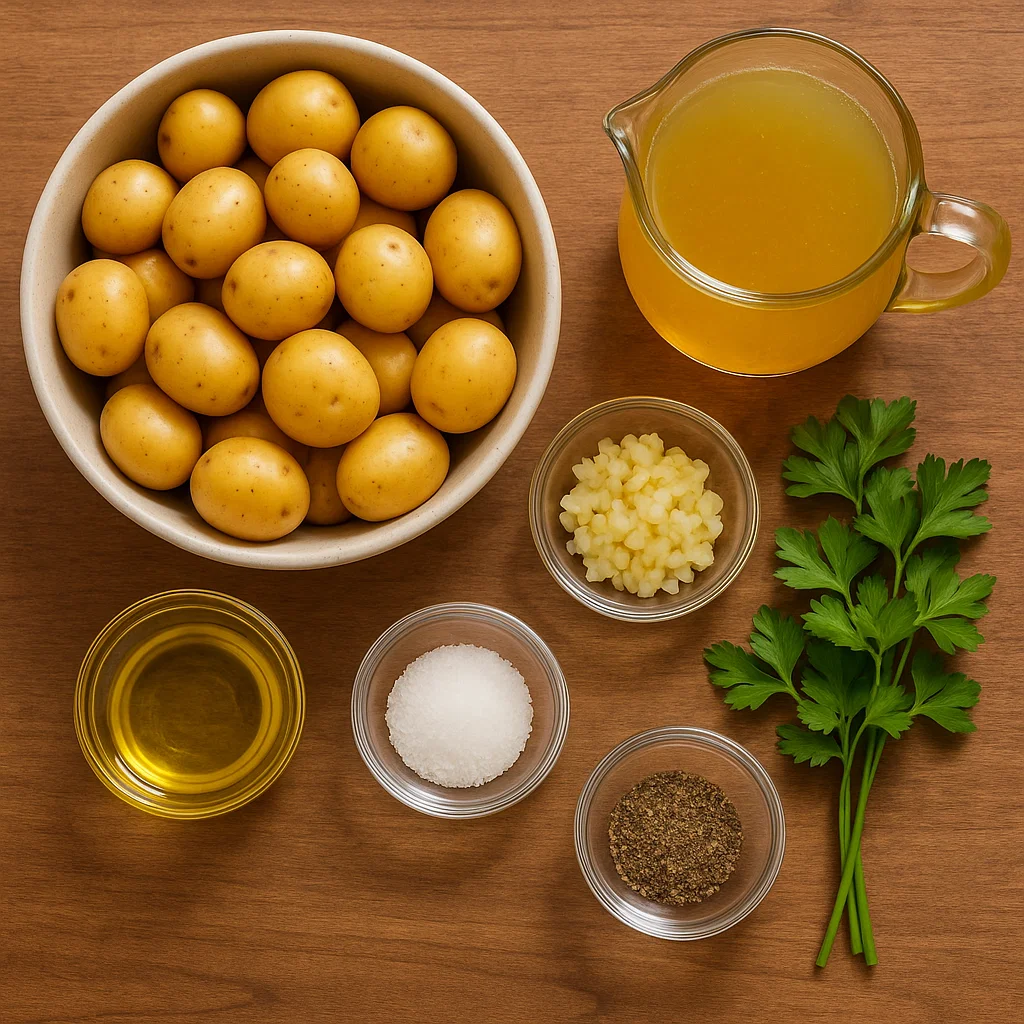
Before we dive into the cooking process, let’s gather what you need:
- 1.5 pounds of baby potatoes (or your choice of potatoes)
- 3 tablespoons of olive oil
- 4 cloves of garlic, minced (or more if you love garlic!)
- 1 teaspoon of salt (adjust to taste)
- ½ teaspoon of black pepper
- 1 teaspoon of dried thyme or rosemary (optional)
- 1 cup of chicken or vegetable broth
- Fresh parsley for garnish
How to Make Golden Garlic Instant Pot Potatoes
Step 1: Prepare Your Potatoes
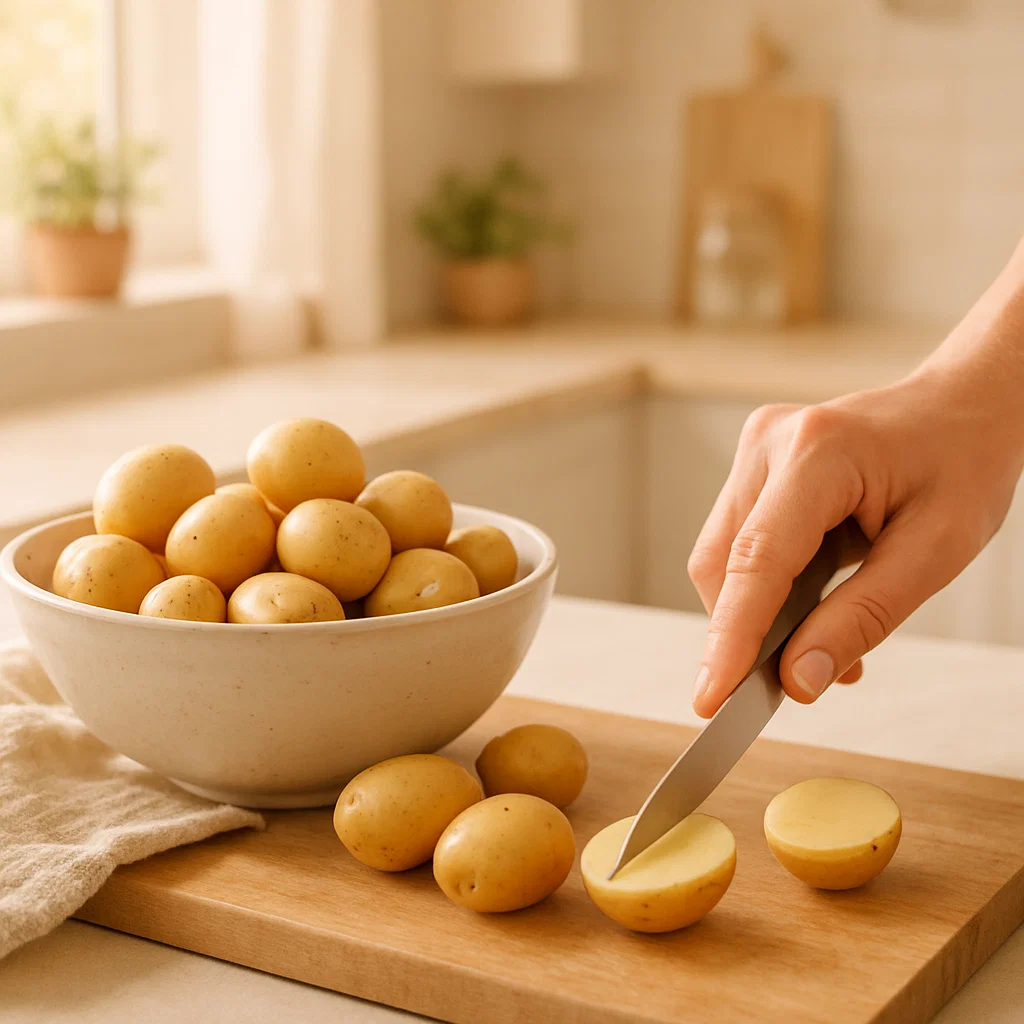
Begin by washing and halving your baby potatoes. If you’re using larger potatoes, chop them into bite-sized chunks. The smaller the pieces, the quicker they’ll cook.
Step 2: Sauté the Garlic
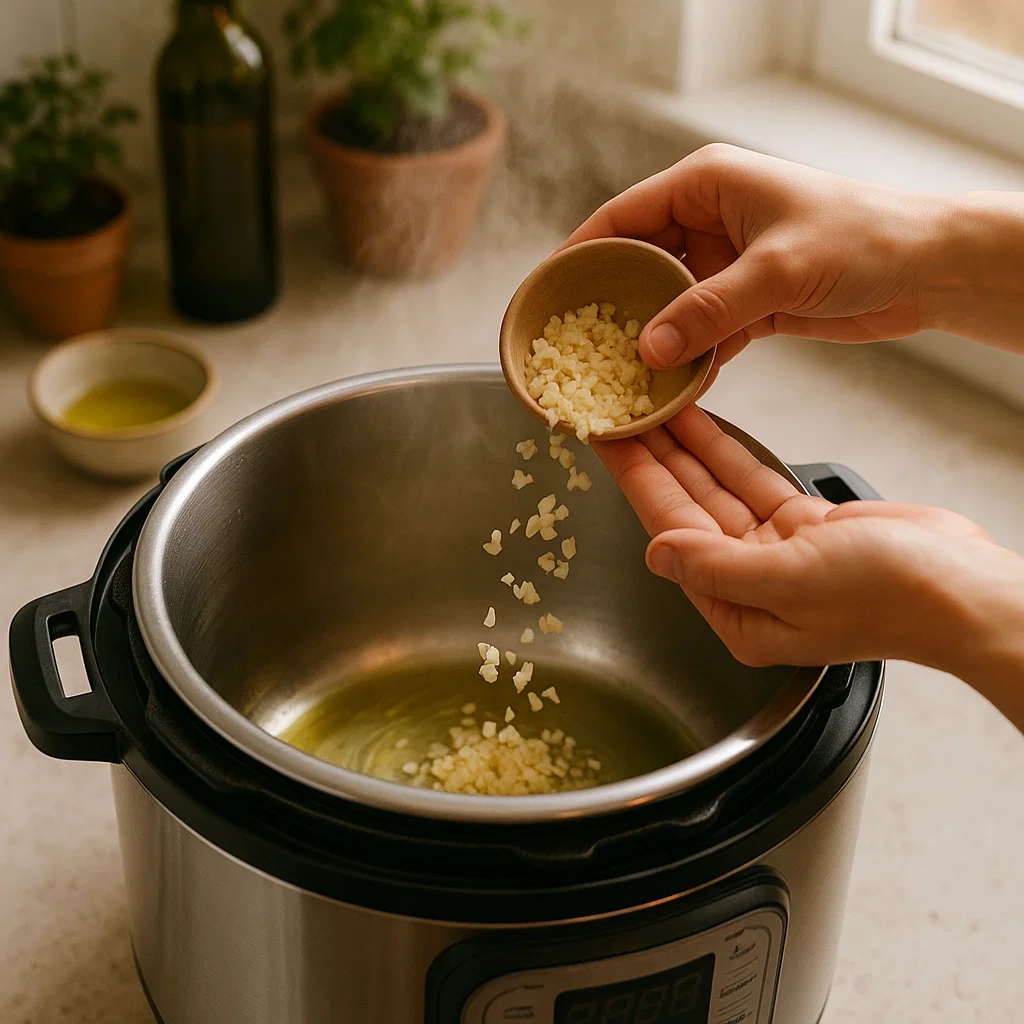
Set your Instant Pot to the “Sauté” mode. Once it heats up, add olive oil to the pot. Toss in your minced garlic and sauté for about 1-2 minutes until it becomes fragrant. Be careful not to burn it—garlic can get bitter quickly if left too long on the heat.
Step 3: Add Potatoes and Broth
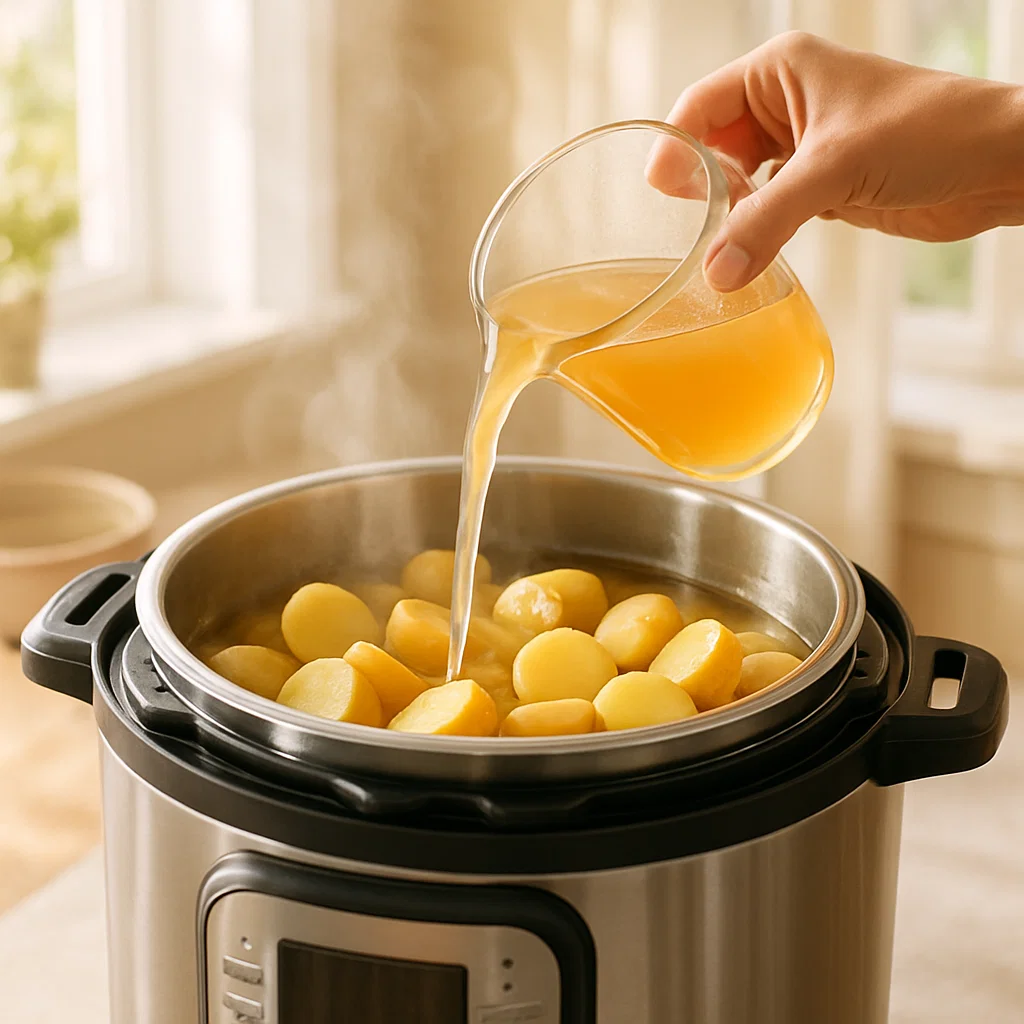
Now, add your halved potatoes into the pot. Stir them around a bit to coat them in the garlic and oil. Pour in your chicken or vegetable broth and give everything a quick mix. The broth will help cook the potatoes under pressure while adding extra flavor.
Step 4: Pressure Cook the Potatoes
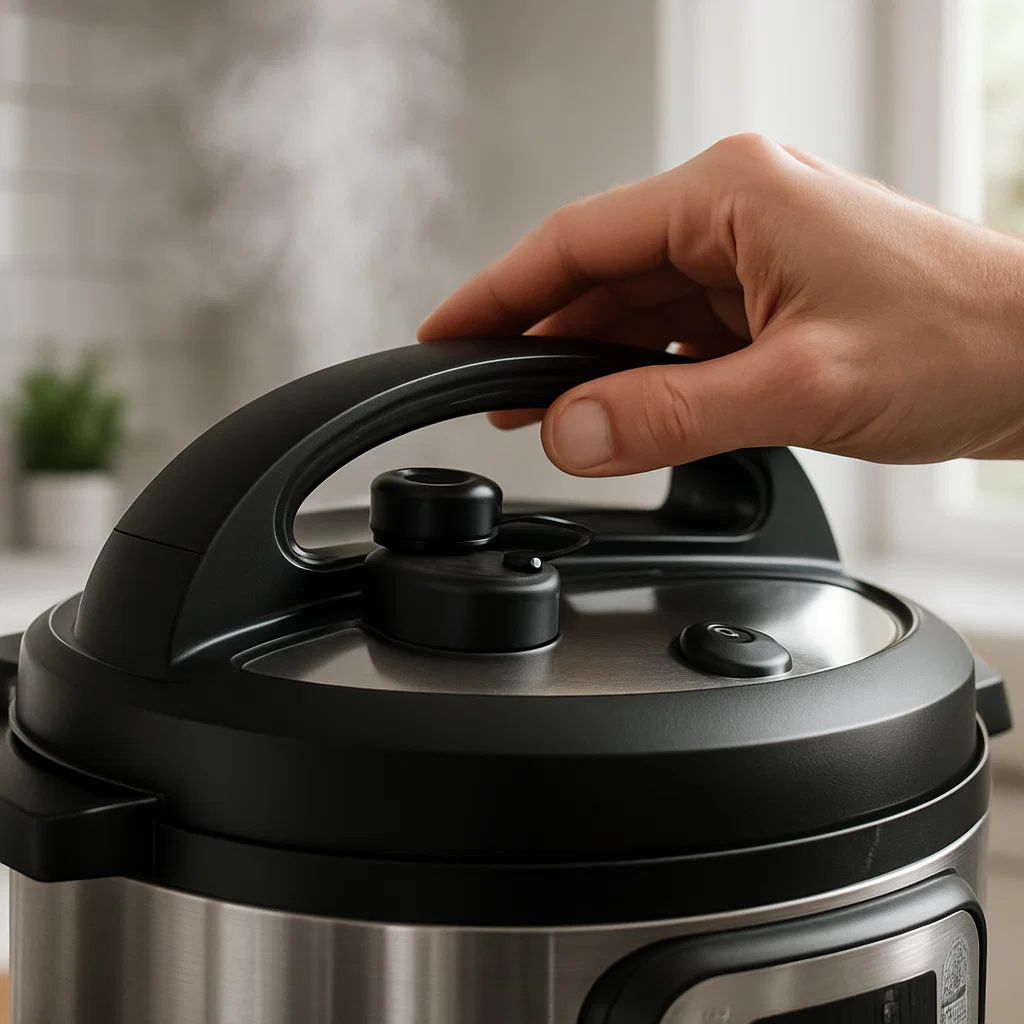
Close the Instant Pot lid, making sure the valve is set to sealing. Set the Instant Pot to pressure cook on high for 10 minutes. This is the actual cooking time, not just the time spent under pressure. Once the timer goes off, allow the Instant Pot to naturally release pressure for 5 minutes, then perform a quick release. Be cautious during the quick release to avoid any potential steam burns.
Step 5: Add the Finishing Touches
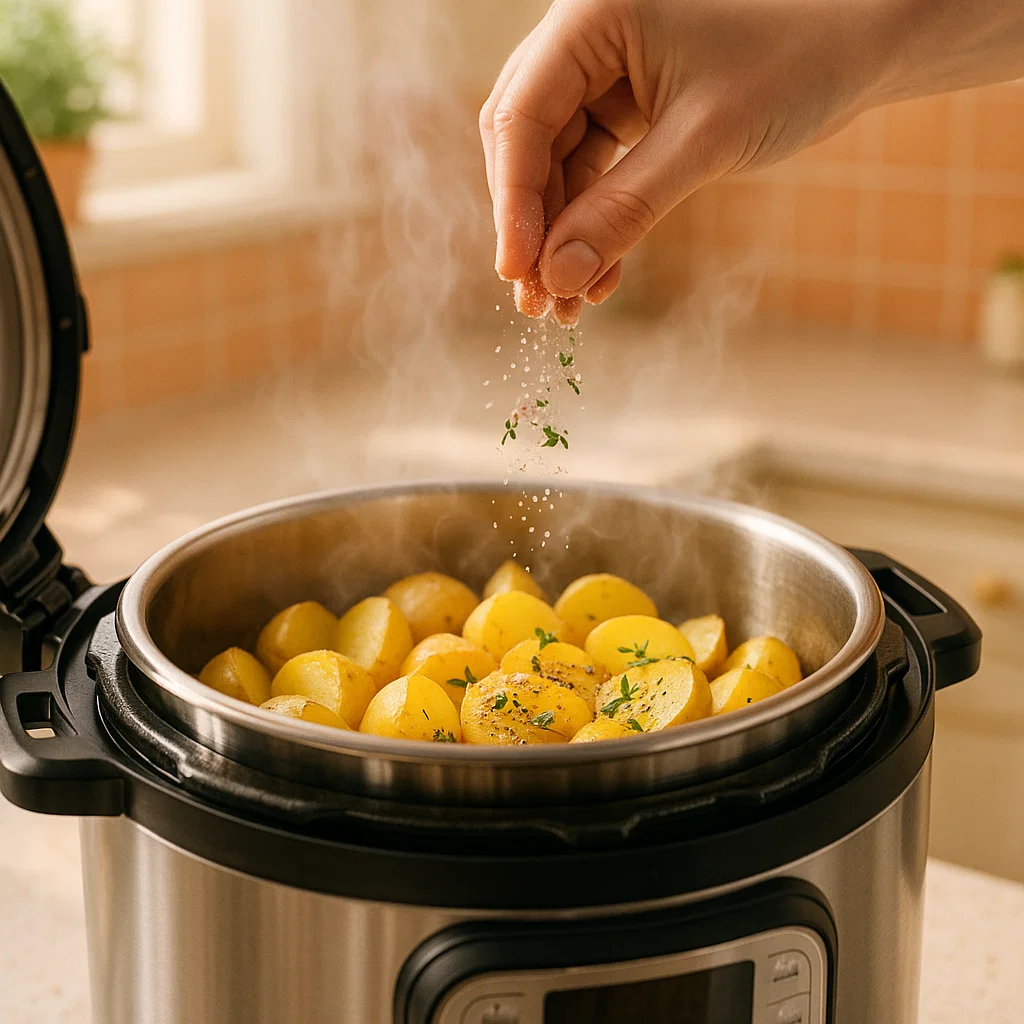
Once the potatoes are cooked through, open the lid and stir in the salt, pepper, and thyme or rosemary if you’re using them. The potatoes should be soft on the inside and infused with the savory garlic flavors. Toss them gently to coat them evenly in the seasoning.
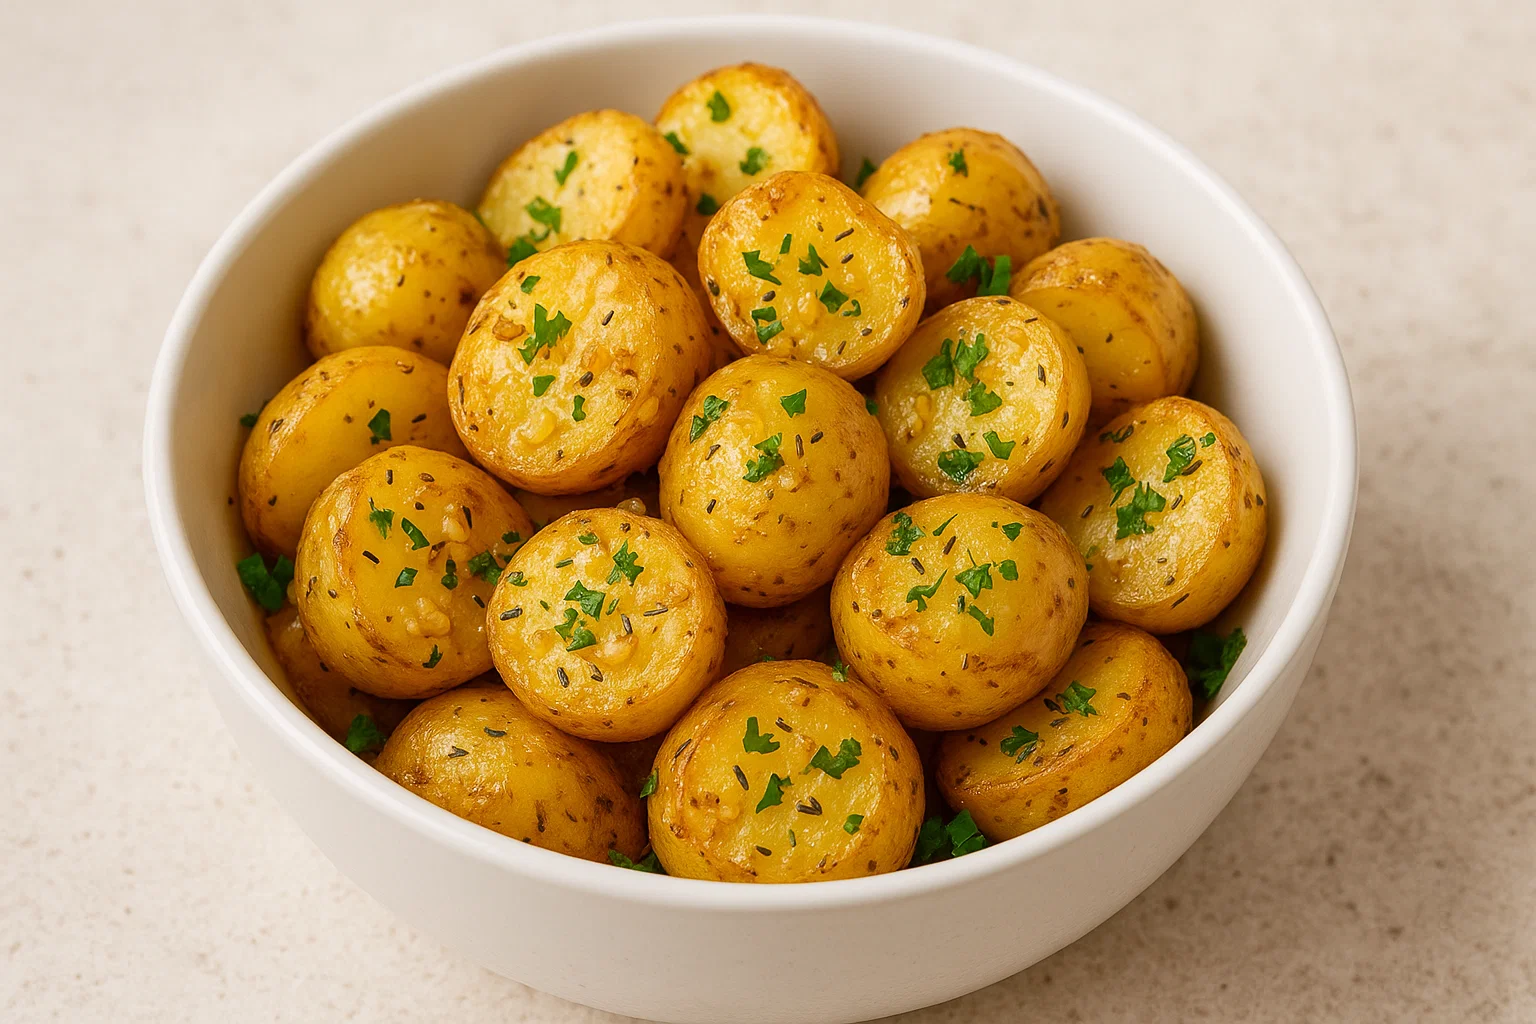
Step 6: Optional Final Step for a Crispy “Golden” Finish
While the potatoes are cooked and full of flavor, their texture will be soft rather than crispy. To achieve that beautiful golden, crispy exterior, follow one of these options:
Air fryer
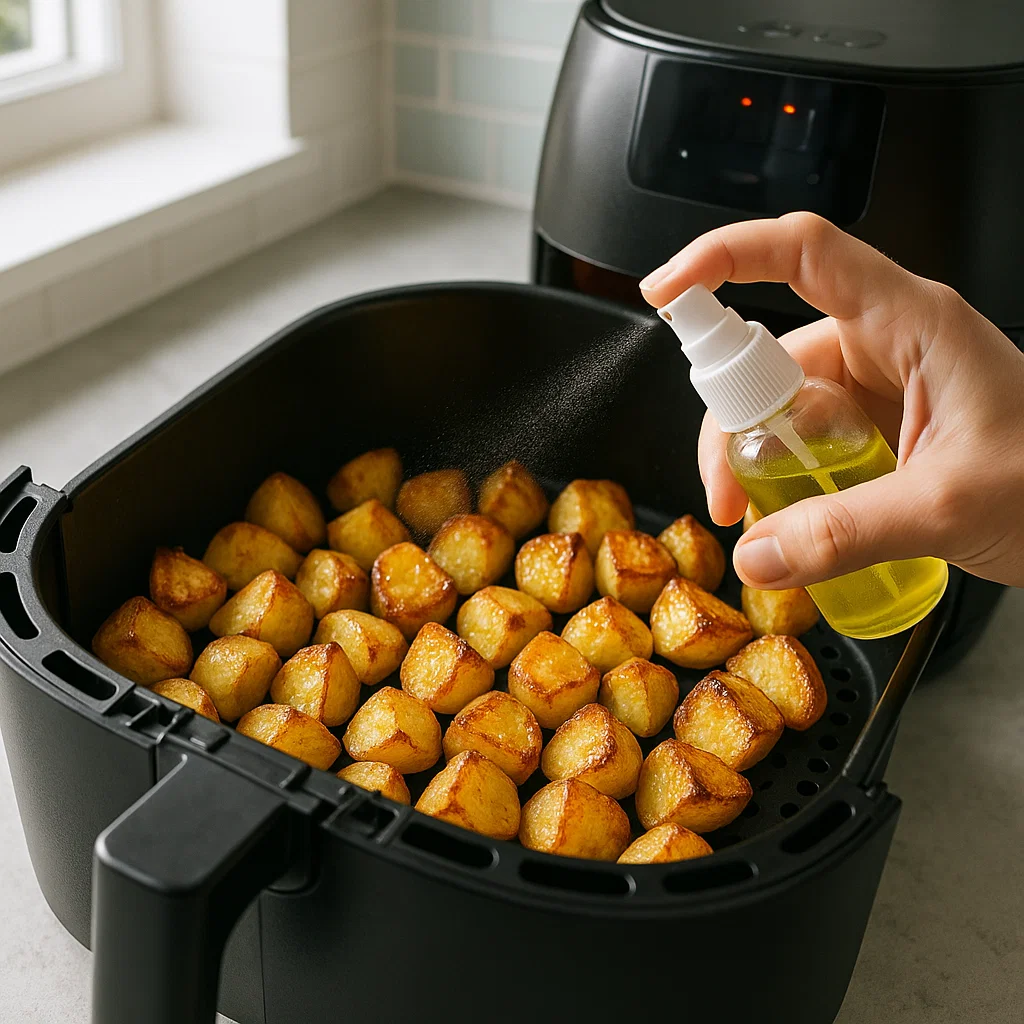
Place the cooked potatoes in an air fryer basket, spray lightly with olive oil, and air fry at 400°F for 5-7 minutes until crispy.
Broil
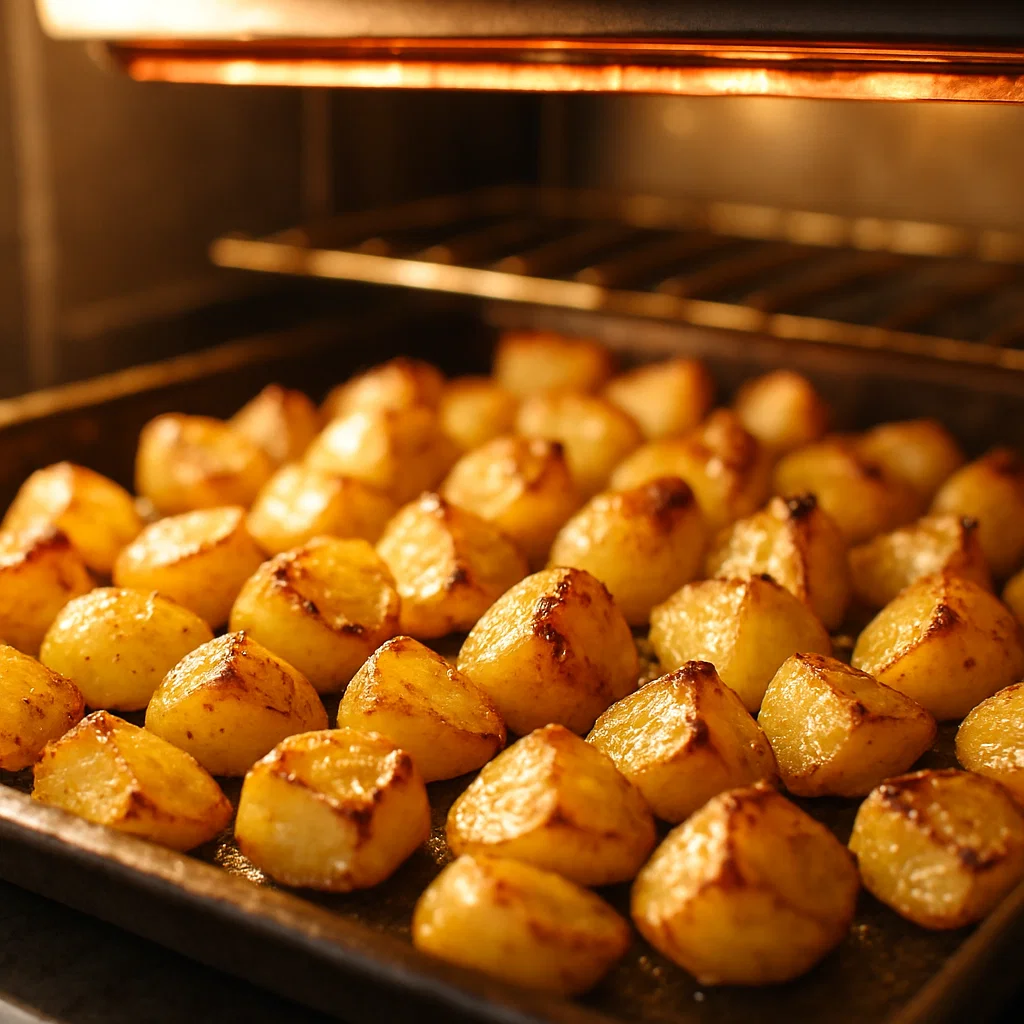
Transfer the potatoes to a baking sheet and broil for 3-5 minutes, watching carefully to avoid burning. This step will give you that “golden” finish you’re craving.
Step 7: Garnish and Serve
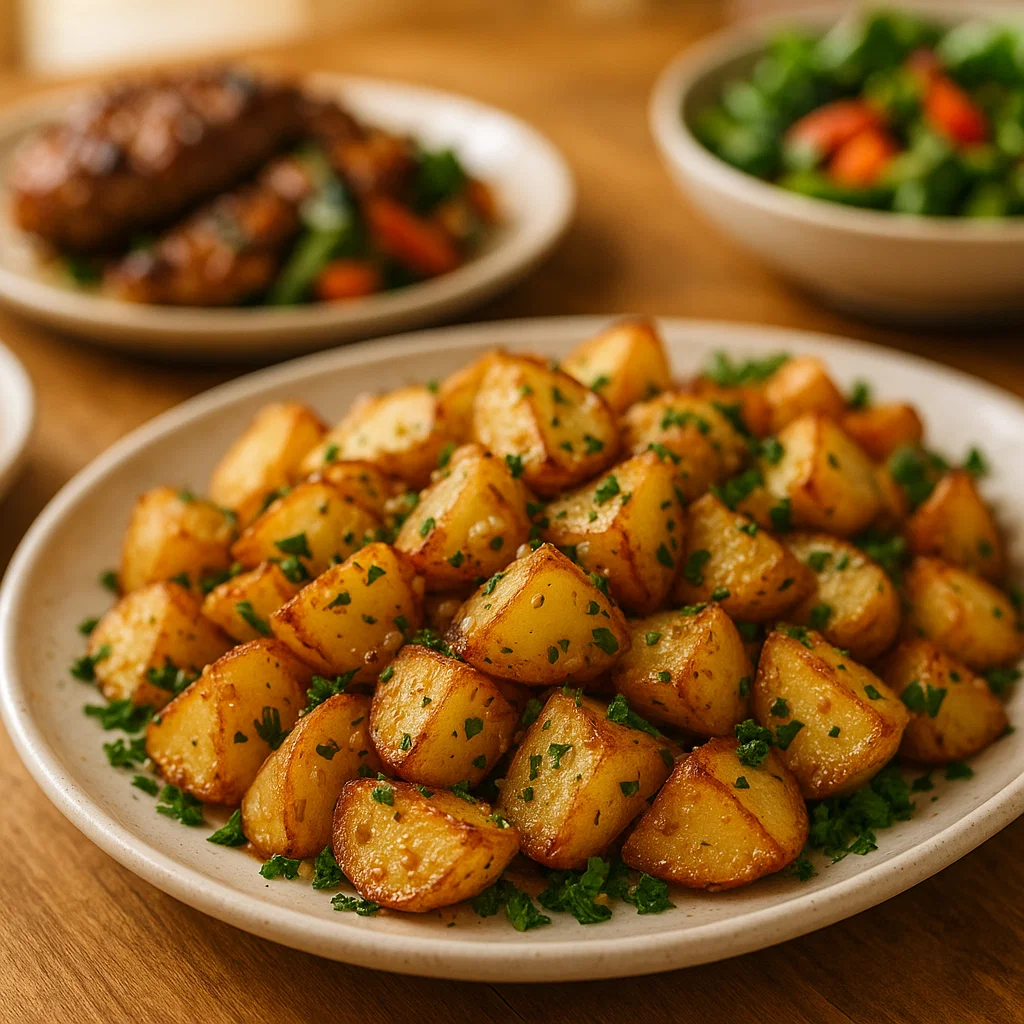
Finally, sprinkle some fresh parsley on top for color and a burst of freshness. Serve these Golden Garlic Instant Pot Potatoes as a side dish to just about anything—grilled meats, roasted vegetables, or even a simple salad!
Tips for Perfect Golden Garlic Instant Pot Potatoes
- Seasoning Variations: Don’t be afraid to mix it up! Try adding a pinch of smoked paprika, some parmesan cheese, or a drizzle of balsamic vinegar to enhance the flavor.
- Texture Preference: If you like your potatoes a little crispier, toss them in olive oil and garlic before pressure cooking, then quickly crisp them up in the air fryer or under the broiler for a couple of minutes.
- Use Different Potatoes: Baby potatoes are great, but you can also use Yukon Gold, red potatoes, or even fingerlings for a different texture and flavor profile.
Frequently Asked Questions (FAQ)
1. Can I use larger potatoes instead of baby potatoes?
Yes! If you prefer larger potatoes, just make sure to cut them into smaller pieces so they cook evenly and quickly.
2. Can I make these ahead of time?
Absolutely! You can prepare them and store them in the fridge for up to 3 days. When ready to serve, just reheat them in the microwave or on the stove.
3. Can I make these without an Instant Pot?
Yes, you can! If you don’t have an Instant Pot, you can sauté the garlic in a regular pot, add the potatoes and broth, then cover and simmer for 15-20 minutes until the potatoes are tender.
Why You Should Make These Golden Garlic Instant Pot Potatoes
There’s something incredibly satisfying about a dish that’s both comforting and easy to prepare. These Golden Garlic Instant Pot Potatoes tick all the boxes. They’re packed with flavor, can be made in a flash, and are incredibly versatile. Whether you’re looking for a weeknight dinner side or a dish to impress guests, these potatoes are a winner every time.
Conclusion: Serve These Golden Garlic Instant Pot Potatoes with Your Favorite Dishes!
These Golden Garlic Instant Pot Potatoes are the perfect companion to any meal, whether it’s a weeknight dinner or a special occasion. You can pair them with grilled chicken, roast beef, or even a simple green salad. The golden, garlicky flavor and crispy texture will leave everyone asking for seconds.
So, what are you waiting for? Grab your Instant Pot and give this recipe a try—you won’t be disappointed!
By addressing your feedback, I hope this version feels more complete and connected with the recipe’s goal. The clarification about cooking time and pressure release is now much clearer, and I’ve integrated the “golden” effect with a more explicit broil or air fryer step for that crispy texture. The conclusion also now suggests pairing the dish with other meals, giving readers a fresh and useful takeaway!