
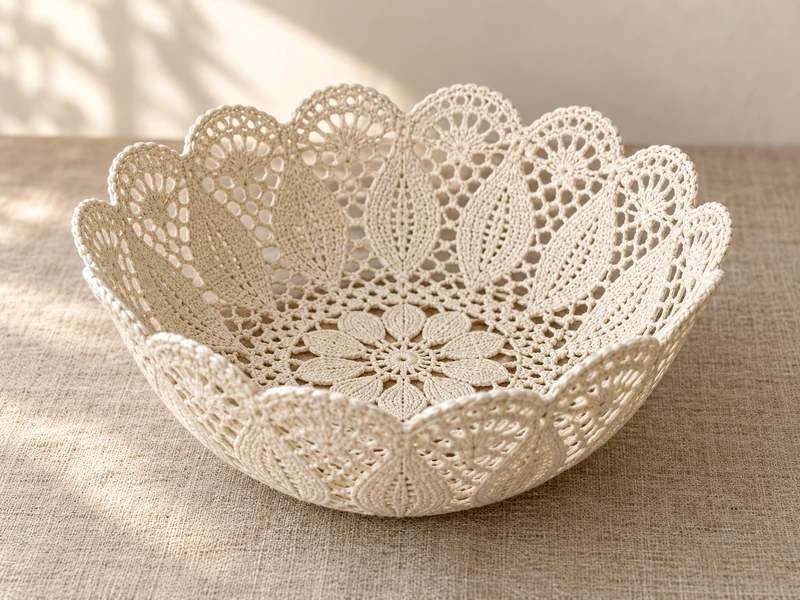
A stiffened lace doily bowl turns one cotton doily into a lightweight catchall with a crisp base and an even scalloped rim. The project is simple, but the result depends on using two correctly sized vessels, saturating the lace evenly, centering the pattern, and allowing it to dry completely.
This tutorial uses a 14-inch cotton doily, a 15-inch soaking dish, and an 8-inch mold to make a bowl approximately 8 inches wide and 3 inches high. Follow the fabric-stiffener label whenever its safety, ventilation, application, cleanup, or drying directions differ from the general guidance below.
Materials and Finished Size
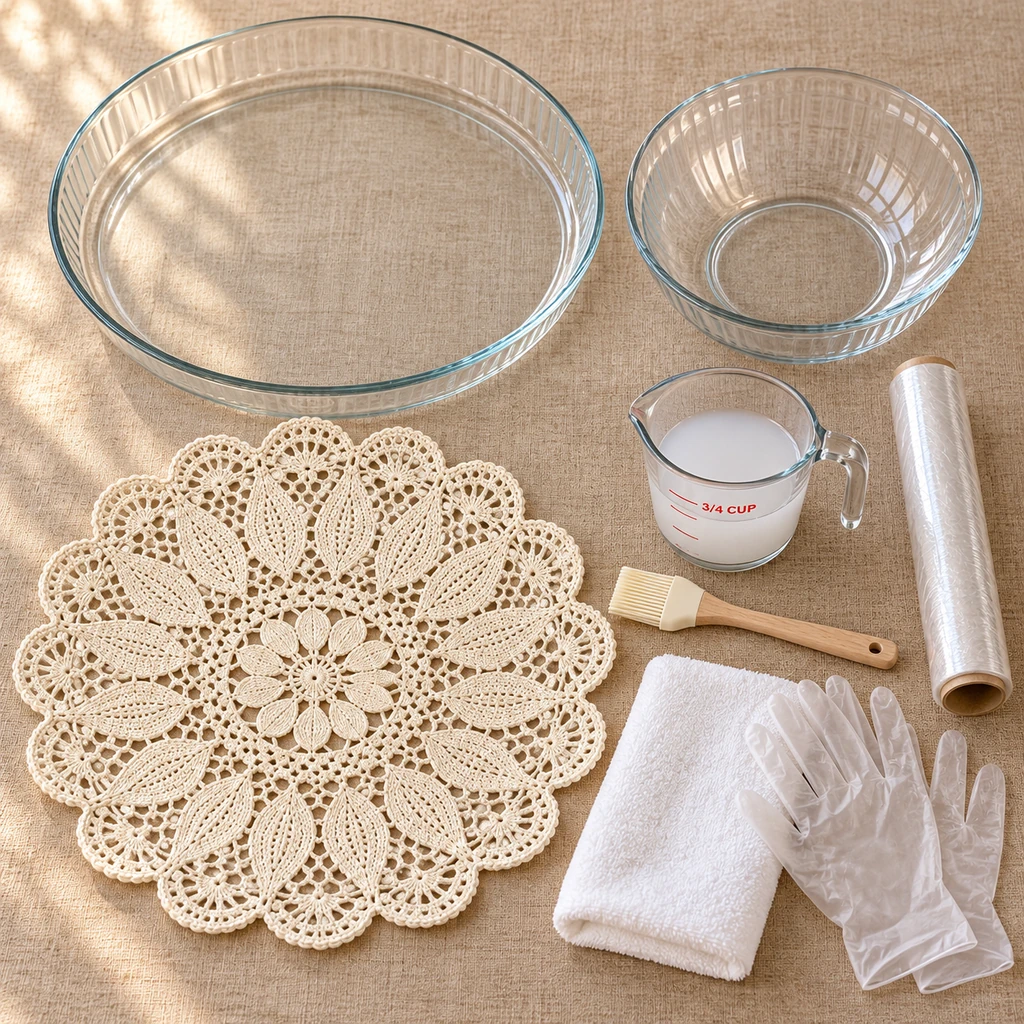
- One 14-inch round cotton crochet doily
- One wide shallow glass dish, about 13 inches across, for soaking
- One smooth 8-inch-diameter glass bowl, about 3 inches deep, for the mold
- 3/4 cup water-based fabric stiffener, or the amount recommended on its label
- Plastic food wrap
- Small bowl and silicone pastry brush for touch-ups
- Clear nitrile gloves, if recommended by the stiffener label
- Clean towel
- Optional low cooling rack for better airflow during drying
Cotton absorbs stiffener more predictably than glossy synthetic lace. Wash a secondhand doily first, rinse out any residue, flatten it, and let it dry completely. Test colored lace for bleeding before soaking the entire piece.
The finished bowl follows the smaller mold—not the soaking dish. A wider mold produces a shallow tray, while a narrower mold produces steeper sides. Before wetting the doily, drape it over the inverted mold and confirm that the lace reaches roughly 1 1/2 inches below the mold’s widest point. That overlap gives the finished bowl enough depth and structure.
If you are using an heirloom doily, inspect every motif and scallop for thinning fibers or small tears. Fabric stiffener will not repair weak thread; choose a sound doily rather than risking an irreplaceable piece.
Step-by-Step Instructions
1. Inspect the Doily and Wrap the Mold
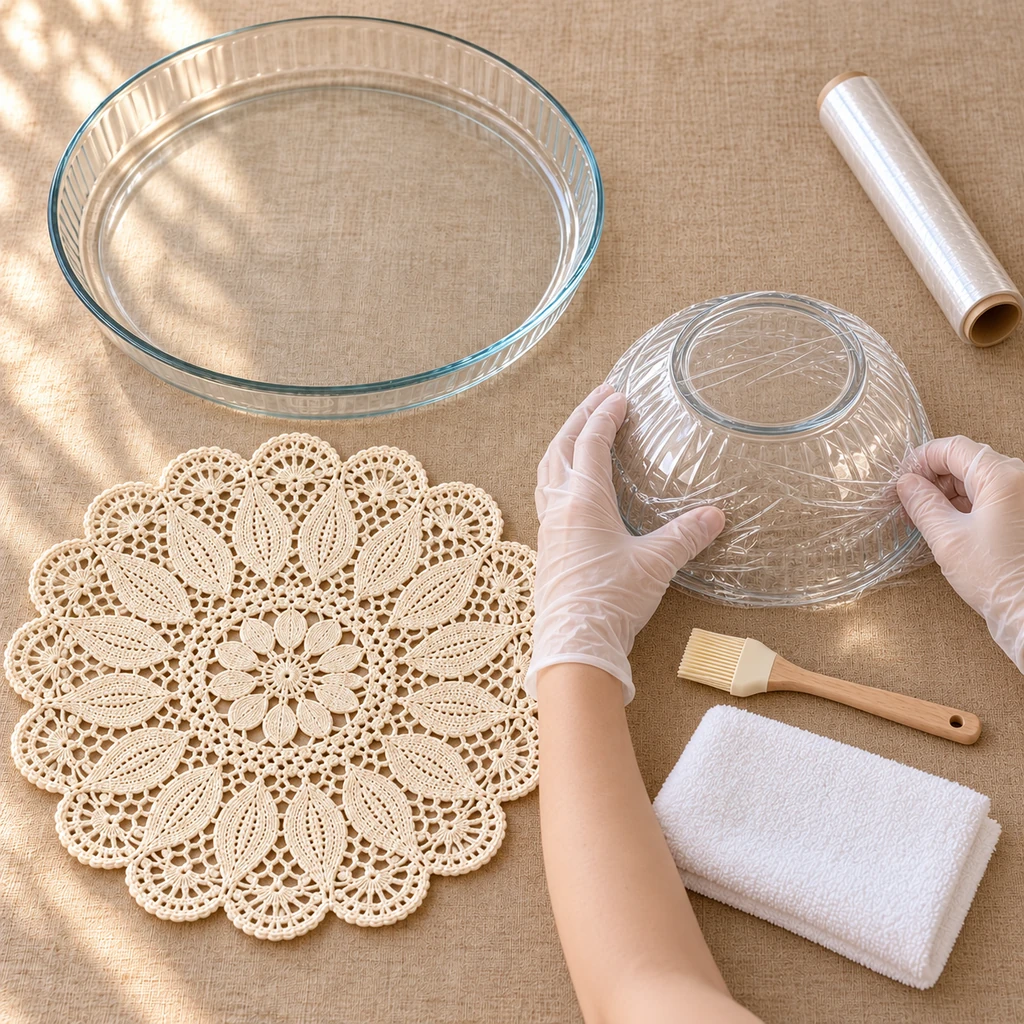
Lay the dry doily flat and check for loose threads, stains, repairs, or weak areas. Cover the entire outside of the smaller 8-inch bowl with smooth plastic wrap, including the crown and sides that will touch the wet lace. Keep the larger soaking dish separate. Put on gloves if the product label calls for them, and set out the brush and towel before opening the stiffener.
2. Saturate the Lace in the Wide Dish
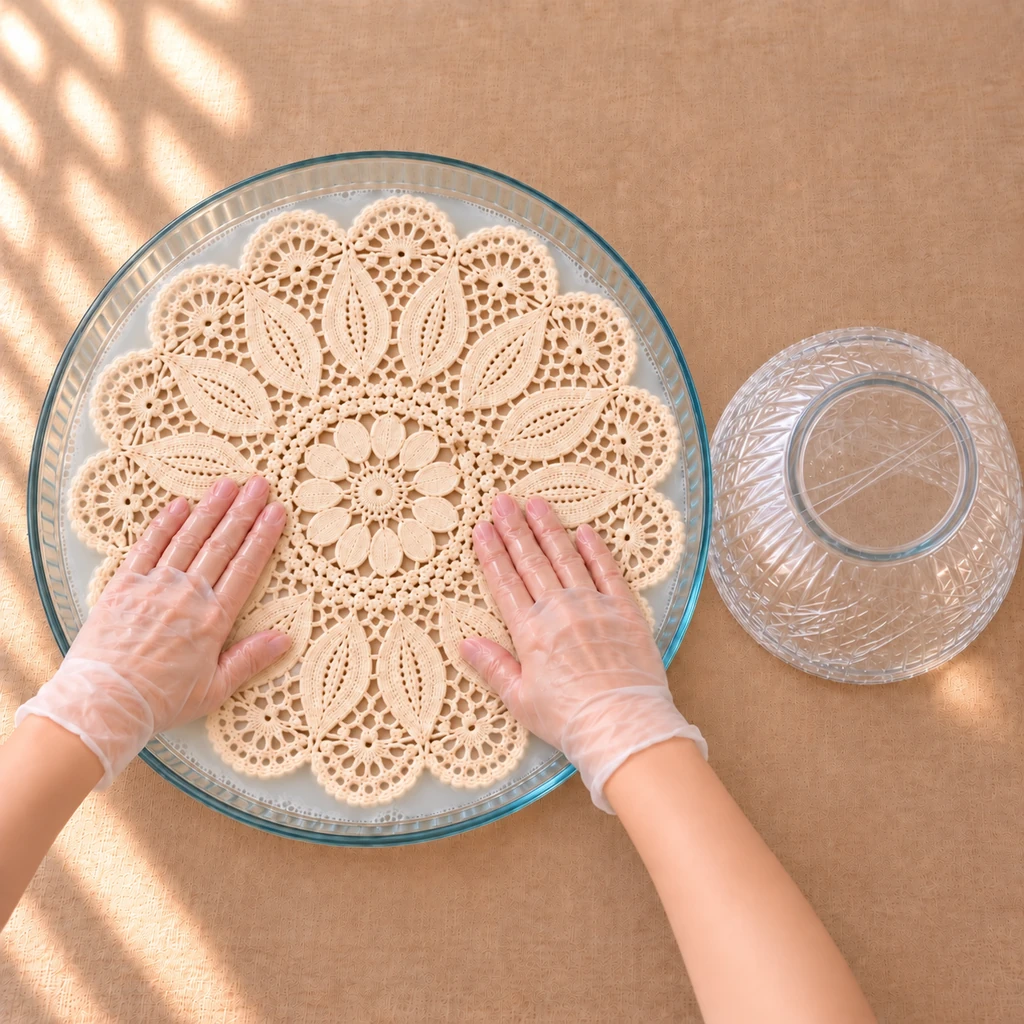
Pour the stiffener into the wide shallow dish and spread the doily flat in the liquid. Press gently across the center, leaf motifs, and scallops until the threads are evenly wet. Turn it once if needed. Lift the lace with both hands and press out excess liquid over the dish without twisting or wringing. It should be saturated but not dripping.
3. Center and Shape the Lace Over the Mold
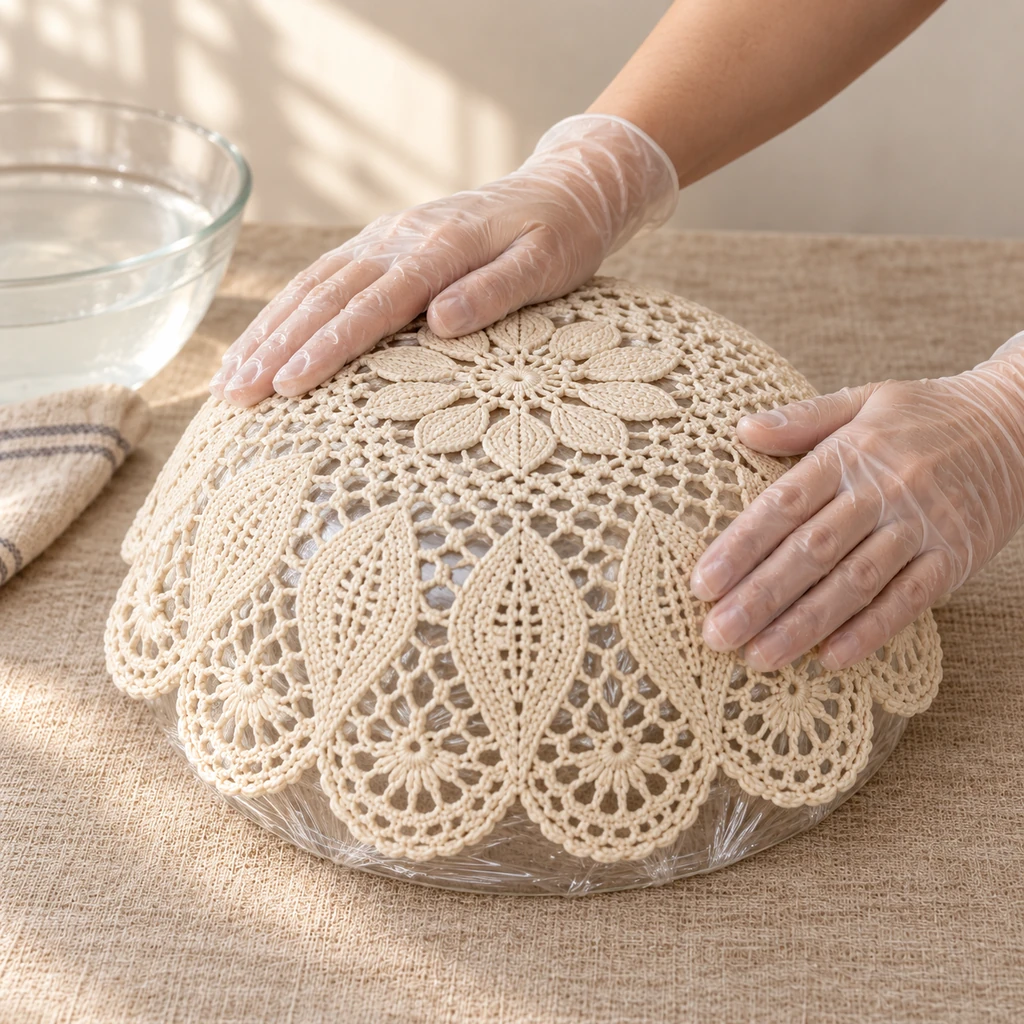
Set the wrapped bowl upside down. Place the doily’s center flower at the highest point, then smooth outward with open palms. Keep the motifs straight and arrange the scallops at an equal height. Do not pull one scallop to correct the opposite side; lift and reset a broad section instead. Confirm that the lace reaches below the widest part of the mold before leaving it to dry.
4. Dry the Lace Without Flipping It
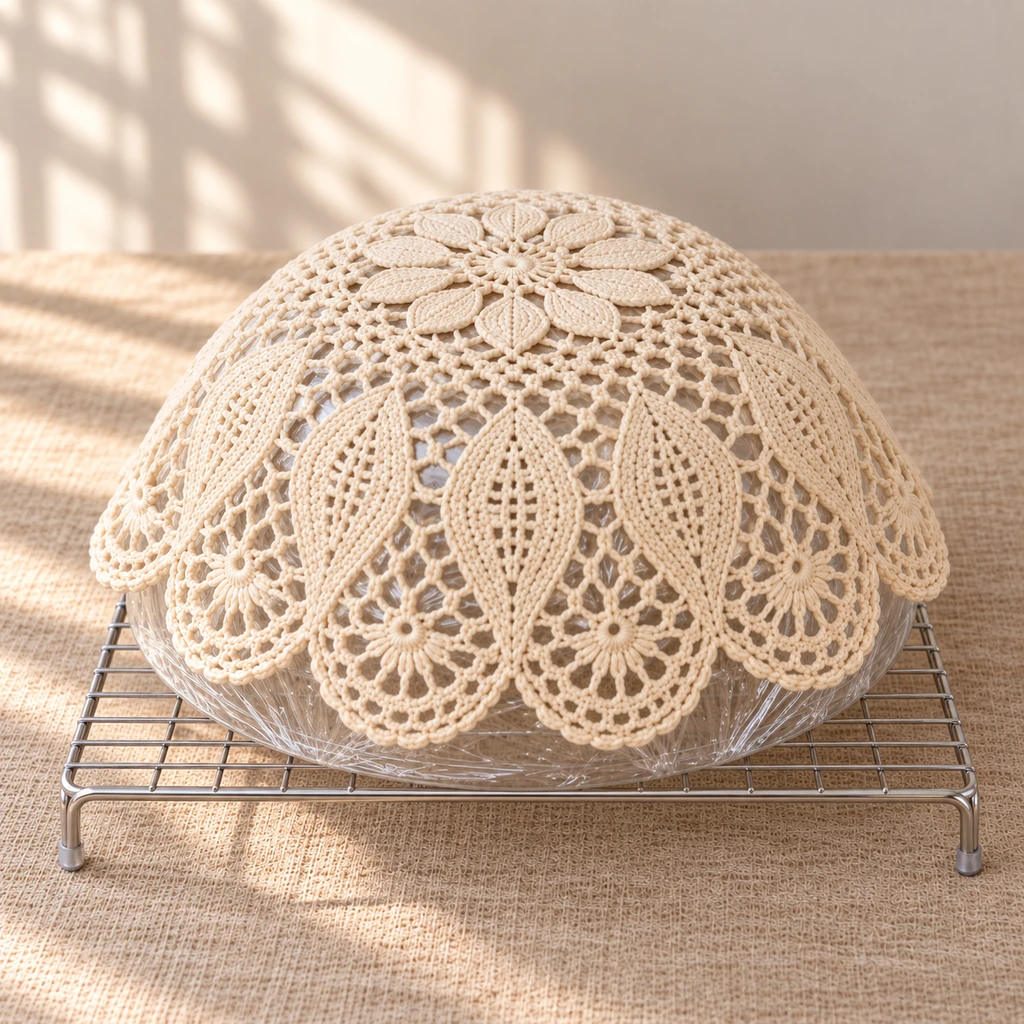
Place the mold in a dry, ventilated room away from direct sun, heaters, hair dryers, and strong fans. If the bowl is stable, support it on a low cooling rack so air can move around the lower edge. Do not flip the mold or shift the damp lace. Rotate the entire rack’s position in the room after about 12 hours only if one side receives noticeably less airflow.
Allow 24 to 36 hours as a working estimate, but follow the stiffener label and extend the time in humid conditions. The center, base, thick motifs, and rim must feel firm and no longer cool or damp to the touch before unmolding.
5. Release the Bowl With Even Support
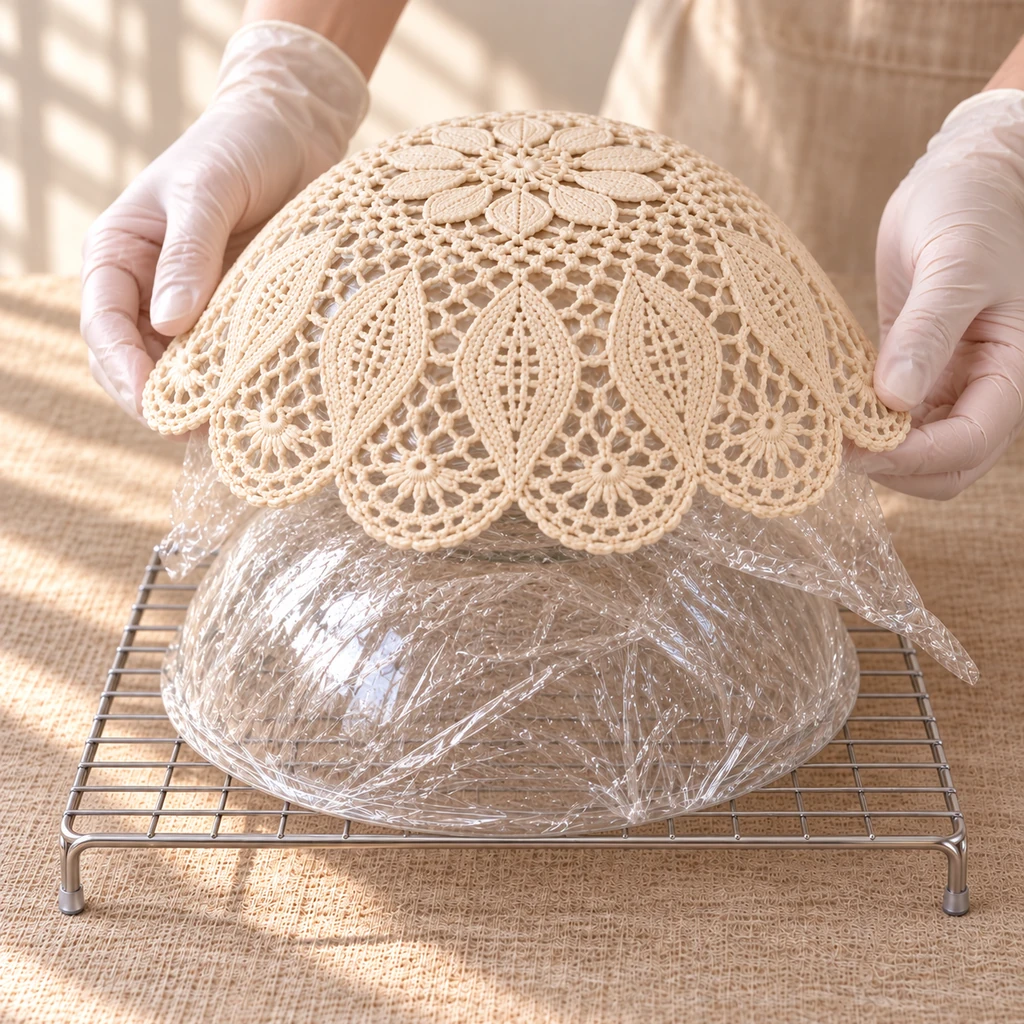
Loosen the plastic from the glass first. Place both hands on broad opposite sections of the lace rim, then work around the circumference a little at a time. Ease the rigid lace and wrap away from the mold without pinching or pulling an individual scallop. Peel away any plastic that remains inside the bowl.
Set the bowl on a flat surface. If the base rocks or one area feels soft, return it to the same wrapped mold, brush a thin touch-up coat onto the weak area, and let it dry completely again.
6. Style the Finished Bowl Safely
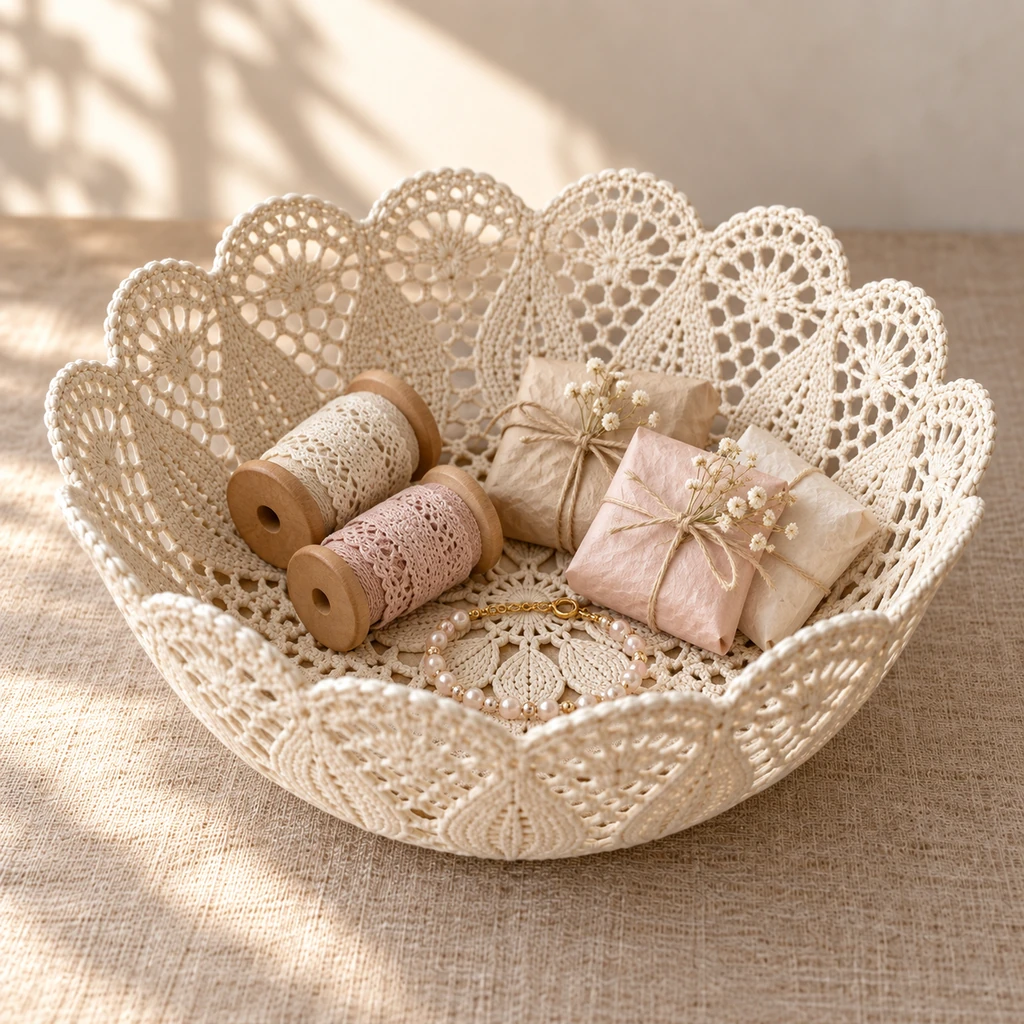
Use the bowl for thread spools, wrapped favors, jewelry, hair accessories, or other dry lightweight objects. Fabric stiffener is not food-safe, and the bowl is neither waterproof nor washable. Keep it away from food, drinks, humid rooms, candles, fireplaces, hot tools, pets that may chew it, and heavy objects that could distort the base.
Substitutions and Variations
- Shallower tray: use a wider, lower mold while keeping enough lace below its widest point.
- Taller catchall: choose a slightly narrower smooth mold and verify that the doily can cover it evenly.
- Natural color: ivory and undyed cotton make the stitch definition easy to see.
- Colored lace: test a hidden area for color bleeding before soaking the whole piece.
- Ceramic mold: a smooth, stable ceramic bowl can replace glass if it can be wrapped completely.
Avoid rough, faceted, or sharp-edged molds. The lace can catch on them during release, and an uneven mold produces an uneven base.
Troubleshooting
The scallops collapse: the lace was removed too early, the room was humid, or the rim did not receive enough stiffener. Return it to the mold, apply one thin touch-up coat, and dry it longer.
The base rocks: the center was off-center or not fully supported. Recenter the bowl on the original mold, add a light coat only where needed, and dry it on a level surface.
The pattern looks crooked: reset a broad wet section instead of stretching one edge. Correct alignment before drying; forcing a dry bowl can crack the finish.
The surface feels sticky: it may still be damp, or too much product may have pooled in thick stitches. Allow more time with gentle room airflow and consult the product label.
White residue appears: excess stiffener may have dried on the surface. Prevention is best: press out drips before shaping and apply touch-up coats thinly.
More Decorative Craft Projects
If you enjoy small decorative catchalls, try these air-dry clay leaf bowls that resist cracking or make a hand-painted bow trinket dish. For another vintage-textile display idea, see the velvet vintage brooch display frame.
Frequently Asked Questions
Why is the soaking dish larger than the mold?
The large dish lets the flat lace absorb stiffener evenly. The smaller bowl is the mold that determines the finished diameter and depth; the vessels have separate jobs.
Can I speed up drying with heat?
No. Unless the product label explicitly says otherwise, use ordinary room-temperature airflow. Concentrated heat can dry the rim before the center and distort the shape.
Can I use a polyester doily?
Possibly, but synthetic fibers may absorb a water-based stiffener less evenly. Test a small inexpensive piece first and follow the stiffener manufacturer’s fiber recommendations.
Can the bowl hold food?
No. Treat it as decorative textile art. It is not food-safe, waterproof, heat-safe, or washable.