

A dried orange garland should look warm and handmade—not turn soft, sticky, or speckled after a week. The difference is not a secret spray. It is careful slicing, thorough drying, a full cool-down, and a sensible display location. This version pairs translucent orange rounds with muted bay leaves for a simple botanical strand that works from early fall through winter without relying on holiday-specific decorations.
The method below is designed for a four-foot indoor garland. Drying time is a range because fruit thickness, moisture, ovens, and local humidity vary. Judge the slices by feel after they cool, not by the clock alone. The finished piece is decorative and should not be eaten.
Why This Garland Is Less Likely to Mold
Mold needs moisture. Orange slices that feel dry while hot can soften as trapped moisture redistributes during cooling, which is why stringing them straight from the oven is risky. Blotting before drying, leaving air around every slice, cooling completely, and checking again after a rest period remove the most common failure points.
No natural garland is mold-proof in every home. A bone-dry strand can still absorb humidity beside a steamy stove, bathroom, damp window, or humidifier. Think of this tutorial as a moisture-control system: dry the components thoroughly, keep them dry, and inspect them periodically.
Materials and Tools
- 3 to 4 firm seedless navel oranges
- 18 to 24 fully dried culinary bay leaves
- 6 feet of unbleached cotton twine for a roughly 4-foot garland
- One large blunt yarn needle
- A sharp chef’s knife and stable cutting board
- A ruler for checking the first few slices
- Plain white paper towels or clean lint-free kitchen towels
- Two rimmed baking sheets with oven-safe wire cooling racks that fit inside
- Kitchen tongs, oven mitts, and scissors
- Two removable hooks or other suitable indoor supports
Choose oranges with firm skins and no bruises, soft spots, or broken areas. Purchased dried bay leaves are more dependable than fresh leaves here: fresh foliage contains moisture, shrinks as it dries, and can make a finished strand change shape. Avoid painted or waxed decorative leaves because their coatings are difficult to identify.
Before You Start
Confirm that your wire racks are oven-safe and follow the manufacturer’s temperature limits. Arrange good ventilation in the kitchen and keep children and pets away from the hot oven and trays. If you prefer a mandoline, use its guard and a cut-resistant glove; the knife method shown here is slower but gives you more control.
Decide where the garland will hang before cutting the twine. Measure the display area, add at least 10 inches for the curve and end loops, and keep the strand well away from burners, fireplaces, candles, and heating vents.
Step-by-Step Instructions
1. Slice the Oranges Evenly
Trim a thin piece from each end, then cut the oranges crosswise into rounds about 1/8 inch (3 mm) thick. Use the ruler on the first two or three slices until your eye adjusts. Consistent thickness matters: a thick center can stay damp long after a thin edge has begun to brown.
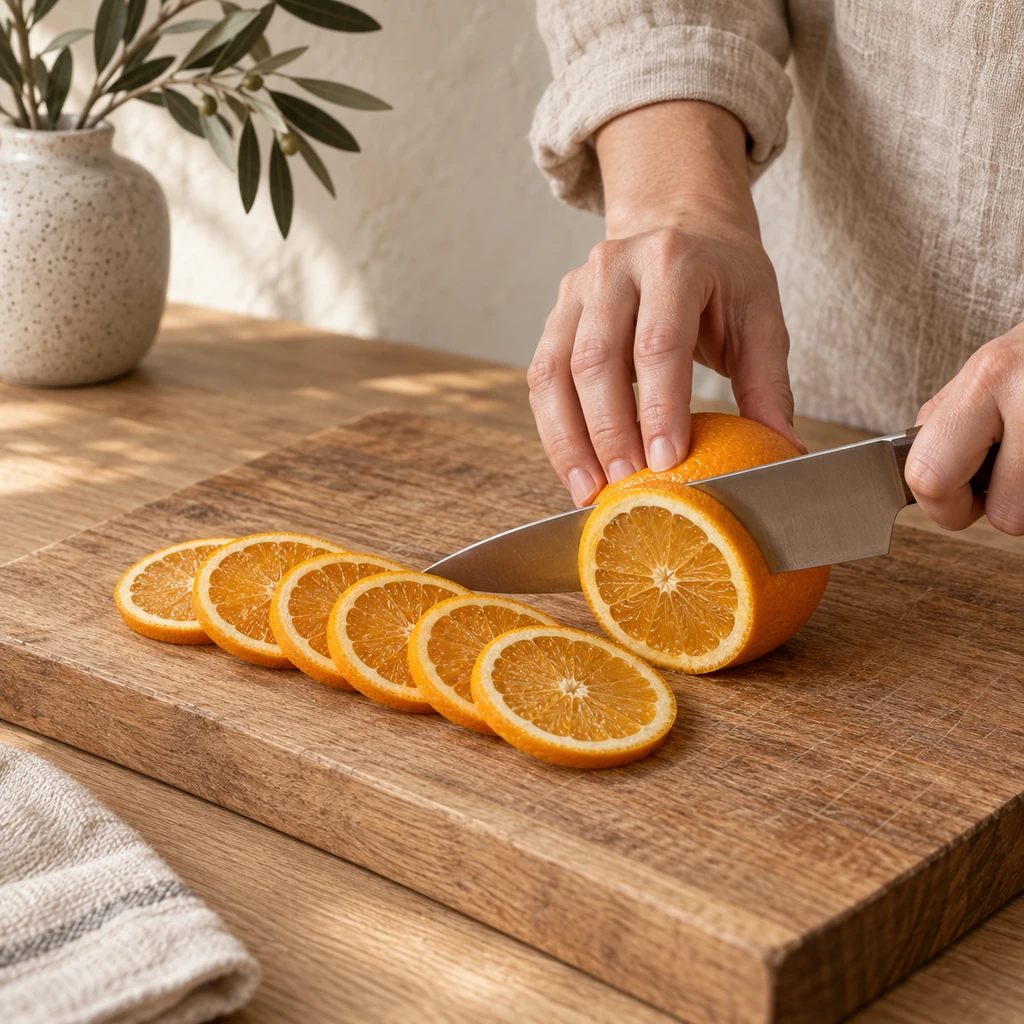
Keep your guiding fingertips curled back and let the knife do the work. Set aside torn slices and end pieces for another use; intact rounds are easier to thread and hang without splitting.
2. Blot Away Surface Juice
Lay the slices on a plain paper towel, cover them with a second towel, and press with flat hands. Lift the top towel, move the rounds to a dry section, and repeat once if the towel is saturated. Press rather than wring: squeezing can tear the membranes and distort the circles.
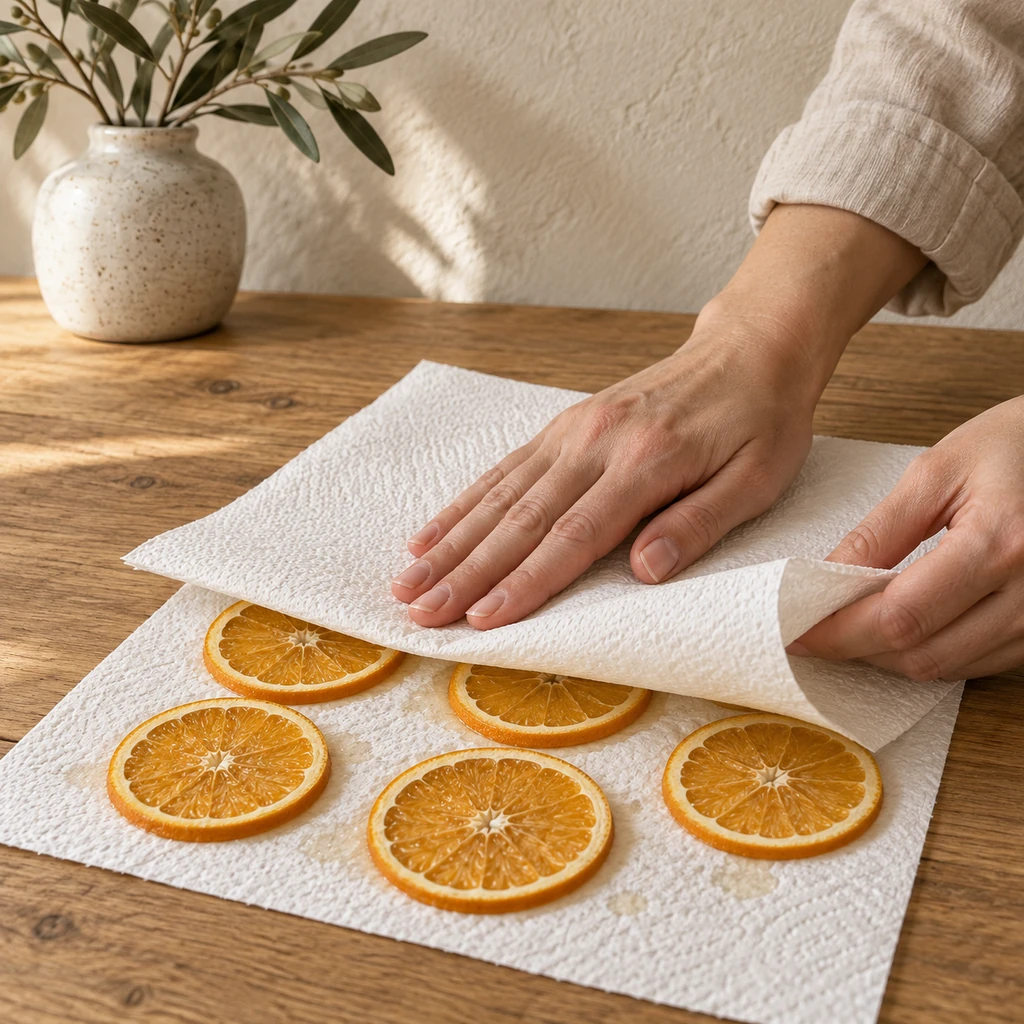
This small step is worth doing. The oven can start evaporating internal moisture instead of spending its first stretch drying puddled juice, and the rounds are less likely to stick to the rack.
3. Dry Low and Slow on Wire Racks
Heat the oven to 200°F (95°C). Set each oven-safe rack inside a rimmed sheet, then arrange the slices in one layer with space between them. Do not overlap them. Dry for 3 to 5 hours, turning the rounds with tongs and rotating the pans every 45 to 60 minutes.
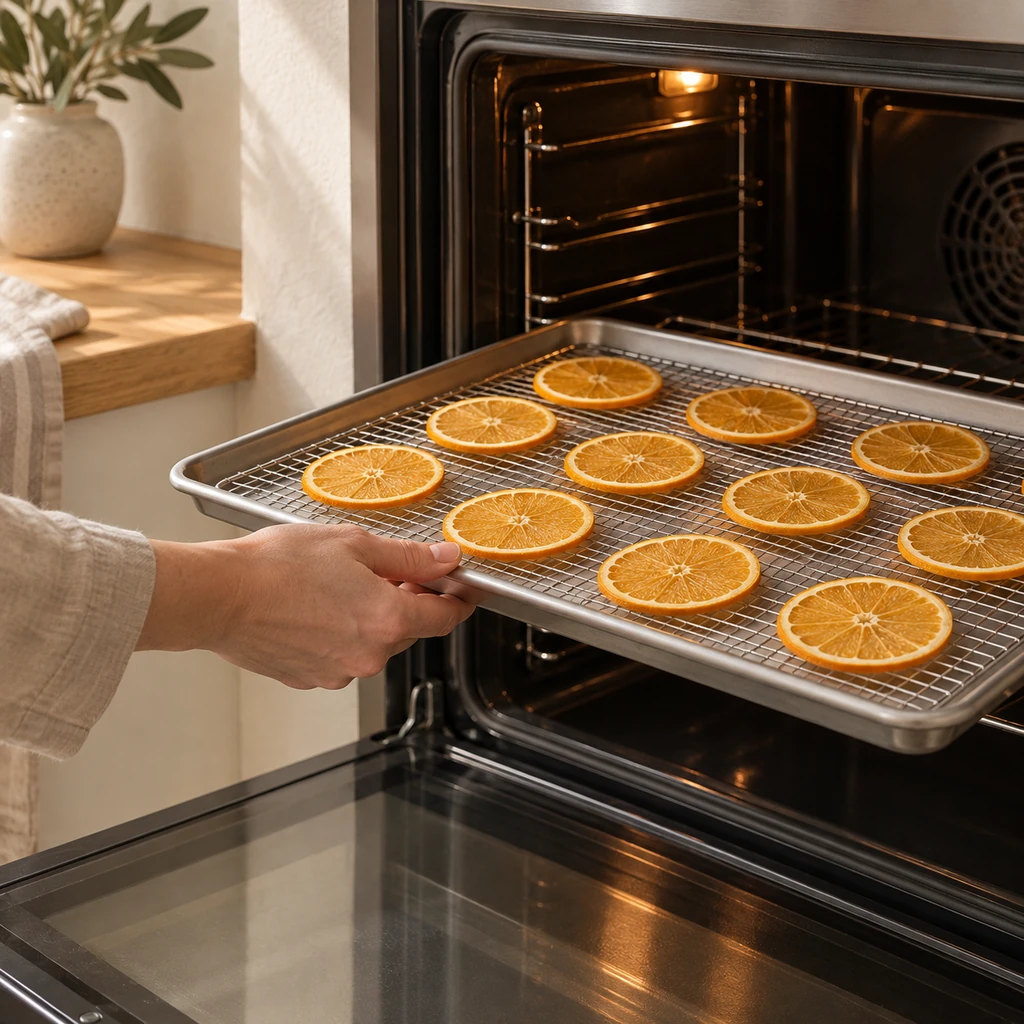
Begin checking the smallest pieces at three hours and remove individual slices when they are evenly dry-looking. They should appear darker and more translucent, with no shiny wet pockets in the center. If the edges brown quickly while the centers remain soft, reduce the heat slightly and continue drying. Never leave the operating oven unattended.
4. Cool Completely and Perform a Dryness Check
Move the racks to a heat-safe surface and leave the slices untouched until completely cool. Pick up each round by the peel. It should feel dry and light, not cool-wet, gummy, or tacky. Press a questionable center against a clean paper towel; any moisture mark means it needs more drying.
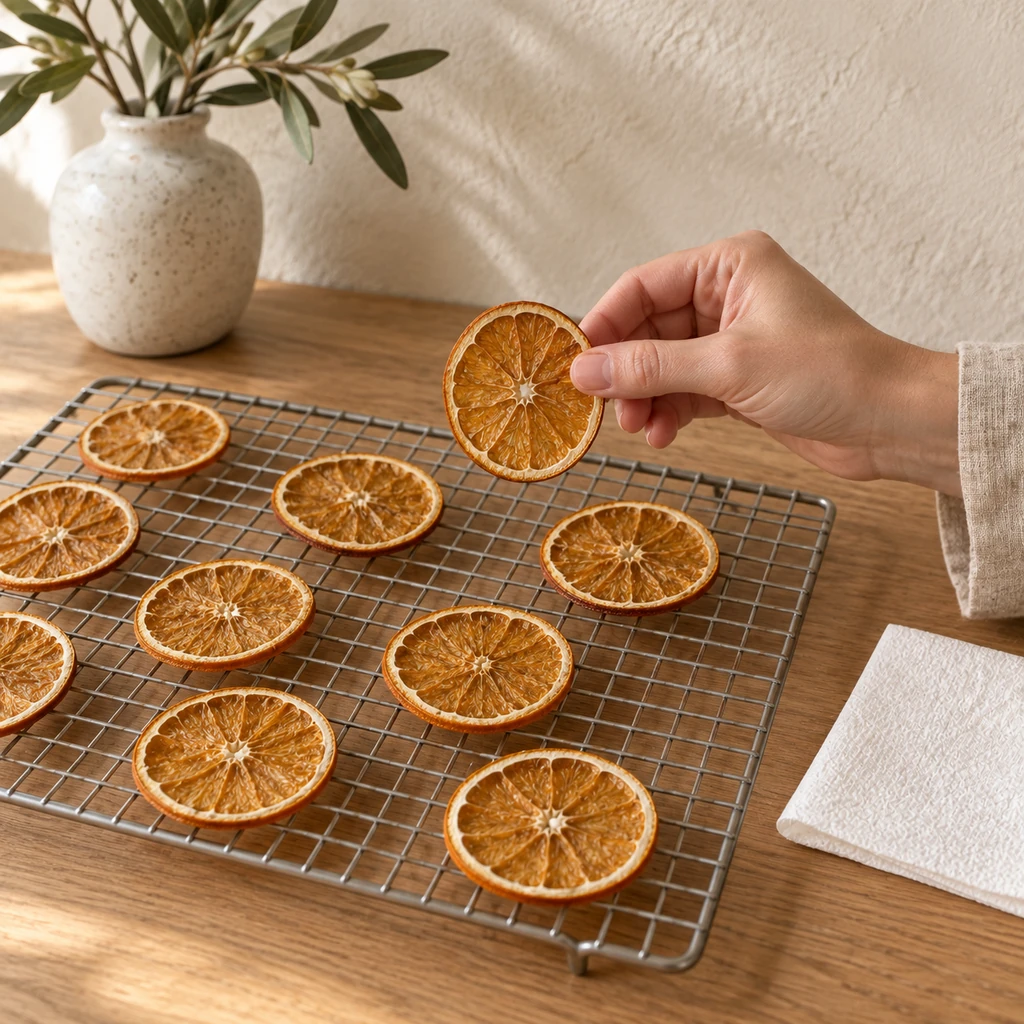
For the strongest mold prevention, leave the cool slices in a single layer in a dry room for 12 to 24 hours, then check again. Return any softened rounds to the low oven. Discard pieces with black spots, fuzzy growth, a fermented smell, or damaged wet areas rather than trying to rescue them.
5. Thread the Pattern Without Cracking the Pieces
Cut the twine to your measured length plus the allowance for end loops, then tie one loop. Thread the needle and pass it through firm orange flesh about 1/4 inch inside the peel. Pull slowly. For each dried bay leaf, pierce the sturdy lower section near the base rather than the fragile tip.
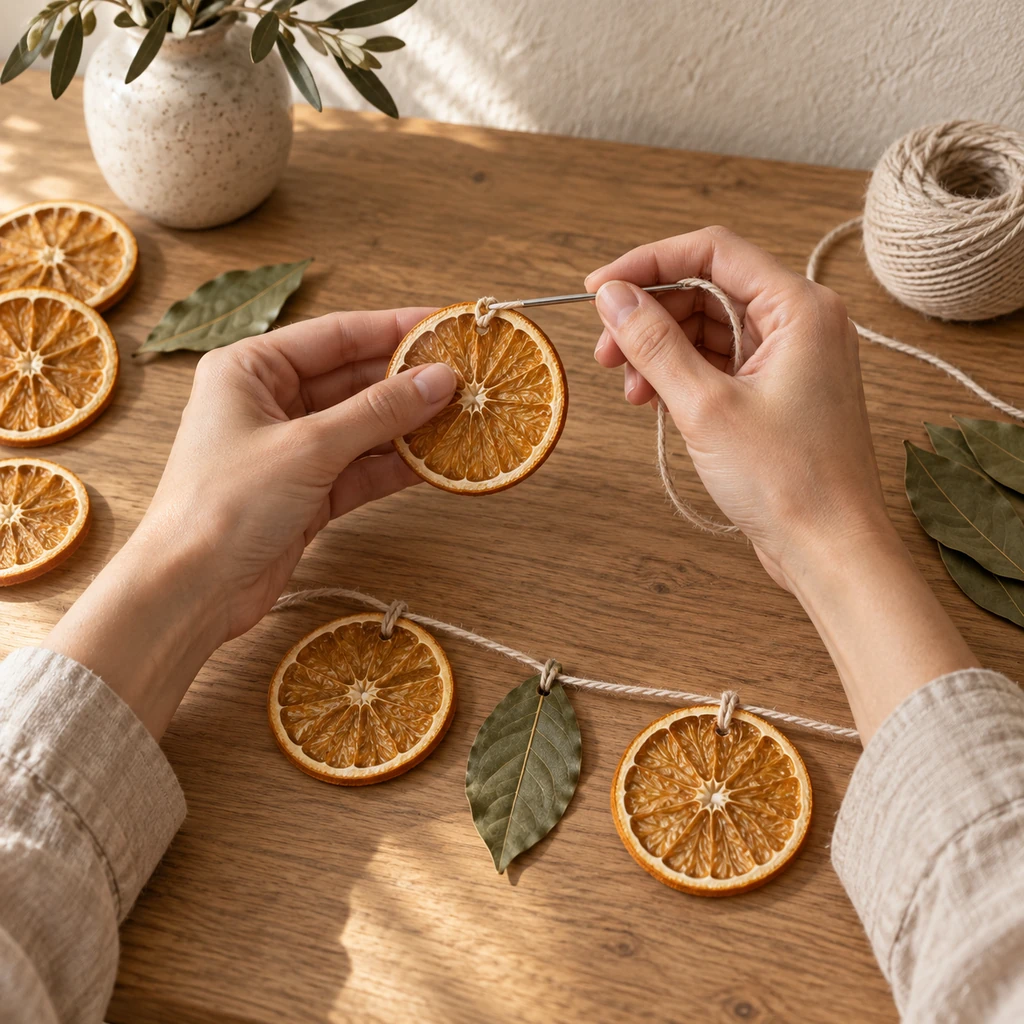
Alternate one orange round with one bay leaf, leaving roughly 1 1/2 to 2 inches between pieces. A small loose overhand knot beside each item can limit sliding, but do not cinch it hard enough to cut the fruit or leaf. Lay the growing strand flat as you work so the twine does not twist.
6. Hang, Adjust, and Inspect
Tie the second end loop and support the garland from both ends before letting the center drop. Adjust the spacing while the strand is supported; dragging it across a hook can crack the dry pieces. Add a center support for a longer or heavier garland.
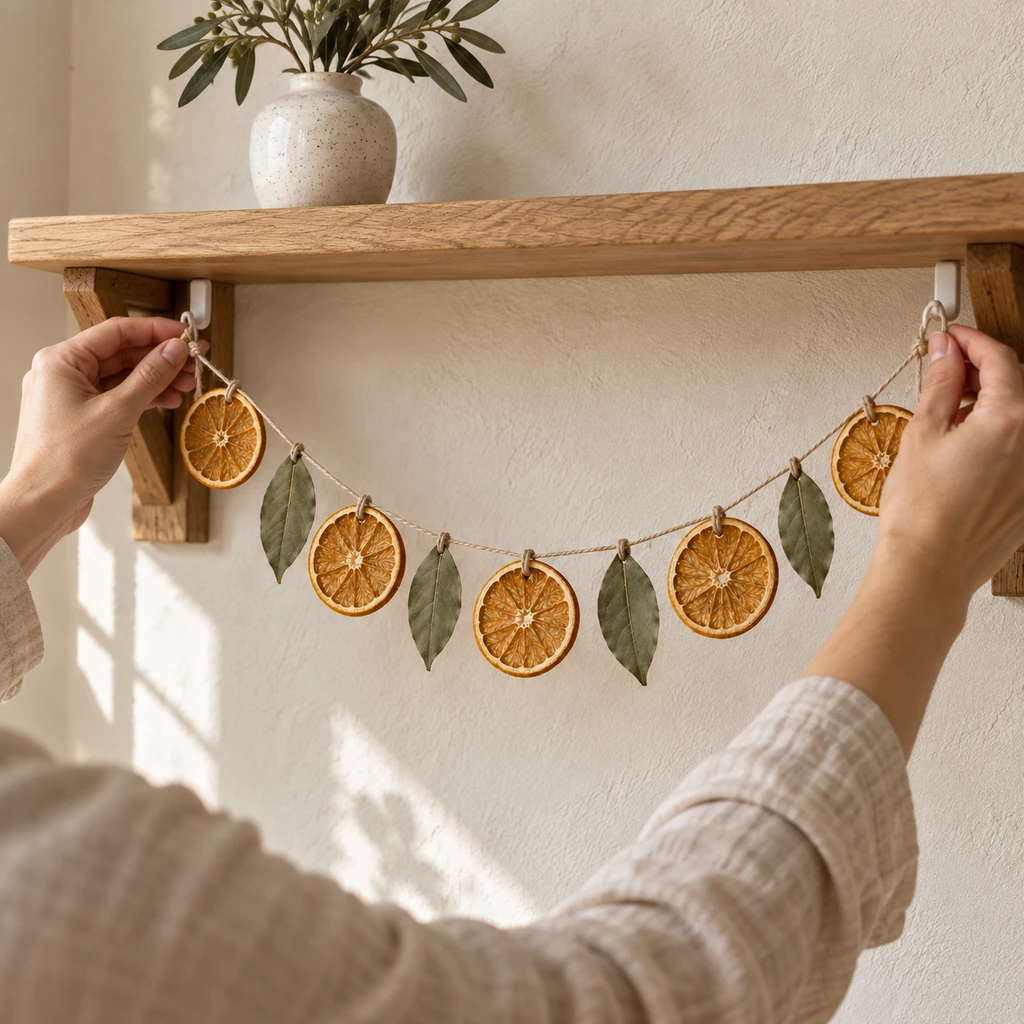
Choose a dry indoor wall, shelf, doorway, or mantel with no active flame. Keep the garland away from cooking steam, bathroom humidity, damp glass, radiators, open fireplaces, and places where children or pets can pull it down. Check the first day for any slice that has softened after hanging.
The Anti-Mold Checkpoint
- Before stringing: every orange round is cool, matte, light, and non-tacky.
- After the overnight rest: no center has softened or left a moisture mark.
- After hanging: the strand is in a dry, ventilated indoor position.
- During use: there is no fuzzy growth, dark spotting, sour odor, or new stickiness.
If one component becomes damp or suspicious, remove and discard it immediately and inspect the neighboring pieces. Do not spray the garland with water, fragrance mist, or household cleaner. Moisture and residue work against the drying you have already done.
Substitutions & Variations
Use grapefruit only if you can cut smaller, even rounds and allow substantially more drying time; the larger centers hold more water. Lemons and small blood oranges can work with the same cool-and-check test. Do not mix dry and fresh citrus on one strand.
If dried bay leaves crack too easily, replace them with cinnamon sticks tied on with separate short pieces of twine, small wooden beads, or folded kraft-paper leaves. For a leaf-only version, use purchased fully dried foliage and tie it around stems instead of piercing brittle blades. Cotton twine creates a soft natural look; thin jute is more rustic but can shed fibers and may be harder to pull through citrus.
Where to Display It
The restrained orange-and-green palette suits a kitchen shelf, entryway console, bookcase, or inactive mantel. It can also frame a mirror if the strand cannot rub against the glass. Keep visual weight balanced by letting the garland form one shallow curve rather than several tight swags.
Avoid outdoor doors and porches unless you consider the project temporary. Dew, rain, temperature swings, and insects shorten the life of natural materials. Near a stove may look attractive in a photo, but repeated steam and grease make it a poor real-world location.
Storage and Reuse
When the season ends, inspect every piece in bright light. If all components are completely dry and clean, lay the strand loosely between sheets of acid-free tissue in a shallow cardboard box. Store it in a cool, dry cupboard rather than a basement, attic, or sealed plastic bag. Breathable storage helps avoid trapping residual humidity.
Dried citrus naturally deepens in color and becomes more fragile over time. That is normal. Replace cracked pieces before rehanging, and discard the entire strand if there is widespread moisture damage, pests, or mold.
Common Problems and Practical Fixes
The centers are sticky but the peels are dark: the rounds were probably too thick or the oven ran hot. Lower the temperature, continue drying, and check more often. Next time, measure the first slices.
The slices curl: slight curling is normal and adds character. Severe cupping usually comes from uneven thickness. Rotate the trays and turn the pieces regularly; do not flatten hot fruit under a heavy object because that can trap moisture.
The bay leaves split: move the puncture closer to the sturdy base, use a larger blunt needle, and pull the twine without jerking. Replace very brittle leaves rather than gluing broken fragments.
The pieces slide toward the center: loosen the display curve and place a small knot beside each component. For a long garland, add a discreet center hook to reduce tension.
Frequently Asked Questions
How long will a dried orange garland last?
There is no fixed lifespan because humidity and drying quality matter more than the calendar. A thoroughly dried garland kept indoors in a dry location may remain attractive for a season and can sometimes be stored for reuse. Inspect it rather than assuming it is safe based on age.
Can I use an air fryer or dehydrator?
A dehydrator is a good controlled option; follow its manual for fruit slices and still perform the full cool-and-rest test. Air fryers vary widely in airflow, capacity, and minimum temperature, so use one only if its manufacturer explicitly supports dehydrating fruit. Small baskets may require several batches.
Should I coat the orange slices with varnish?
It is not necessary for this natural finish, and coating a slice that still contains moisture can seal the problem inside. If you choose a craft sealer for a different look, apply it only to completely dry pieces in a well-ventilated area and follow the product label. Keep the result decorative and away from food.
Can I add essential oil for fragrance?
Skip liquid oil on the fruit and leaves because it can create spots and alter how the surface ages. If fragrance is important, scent a separate porous ornament and hang it nearby without touching the garland. Keep concentrated oils away from children and pets and follow the product’s safety directions.