
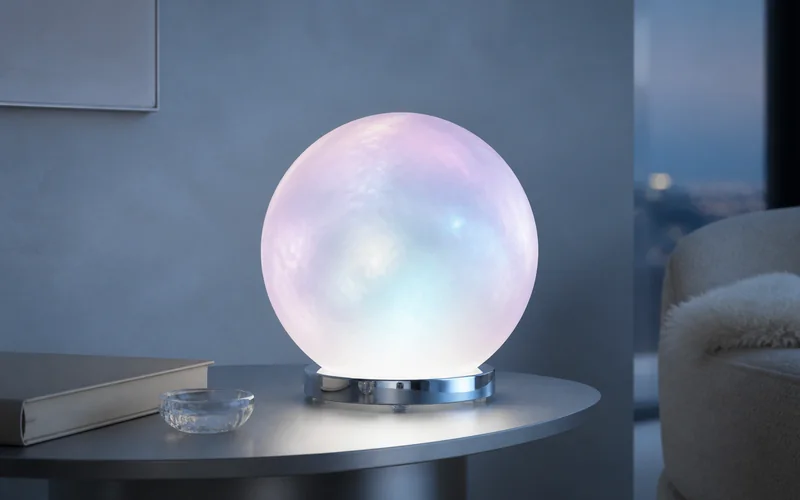
This glowing orb looks like a tiny piece of sci-fi set design, but it requires no rewiring. A rechargeable LED puck hides beneath an eight-inch acrylic globe, while a thin interior pearl coating shifts from icy blue to pale lavender as the viewing angle changes.
Opalescent Orb Lamp Plan
The lamp uses an 8-inch globe with a single 3 1/4-inch neck opening, a 6-inch chrome display ring, and a rechargeable puck no wider than 3 inches. Measure all three parts before buying: the neck must sit securely on the ring, and the puck must remain centered beneath the opening.
Materials and Tools
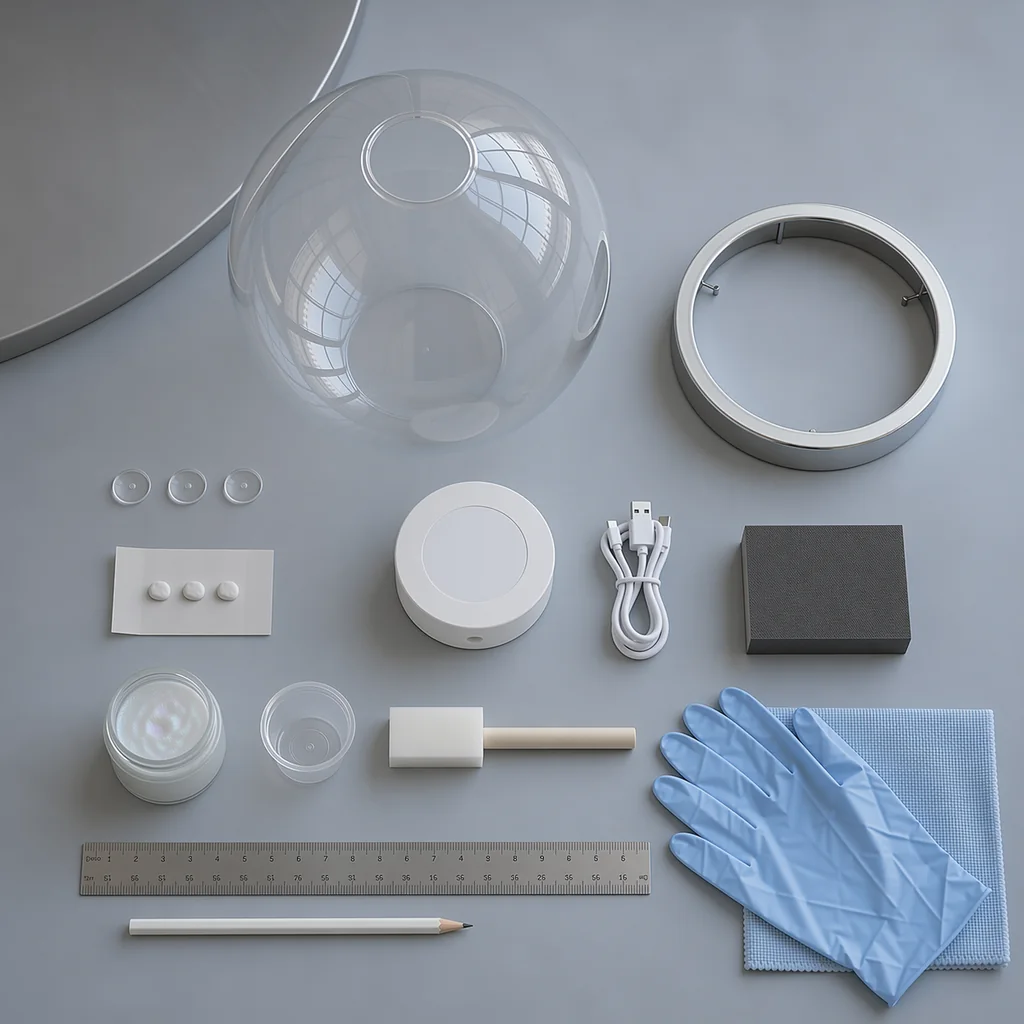
- One clear 8-inch acrylic globe with a 3 1/4-inch neck opening
- One low 6-inch polished-chrome display ring
- One 3-inch rechargeable, dimmable, low-heat LED puck light
- Pearl iridescent interference acrylic medium approved for plastic
- One 1-inch foam brush and a small mixing cup
- Three clear rubber bumpers and removable museum putty
- Microfiber cloth, mild dish soap, gloves, ruler, and pencil
Step 1: Test the Fit and Clean the Globe
Set the chrome ring on a level table and place the clear globe neck-down on it. The ring should support the neck evenly without letting the sphere rock. Center the unlit puck underneath and confirm that its charging port can face the rear.
Wash the inside of the globe with warm water and a drop of mild dish soap. Rinse thoroughly and let it air-dry neck-down. Avoid alcohol, ammonia, and solvent cleaners, which can cloud or craze some acrylic plastics.
Step 2: Build the Opalescent Interior
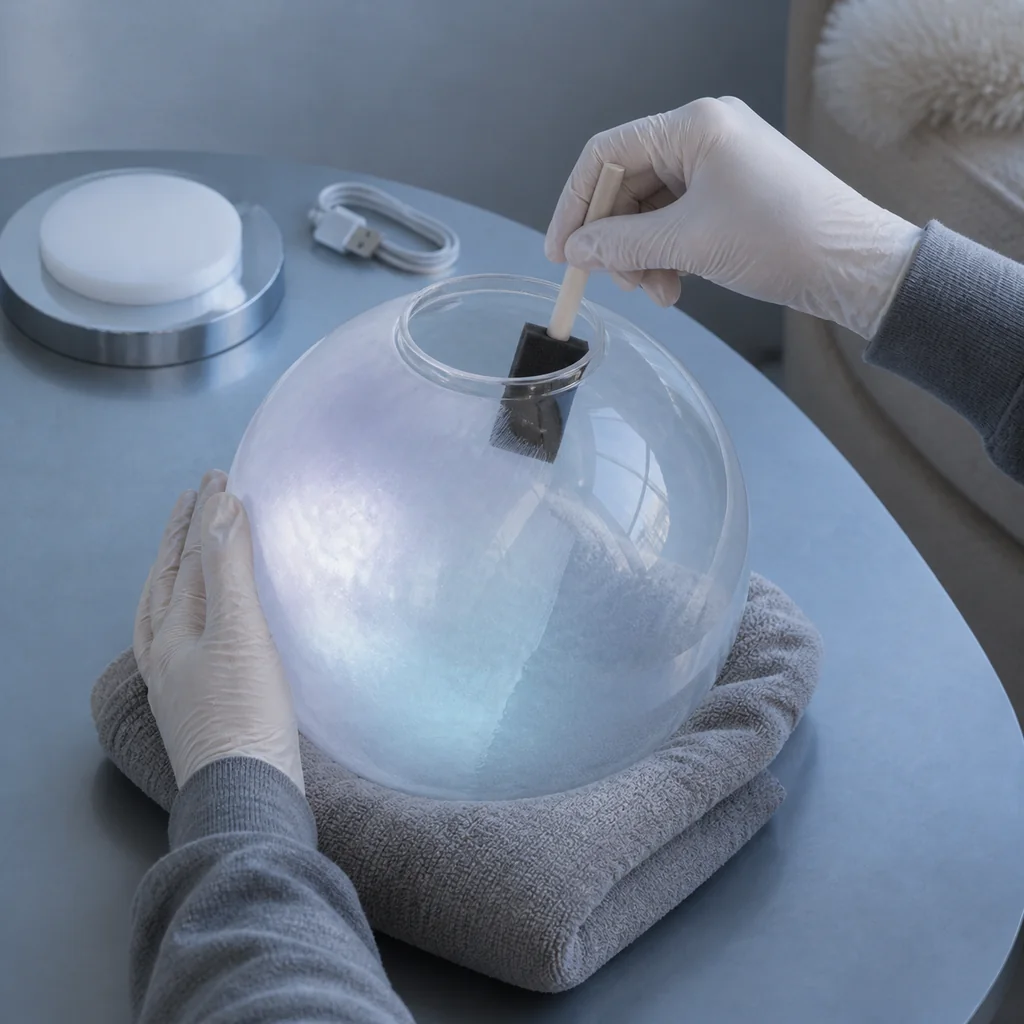
Nest the globe neck-up in a folded towel. Wearing gloves, brush a very thin layer of interference medium inside the sphere. Work from the neck toward the widest area, rotating the globe rather than reaching across wet sections.
Let each layer dry according to the product label. Apply two or three thin coats until the clear plastic becomes milky but still transmits light. Thick paint can pool at the bottom and create a bright, opaque patch. Allow the final coat to cure for at least 24 hours.
Step 3: Prepare the Cordless Base
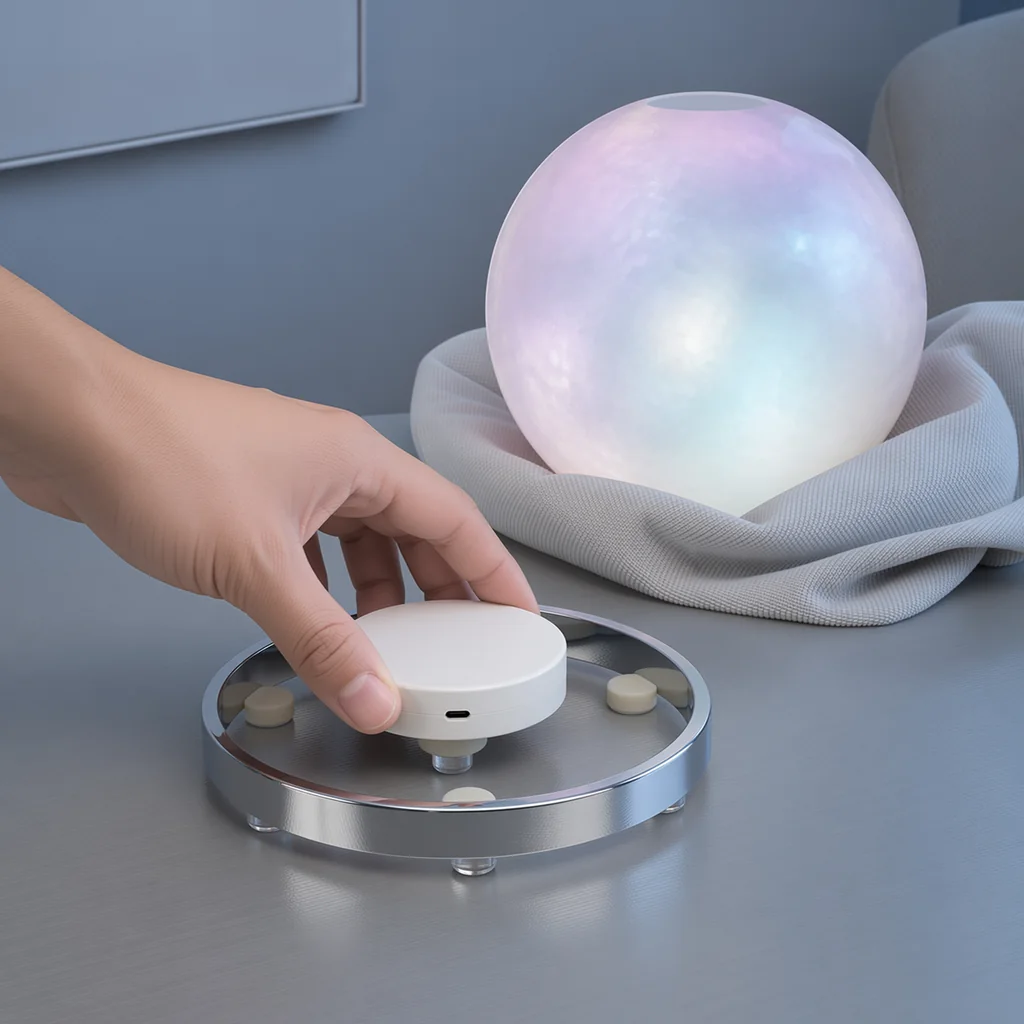
Place three clear bumpers beneath the ring at equal 120-degree intervals. They protect the tabletop and stop the base from sliding. Add three pea-size pieces of museum putty inside the ring, then press the puck lightly into the center with its charging port facing outward.
The putty should prevent shifting but remain removable. Do not glue the puck permanently; it must come out for charging and inspection.
Step 4: Assemble and Test the Glow
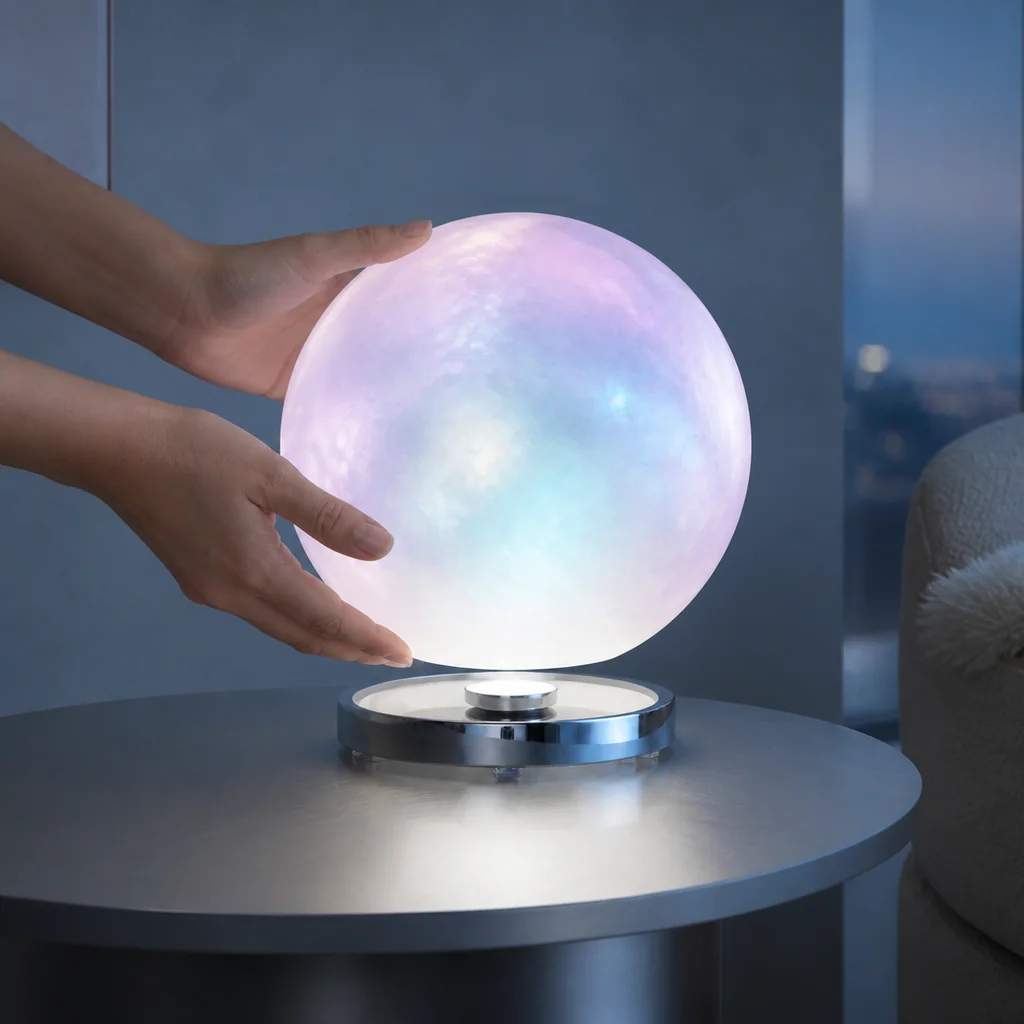
Charge the puck fully on an uncovered, nonflammable surface. Switch it on, select the lowest brightness, and lower the cured globe neck-down onto the ring. Check the lamp from every side. If one area looks brighter, recenter the puck rather than adding more paint.
Essential Safety Rules
- Use only a rechargeable LED puck specified as low heat.
- Never use an incandescent bulb, halogen bulb, mains-powered socket, or candle.
- Remove the globe before charging; never charge or leave the puck running unattended while covered.
- Turn the lamp off immediately if the globe, ring, battery, or puck feels warm.
- Keep it on a stable indoor surface away from water, curtains, children, and pets.
Styling and Care
Pair the cool glow with chrome, clear glass, and pale textiles. Dust the outside with a dry microfiber cloth and lift the globe by supporting it with both hands. Do not spray cleaner directly onto the coated acrylic.
Continue the luminous theme with this opalescent moon phase wall hanging. For another sculptural accent, try the Neo Deco sunburst mirror or a painted scallop lampshade.
Frequently Asked Questions
Why does my globe show brush marks?
The coats are probably too thick. Let the layer dry, then add one very thin crosswise coat while rotating the globe continuously.
Can I use a glass globe?
Acrylic is safer and lighter for this removable design. Glass requires a base engineered for its exact weight and neck profile.
Final Notes
The effect depends on restraint: a stable chrome ring, a centered low-heat puck, and just enough translucent coating to diffuse the light. Test the fit before painting and keep every component removable for safe charging.