
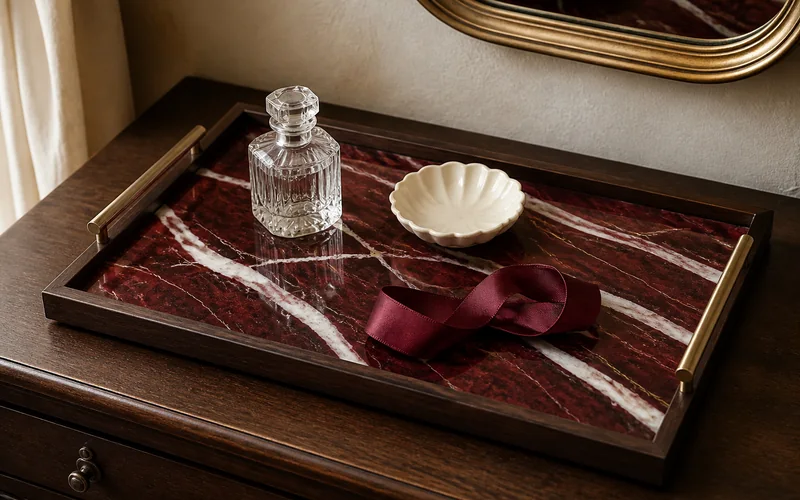
Deep red marble and warm brass can make a vanity feel collected rather than cluttered. This compact tray recreates that luxurious look with paint, plywood, and walnut trim—no stone-cutting or resin pour required.
Finished Faux Red Marble Tray Plan
The outside dimensions are 18×10 inches with a 3/4-inch raised rim and two 6-inch brushed-brass bar handles. Five broad ivory veins cross the oxblood center diagonally, while a few fine gold lines add depth without making the surface busy.
Materials and Tools
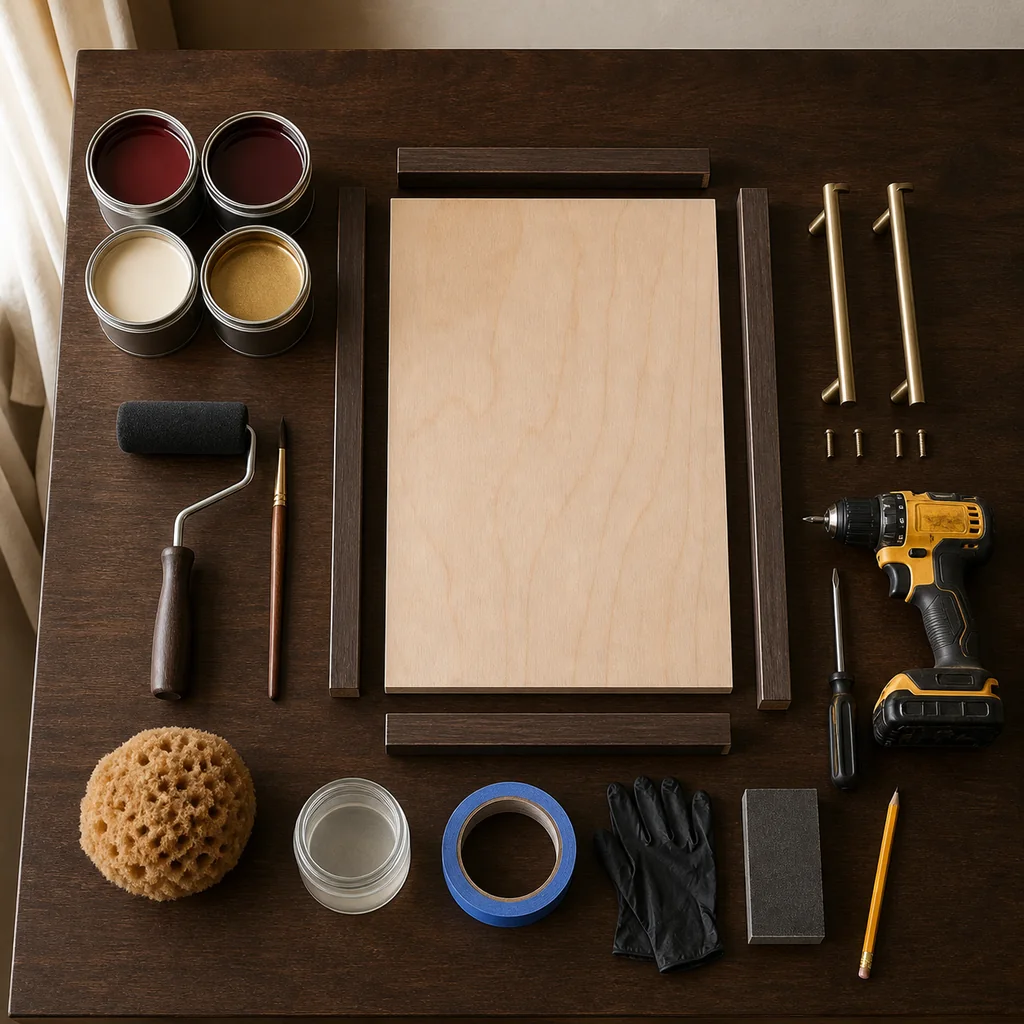
- One 18×10-inch piece of 1/4-inch birch plywood
- Four 3/4-inch-square walnut trim pieces, mitered to fit the perimeter
- Two matching 6-inch brass bar handles with screws
- Wood glue and 5/8-inch pin nails
- Bonding primer; oxblood, burgundy, ivory, and metallic-gold acrylic paint
- Water-based satin polyurethane
- Foam roller, fine liner brush, sea sponge, painter’s tape, and 220-grit sanding sponge
- Drill, screwdriver, ruler, pencil, clamps, eye protection, and gloves
Step 1: Assemble and Prepare the Tray
Dry-fit the four mitered rails around the plywood. Glue and clamp them, then secure the underside with short pin nails. Wipe away squeeze-out immediately. Sand every edge smooth and remove dust with a slightly damp lint-free cloth.
Center one handle on each short side. Mark the holes, drill pilots sized for the supplied screws, and test the hardware. Remove both handles before painting. This prevents chipped finish and keeps the brass clean.
Step 2: Roll on the Oxblood Base
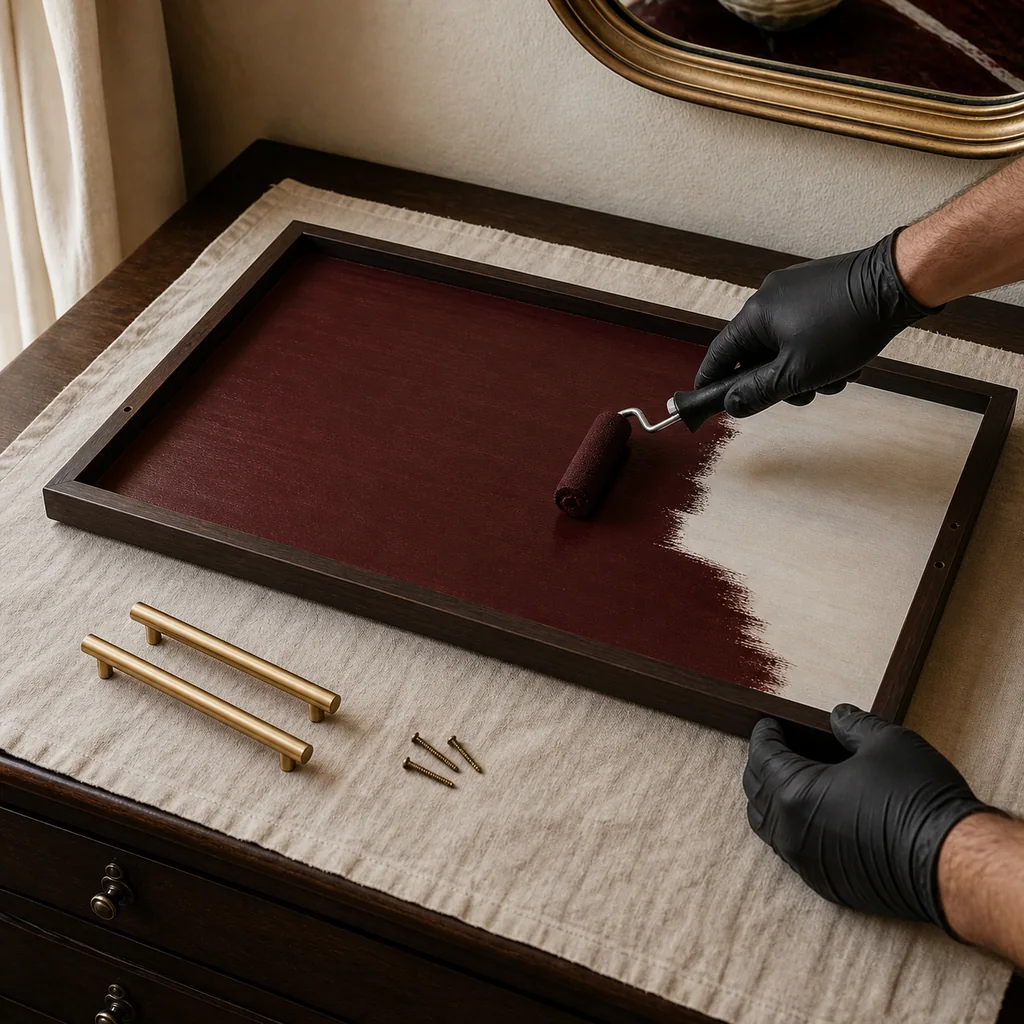
Tape the walnut rim and prime only the flat plywood center. When dry, roll on two thin oxblood coats, allowing the first to dry for the manufacturer’s stated time. Use very light pressure on the final pass so roller lines level out.
Stipple a small amount of burgundy paint with a barely damp sea sponge. Rotate the sponge often and leave some quiet areas; marble needs variation, not an even pattern.
Step 3: Paint Five Marble Veins
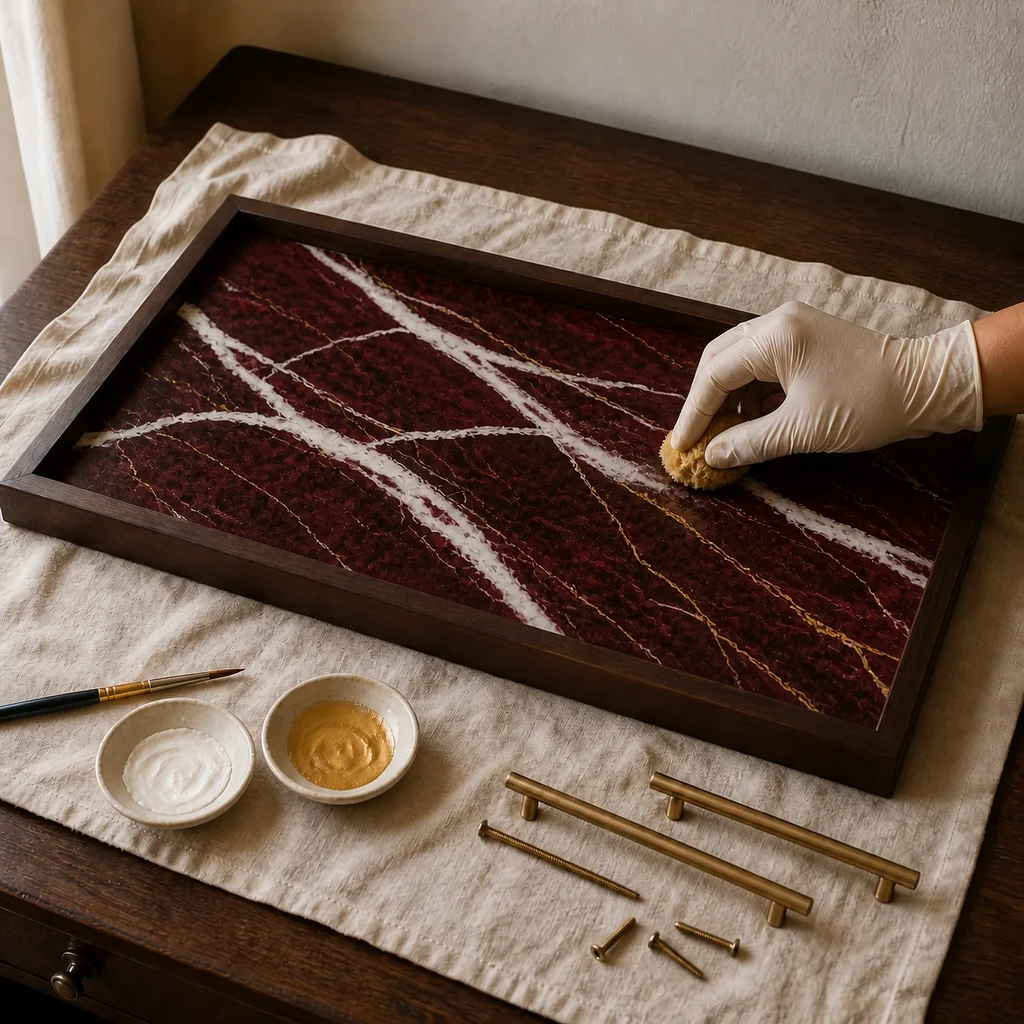
Sketch five loose diagonal paths with chalk. Vary their width and let two branch subtly. Paint one ivory line at a time, then tap its edges with a clean damp sponge before it dries. The center should remain brighter than the feathered edges.
When the ivory is dry, use a liner brush to add a few broken metallic-gold hairlines beside—not directly over—the main veins. Stop while large areas of red are still visible.
Step 4: Seal the Painted Surface
Let the design dry for 24 hours. Apply three thin coats of water-based satin polyurethane, following the recoat time on the label. Sand very lightly with 400 grit between fully dry coats if the finish feels rough. Keep the walnut rim taped until the last coat is touch-dry.
Step 5: Install the Brass Handles
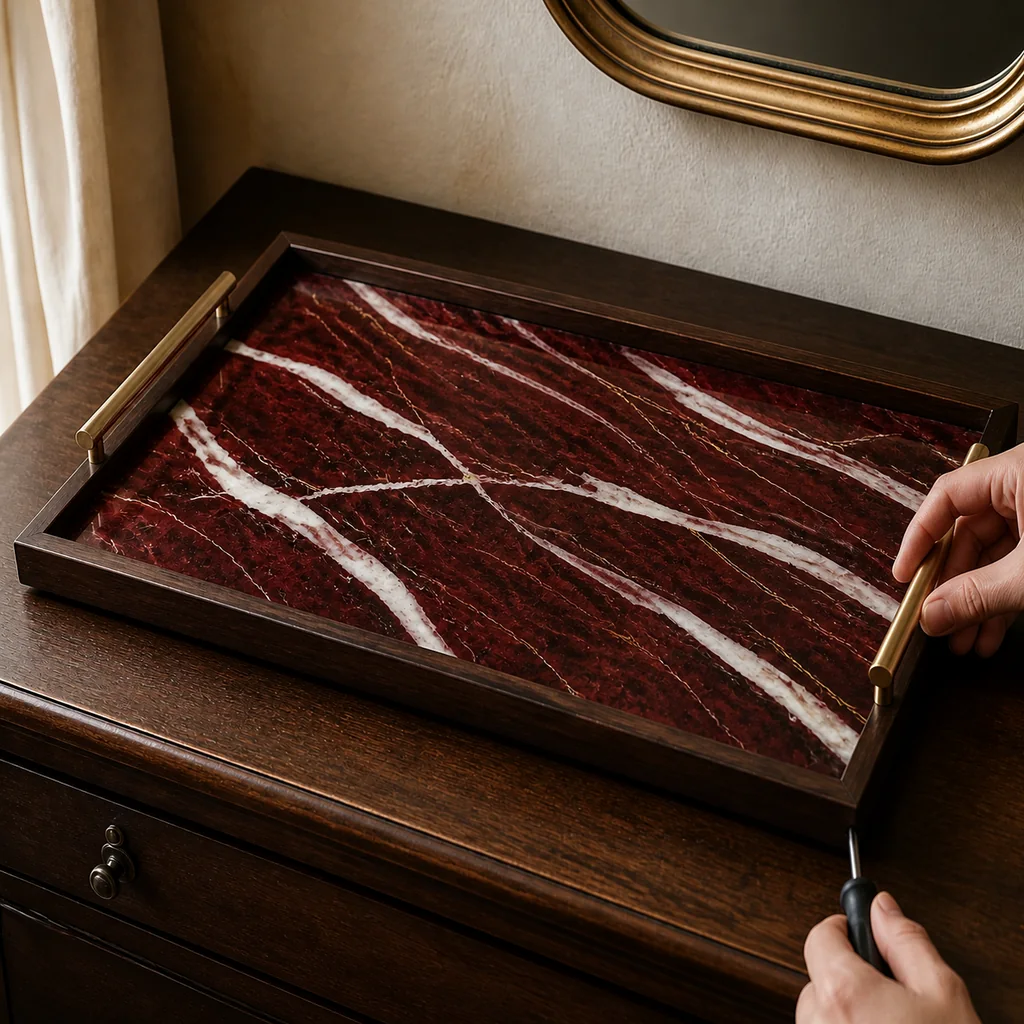
Allow the clear coat to cure for at least 72 hours. Reinstall both handles with a manual screwdriver so you can stop as soon as they feel secure. Overtightening may dent the wood or crack the finish.
Styling, Safety, and Care
- Use the tray for perfume, jewelry, makeup, or other dry decorative objects.
- It is not certified food-safe, heatproof, or suitable for standing water.
- Lift it by both handles and keep the load centered.
- Clean with a soft damp cloth; avoid alcohol-based perfume overspray and abrasive cleaners.
- Wear eye protection while cutting, drilling, and pin-nailing.
Build a coordinated vanity with this fluted perfume display stand, a hand-painted bow trinket dish, or the new velvet brooch display frame.
Frequently Asked Questions
Can I start with a ready-made wooden tray?
Yes. Choose one with a completely flat center, remove its hardware, and begin with sanding and bonding primer.
How do I make the veins look natural?
Avoid parallel lines. Change pressure, interrupt each stroke, and soften only parts of the edge. Photograph the design between layers so you can judge the overall balance.
Final Notes
The convincing finish comes from controlled layers: quiet burgundy mottling, five varied ivory veins, restrained gold accents, and a satin protective coat. Let every layer dry fully; rushing is the fastest way to blur the marble effect.