
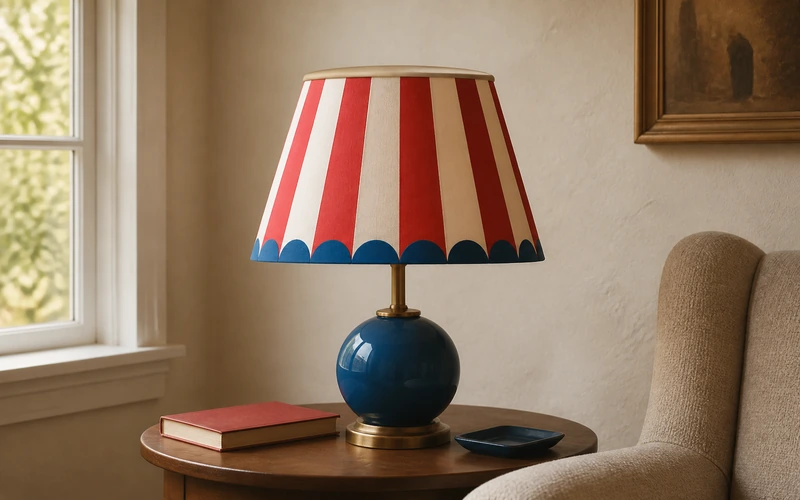
Turn a plain thrifted shade into a joyful focal point with crisp red stripes and cobalt scallops. This beginner-friendly project delivers vintage circus character without making the room feel like a theme park.
DIY Circus Lampshade Materials and Measurements
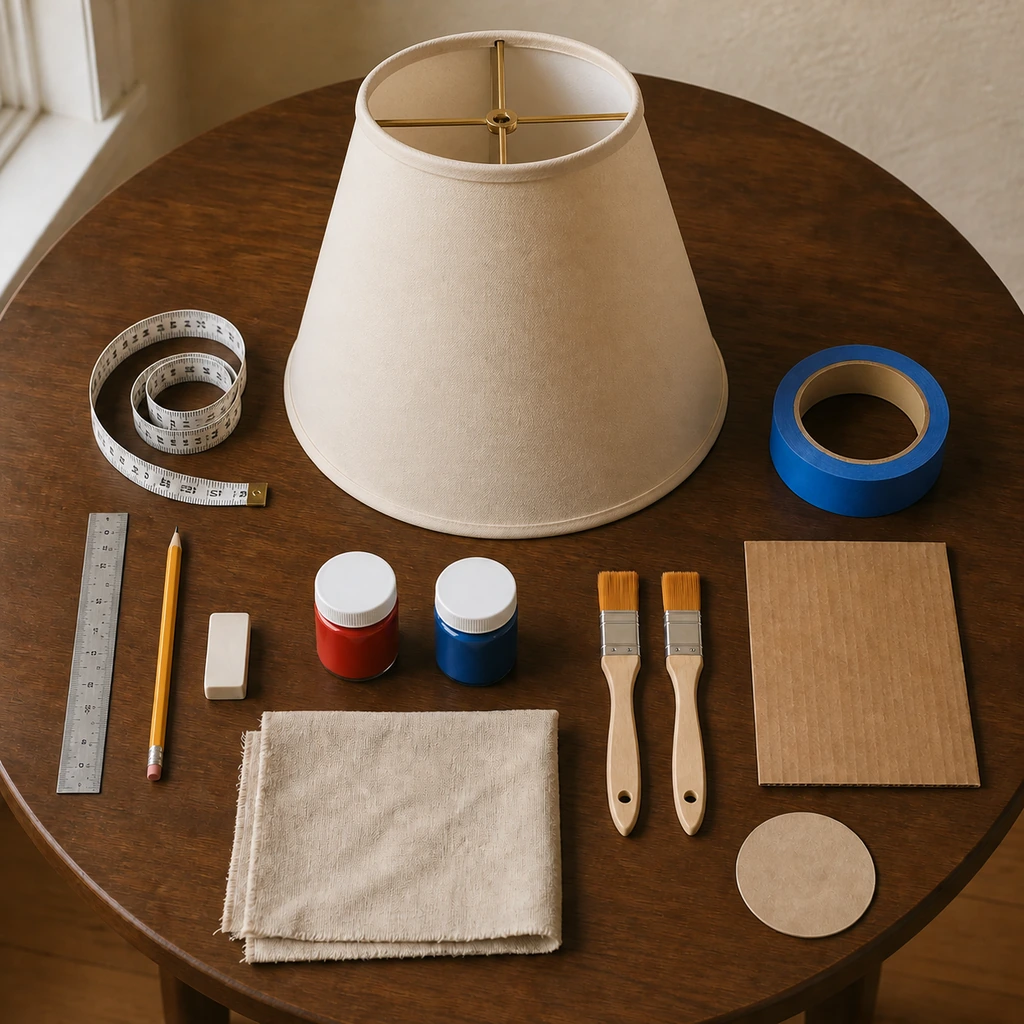
Choose a clean, fabric-covered hardback shade with a pale exterior. The sample shade measures 10 inches across the top, 14 inches across the bottom, and 10 inches along the slant.
- Tapered lampshade
- Flexible measuring tape and ruler
- Pencil and white eraser
- 1-inch low-tack painter’s tape
- Water-based fabric paint in tomato red and cobalt blue
- Two flat synthetic brushes, 1/2 inch wide
- Scrap cardboard and drop cloth
- 1 1/2-inch round template
- LED bulb approved for your lamp
If you enjoy giving overlooked pieces a second life, bookmark these simple upcycling projects for your next weekend.
Plan the Circus Stripe Pattern
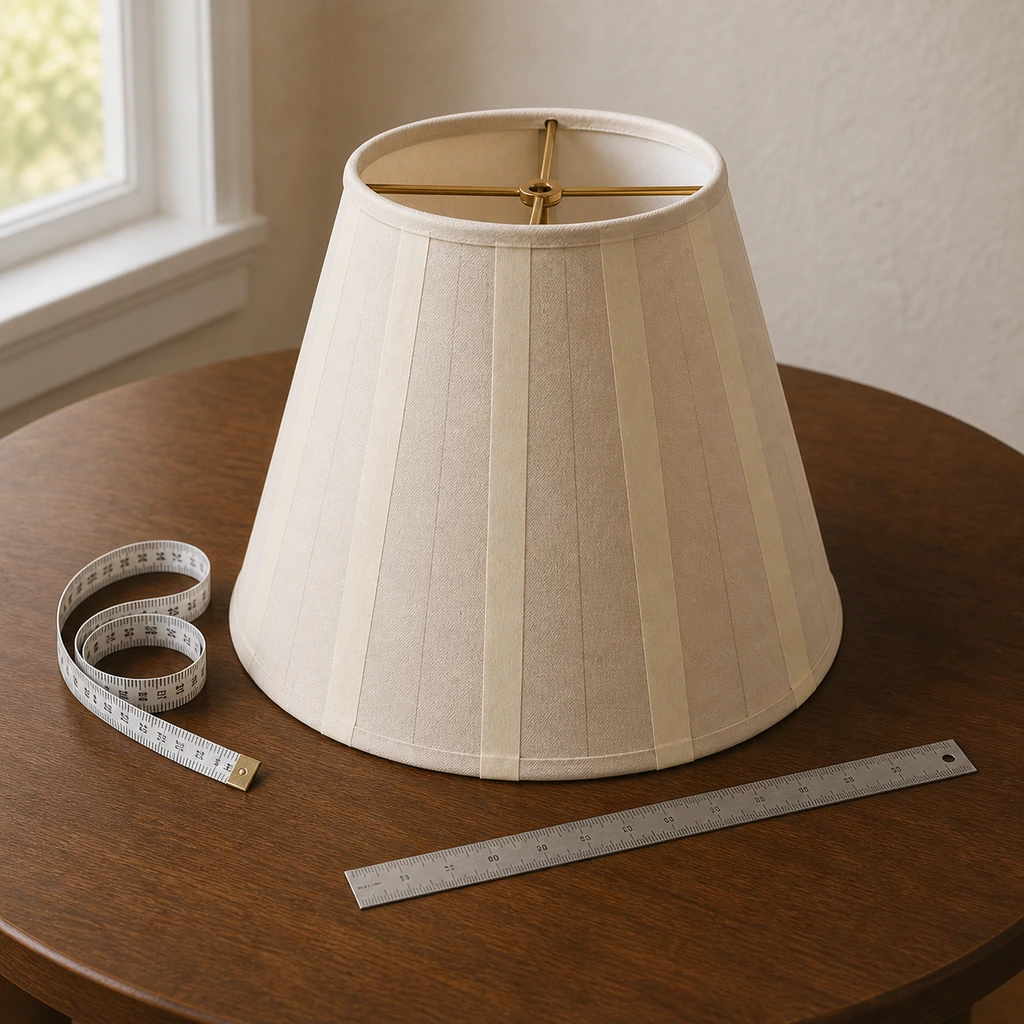
Measure the bottom circumference and divide it into 12 equal sections. Repeat at the top rim, then connect matching marks with light pencil lines. On a tapered shade, the lines should angle gently toward the narrower top.
Tape inside every other section, pressing the edges firmly but gently. This creates six red panels separated by six cream panels. Slide cardboard behind the area you are painting so pressure from the brush does not dent the shade.
Paint the Lampshade Step by Step
1. Test the paint
Test a small amount near the back seam. Let it dry completely and switch on the lamp with an LED bulb. Confirm that you like both the daylight color and the illuminated effect.
2. Build the red stripes
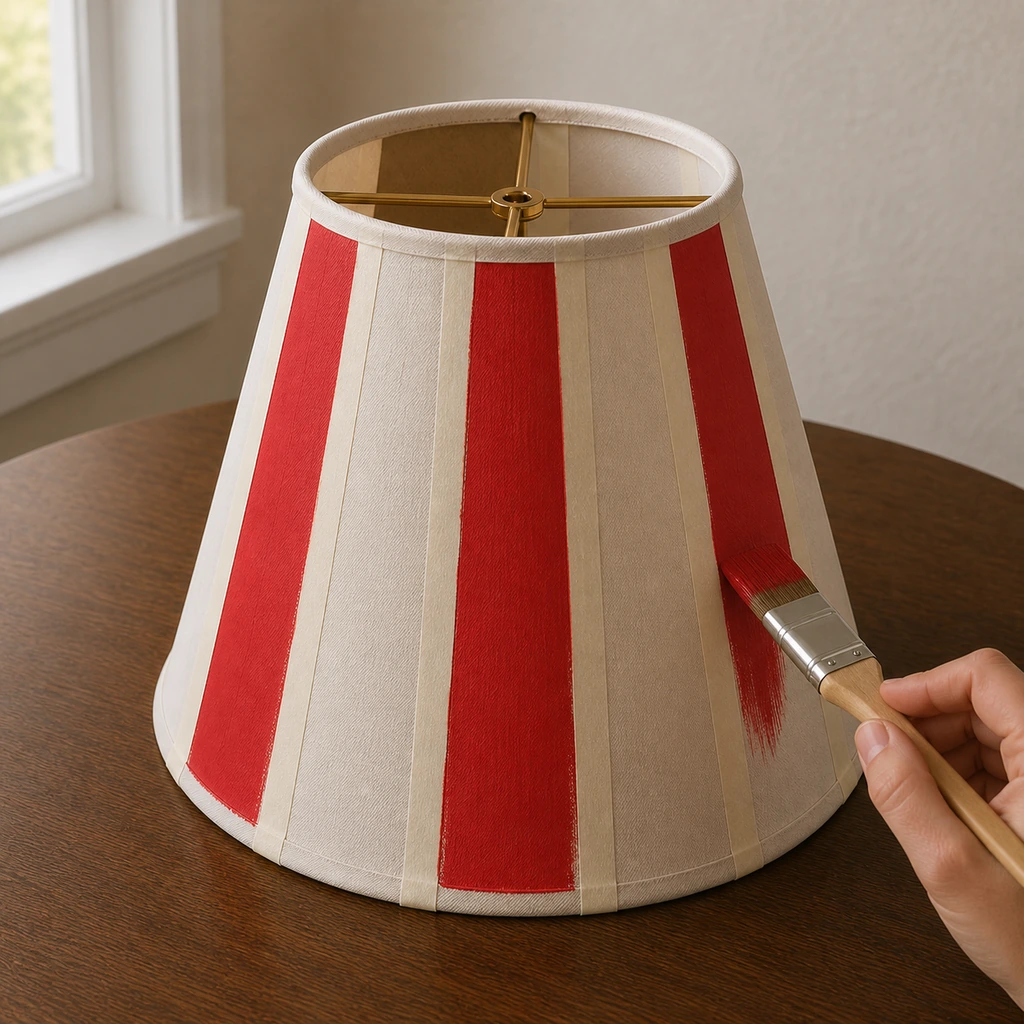
Brush tomato-red paint from top to bottom in thin, even strokes. Avoid soaking the fabric. Apply a second light coat after the first feels dry, following the paint manufacturer’s timing.
3. Reveal crisp edges
Peel the tape away while the final coat is slightly damp. Pull slowly toward the painted area. Correct tiny gaps with the corner of a clean brush, then let the stripes dry flat and undisturbed.
4. Trace the scallops
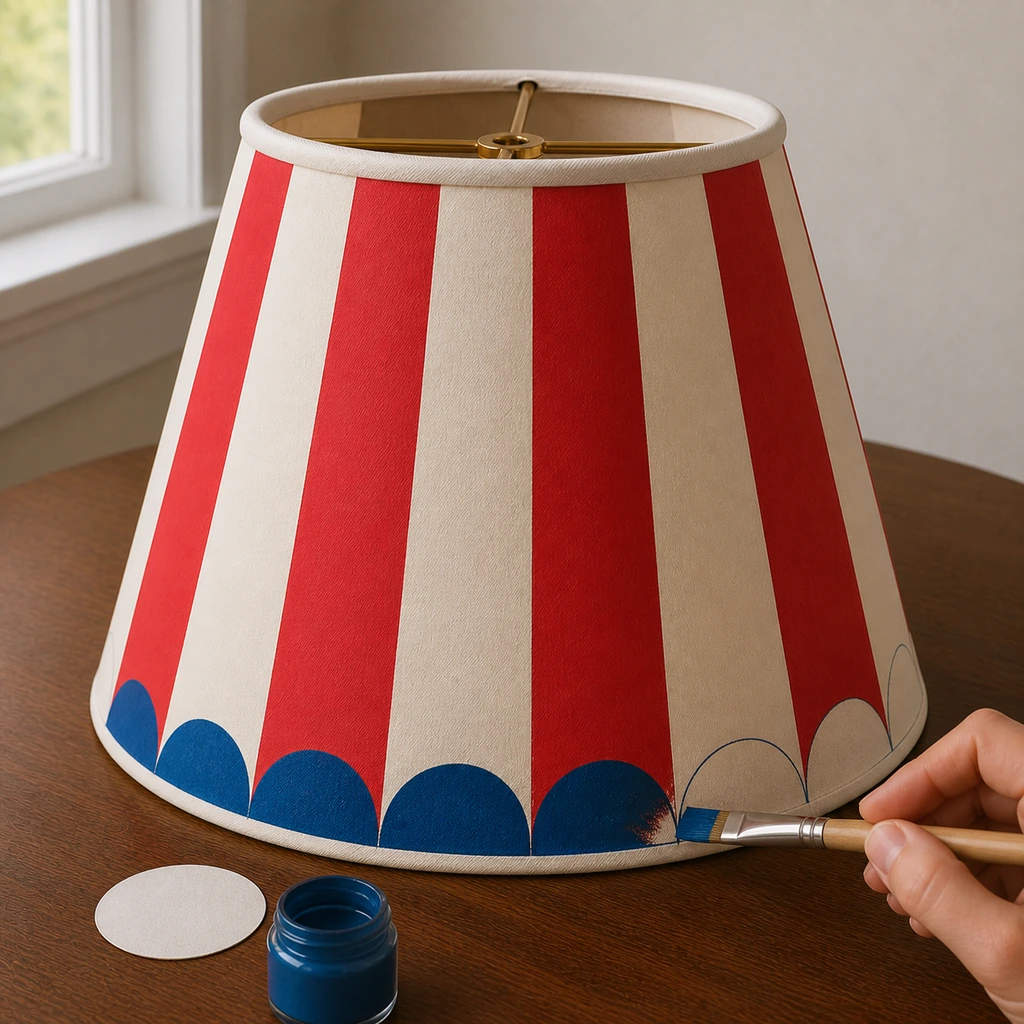
Place the 1 1/2-inch circle template along the lower edge, showing only its upper half. Repeat around the shade so each arc touches the next. Keep the row level by measuring 3/4 inch up from the rim at several points.
5. Add the cobalt border
Fill the half-circles with cobalt-blue fabric paint, using two thin coats. Turn the shade instead of twisting your wrist. Let everything cure for 24 hours before reinstalling it.
For more low-cost room updates, explore these easy DIY home decor ideas.
Style and Use Your Painted Lampshade Safely
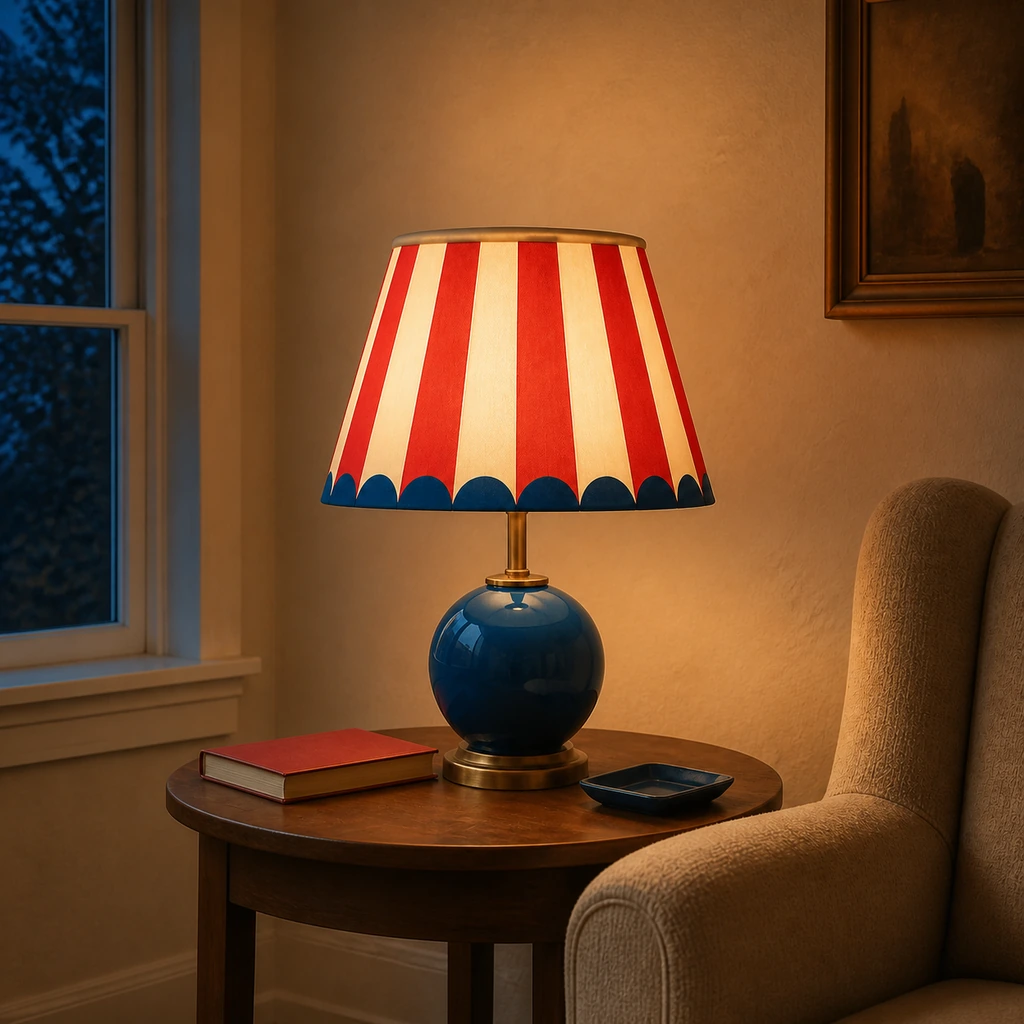
Pair the finished shade with a simple brass or dark-blue lamp base. Echo one color elsewhere—a striped pillow, red frame, or small blue tray—while keeping surrounding surfaces calm. That balance makes the circus reference feel intentional and grown-up. These budget-friendly home decor tips can help finish the vignette.
Always unplug the lamp before removing the shade. Paint only the exterior, keep paint away from the fitter and interior lining, and use a cool-running LED bulb within the lamp manufacturer’s wattage limit. Stop using the shade if it warps, discolors, or develops an odor.