
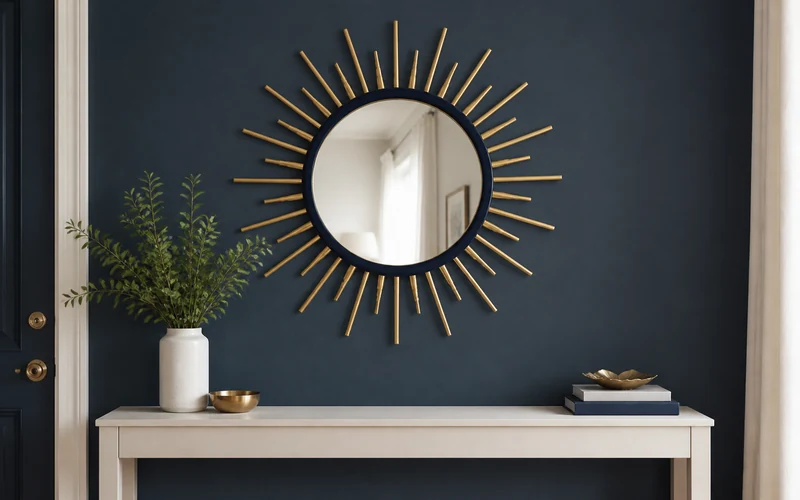
A plain round mirror becomes a bold geometric focal point with slim wood rays, deep blue paint, and warm brass. This measured weekend project creates a polished 25-inch statement piece without complicated joinery.
DIY Neo Deco Sunburst Mirror Project Overview
This DIY Neo Deco sunburst mirror uses a 12-inch mirror centered on a 14-inch plywood circle. Forty lightweight basswood rays alternate between two lengths, producing a 25-inch finished diameter. Expect about four hours of active work plus drying time.
The project suits a bedroom, entryway, or living room. It also complements these Art Deco revival decor ideas without copying their broader room-styling intent.
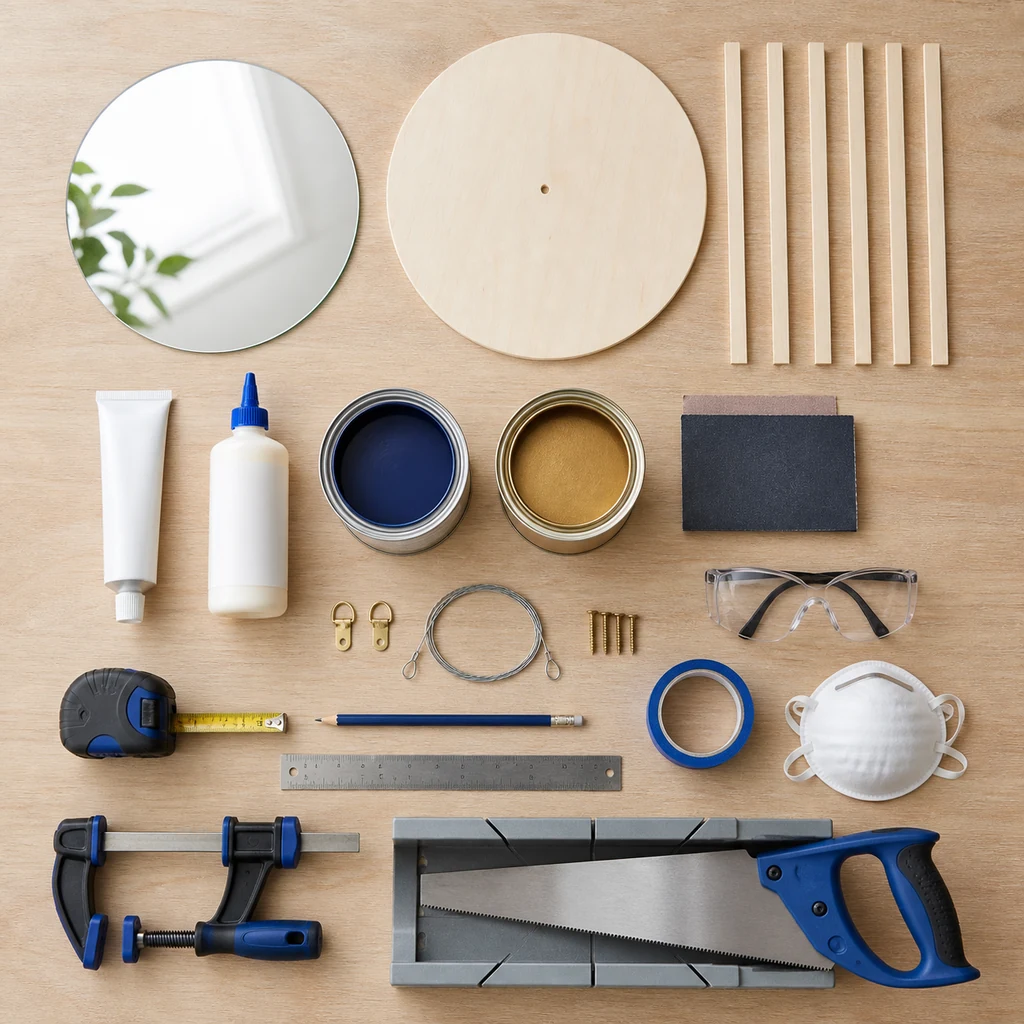
What You’ll Need
- One 12-inch round, unframed mirror
- One 14-inch-diameter, 1/2-inch-thick plywood circle
- Eight 1/4-by-1/2-by-36-inch basswood strips
- One sheet of paper at least 14 inches square
- Mirror-safe construction adhesive
- Wood glue
- 120- and 220-grit sandpaper
- Deep navy water-based craft paint
- Metallic brass water-based craft paint
- Water-based clear satin topcoat
- Two small D-ring hangers, 20-pound picture wire, and 3/8-inch screws
- Wall fastener rated for the finished mirror and your wall type
- Measuring tape, pencil, straightedge, scissors, clamps, and painter’s tape
- Miter box with fine-tooth hand saw, or a power miter saw
- Eye protection, hearing protection for power tools, and a dust mask
Cut List and Finished Measurements
- 20 long rays: 1/4 by 1/2 by 7 1/2 inches
- 20 short rays: 1/4 by 1/2 by 5 1/2 inches
- Backing: one 14-inch-diameter plywood circle
- Mirror: one 12-inch-diameter round mirror
- Finished size: approximately 25 inches wide, 25 inches high, and 1 inch deep
Cut one long and one short test ray first. Place them behind the plywood with 2 inches overlapping the disk. The long ray should extend 5 1/2 inches beyond the edge; the short ray should extend 3 1/2 inches.
Step 1: Make a 40-Part Spacing Guide
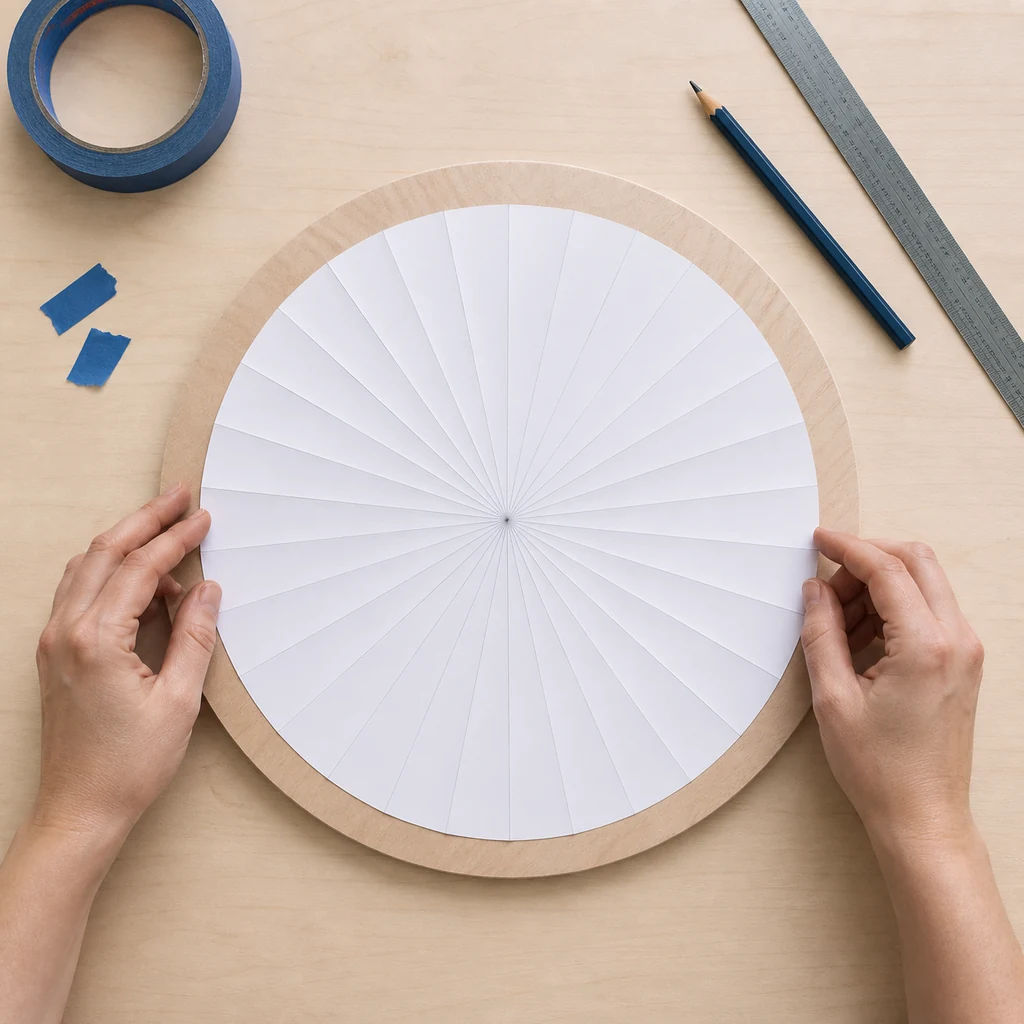
Trace the plywood circle onto paper and cut it out. Mark the center, then use a protractor and straightedge to draw a radial line every 9 degrees. Continue around the circle until the guide contains 40 equal wedges, then punch a tiny center hole.
Center the guide on the back of the plywood and tape it in place. Extend each crease from the center toward the edge with a straightedge. These lines keep the rays evenly spaced.
Step 2: Cut and Sand the Wood Rays
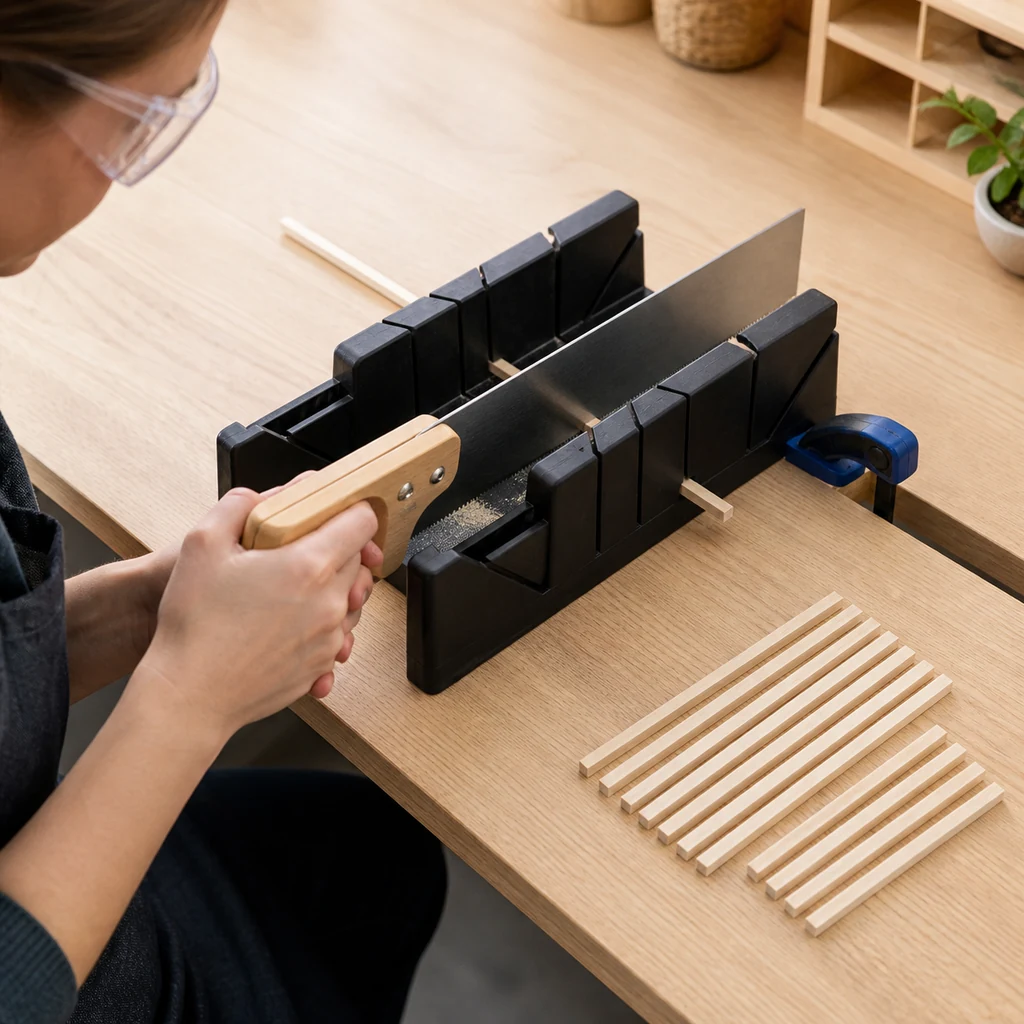
Mark 20 pieces at 7 1/2 inches and 20 pieces at 5 1/2 inches. Cut square ends using a secured miter box and fine-tooth saw. Keep hands outside the cutting path and clamp narrow stock instead of holding it close to the blade.
Bundle matching pieces together and compare their ends. Recut any piece that differs by more than 1/16 inch. Sand cut edges with 120 grit, then lightly smooth every face with 220 grit.
Step 3: Dry-Fit and Glue the Rays
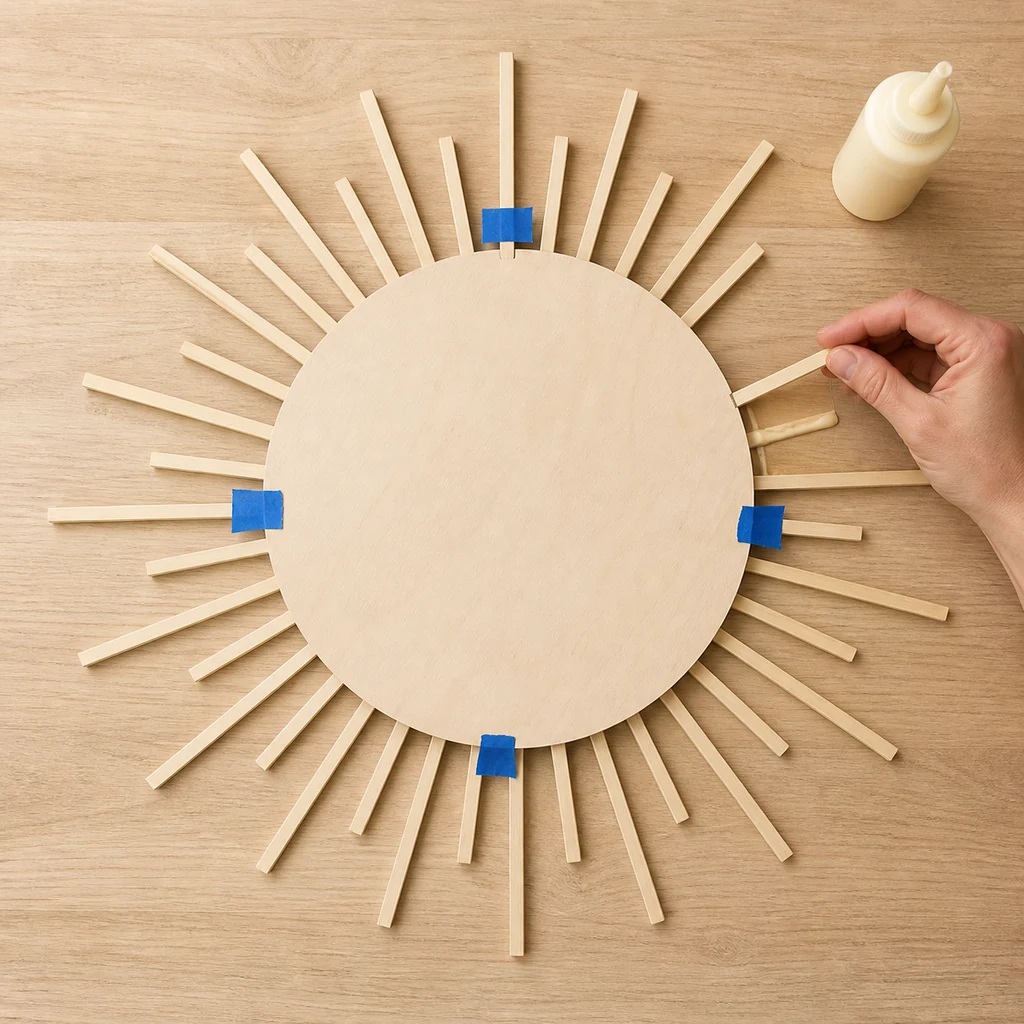
Lay the plywood face down. Align a long ray with the top line and overlap the disk by exactly 2 inches. Place a short ray on the next line with the same overlap. Continue alternating long and short pieces around the circle.
Check that opposite long rays measure about 25 inches tip to tip. When spacing looks even, mark each inner end. Lift four rays at a time, apply a thin film of wood glue within the overlap, replace them, and tape them down. Wipe away squeeze-out immediately.
Place a second flat board over the glued overlaps and add evenly distributed weights or clamps. Let the glue cure according to its label before moving the assembly.
Step 4: Paint and Seal the Frame
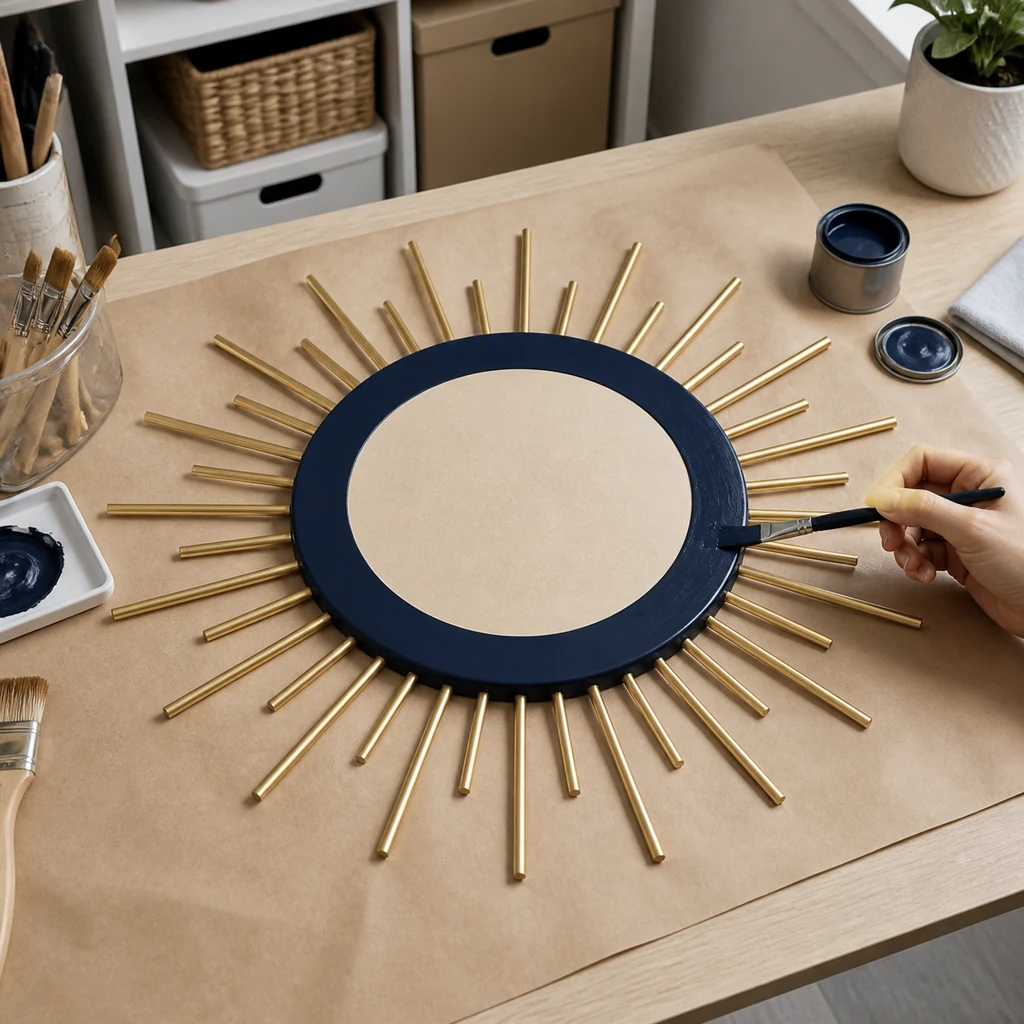
Paint the exposed front and edge of the plywood deep navy. Paint the rays brass on all visible faces. Two thin coats produce cleaner edges than one heavy coat. Allow each coat to dry fully and lightly smooth raised grain with 220-grit paper.
Apply one thin satin topcoat. Avoid coating the center where the mirror adhesive will bond. If you prefer a natural finish, leave the basswood bare and seal it with clear water-based topcoat, as seen in these rustic wood frame ideas.
Step 5: Install the Hanging Hardware and Mirror
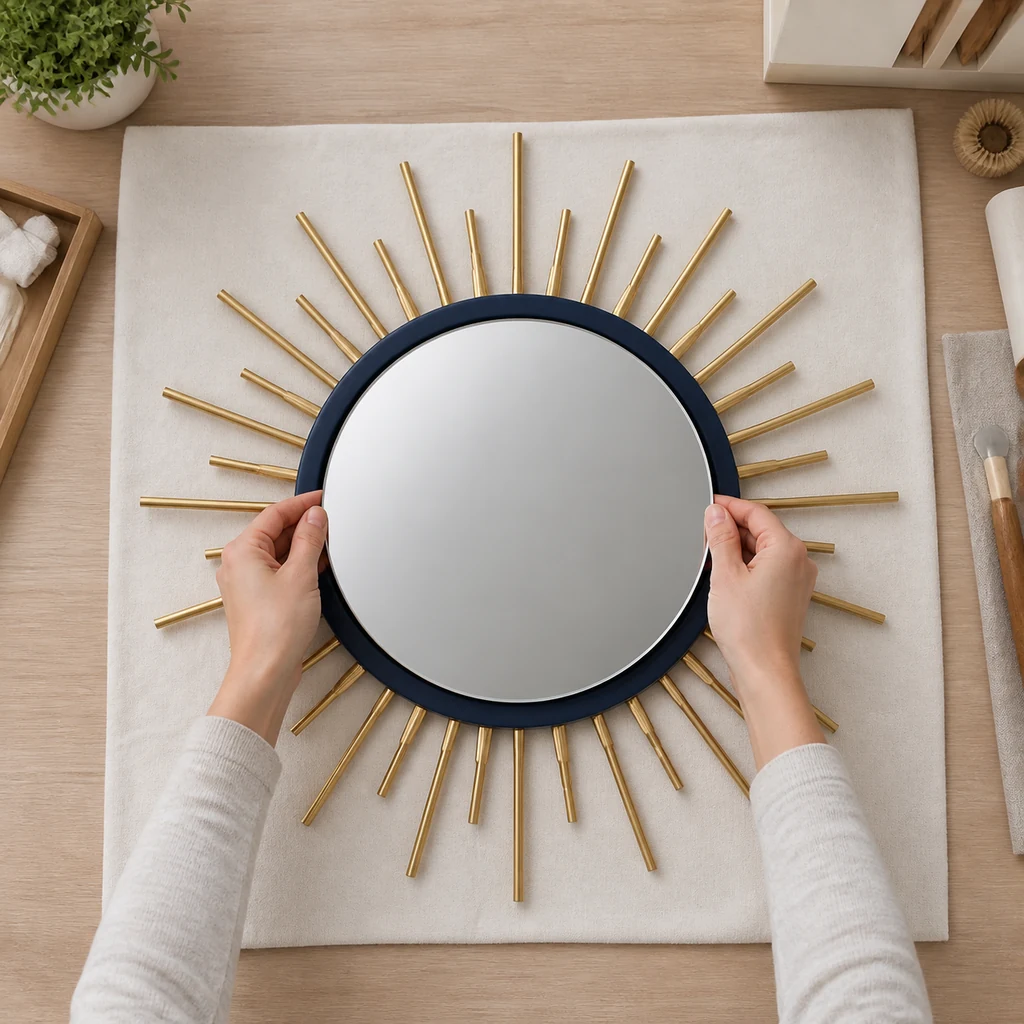
Keep the frame face down on a padded surface. Attach two D-rings to the plywood within the clear central area, equally spaced above the centerline. Use 3/8-inch screws so they cannot penetrate the front. Add picture wire with secure wrapped ends and moderate slack.
Turn the piece face up. Clean the plywood center and the mirror back. Apply mirror-safe adhesive exactly as directed; ordinary solvent adhesive can damage reflective backing. Center the mirror so a uniform 1-inch navy rim remains visible. Add padded weights and allow the full cure time.
Step 6: Hang and Level the Mirror
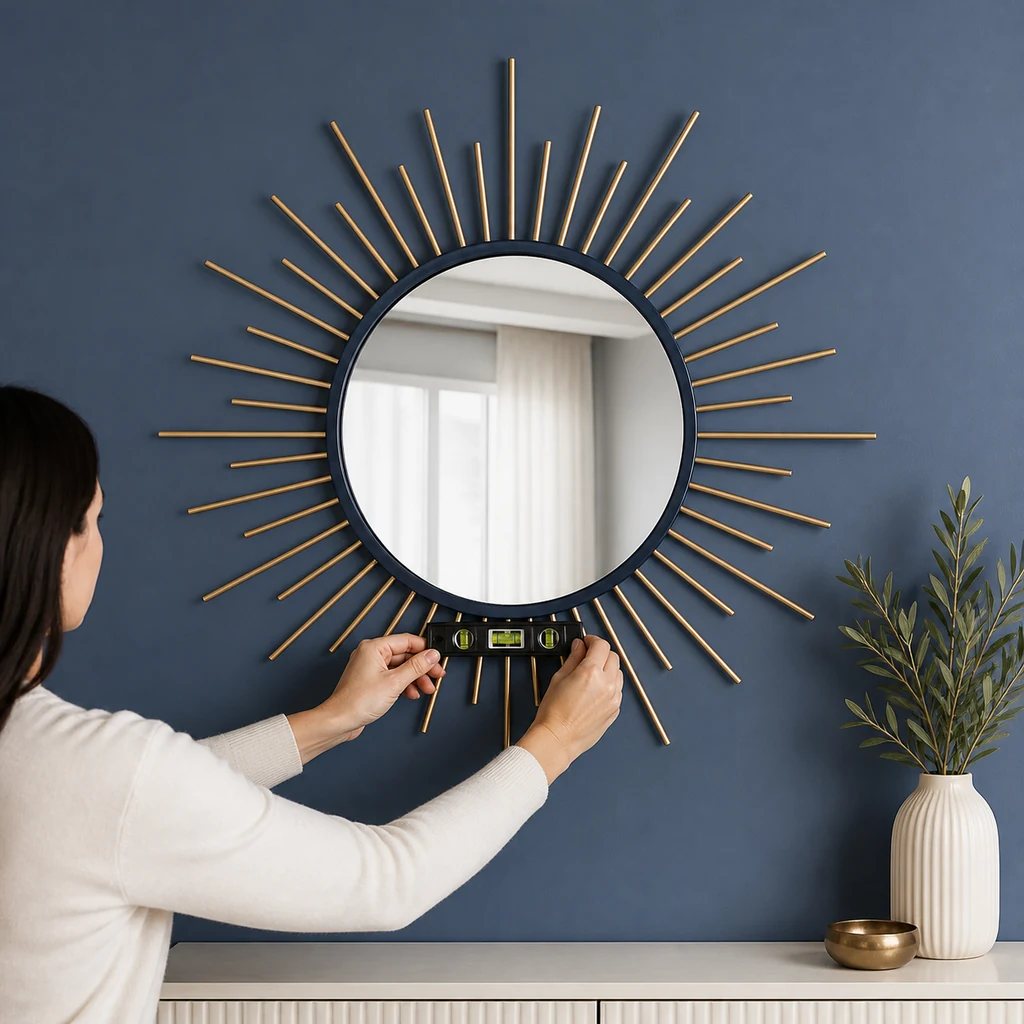
Weigh the completed mirror. Choose a wall fastener rated above that weight and approved for drywall, masonry, or wood as applicable. A screw driven into a stud is preferred. Never rely on an adhesive picture strip for a glass mirror.
Mark the hanger location, check for hidden wiring or plumbing, install the fastener, and hang the wire. Level the design using opposite long rays. Add two small clear bumpers behind the lower plywood edge so the mirror rests flat.
Troubleshooting and Safety
- Uneven starburst: Verify the 2-inch overlap and alternate lengths before gluing.
- Rays lift while drying: Use a flat caul board so pressure reaches every overlap.
- Mirror slides: Use removable painter’s-tape guides while the adhesive cures.
- Paint looks streaky: Add another thin coat instead of overworking wet metallic paint.
- Cracked or chipped mirror: Do not use it. Wear gloves, contain the pieces, and follow local glass-disposal rules.
Cut in a ventilated area and wear eye protection. Follow every adhesive, paint, tool, and wall-anchor label. This frame is decorative; the wall hardware must carry the complete load.
Size Options and Care
For a smaller version, combine a 10-inch mirror with a 12-inch backing and shorten every ray by 1 inch. For a larger version, increase the plywood thickness and have the hanging plan reviewed at a hardware store; longer rays add leverage, not just weight.
Dust with a soft cloth and clean the glass by spraying cleaner onto the cloth, not the mirror. Keep the wood frame away from direct water and high-humidity bathroom zones. For more approachable projects, browse these budget DIY home decor ideas.
Frequently Asked Questions
Can I use MDF instead of plywood?
Yes, if it is at least 1/2 inch thick and stays dry. Seal every MDF edge before painting because exposed fibers absorb moisture quickly.
Can I use spray paint?
Yes, outdoors or in a properly ventilated work area. Follow the label, protect nearby surfaces, and let the finish cure before attaching the mirror.
How do I keep the rays symmetrical?
Use the 40-part guide, maintain the same 2-inch overlap, and measure opposite long rays before glue sets.
Final Notes
The repeated rays create the drama, while the limited navy-and-brass palette keeps the mirror refined. Careful spacing, thin paint coats, mirror-safe adhesive, and weight-rated hardware are the four details that make this project both polished and practical.