
A duvet insert that slides into one corner can leave half the cover looking empty by morning. Before adding clips or replacing your bedding, check whether the whole insert is moving, whether the cover and insert actually fit, and whether their built-in anchors are connected. This six-step reset works with a cover that has corner ties or equivalent fasteners.
Quick answer: Match the insert and cover by their measured dimensions, turn the cover inside out, secure each compatible corner tie to its insert loop, then pull the cover over the insert and close its opening. If the fill is lumpy inside the insert itself, corner ties will not fix that separate problem.
What You Need
- A duvet insert and removable cover
- The cover’s built-in corner ties, snaps, or other compatible anchors
- Matching loops or tabs on the insert, if your cover uses ties
- A tape measure for a fit check
Many covers and inserts are designed as matching pairs: for example, Brooklinen describes cover ties that pair with insert loops at all four corners. Check your own pieces rather than assuming every brand has the same construction.
How to Keep a Duvet Insert From Bunching
Step 1: Identify Whether the Insert or Its Fill Has Shifted
Open the cover and look at an empty-feeling corner. If the whole white insert has pulled away from that corner while its quilting still looks even, the insert has slipped inside the cover. If the insert’s shell reaches the corner but its filling has collected in another area, follow the insert’s care label or ask its maker about fill recovery instead.

Step 2: Compare the Actual Width and Length
Lay both pieces flat and measure their width and length separately. Queen, full, and king labels do not tell you the exact dimensions of every product. A cover much larger than its insert leaves loose fabric where the insert can travel; a cover that is too small compresses the insert. Look for a close, comfortable fit rather than forcing an oversized insert into a tight shell. Brooklinen likewise recommends comparing listed cover and insert dimensions, along with closure and attachment details.
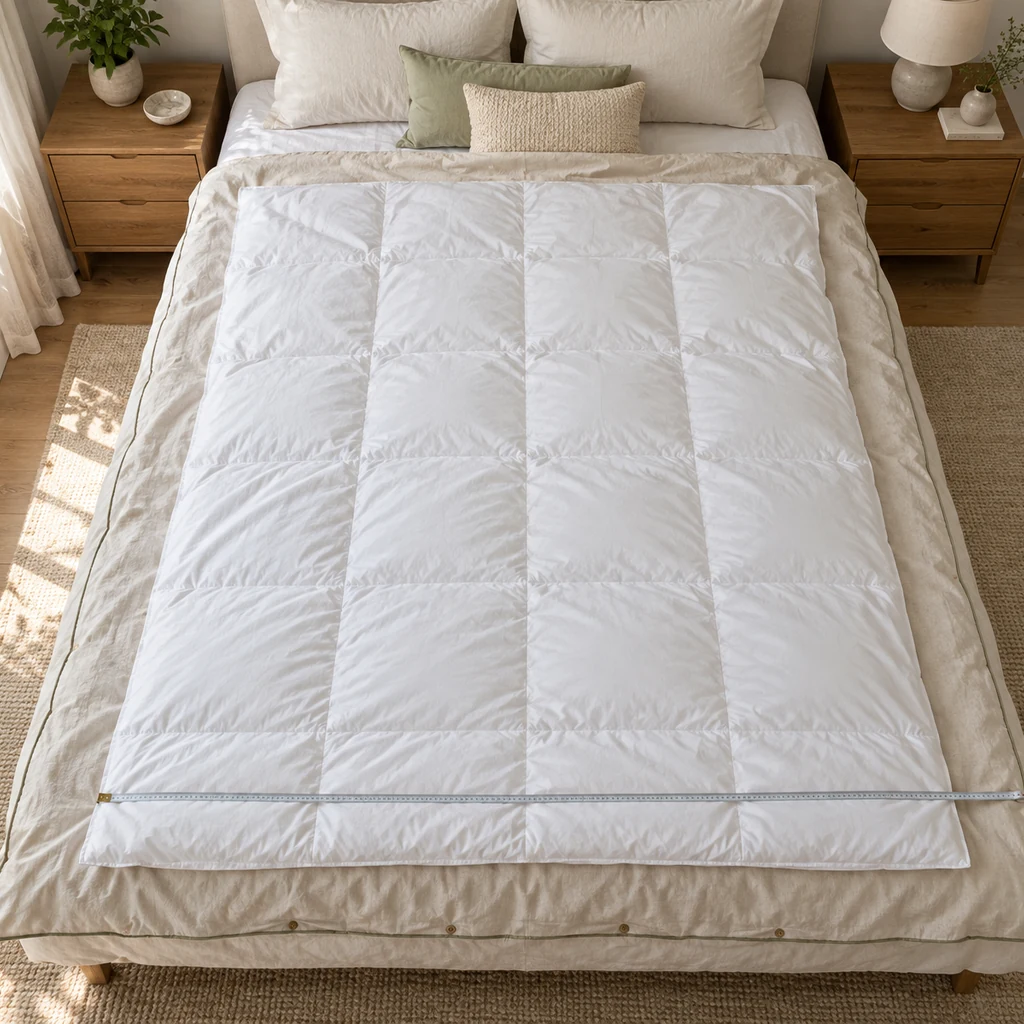
Step 3: Turn the Cover Inside Out and Find Its Anchors
Spread the cover inside out over the bed, with the opening at the foot. Find every interior tie, snap, or tab and the matching loop or attachment on the insert. The pictured example uses four corner ties. If your set has additional compatible side anchors, plan to connect those too; do not attach a fastener to unsupported fabric.
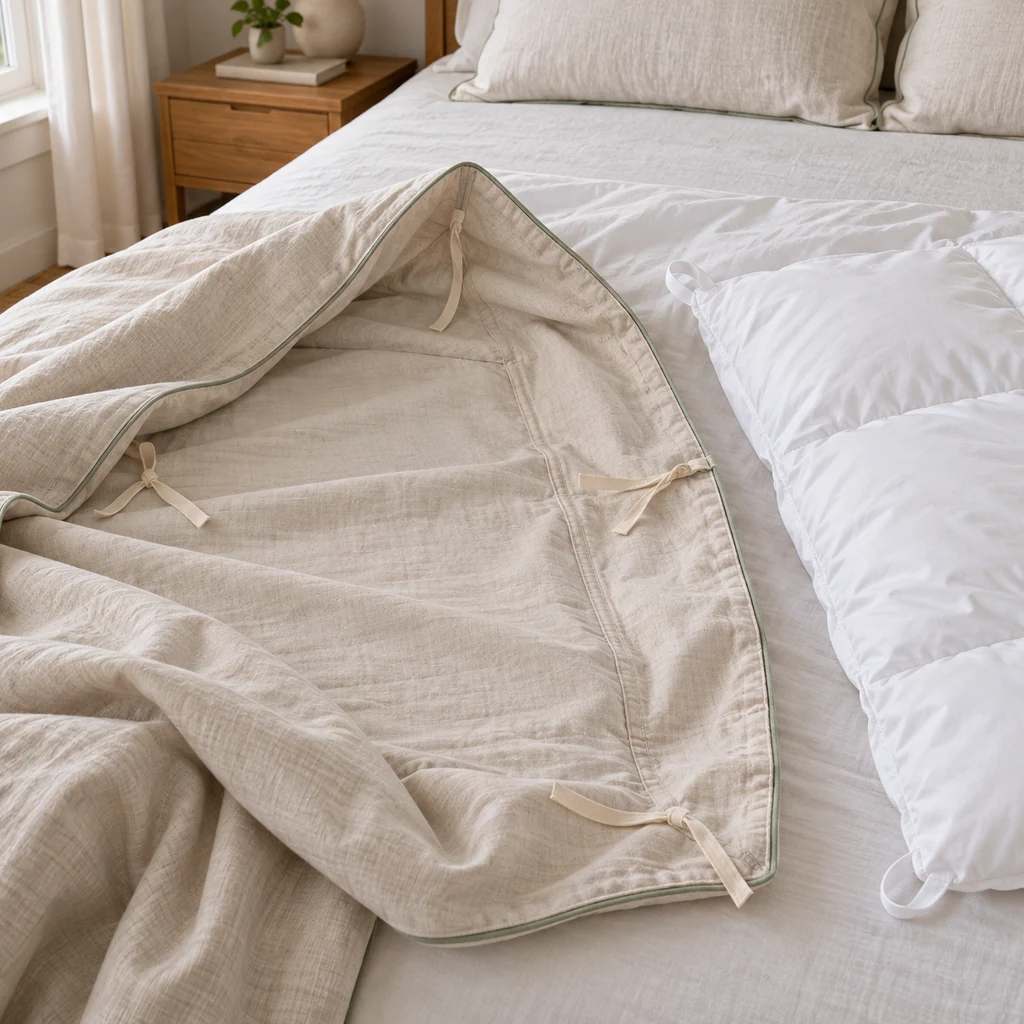
Step 4: Secure All Matching Corners
Start at the two corners farthest from the opening. Pass each cover tie through the corresponding sewn insert loop and tie it securely without pulling the fabric into a tight pucker. Fasten the remaining matching corners and any side anchors your two pieces provide. Pull lightly on each connection to confirm that it catches the insert, not just a loose edge of the cover.

Step 5: Pull the Cover Over Without Twisting the Insert
Keep hold of the connected far corners through the fabric and draw the cover down over the insert until it turns right side out. Work gradually toward the opening instead of yanking one loose side. Flatten the top edge, then check that the insert reaches both top corners and both lower corners before closing anything.

Step 6: Close the Opening and Check for Empty Corners
Close the cover’s existing zipper, buttons, or ties fully. Smooth from the center toward each edge, then lift the duvet by its top corners for a gentle settling shake. Feel each corner and along both sides: there should be no broad sleeve of empty cover and no fold of insert trapped at the foot. Reopen and correct an unmatched corner rather than hiding it under the bed styling.

If Your Cover Has No Ties or Your Insert Has No Loops
First see whether your pieces use another designed attachment, such as snaps or tabs. If they do not, choose a compatible duvet fastener made for bedding and follow its maker’s instructions, or select a cover-and-insert pair with matching anchors. Avoid piercing bedding with ordinary safety pins: they can open, snag fabric, and become a hazard. A fastener cannot compensate for a large size mismatch or for filling that has moved inside the insert’s own shell.
Common Questions
Will a bigger insert keep the cover full?
A slight difference may create a fuller look, but an insert that must be folded or compressed to fit can form new lumps. Compare the measurements and the maker’s fit guidance before buying.
Why does it bunch again after washing?
The anchors may have been left disconnected when the clean cover went back on, or the insert and cover may have changed size according to their care labels. Measure again, reconnect the corners, and check that the insert itself is fully dry and evenly filled before enclosing it.
Do I need to add more anchors?
Use all compatible anchors already built into your bedding first. If both pieces have side attachment points, fasten those as well. If the cover is much larger than the insert, correct the fit before adding hardware.
Once the duvet lies flat, keep the rest of the bed simple: our five-pillow queen bed guide shows a tidy finishing arrangement. When swapping covers, give the spare set a dedicated shelf using the four-zone linen closet method.
Check the construction and care instructions of your bedding before choosing a fastening method.