

There are plenty of dinners that promise a crispy coating, then turn soft as soon as they hit the plate. This parmesan crusted chicken is built to avoid that. The cutlets are thin, the parmesan is mixed with panko instead of packed on in a heavy layer, and the cooked chicken rests on a wire rack so the crust stays crisp while you finish the rest of dinner.
RECIPE CARD
Parmesan Crusted Chicken
Ingredients
- 2 large boneless, skinless chicken breasts , sliced into 4 thin cutlets
- 3/4 teaspoon kosher salt , plus more to taste
- 1/2 teaspoon black pepper
- 1/2 cup all-purpose flour
- 2 large eggs
- 1 tablespoon water
- 1 cup panko breadcrumbs
- 3/4 cup finely grated parmesan cheese
- 1 teaspoon garlic powder
- 1 teaspoon Italian seasoning
- 1/2 teaspoon paprika , optional but good for color
- 3 tablespoons olive oil , plus more if cooking in batches
- 1 tablespoon butter , optional for extra flavor
- Lemon wedges and chopped parsley , for serving
Quick Method
Condensed overview. Use Full Instructions for the complete method, timing and doneness details.
- Make Thin, Even Cutlets: Thin, even cutlets cook quickly, so the crust can turn golden before the chicken dries out. Place each chicken breast on a cutting board…
- Set Up the Breading Station: The breading station should be simple: seasoned flour, egg, then a parmesan panko coating pressed on firmly. Use three shallow bowls. Put flour in…
- Pan-Sear Until Golden and Crisp: Moderate heat gives the cutlets time to cook through while the parmesan crust turns crisp instead of scorching. Heat the olive oil in a…
- Check Doneness and Rest on a Rack: Rest cooked cutlets on a wire rack, not paper towels, so the underside stays crisp. The safest way to know the chicken is done…
- Serve While the Crust Is Still Crisp: Serve it with something fresh and something creamy for the best balance. Serve the chicken with lemon wedges and parsley. The lemon is not…
The flavor is familiar in the best way: salty parmesan, a little garlic, a little Italian seasoning, juicy chicken, and a golden crust that tastes like it took more effort than it did. It is not a fussy restaurant copycat and it is not a dry baked chicken breast hiding under cheese. It is the kind of skillet chicken I would make when I want dinner to feel comforting but still fresh enough for a weeknight.
Recipe snapshot: 15 minutes prep, 12 to 16 minutes cooking, serves 4, skillet method, crisp parmesan panko crust, best with salad, potatoes, pasta, or roasted vegetables.
Why This Parmesan Crusted Chicken Works
The biggest difference between good parmesan crusted chicken and disappointing parmesan crusted chicken is thickness. Thick chicken breasts take too long to cook, which means the coating can get too dark before the center is ready. Thin cutlets solve that. They cook fast, brown evenly, and stay tender when you pull them from the pan at the right moment.
The coating matters too. Parmesan alone can melt, clump, and scorch. Panko alone can taste plain. Together, they make a crust that is crisp, savory, and light. A small amount of flour gives the egg something to grip, and the egg gives the parmesan mixture something to hold onto.
Ingredients You Need
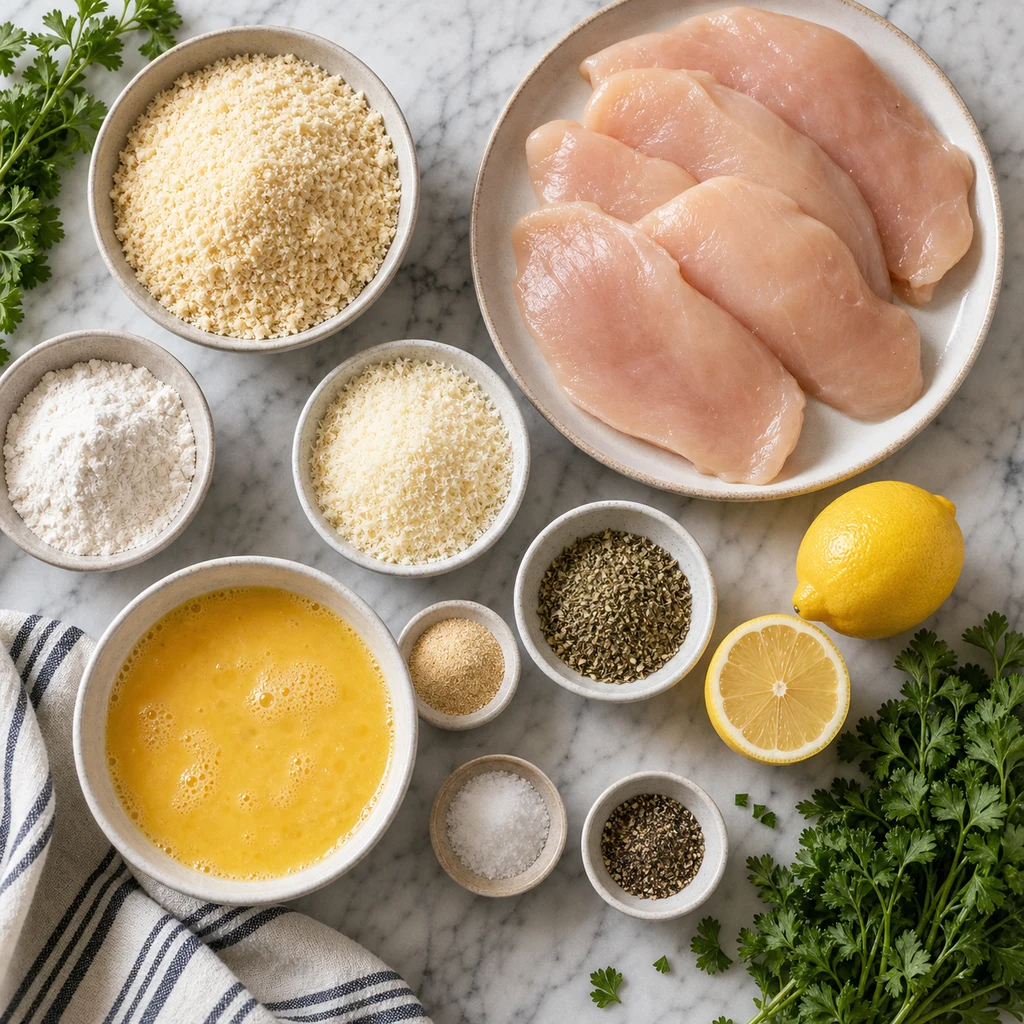
- 2 large boneless, skinless chicken breasts, sliced into 4 thin cutlets
- 3/4 teaspoon kosher salt, plus more to taste
- 1/2 teaspoon black pepper
- 1/2 cup all-purpose flour
- 2 large eggs
- 1 tablespoon water
- 1 cup panko breadcrumbs
- 3/4 cup finely grated parmesan cheese
- 1 teaspoon garlic powder
- 1 teaspoon Italian seasoning
- 1/2 teaspoon paprika, optional but good for color
- 3 tablespoons olive oil, plus more if cooking in batches
- 1 tablespoon butter, optional for extra flavor
- Lemon wedges and chopped parsley, for serving
A Quick Note on Parmesan
Use finely grated parmesan, not long thick shreds. Finely grated cheese blends into the panko and helps the coating stick. Shredded parmesan can create patchy spots and may pull away from the chicken when you flip it.
If you only have pre-grated parmesan, it can still work, but taste it first. Some brands are much saltier than others, so you may want to reduce the salt slightly.
Step 1: Make Thin, Even Cutlets
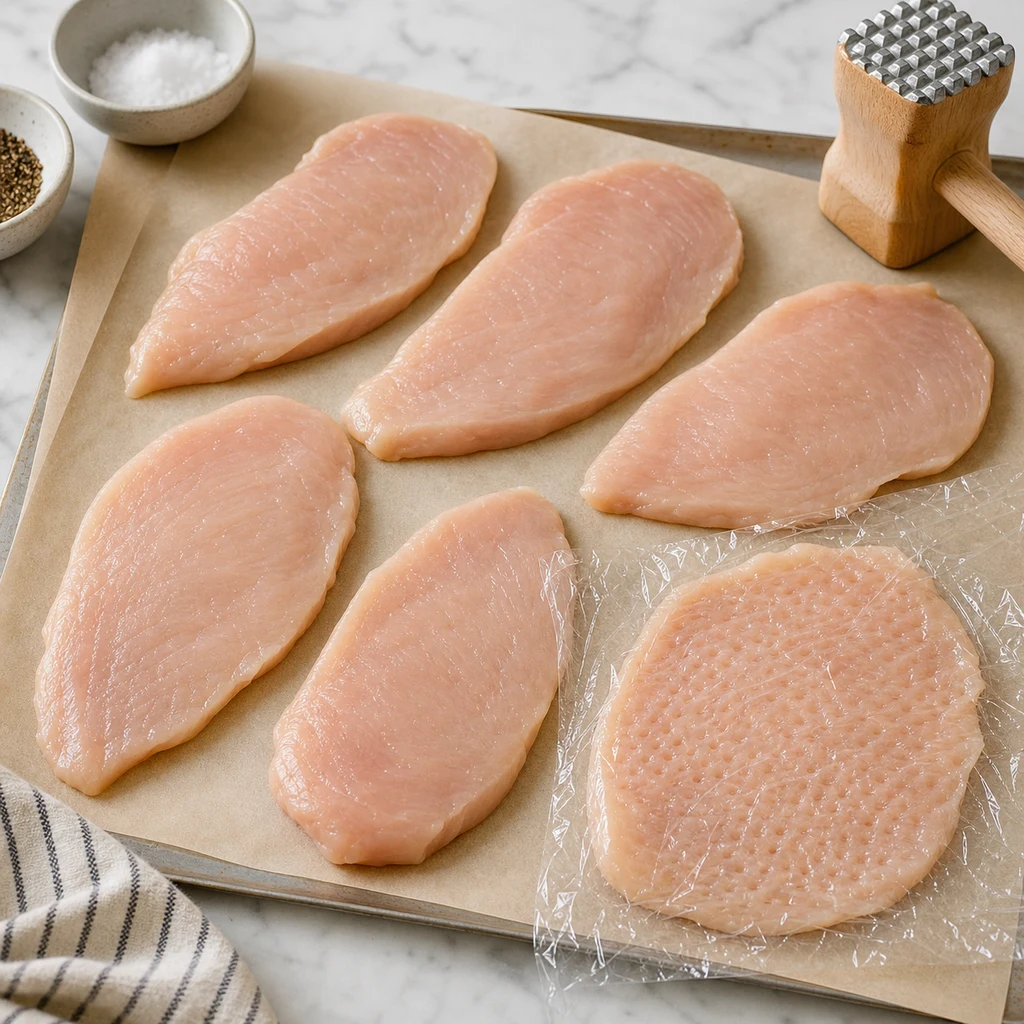
Place each chicken breast on a cutting board and slice it horizontally into two thinner pieces. If the cutlets are still uneven, cover them with plastic wrap or parchment and gently pound the thicker end until each piece is about 1/2 inch thick.
This step is worth the extra few minutes. Even cutlets cook at the same speed, which keeps the thinner side from drying out before the thick side is safe to eat. Pat the chicken dry, then season both sides with salt and pepper.
Step 2: Set Up the Breading Station
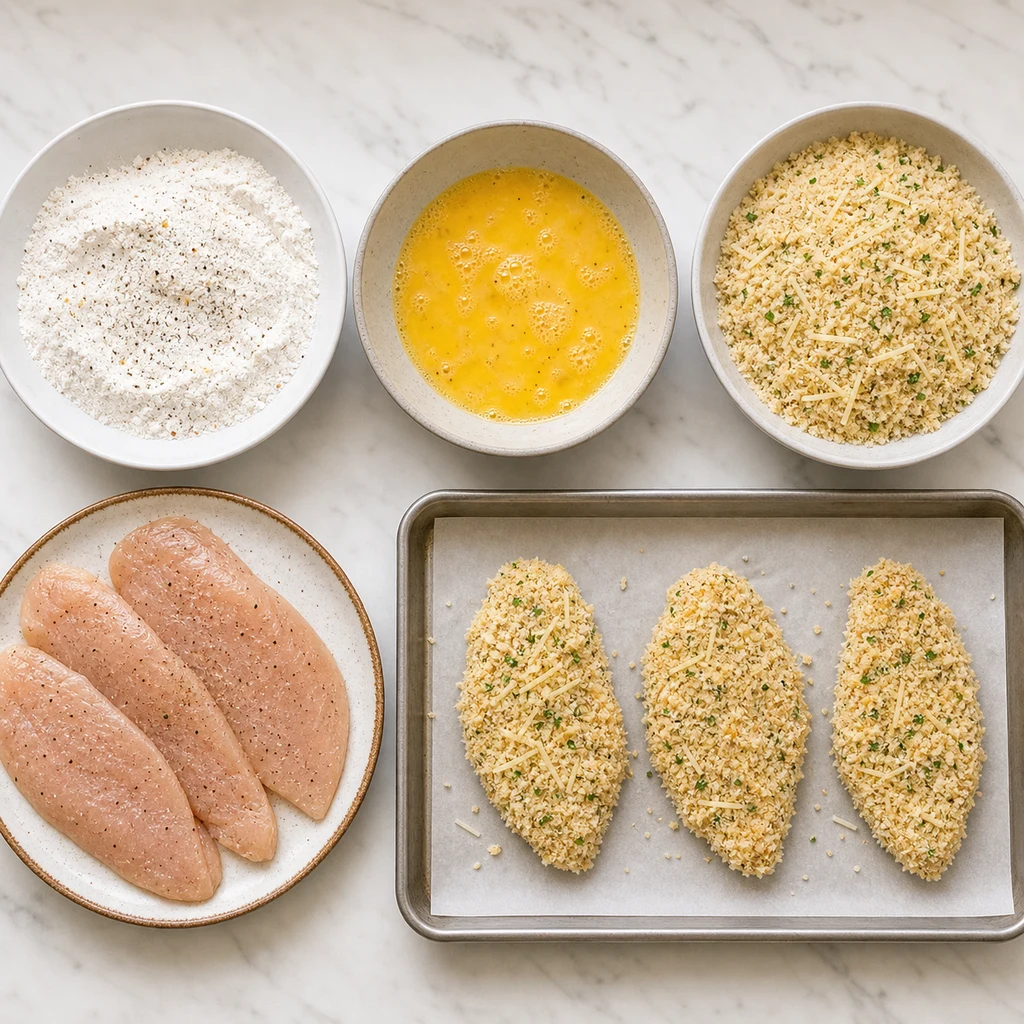
Use three shallow bowls. Put flour in the first bowl. Beat the eggs with 1 tablespoon water in the second. In the third bowl, mix panko, parmesan, garlic powder, Italian seasoning, and paprika.
Dredge one cutlet in flour and shake off the excess. Dip it into the egg, letting the extra drip back into the bowl. Press it into the parmesan panko mixture on both sides. Do not just lay it in the crumbs. Press gently so the coating attaches.
Move the coated cutlets to a parchment-lined tray and let them sit for 5 minutes while the skillet heats. That short rest helps the coating settle instead of sliding around in the pan.
Step 3: Pan-Sear Until Golden and Crisp
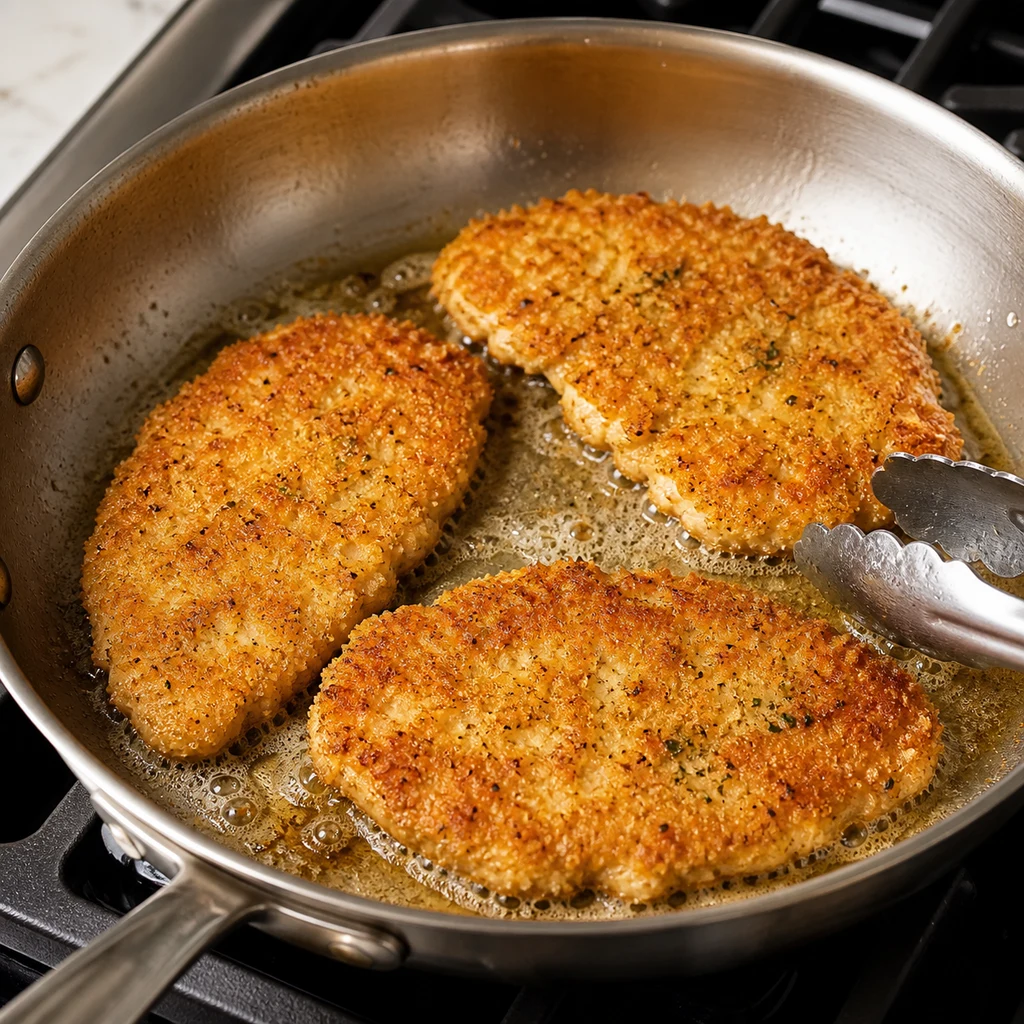
Heat the olive oil in a large skillet over medium heat. Add the butter if using. When the oil shimmers, add the cutlets in a single layer. If the pan is crowded, cook in two batches. Crowding traps steam and softens the crust.
Cook for 3 to 4 minutes on the first side, then flip carefully and cook another 3 to 4 minutes. The crust should be deep golden, not pale and not burnt. If the coating browns too quickly, lower the heat slightly. Parmesan can go from golden to bitter if the skillet is too hot.
Step 4: Check Doneness and Rest on a Rack
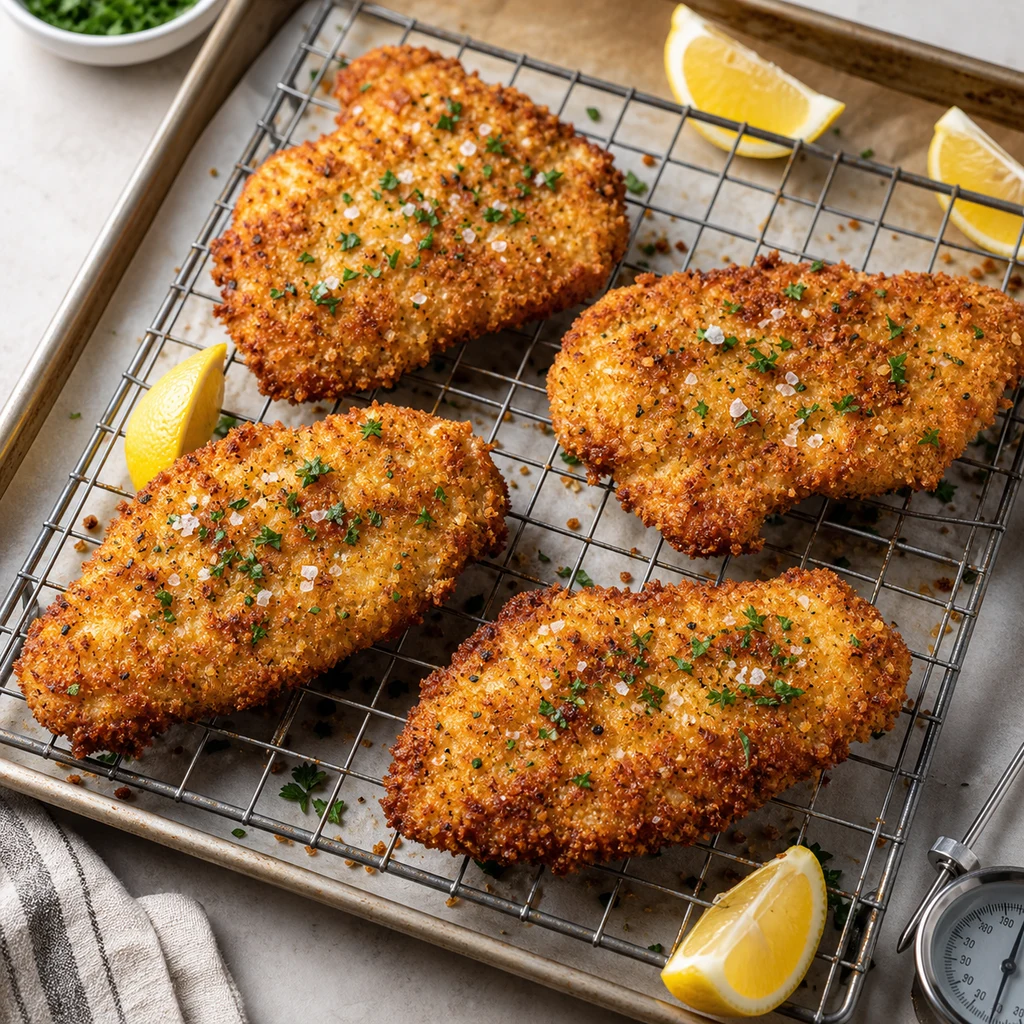
The safest way to know the chicken is done is to check the thickest part with an instant-read thermometer. Chicken should reach 165 degrees F. If the crust is browned but the center needs another minute, lower the heat and let it finish gently.
Transfer cooked cutlets to a wire rack set over a sheet pan. Paper towels catch oil, but they also trap steam. A rack keeps air moving underneath, which is how the bottom stays crisp while the chicken rests.
Step 5: Serve While the Crust Is Still Crisp
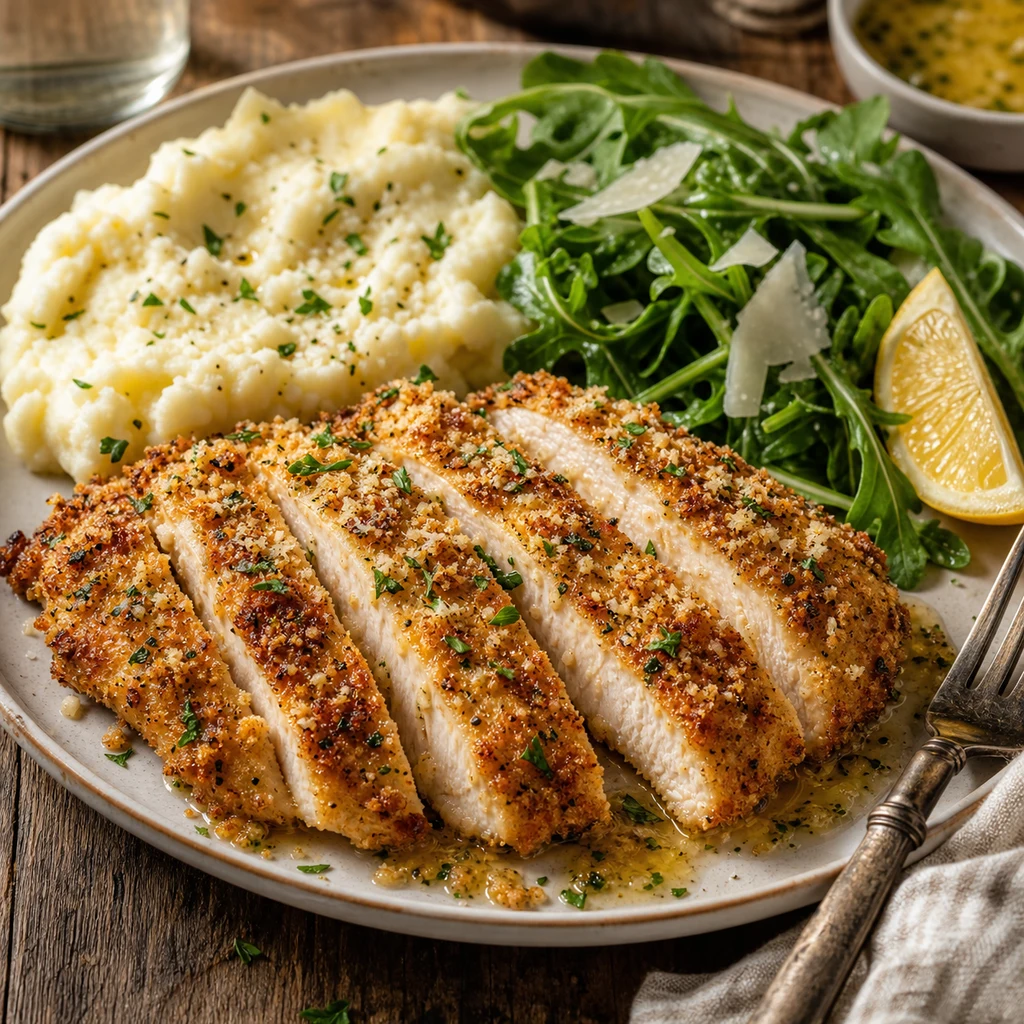
Serve the chicken with lemon wedges and parsley. The lemon is not just decoration. A small squeeze over the top brightens the parmesan and cuts through the richness of the crust.
For a simple dinner, add mashed potatoes and a green salad. For something lighter, serve the cutlets over arugula with cherry tomatoes and a lemony dressing. For a more classic plate, add pasta with marinara or garlic butter.
What the Texture Should Look Like
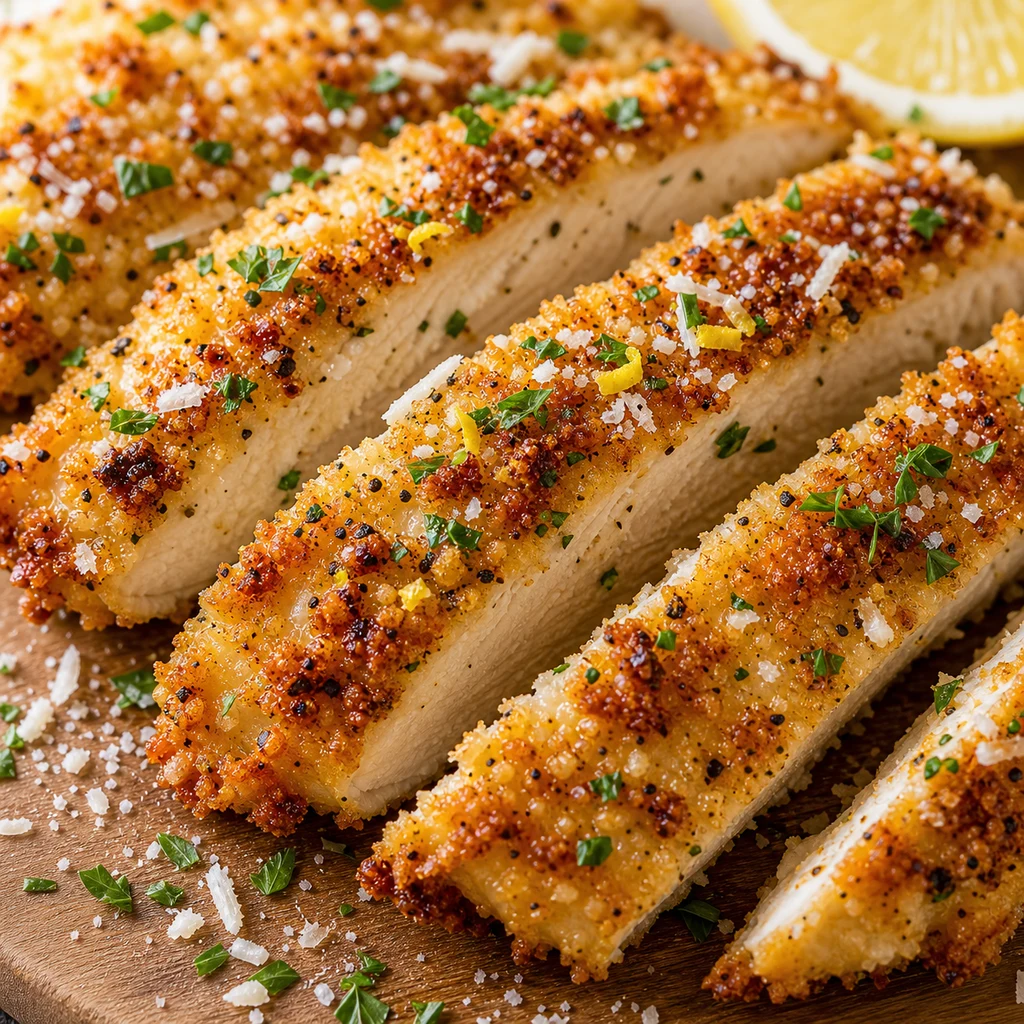
The best version has a crust that flakes slightly when you cut it, but it should not fall off in one sheet. Inside, the chicken should be white, juicy, and tender. If the crust is dark before the chicken is done, the heat was too high or the cutlets were too thick.
If the crust falls off, the chicken may have been wet, the excess flour may not have been shaken off, or the coating may not have been pressed firmly enough. Letting the breaded chicken rest for a few minutes before cooking also helps.
Baked and Air Fryer Options
The skillet gives the best color and flavor, but you can bake or air fry this recipe if you prefer.
Baked parmesan crusted chicken
Place breaded cutlets on a rack set over a baking sheet. Spray both sides with oil. Bake at 425 degrees F for 15 to 20 minutes, flipping once, until the chicken reaches 165 degrees F and the crust is crisp.
Air fryer parmesan crusted chicken
Preheat the air fryer to 390 degrees F. Spray the basket and the cutlets with oil. Cook for 8 to 12 minutes, flipping halfway through, until golden and cooked through. Work in batches so the air can circulate.
What to Serve With Parmesan Crusted Chicken
This chicken works with cozy sides and fresh sides. Try mashed potatoes, roasted potatoes, buttered noodles, spaghetti with marinara, garlic green beans, roasted broccoli, asparagus, Caesar salad, or a simple tomato cucumber salad.
If you want more easy dinner ideas, try lemon garlic chicken, roasted garlic alfredo tortellini, spinach tomato quesadilla with pesto, or browse more Food & Drink recipes.
Make-Ahead and Storage
You can slice and pound the chicken up to a day ahead. Keep it covered in the refrigerator. For the best crust, bread the chicken shortly before cooking. If you bread it too far ahead, the crumbs can absorb moisture and lose some crunch.
Store leftovers in an airtight container for up to 3 days. Reheat in a 375 degrees F oven or air fryer until warmed through and crisp again. The microwave is fine for speed, but it will soften the coating.
Common Mistakes to Avoid
- Using thick chicken breasts: they take too long to cook and can burn the crust.
- Skipping the flour: the egg and crumbs need something dry to grip.
- Using high heat: parmesan browns quickly, so medium heat is safer.
- Crowding the skillet: steam makes the crust softer.
- Resting on paper towels: a wire rack keeps the bottom crisp.
FAQ
Can I use chicken thighs?
Yes, boneless skinless thighs work, but they are usually thicker and less even. Pound them lightly and cook until they reach 165 degrees F.
Can I make this gluten-free?
Yes. Use gluten-free flour and gluten-free panko. The cooking method stays the same.
Can I use regular breadcrumbs instead of panko?
You can, but the crust will be finer and less crunchy. Panko gives a lighter, crispier texture.
Why did my coating fall off?
The chicken may have been too wet, the flour layer may have been too thick, or the crumbs may not have been pressed on firmly. Letting the coated cutlets rest for 5 minutes helps.
Can I double the recipe?
Yes. Cook in batches and wipe out burnt crumbs between batches if needed. Keep finished cutlets warm on a wire rack in a low oven.
Final Thoughts
Parmesan crusted chicken should be crisp, juicy, and easy to make without feeling like a kitchen project. Thin cutlets, finely grated parmesan, panko, moderate heat, and a wire rack are the small details that make the recipe feel dependable. Once you know those, this becomes the kind of dinner you can repeat without needing to stare at the recipe every time.