
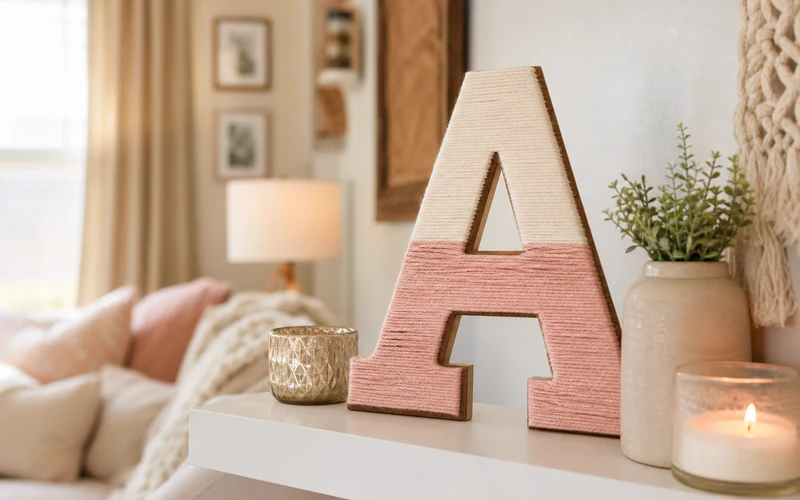
A yarn-wrapped wooden letter is one of the easiest ways to add color, texture, and personality to a blank wall or shelf. Whether you are decorating a nursery, styling a reading nook, or making a handmade gift, this DIY home decor project turns a simple craft-store letter into a polished accent piece. The technique is forgiving, the supplies are affordable, and the finished look feels far more custom than anything mass-produced.
This tutorial walks you through every stage of making a yarn-wrapped wooden letter for home decor, from sanding rough edges to securing the final strand. You will also find styling ideas, a printable-style checklist, and answers to the most common beginner questions. If you enjoy budget-friendly room upgrades, pair this project with DIY $15 Chunky Wooden Floating Shelves for display space, or explore Easy DIY Platform Bed and 10 Small Bathroom Wall Storage Ideas for more hands-on ways to personalize your home.
Why Make a Yarn-Wrapped Wooden Letter?
Wooden letters are inexpensive, easy to find, and instantly recognizable as decor. Wrapping them in yarn adds softness and dimension that paint alone cannot replicate. Unlike stenciling or decoupage, yarn wrapping requires no drying time between coats and very little cleanup.
This project also scales well. Make one monogram for a child’s bedroom, spell a short word for a gallery wall, or create a single oversized initial as a wedding or housewarming gift. Because the materials are lightweight, finished letters are simple to hang with removable adhesive strips or lean on a shelf without heavy hardware.
Materials You Will Need
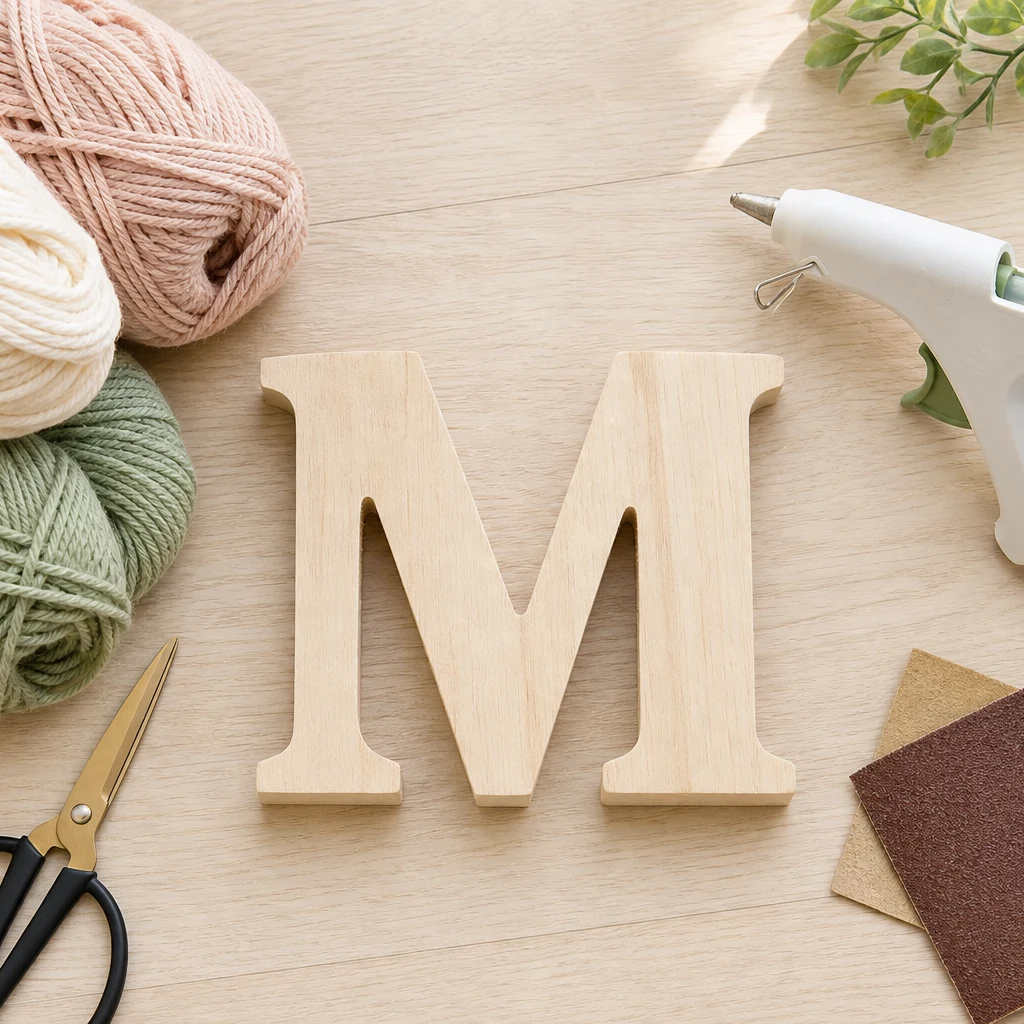
- Wooden letter in your chosen size and font (craft stores and online shops carry MDF and pine options)
- Yarn in one or more colors (medium-weight acrylic or cotton yarn is easy to work with)
- Hot glue gun and glue sticks
- Sharp scissors
- Fine-grit sandpaper (about 180 to 220 grit)
- Optional: craft knife, tweezers, ruler, and low-tack painter’s tape
Choose a letter with smooth outer edges when possible. Deeply carved serif fonts can still work, but they require slower wrapping around corners. For first-time crafters, a bold sans-serif letter such as A, M, or S is the most forgiving shape.
Step-by-Step Instructions
Step 1: Prepare Your Wooden Letter
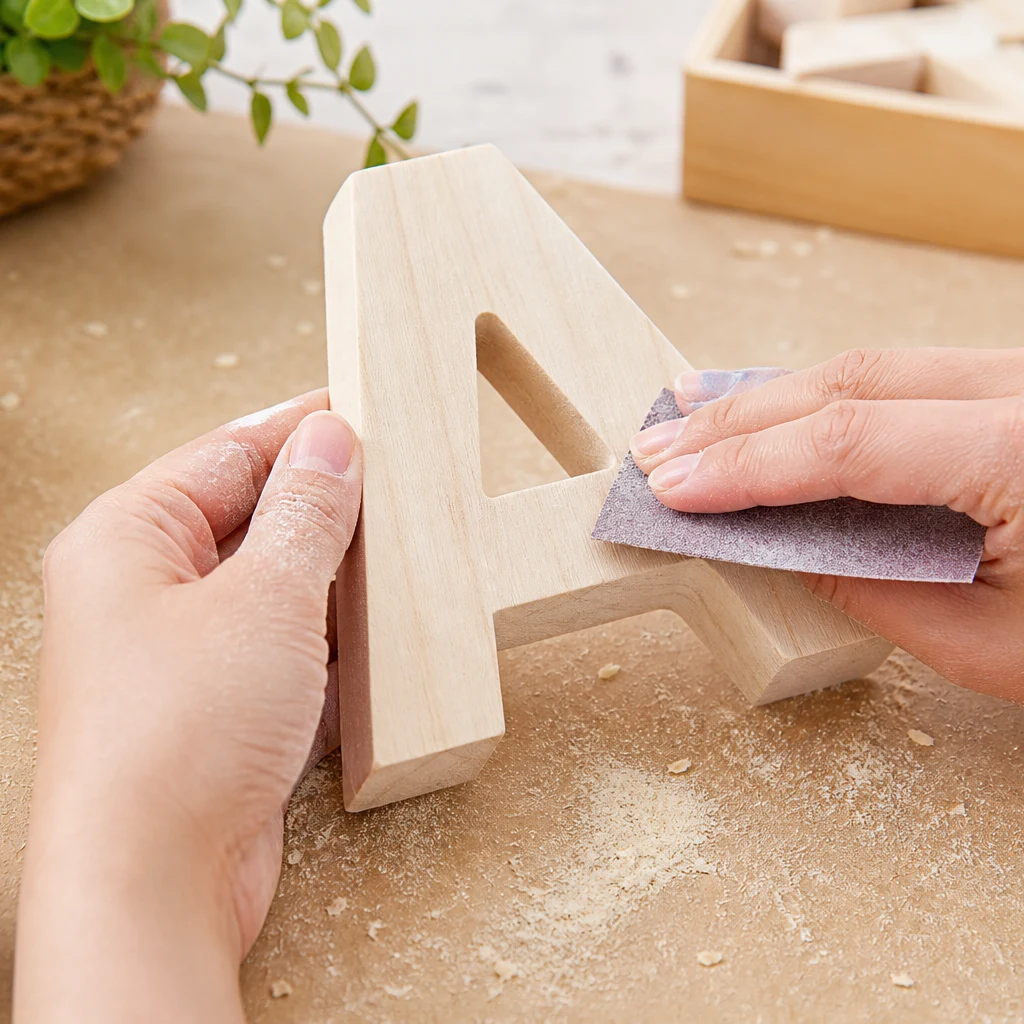
Start by wiping the letter clean and sanding any rough spots, splinters, or laser-cut char marks. Pay special attention to corners and inner cutouts where yarn can snag later. You do not need a perfectly stained surface because the yarn will cover the wood, but a smooth base makes wrapping noticeably easier.
If the letter has hanging hardware or stickers on the back, remove them now. For MDF letters with fuzzy edges, a quick pass with sandpaper often makes the difference between a tidy wrap and a bumpy finish.
Step 2: Choose Your Yarn Colors
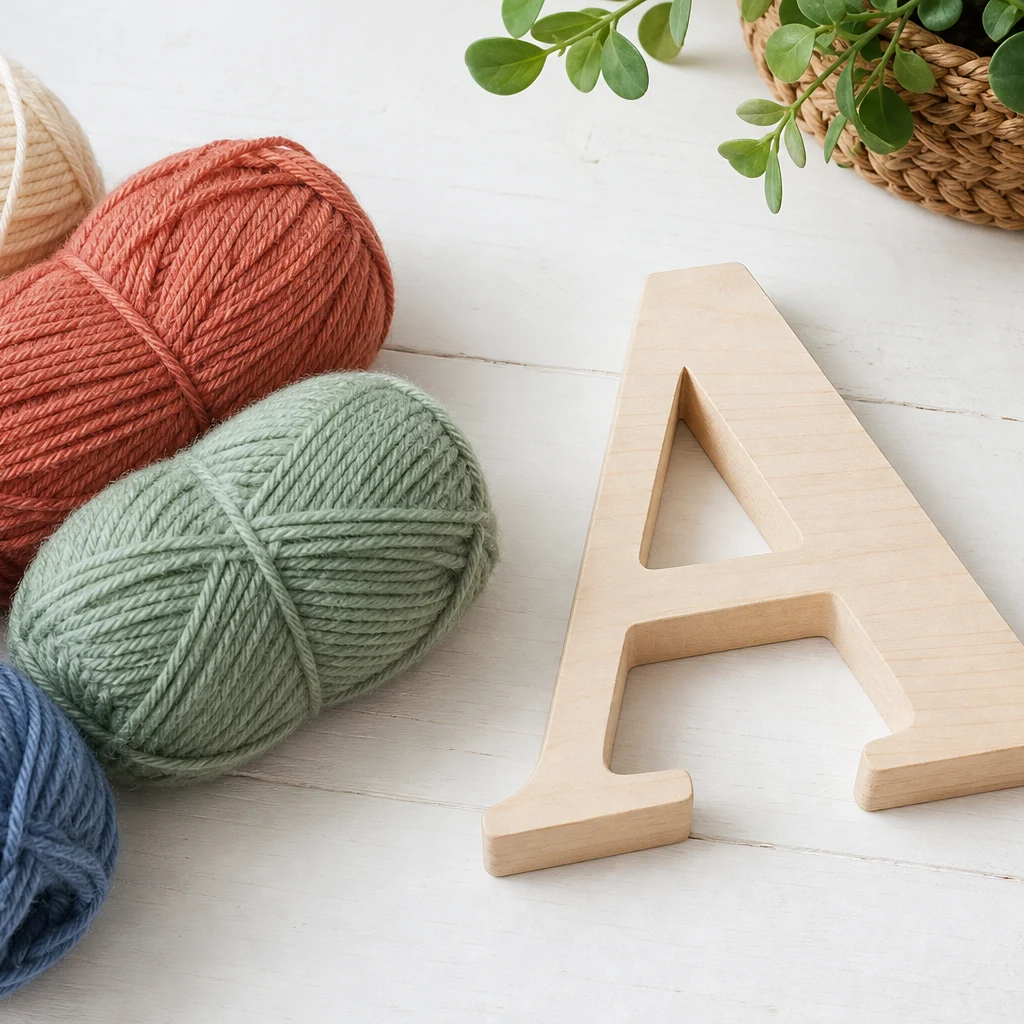
Decide whether you want a single-color statement piece or a multi-tone design. One solid color creates a clean, modern look that blends easily with neutral rooms. Two or three colors let you add stripes, ombre transitions, or accent sections on the vertical strokes of the letter.
Lay your yarn next to the unfinished letter before gluing anything. This quick preview helps you judge contrast against your wall color and nearby furniture. Thicker yarn covers wood faster but can look bulky on small letters; thinner yarn takes longer but gives a refined, tight finish.
Step 3: Secure the Starting Strand
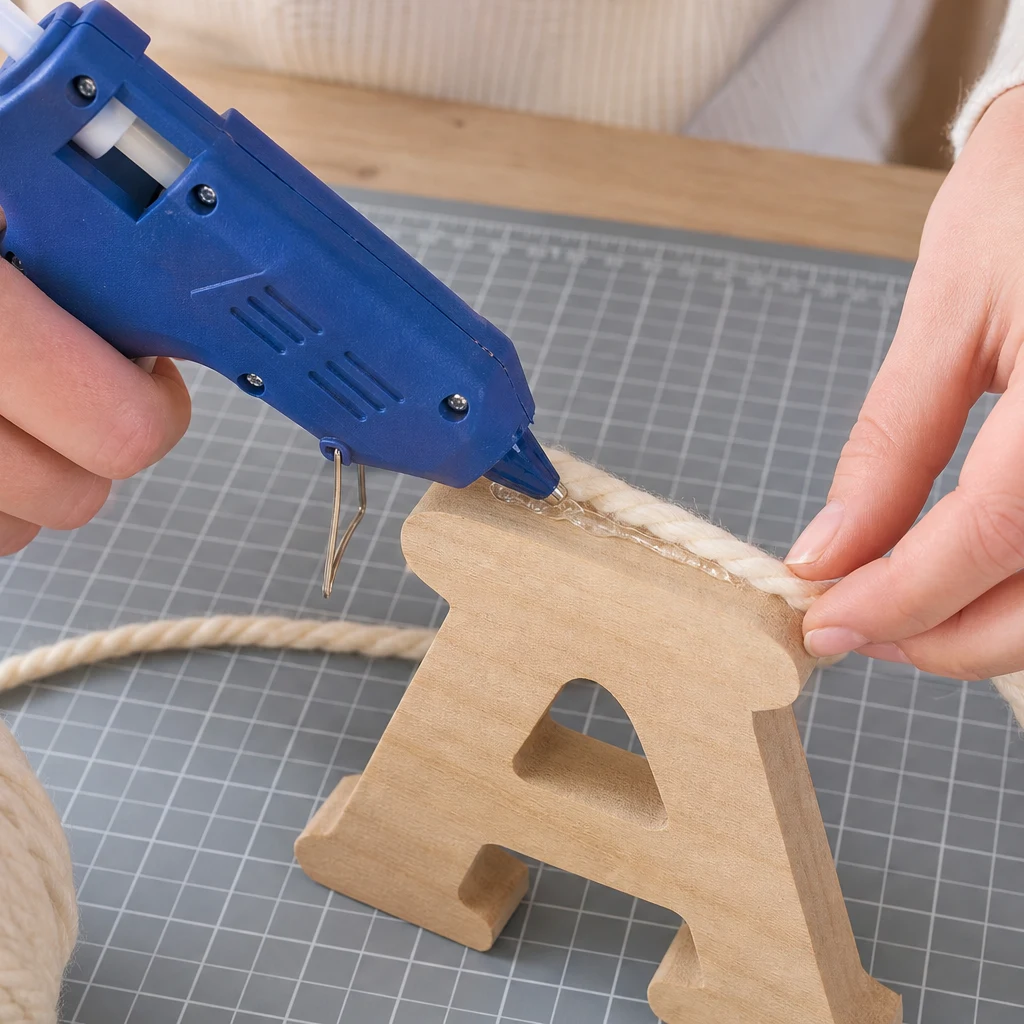
Flip the letter face down on your work surface. Apply a small line of hot glue near the bottom edge or along the back of the starting point you mapped out. Press the yarn end firmly into the glue and hold it for a few seconds until it sets.
Keep glue dots thin so the letter still sits flat when displayed. If you plan to hang the piece, all glue should stay on the back or side edges rather than the front face. A low-temperature glue gun reduces the risk of burns and is usually strong enough for yarn crafts.
Step 4: Wrap the Yarn Evenly
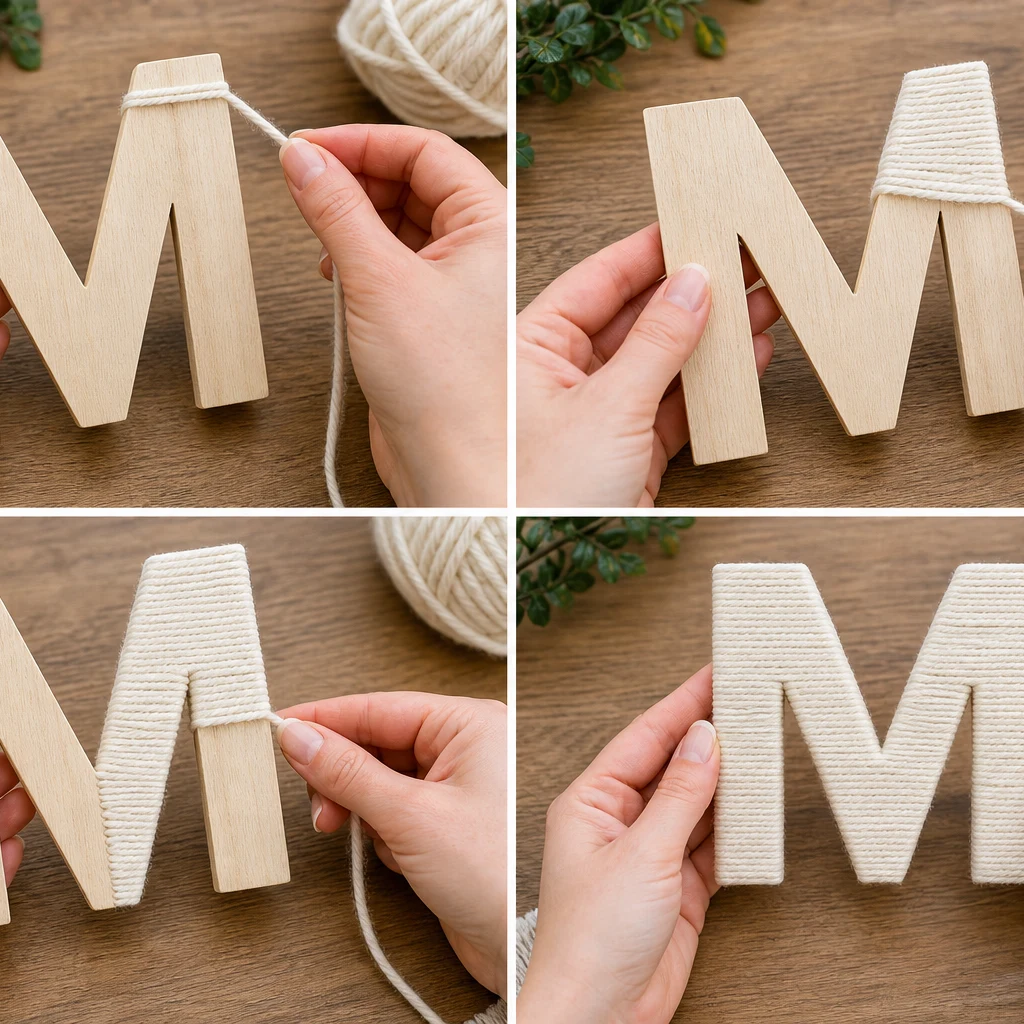
Turn the letter over and begin wrapping with steady, slightly firm tension. Keep each strand close to the previous one so bare wood does not peek through. Work in one consistent direction when you can, especially across straight sections.
At curves and corners, wrap more slowly and nudge the yarn into place with your fingernail or a tweezers tip. If a gap appears, gently slide neighboring strands together before continuing. Take breaks on large letters so your tension stays even from top to bottom.
Step 5: Switch Colors (Optional)
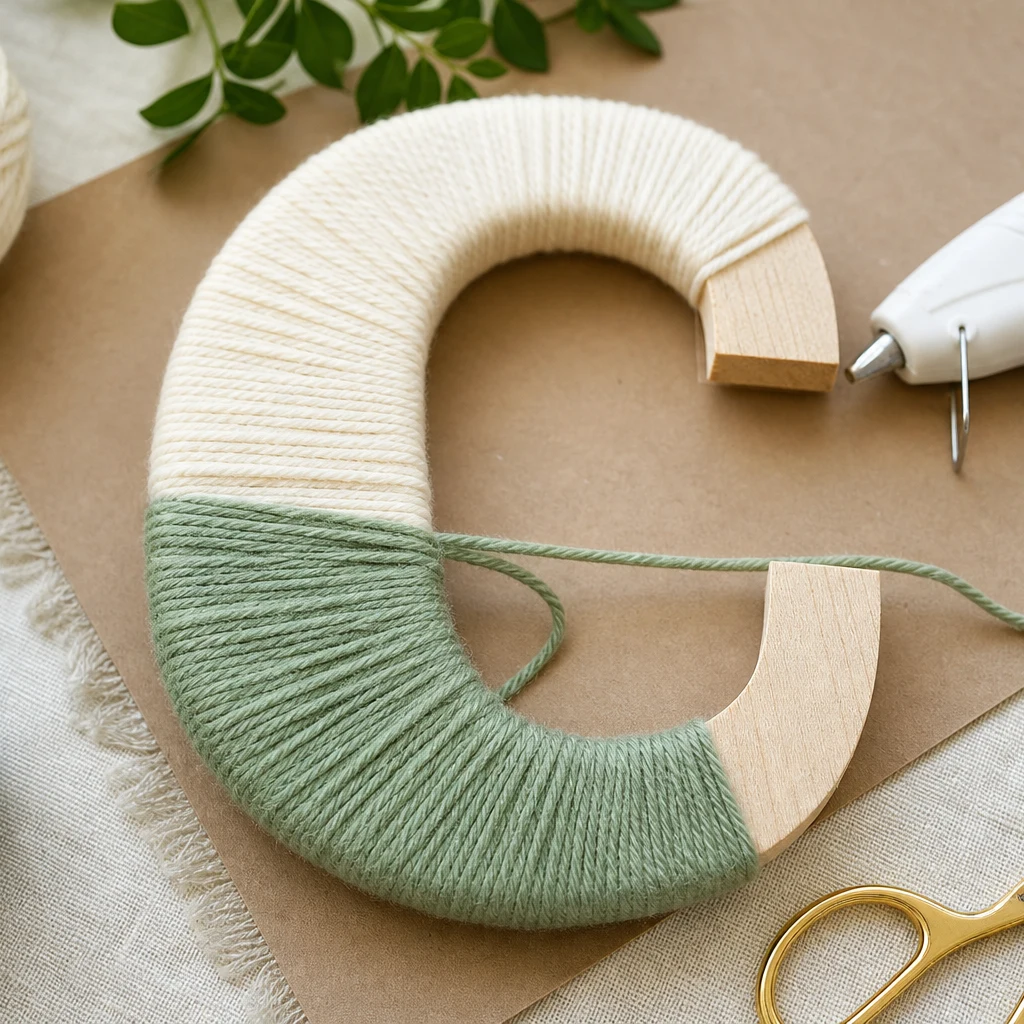
To add a second color, stop at a natural break point such as the end of a letter stroke. Cut the first yarn color, glue the tail to the back, and start the new color with another small glue dot in the same area. Continue wrapping as before, making sure the transition line stays on the back or side edge.
Stripes look best when you plan color changes at corners rather than mid-face. For an ombre effect, blend through two or three closely related shades instead of one harsh swap. Mark planned transition points lightly in pencil on the back if that helps you stay consistent.
Step 6: Finish and Secure the End
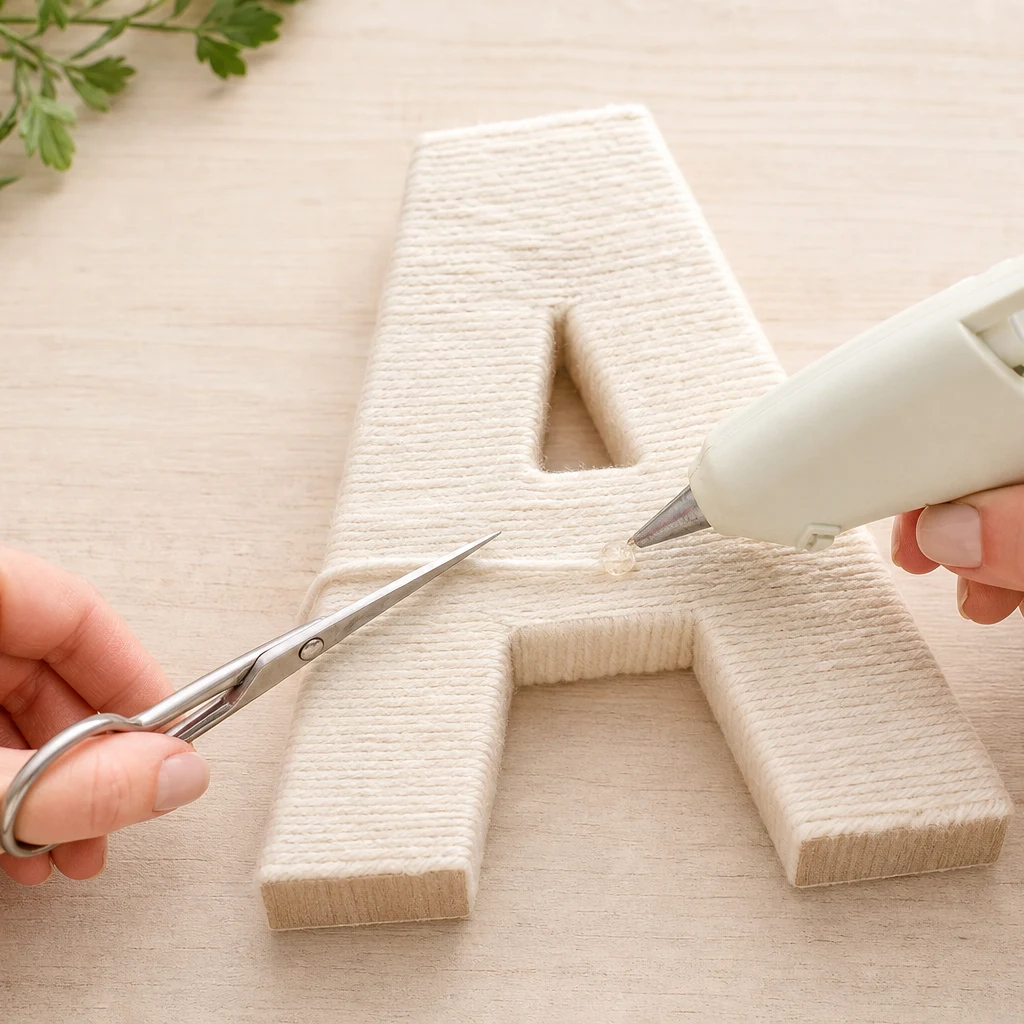
When the entire front and sides are covered, cut the yarn with a clean diagonal snip. Tuck the end to the back, glue it down, and press until secure. Check the front for thin spots, loose loops, or visible wood and wrap over them if needed.
Trim any glue strings with scissors and rotate the letter under good light. Small adjustments now are much easier than fixing gaps after the piece is on the wall.
Step 7: Display Your Yarn-Wrapped Letter
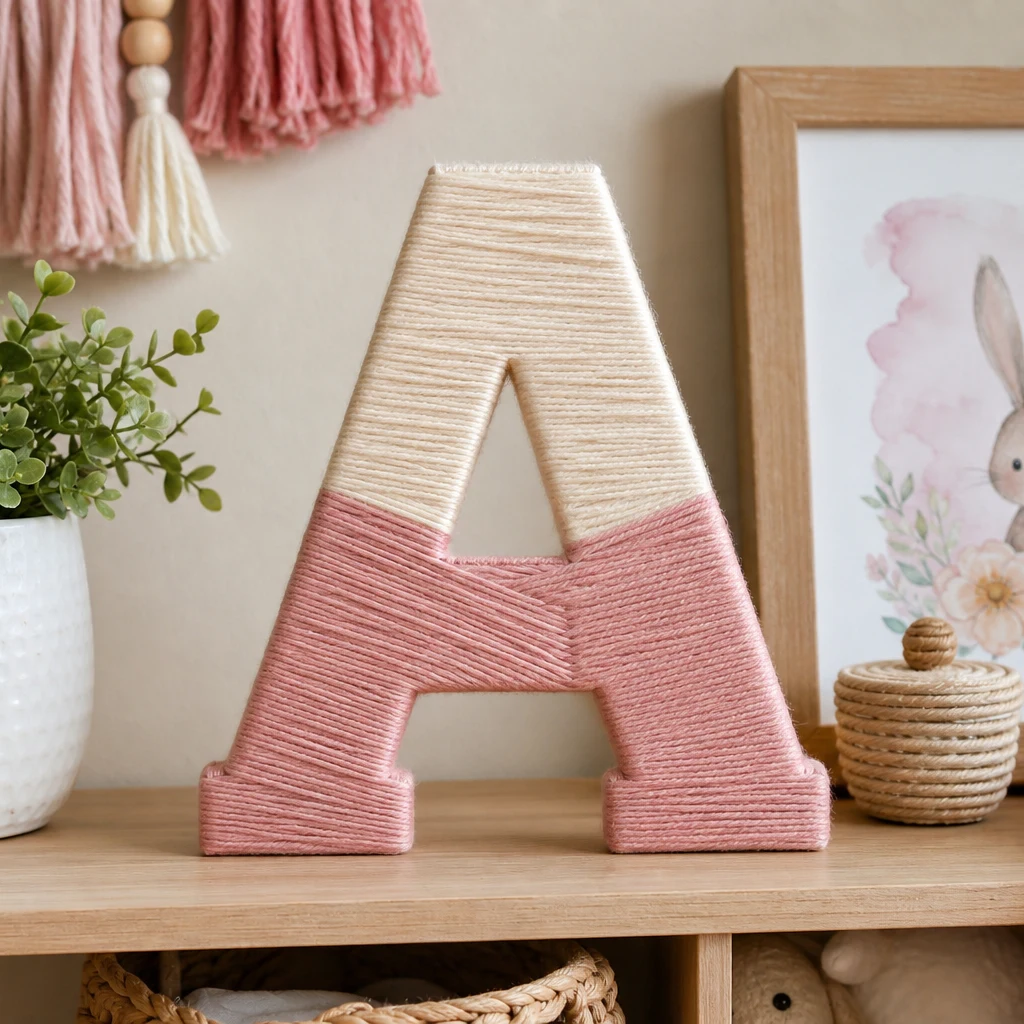
Display your finished yarn-wrapped wooden letter on a bookshelf, mantel, entryway table, or nursery ledge. Lean it against the wall for a casual look, or use removable picture-hanging strips for a lightweight mount that will not damage paint.
Group letters into short words such as HOME, READ, or a child’s name for stronger visual impact. Mix textures nearby – ceramic vases, framed prints, or woven baskets – to highlight the softness of the yarn.
Design Ideas and Styling Tips
Monograms and Nursery Decor
A single initial in muted blush, sage, or butter yellow feels sweet without looking childish. Add a pom-pom trim on one edge for extra charm, or keep the design flat and modern with one cream yarn from end to end.
Gallery Wall Accent
Use one wrapped letter as the textural focal point among framed photos and line art. Choose a yarn color that repeats a tone from your artwork so the display feels intentional rather than crowded.
Seasonal Color Updates
Because yarn is inexpensive, you can wrap a new letter for holidays or seasons without committing to permanent wall paint. Deep green and cream work for winter, while terracotta and natural cotton yarn suit warmer months.
Common Mistakes to Avoid
- Skipping sanding, which leads to snagged yarn and uneven wrapping
- Using too much glue on the front face, creating visible bumps
- Wrapping too loosely so wood shows between strands
- Cutting yarn ends too short on the back, causing unraveling later
- Rushing corners on serif fonts instead of building up yarn gradually
Yarn-Wrapped Wooden Letter Checklist
- Choose a smooth wooden letter sized for your display spot.
- Sand rough edges and wipe away dust before wrapping.
- Preview yarn colors against your wall or shelf backdrop.
- Secure the starting strand on the back with a thin glue line.
- Wrap with even tension and keep strands close together.
- Plan color changes at corners or back edges for cleaner lines.
- Glue every cut end to the back of the letter.
- Inspect the front under bright light for thin or bare patches.
- Trim glue strings and loose fibers before displaying.
- Use removable hanging strips if mounting on painted walls.
Frequently Asked Questions
What size wooden letter should I buy?
Eight to twelve inches tall is the most versatile size for shelves and gallery walls. Larger letters make a bold statement above a crib or desk, while smaller ones work well on tiered trays and bookcase styling. Match the scale to your display area so the letter feels balanced, not crowded.
Can I use any type of yarn?
Medium-weight acrylic, cotton, or wool-blend yarn all work well. Avoid overly fuzzy novelty yarn for your first project because it can hide uneven wrapping. Smooth yarns show crisp lines and are easier to reposition if you need to tighten a section.
Will hot glue hold the yarn long term?
Yes, when you glue only the start and end strands plus occasional anchor points on the back. Hot glue creates a strong bond between yarn and unfinished wood. Keep glue off the display face and press each end firmly for a durable hold.
How do I wrap letters with holes, such as A or O?
Wrap the outer frame first, then work the inner sections separately. Secure new starting points on the back each time you move to a new arm of the letter. Go slowly around inner corners so the yarn does not twist or gap.
Can I hang a yarn-wrapped wooden letter on the wall?
Absolutely. Most craft letters are light enough for removable adhesive strips rated for picture frames. Attach strips to the flat back surface rather than the yarn face. For heavier wood letters, add a sawtooth hanger before wrapping or lean the piece on a shelf.
How do I clean a yarn-wrapped letter?
Dust lightly with a dry microfiber cloth or use the brush attachment on a vacuum on low suction. Avoid water and harsh cleaners, which can mat the yarn or weaken glue bonds. Display the piece away from direct moisture in kitchens and bathrooms.
Final Thoughts
A yarn-wrapped wooden letter is a small project with a big visual payoff. With basic supplies and a little patience, you can create custom home decor that reflects your color palette and personal style. Start with one letter, master the wrapping rhythm, and you will have a repeatable craft you can adapt for gifts, seasonal vignettes, and every room that needs a softer handmade touch.