If you’re a fan of the deliciously crunchy, caramel-flavored Lotus Biscoff biscuits, then you’re in for a treat with this No-Bake Lotus Biscoff Cheesecake! This simple recipe combines the rich flavor of the beloved Biscoff cookies with a creamy, smooth cheesecake filling—no oven required. Perfect for a special dessert or just a sweet indulgence, this easy recipe will wow your guests or satisfy your sweet tooth. Let’s dive into how to make it!
Ingredients:
For the Crust:
- 200g Lotus Biscoff biscuits (or any speculoos-style cookies)
- 80g unsalted butter, melted
For the Filling:
- 250g cream cheese (room temperature)
- 200ml double cream (whipped to soft peaks)
- 100g powdered sugar
- 1 tsp vanilla extract
- 100g Lotus Biscoff spread (smooth or crunchy)
- 3 tbsp milk (for smooth consistency)
For the Topping:
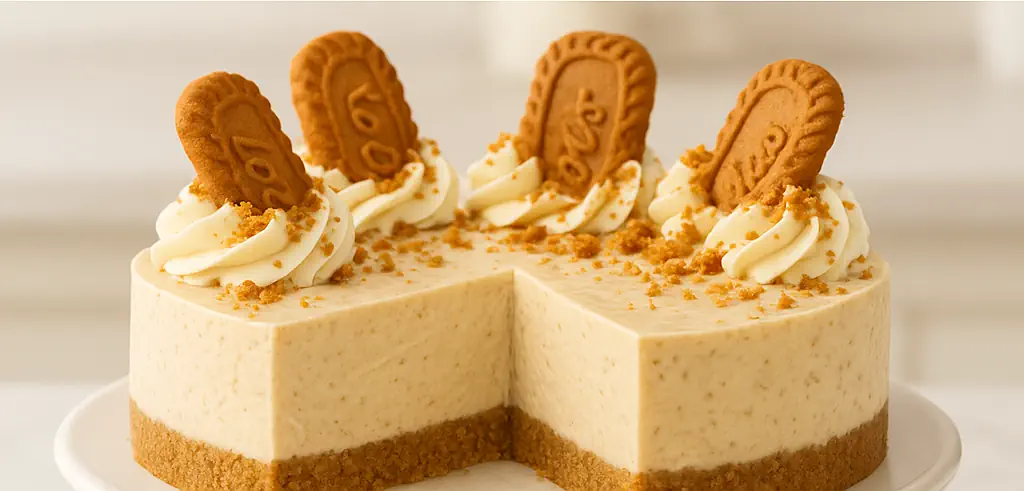
- 2-3 Lotus Biscoff biscuits, crushed or whole for garnish
- 2 tbsp Lotus Biscoff spread, slightly melted (optional)
Instructions:
Step 1: Prepare the Crust
- Crush the Biscoff biscuits: Place the biscuits into a food processor and pulse until they turn into fine crumbs. If you don’t have a food processor, you can also put the biscuits into a resealable plastic bag and crush them with a rolling pin.
- Mix with butter: In a bowl, combine the crushed biscuits with the melted butter. Stir until the mixture is fully combined and the crumbs are coated in butter.
- Form the crust: Press the biscuit mixture firmly into the base of a springform pan or a 9-inch round cake pan. Use the back of a spoon to press it down evenly.
- Chill the crust: Place the crust in the fridge for about 30 minutes to set while you prepare the filling.
Step 2: Prepare the Filling
- Whip the cream: In a mixing bowl, whisk the double cream until it forms soft peaks. Be careful not to overwhip.
- Beat the cream cheese: In a separate bowl, beat the cream cheese with the powdered sugar and vanilla extract until smooth and creamy.
- Add Lotus Biscoff spread: Mix in the Lotus Biscoff spread to the cream cheese mixture. Add a little milk if necessary to make the filling smoother and easier to mix.
- Fold in the whipped cream: Gently fold the whipped double cream into the Biscoff cream cheese mixture, combining until smooth and well incorporated.
Step 3: Assemble the Cheesecake
- Fill the crust: Pour the cheesecake filling into the chilled crust, smoothing the top with a spatula to make it even.
- Chill: Place the cheesecake in the fridge for at least 4 hours or preferably overnight to set. This will help the filling firm up and hold its shape.
Step 4: Decorate and Serve
- Top the cheesecake: Once the cheesecake is set, crush a few Lotus Biscoff biscuits and sprinkle them on top for added texture and flavor. You can also drizzle melted Lotus Biscoff spread over the top for an extra indulgent touch.
- Serve: Slice and enjoy! The cheesecake should be creamy and smooth with a delightful crunch from the Biscoff biscuits.
Tips and Variations:
- For a thicker crust: Add a little more melted butter to the biscuit mixture if you prefer a denser, firmer base.
- Make it extra indulgent: You can layer in some Biscoff cookie crumbs into the filling or swirl extra Biscoff spread through the filling for a more intense flavor.
- No springform pan? You can use a regular round cake pan lined with parchment paper or even individual tart pans for single-serving cheesecakes.
- Vegan option: For a vegan version, substitute the cream cheese with vegan cream cheese, use coconut cream instead of double cream, and make sure your biscuits and spread are vegan-friendly.
Conclusion:
This No-Bake Lotus Biscoff Cheesecake is a heavenly, simple dessert that combines the rich flavor of Biscoff cookies and spread with the creamy, indulgent texture of a cheesecake. It’s perfect for any occasion, from family gatherings to a special treat for yourself. Plus, with no baking involved, it’s quick to prepare and easy to enjoy.