If you love indulgent desserts but don’t want to spend hours in the kitchen, No-Bake Biscoff Cheesecake Cups are the perfect solution! These little cups combine the rich flavor of Biscoff cookies with a smooth, creamy cheesecake filling. Best of all? No oven is needed. This simple dessert is perfect for anyone looking to satisfy their sweet tooth with minimal effort.
Why No-Bake Desserts are a Game Changer
There are days when you want a delicious dessert but don’t have the time or patience for baking. This is where no-bake desserts shine. A little prep, some chilling, and you have a treat that’s both impressive and easy to make. Personally, I love no-bake recipes because they save time while still delivering big on flavor.
If you’ve never tried a Biscoff cheesecake, you’re in for a treat. The Biscoff cookies add a wonderful texture and flavor to the crust, while the creamy filling is light and smooth. It’s a perfect balance of flavors and textures.
Ingredients for No-Bake Biscoff Cheesecake Cups
Here’s what you’ll need to create these delicious cheesecake cups:
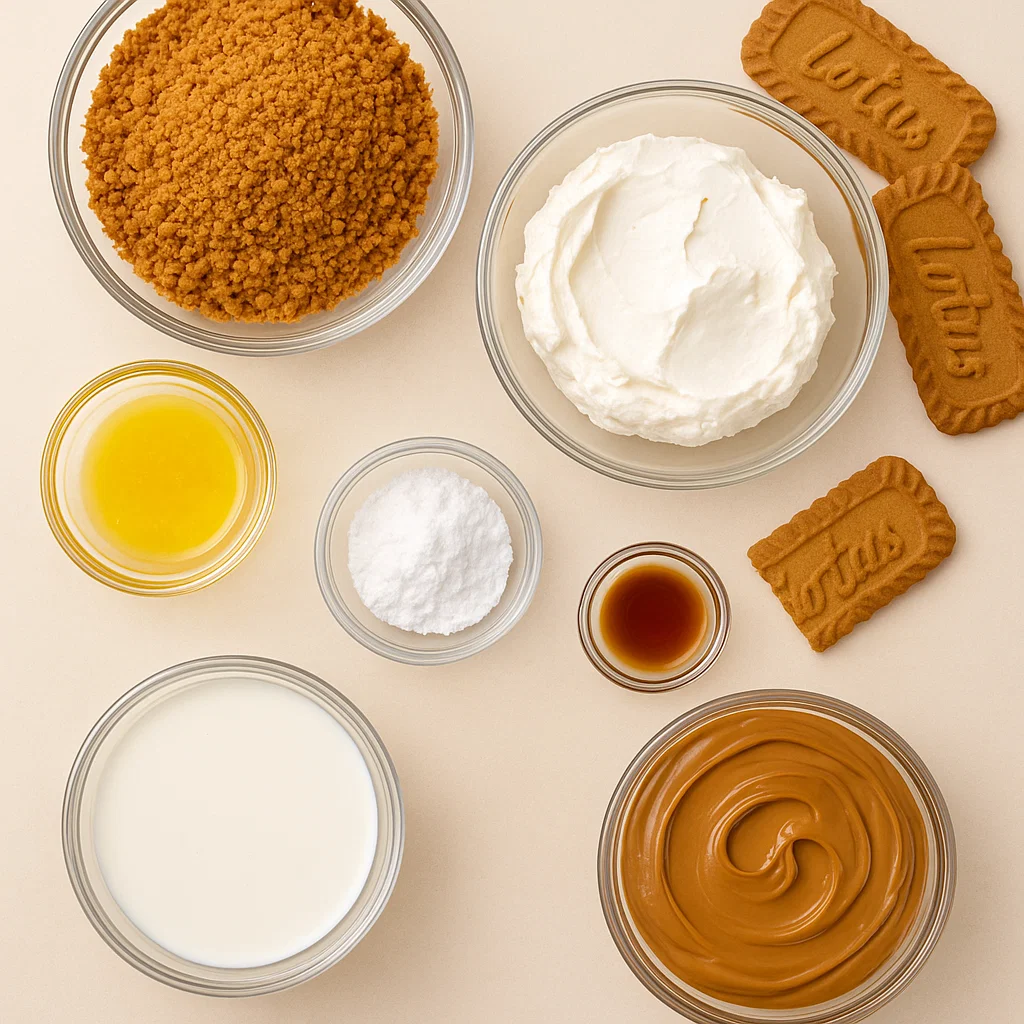
- 1 cup (120g) Biscoff cookie crumbs (about 10 cookies)
- 3 tbsp (45g) melted butter
- 8 oz (225g) cream cheese, softened
- 1/4 cup (30g) powdered sugar
- 1 tsp vanilla extract
- 1/2 cup (120ml) heavy cream
- 1/2 cup (120g) Biscoff spread (or more for topping)
- Optional: Extra Biscoff cookies for garnish
Step-by-Step Guide to Making No-Bake Biscoff Cheesecake Cups
1. Prepare the Crust
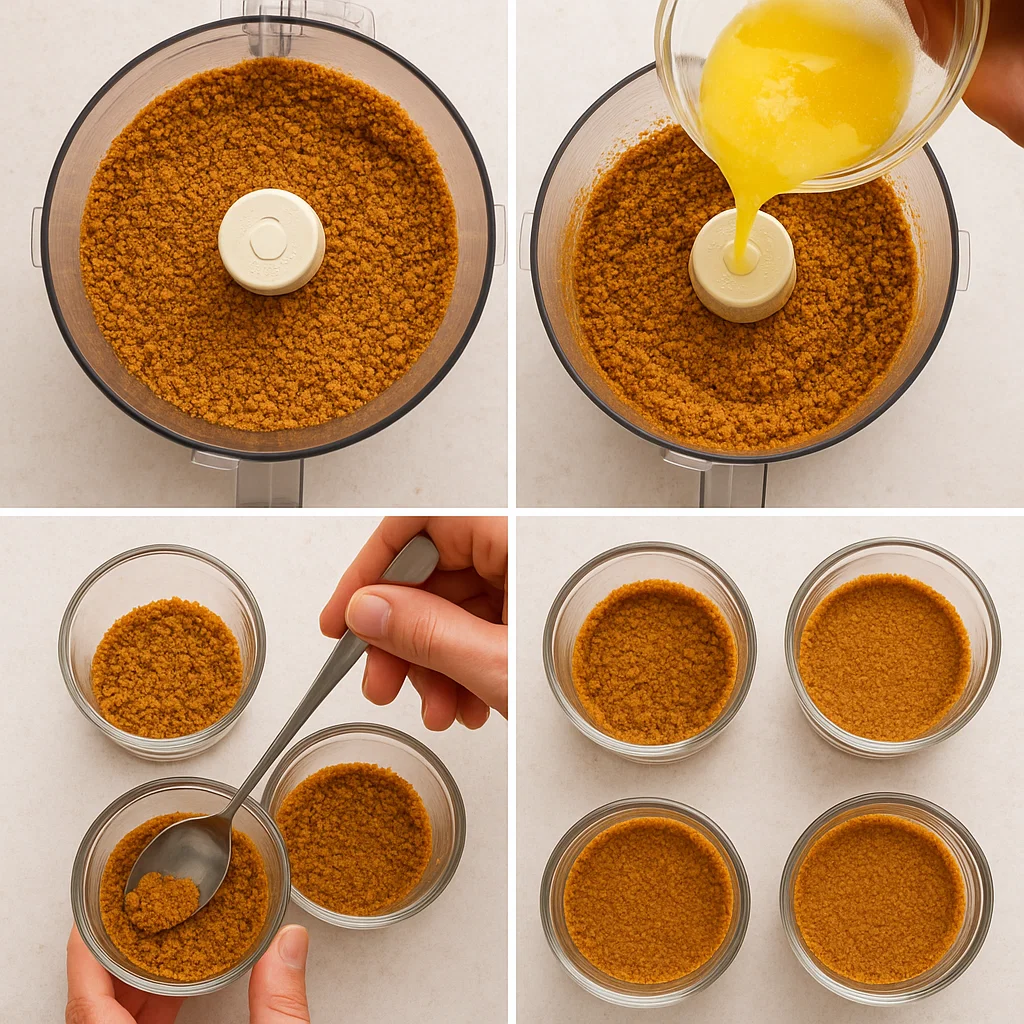
Start by making the Biscoff cookie crust. This is a super easy step:
- Crush Biscoff cookies in a food processor until you have fine crumbs (about 1 cup or 120g).
- Mix the crumbs with 3 tbsp melted butter (45g) until it resembles wet sand.
- Spoon about 1 tbsp of the mixture into each cup (you can use small mason jars, shot glasses, or clear cups).
- Press down firmly with a spoon to make an even layer.
2. Make the Cheesecake Filling
Next, let’s make the creamy cheesecake filling:
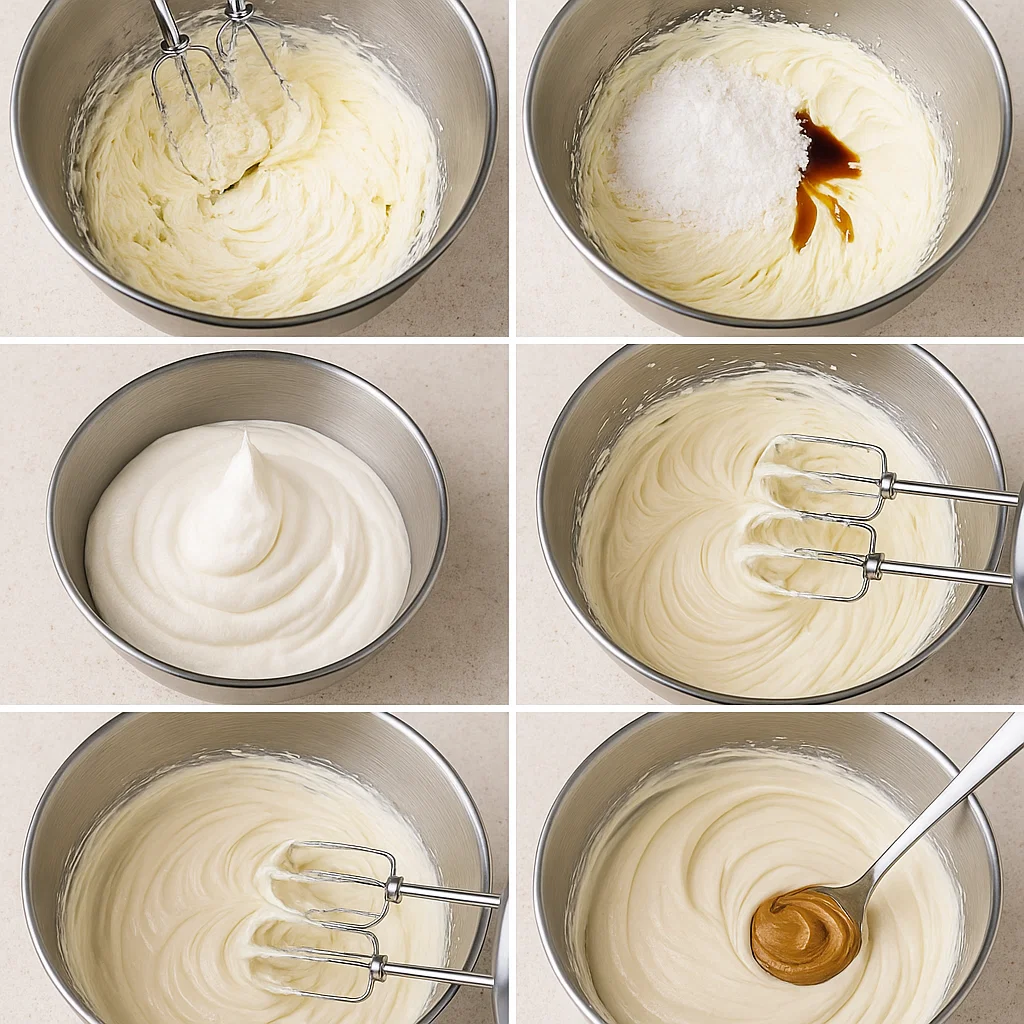
- Beat cream cheese in a mixing bowl until smooth (about 1-2 minutes).
- Add powdered sugar (30g) and vanilla extract, then mix until smooth.
- In a separate bowl, whip the heavy cream (120ml) until stiff peaks form.
- Gently fold the whipped cream into the cream cheese mixture until smooth.
- Stir in Biscoff spread (120g), ensuring everything is well combined.
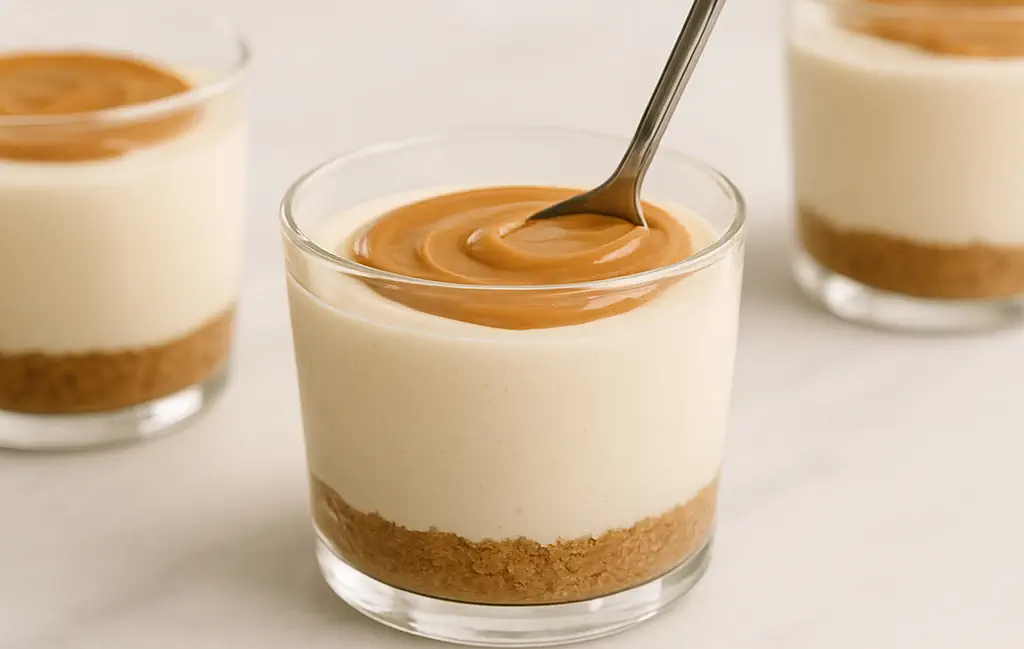
3. Assemble the Cups
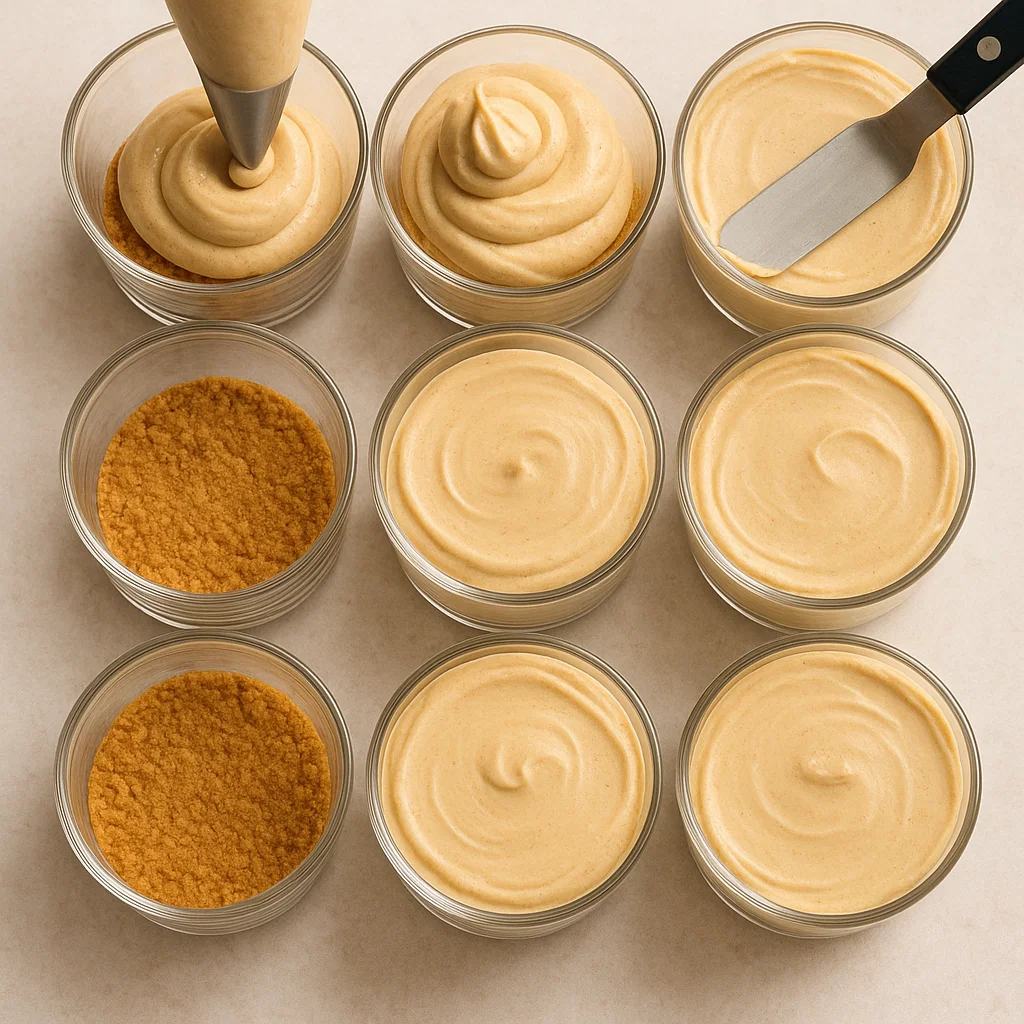
Now that you have your crust and filling ready, it’s time to assemble:
- Spoon or pipe the cheesecake filling over the prepared crust in each cup.
- Smooth the top with a spatula or the back of a spoon for an even finish.
4. Chill and Set
Place the filled cups in the fridge to set. Let them chill for at least 2 hours, but if you have time, overnight works even better.
5. Garnish and Serve
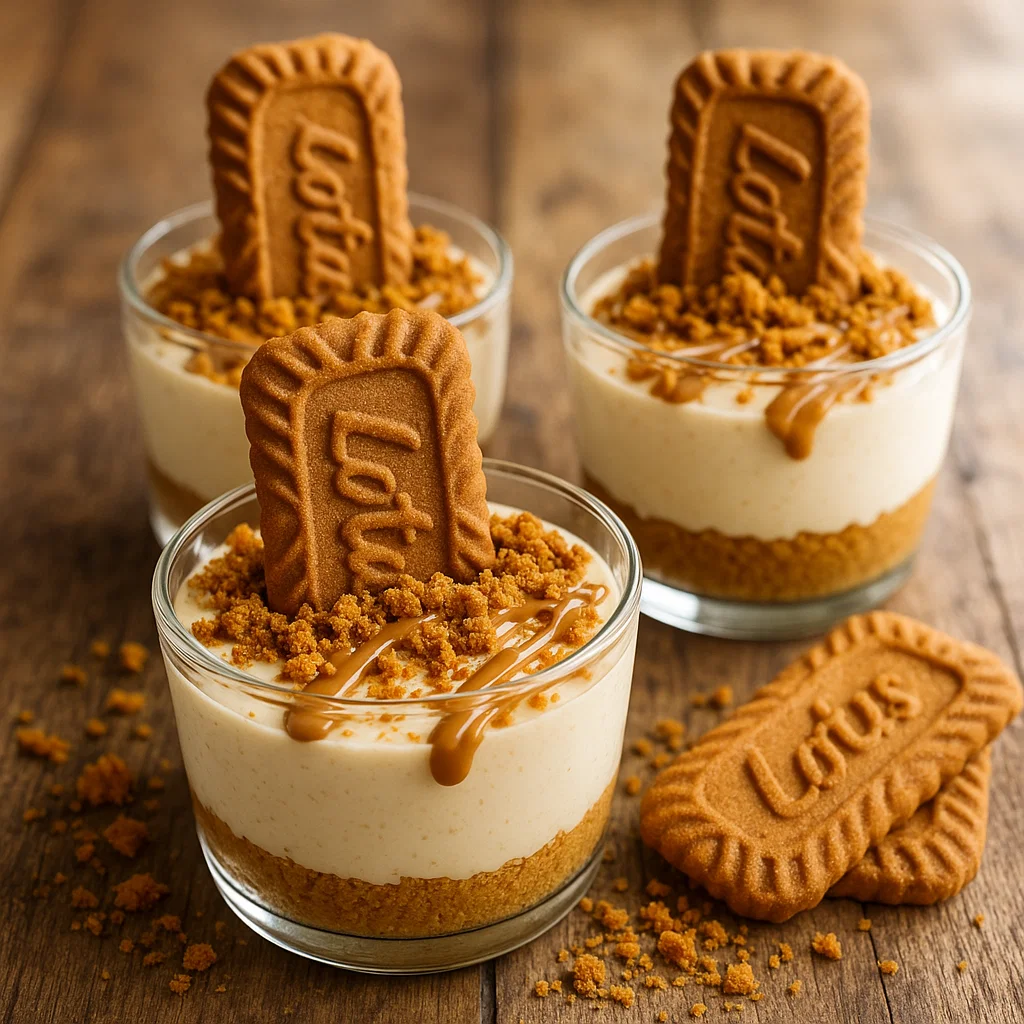
Once the cheesecake cups have set, garnish with extra Biscoff crumbs or a drizzle of Biscoff spread for that extra flavor. You can even top with a whole Biscoff cookie for a perfect finishing touch.
Why These No-Bake Biscoff Cheesecake Cups Are So Great
- Quick & Easy: Perfect for when you’re craving something sweet but don’t want to spend a lot of time in the kitchen.
- Rich & Flavorful: The combination of Biscoff cookies and cheesecake is unbeatable. It’s a smooth, indulgent treat that’s sure to impress.
- Customizable: You can add different toppings or mix in extra ingredients, like caramel sauce or chocolate chips, to give your coasters a personal twist.
Final Thoughts: Try These No-Bake Biscoff Cheesecake Cups Today!
These No-Bake Biscoff Cheesecake Cups are sure to be a crowd-pleaser! Whether you’re hosting a party or just looking for a sweet treat to enjoy at home, they’re an easy and delicious option. With minimal effort, you’ll have a decadent dessert ready to go.
Call to Action:
Excited to try these no-bake cheesecake cups? Grab your ingredients and get started today! Don’t forget to share your creations with me in the comments below!
How could We replace the Heavy Whipping Cream with using Cool Whip instead??
Thanks so much for your question! For this no-bake cheesecake recipe, you can use Cool Whip instead of heavy whipping cream. Since Cool Whip is already sweetened and stabilized, you can fold it directly into the cream cheese mixture. Just skip the step of whipping the cream, and gently mix in the Cool Whip until smooth. The texture will be a little lighter and sweeter, but it still works great!