
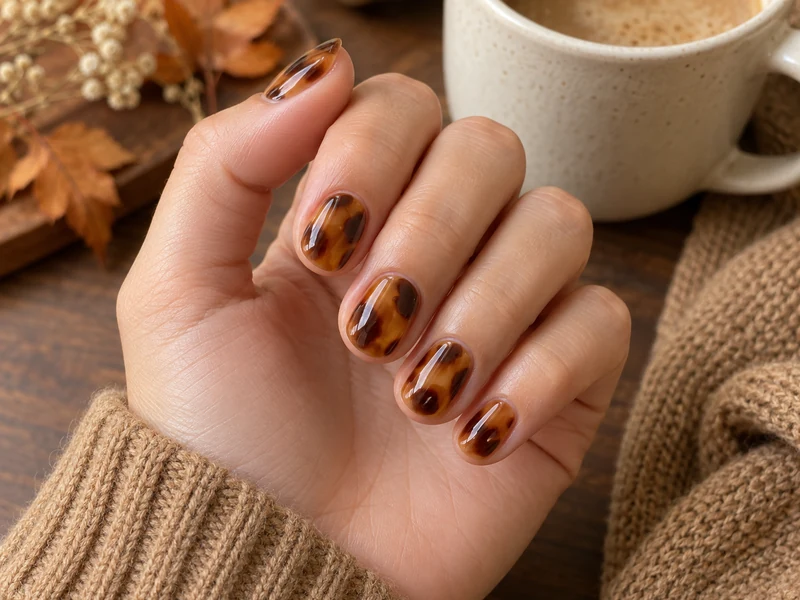
Tortoiseshell nails look complex because the color seems suspended in layers, but the pattern needs only three regular-polish shades: sheer amber, caramel brown, and deep espresso. The key is not perfect spots. It is leaving visible amber space between irregular patches and making each dark accent smaller than the color beneath it.
This tutorial uses ordinary air-dry polish—no gel products and no UV lamp. Plan about 45 to 75 minutes for application, then allow additional drying time according to your product labels and the thickness of your coats.
Safety Before You Start
- Work in a well-ventilated room and follow every warning and direction on each product label.
- Keep polish, remover, cotton, and tools away from flames, cigarettes, heating elements, and other heat sources.
- Do not use cosmetic nail products on broken, inflamed, infected, or painful skin or nails.
- Avoid getting polish or remover in the eyes or mouth, and keep all products away from children and pets.
- If you develop burning, swelling, rash, or persistent redness, remove the product if you can do so safely, stop using it, and seek medical advice.
The Layer Map
| Layer | Color | Coverage goal |
|---|---|---|
| 1 | Clear base coat | One thin, even coat |
| 2 | Sheer amber | One translucent coat over the full nail |
| 3 | Caramel brown | Two to four irregular patches per nail |
| 4 | Sheer amber | One thin glaze over the patches |
| 5 | Deep espresso | One to three small accents per nail |
| 6 | Optional amber glaze | Only if the contrast looks too sharp |
| 7 | Clear glossy top coat | One floating coat after color is dry |
The counts are guides, not quotas. One nail may need two caramel shapes while another needs four. Repeating the exact same map on every nail makes the result look printed rather than organic.
What You Need
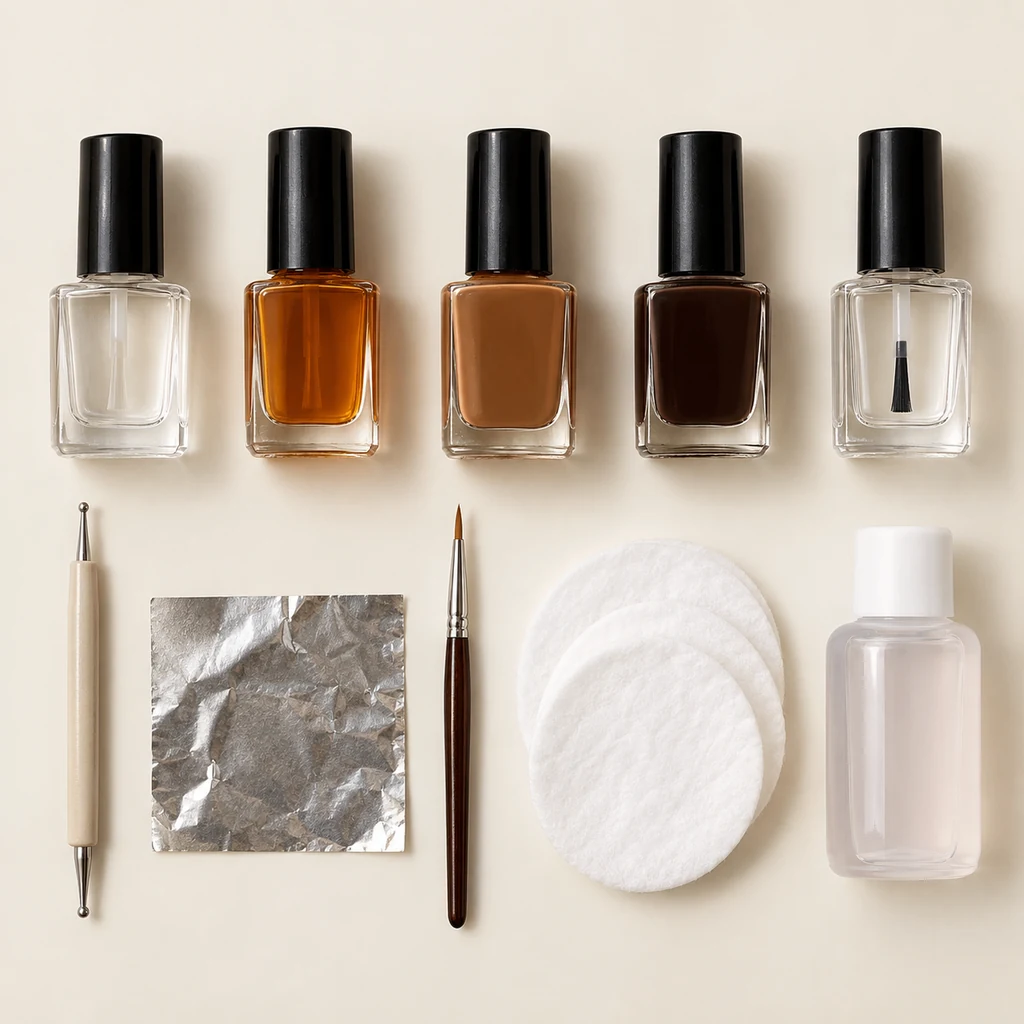
- Clear regular-polish base coat
- Sheer amber or honey-colored regular polish
- Opaque caramel-brown regular polish
- Deep espresso-brown regular polish
- Clear glossy regular-polish top coat
- Small dotting tool or rounded end of a clean toothpick
- Small foil square or disposable palette
- Fine cleanup brush, cotton pads, and compatible remover
Choose a true translucent amber rather than an opaque orange. You should be able to see through one thin coat. Do not pour polishes into one another or thin them with an unapproved household solvent; use each product as its label directs.
How to Do Tortoiseshell Nails With Regular Polish
Step 1 — Prep Without Over-Buffing
Wash and dry your hands. Remove old polish, gently shape the free edge, and push back only loose cuticle tissue if that is already part of your normal routine. Wipe the nail plate with the prep method recommended by your base-coat label.
Do not aggressively file or buff the surface to make regular polish stick. If a nail or surrounding skin is sore, split, swollen, or discolored in a concerning way, postpone the manicure.
Step 2 — Apply One Thin Base Coat
Use three light strokes—center, then each side—without flooding the cuticle. Cap the free edge only if your product directs it. Let the base coat dry for the time stated on its label.
Step 3 — Add the First Amber Veil
Apply one thin coat of sheer amber over the entire nail. A few lighter and darker brush areas are acceptable because later layers add depth. Keep the coat thin enough that the natural nail still influences the color.
Step 4 — Place Loose Caramel Patches
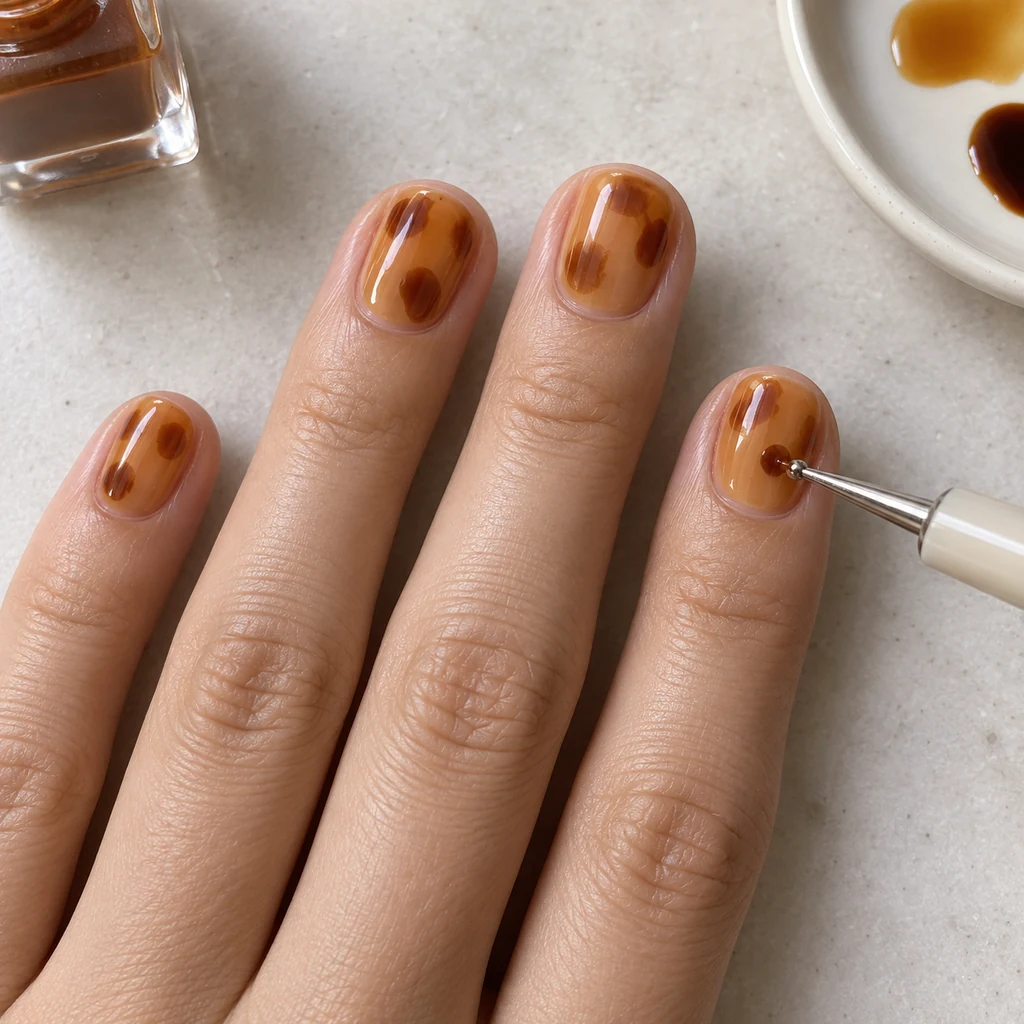
Put a small drop of caramel polish on foil. With the dotting tool, place two to four uneven patches on each nail. Nudge one edge outward so the shape is not a perfect circle. Vary their size and position, and leave at least half of the amber background visible.
Work one hand at a time. If a patch becomes too large, do not scrape wet polish back and forth; leave it and make the neighboring shapes smaller.
Step 5 — Glaze With Sheer Amber
When the caramel layer is dry enough that a light brush pass will not drag it, apply another thin amber coat over the full nail. This glaze pushes the caramel visually below the surface and creates the characteristic resin-like depth.
Use the drying guidance on your bottles rather than a universal timer. Room temperature, humidity, coat thickness, and formula can all change how long regular polish remains vulnerable to dents.
Step 6 — Add Smaller Espresso Accents
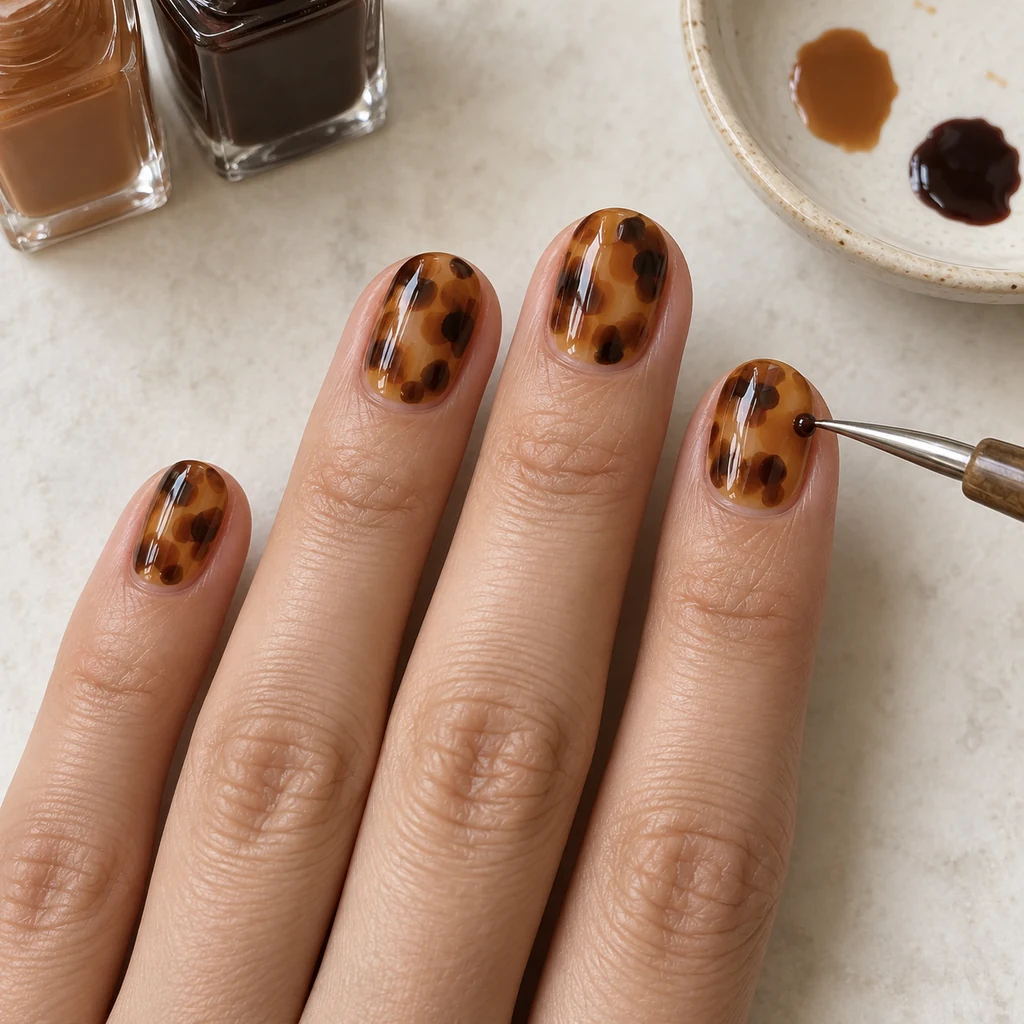
Place a fresh drop of espresso polish on the foil. Add one to three small accents per nail, concentrating them inside or along the edge of selected caramel patches. Leave some caramel shapes untouched.
Turn round dots into short commas, soft triangles, or uneven half-moons with the tool tip. The accents should be the smallest marks in the design. If every shape receives a centered dot, the manicure will read as leopard print rather than tortoiseshell.
Step 7 — Balance the Pattern
Look at the whole hand from arm’s length. Add one small caramel mark only where a nail looks empty. If the dark accents appear harsh, use one final whisper-thin amber glaze; skip it if the layers already look clear and dimensional.
For a quieter manicure, use tortoiseshell on two accent nails and borrow neutral companions from these chic nude nail ideas. For a moodier version, pair it with one or two ideas from these matte black nail designs, while keeping the tortoiseshell nails glossy.
Step 8 — Top Coat, Clean, and Dry
Wait until the color layers can tolerate a light touch without dragging. Load the top-coat brush generously and float one smooth coat over the nail with minimal pressure. Repeated brushing can smear the espresso marks.
Use a fine brush lightly dampened with compatible remover to clean only the surrounding skin. Close every bottle tightly, store products as directed, and allow more time before showering, sleeping, or pressing fingertips into fabric. Surface-dry polish can still dent underneath.
Troubleshooting the Pattern
| Problem | Cause | Fix |
|---|---|---|
| It looks like polka dots | Shapes are equally round and evenly spaced | Stretch selected edges into commas and vary the gaps |
| It looks like leopard print | Every caramel patch has one centered dark dot | Move accents to edges and leave some patches untouched |
| The design looks muddy | Layers are thick or still wet | Stop adding color, let it dry, and use fewer marks next time |
| The background is opaque | Amber polish is too pigmented | Choose a labeled sheer or jelly-style regular polish |
| Top coat smears the pattern | Color is not dry or the brush is pressed down | Wait longer and float one loaded stroke with minimal pressure |
| Polish floods the cuticle | Too much product is on the brush | Wipe one brush side at the bottle neck and use thinner coats |
Three Easy Variations
- Accent pair: use tortoiseshell on the ring and middle fingers with sheer amber on the rest.
- Micro French: keep a nude base and confine the layered pattern to a narrow tip.
- Dark frame: add one very thin espresso side detail on selected nails, not a full heavy outline.
If you enjoy translucent color but want a brighter palette next time, these jelly-inspired nail ideas use the same idea of preserving visible depth.
Frequently Asked Questions
Can I make tortoiseshell nails without gel?
Yes. This method is designed for ordinary air-dry base coat, color polish, and top coat. No curing lamp is used.
Will it work on short nails?
Yes. Use fewer, smaller patches and preserve more amber background so the pattern does not crowd a short nail.
Do all five nails need the same pattern?
No. Keep the palette and layer order consistent, but change the position, scale, and number of shapes on each nail.
How long should I wait between coats?
Follow the label for each product and wait longer when a layer still dents or drags. Formula, room conditions, and coat thickness make one universal minute count unreliable.
Can I use black instead of espresso?
You can, but use very small marks. Black creates stronger contrast and can overpower the translucent amber more easily than deep brown.
Why did bubbles appear?
Thick coats, vigorous bottle shaking, or repeatedly brushing a drying layer can trap air. Roll the closed bottle gently between your hands if its label permits and apply thinner coats.