
There’s something magical about dandelions that captures our hearts—maybe it’s their whimsical nature or the way they dance in the breeze, carrying wishes on their delicate seeds. Now, you can bring that same enchanting beauty to your fingertips with stunning dandelion nail art that’s both elegant and surprisingly achievable.
Whether you’re a nail art beginner or someone who’s been perfecting your skills for years, these delicate dandelion designs will transform your manicure into a work of art. You’ll discover that creating these dreamy looks is easier than you think, and the results are absolutely breathtaking. From simple silhouettes to intricate seed-blown masterpieces, there’s a dandelion design here that will speak to your creative soul.
Why Dandelion Nail Art Is Having a Moment
Dandelion nail art has blossomed into one of the most sought-after designs in the beauty world, and for good reason. These designs embody everything we love about nature-inspired beauty—they’re delicate yet bold, whimsical yet sophisticated. The contrast between the sturdy stem and the ethereal, floating seeds creates visual interest that works beautifully on nails of any length or shape.
What makes dandelion designs particularly special is their versatility. You can keep them minimalist with simple black line work, or go full fantasy with golden yellows and shimmering details. They work equally well as accent nails or full manicure statements, making them perfect for both everyday wear and special occasions.
Essential Tools for Creating Dandelion Nail Art
Before we dive into the designs, let’s gather your supplies. Having the right tools makes all the difference between a design that looks homemade and one that rivals salon quality. You don’t need an extensive collection—just a few key items that you’ll use again and again.
Must-Have Tools:

- Fine detail brushes (sizes 00 and 000)
- Dotting tools in various sizes
- Nail art pens with ultra-fine tips
- Small makeup sponges for blending
- Toothpicks for fine detail work
- Good quality base and top coat
Color Palette Essentials:
- Black or dark brown for stems and outlines
- White for dandelion seeds
- Yellow and gold for flower heads
- Soft pastels for background gradients
- Silver or gold glitter for magical accents
The beauty of dandelion art lies in its simplicity—you can create stunning results with just black and white polish if that’s what you have on hand. Don’t let a limited color selection hold you back from trying these gorgeous designs.
Simple Silhouette Dandelions: Perfect for Beginners
Starting with silhouette dandelions is like learning to walk before you run—it builds your confidence while creating absolutely beautiful results. These designs focus on clean lines and elegant shapes rather than intricate details, making them perfect for your first attempt at dandelion nail art.
The Classic Single Stem Design:
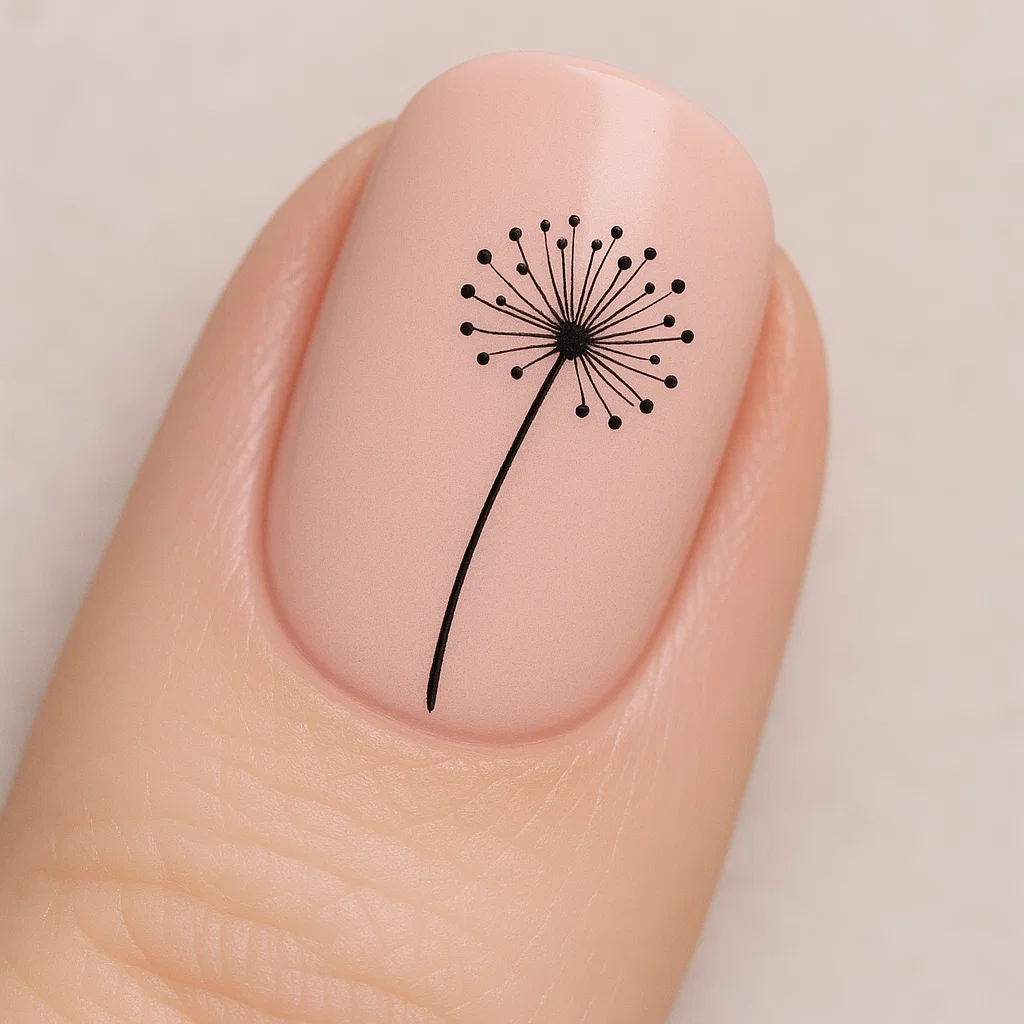
Begin with a solid base color—soft pink, nude, or even classic white works beautifully. Once your base is completely dry, use a fine brush to paint a thin, slightly curved stem starting from the bottom corner of your nail. The stem should be delicate but visible, about the width of a fine pen line.
At the top of your stem, create the dandelion head by painting small lines radiating outward in a circular pattern. Think of it like drawing the sun, but with more delicate, wispy rays. Some of your lines should be longer than others to create natural variation. At the tips of these lines, add tiny dots to represent the seeds—this is where your dotting tool becomes invaluable.
Adding Movement with Flying Seeds:
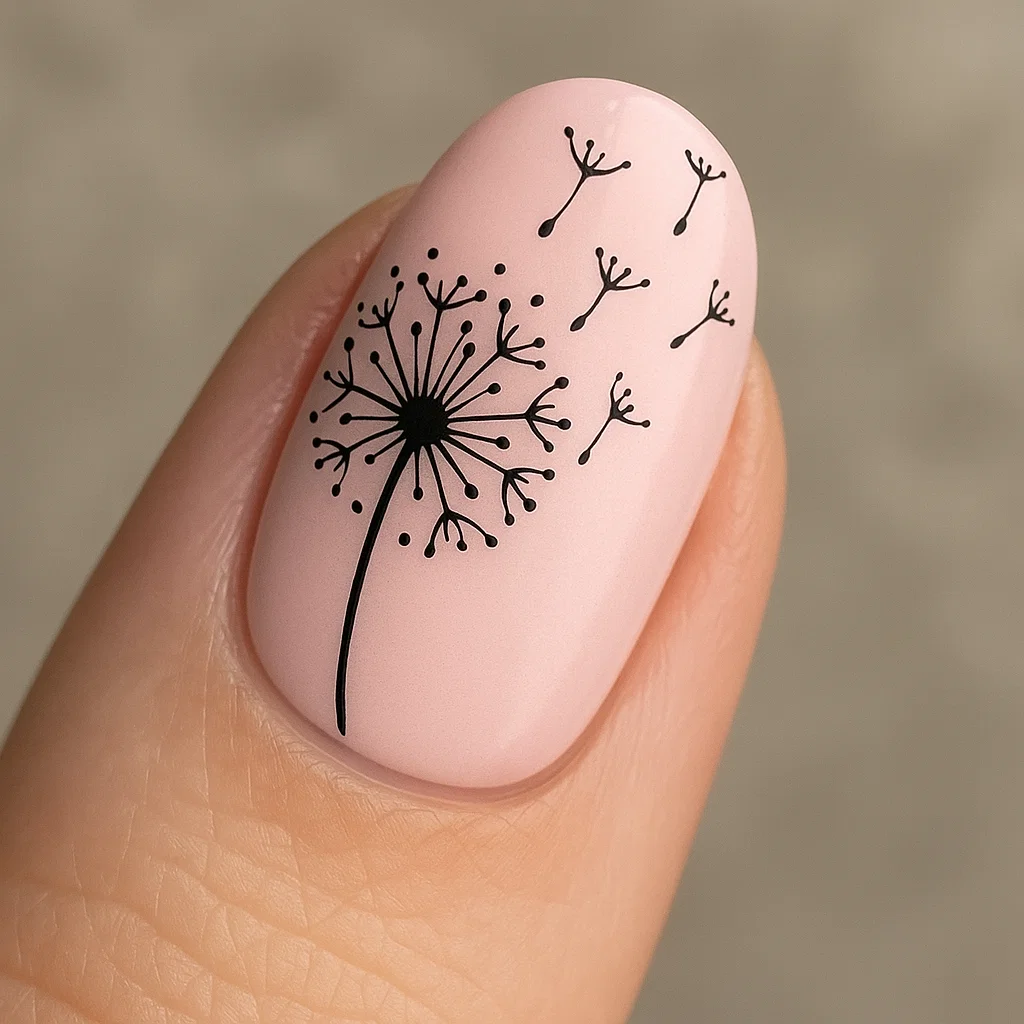
The magic happens when you add seeds floating away from the main flower. Paint small dots scattered across your nail, getting smaller and more spread out as they “travel” away from the dandelion. Connect each seed to a tiny line to represent the wispy stem that carries it on the wind.
This technique creates the illusion of movement and brings your design to life. You’ll be amazed at how this simple addition transforms a static flower into a dynamic, story-telling piece of art.
Gradient Background Dandelions: Adding Depth and Drama
Once you’ve mastered the basic silhouette, it’s time to explore backgrounds that make your dandelions pop. Gradient backgrounds create depth and atmosphere that elevates your nail art from pretty to absolutely stunning.
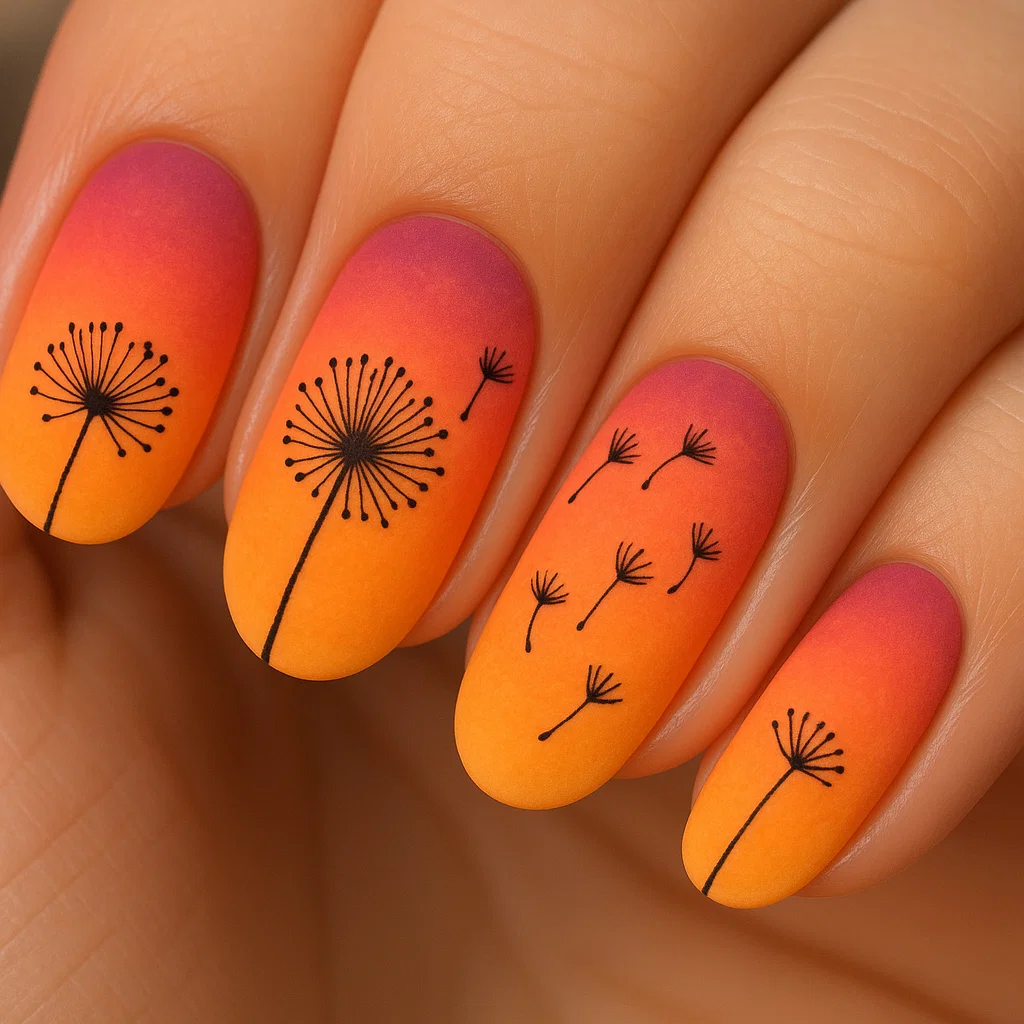
Sunset Dandelion Dreams:
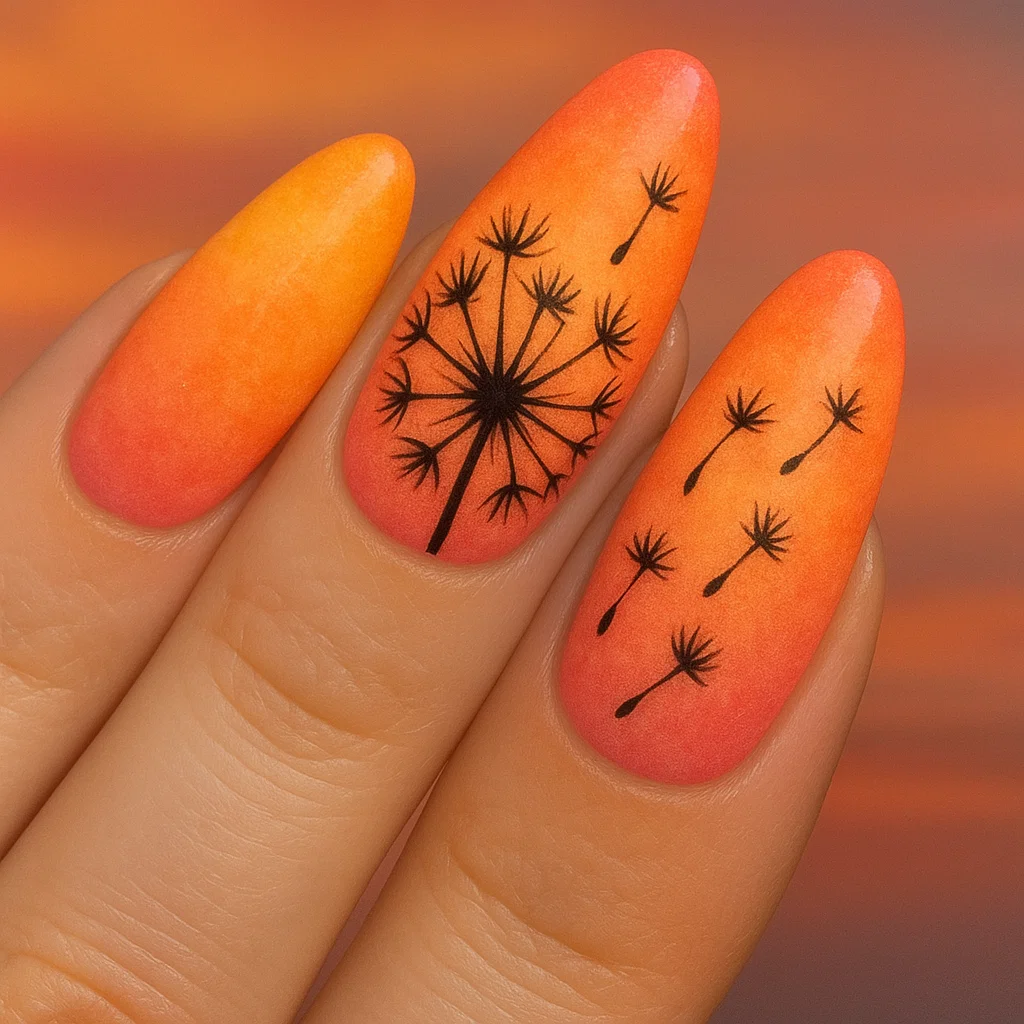
Create a gorgeous sunset effect using orange, pink, and yellow polishes. Start by applying your lightest color as a base, then use a makeup sponge to dab the deeper colors onto your nail, blending as you go. The key is working while the polish is still slightly wet, allowing the colors to melt together naturally.
Once your gradient is dry, add your dandelion silhouette in black or deep brown. The contrast against the warm sunset colors creates a dramatic, dreamy effect that looks incredibly sophisticated. This design works especially well on longer nails where you have more canvas to show off the gradient.
Twilight Magic:
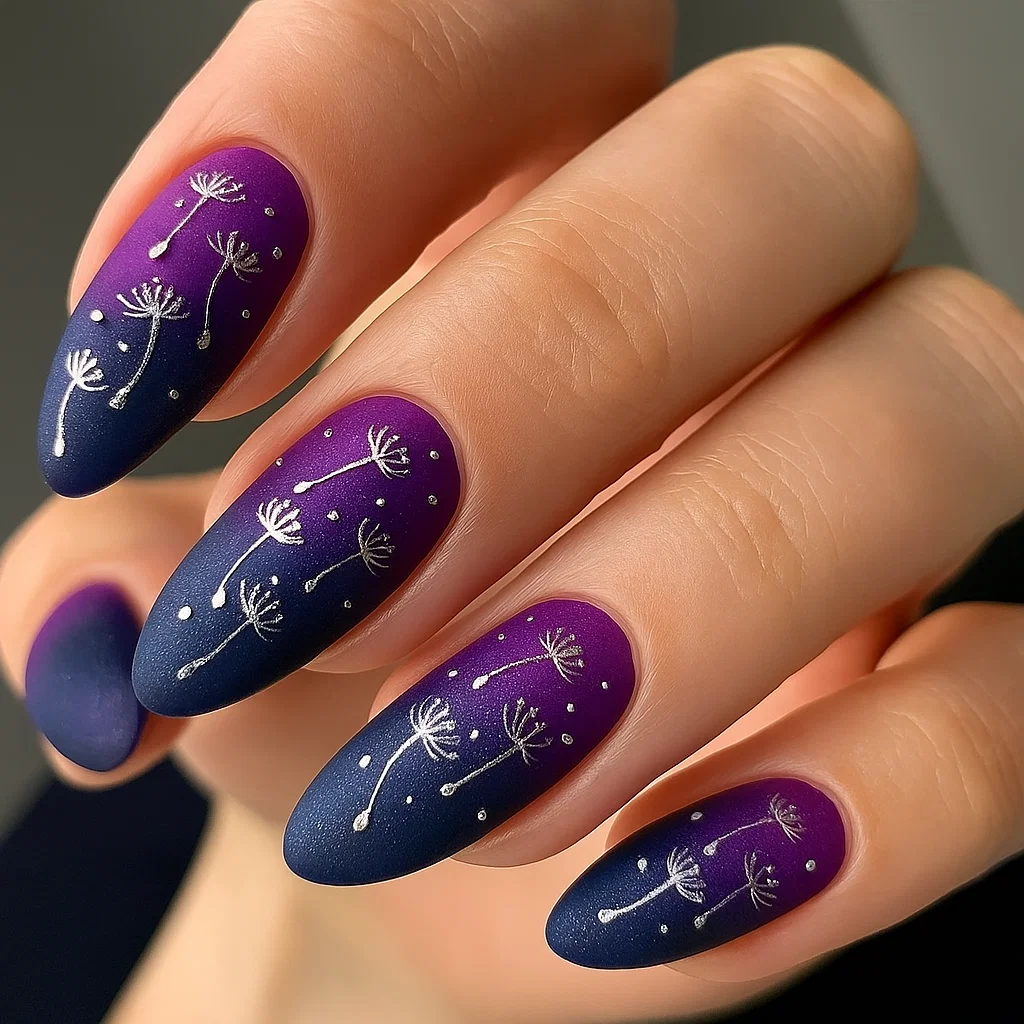
For an evening-appropriate look, try a purple-to-navy gradient with silver dandelion details. This color combination feels mystical and elegant, perfect for date nights or special events. Use silver polish for your dandelion stems and seeds, and consider adding a few tiny rhinestones scattered among the floating seeds for extra sparkle.
Detailed Dandelion Gardens: For the Adventurous Artist
Ready to challenge yourself? These intricate designs require patience and a steady hand, but the results are absolutely breathtaking. Think of these as your masterpiece nails—the ones that make people stop and stare.
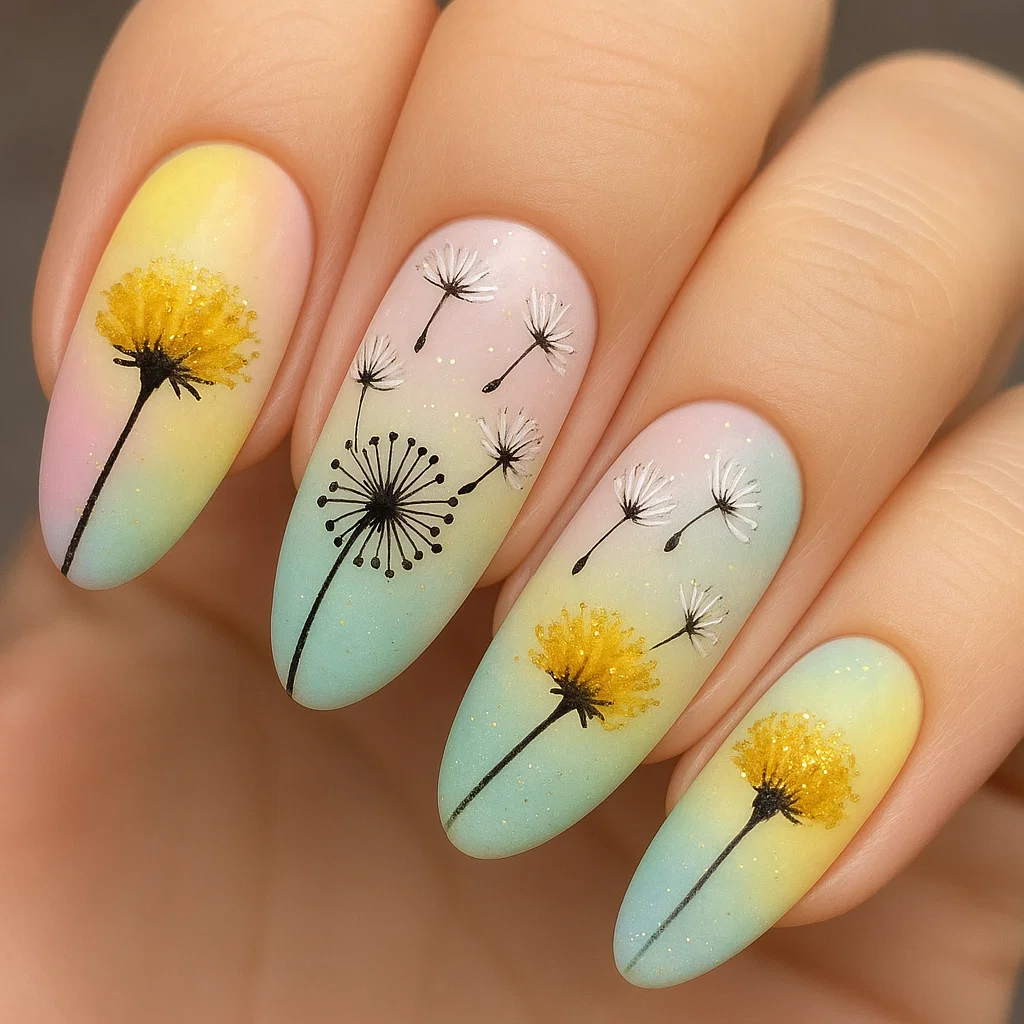
The Full Dandelion Lifecycle:
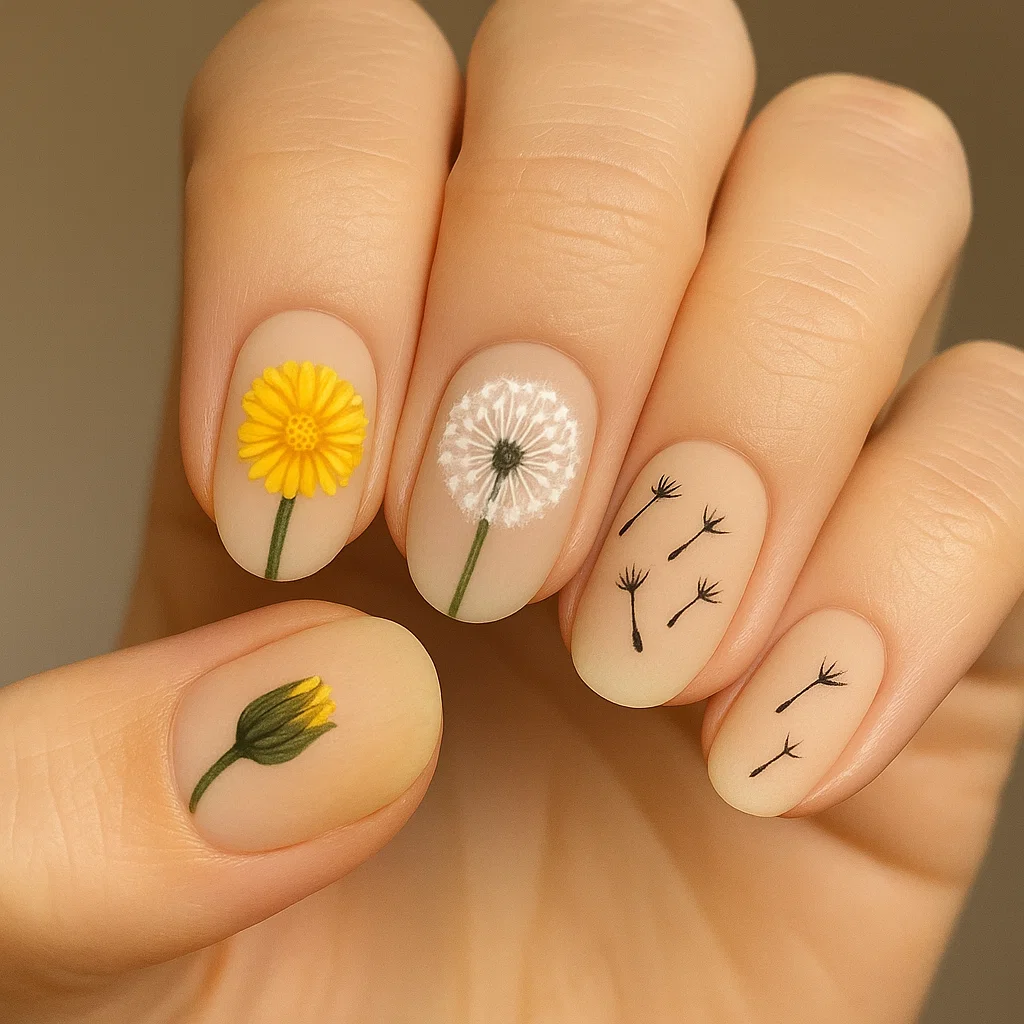
This design tells a complete story across your nails, showing dandelions in different stages of their lifecycle. On your thumb, paint a closed bud. Your index finger gets a full yellow bloom with detailed petals. The middle finger showcases the classic white seed head, while your ring finger displays seeds blowing away. Your pinky can feature just scattered seeds or a simple stem.
Creating the yellow bloom requires patience. Start with a yellow base in a circular shape, then use a fine brush to add individual petal details. Each petal should be slightly different in size and shape—nature isn’t perfectly symmetrical, and your art shouldn’t be either. Add depth by using two shades of yellow, highlighting the center petals with a lighter tone.
Intricate Seed Details:
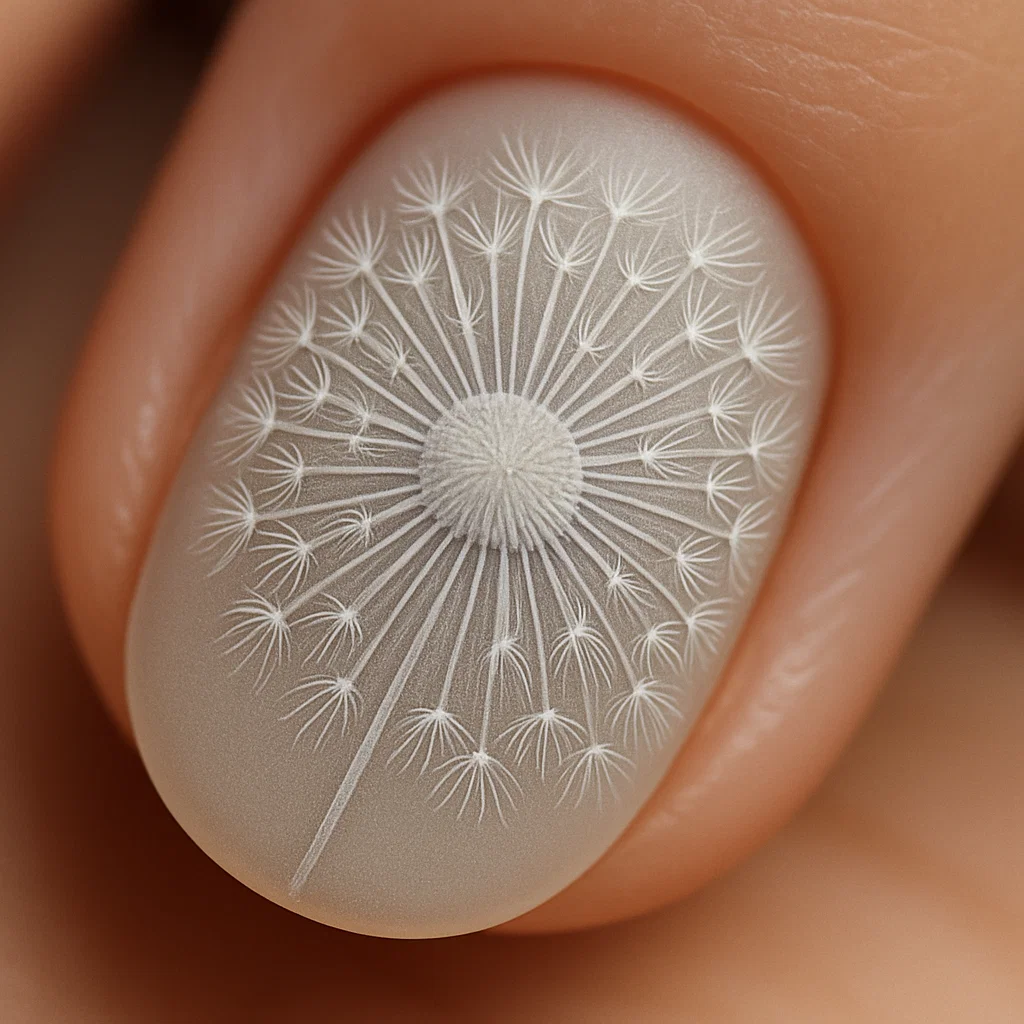
The white seed head is where you can really showcase your skills. Start with a circular base in light gray or off-white. Then, using your finest brush, paint dozens of tiny lines radiating from the center. Each line should end with a small burst or star shape representing the seed’s parachute-like structure.
This level of detail takes time—sometimes 30 minutes per nail—but the results are stunning. The three-dimensional effect you create makes it look like you could actually blow the seeds right off your nail.
Color Variations That Make a Statement
While black and white dandelions are classic, experimenting with color opens up a whole world of creative possibilities. Different color choices can completely change the mood and style of your nail art.
Golden Hour Glamour:
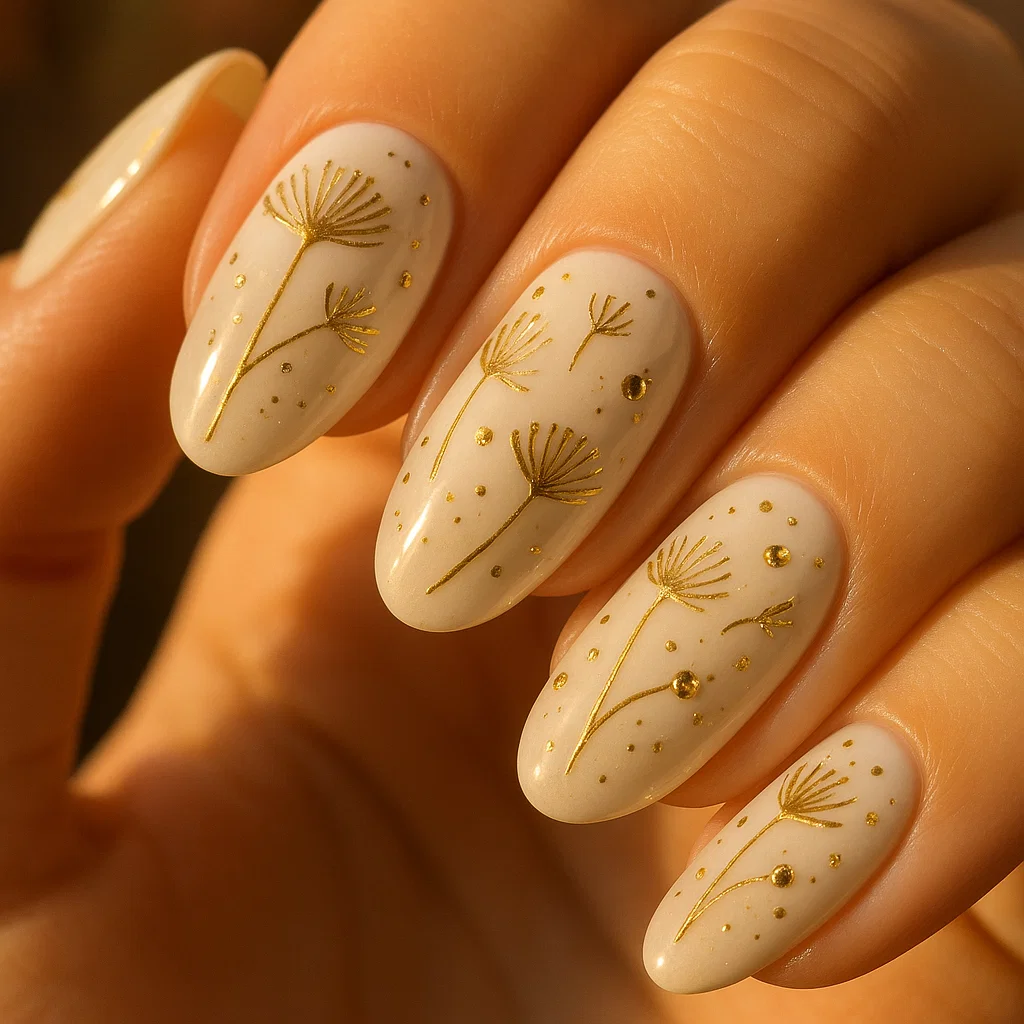
Use metallic gold polish for your stems and seed details against a cream or white base. This creates an luxurious, elegant look that’s perfect for special occasions. The gold catches the light beautifully, adding dimension and glamour to the delicate design.
Consider adding small gold rhinestones or glitter particles among the floating seeds for extra sparkle. This variation works especially well for weddings, parties, or any time you want your nails to feel extra special.
Pastel Paradise:
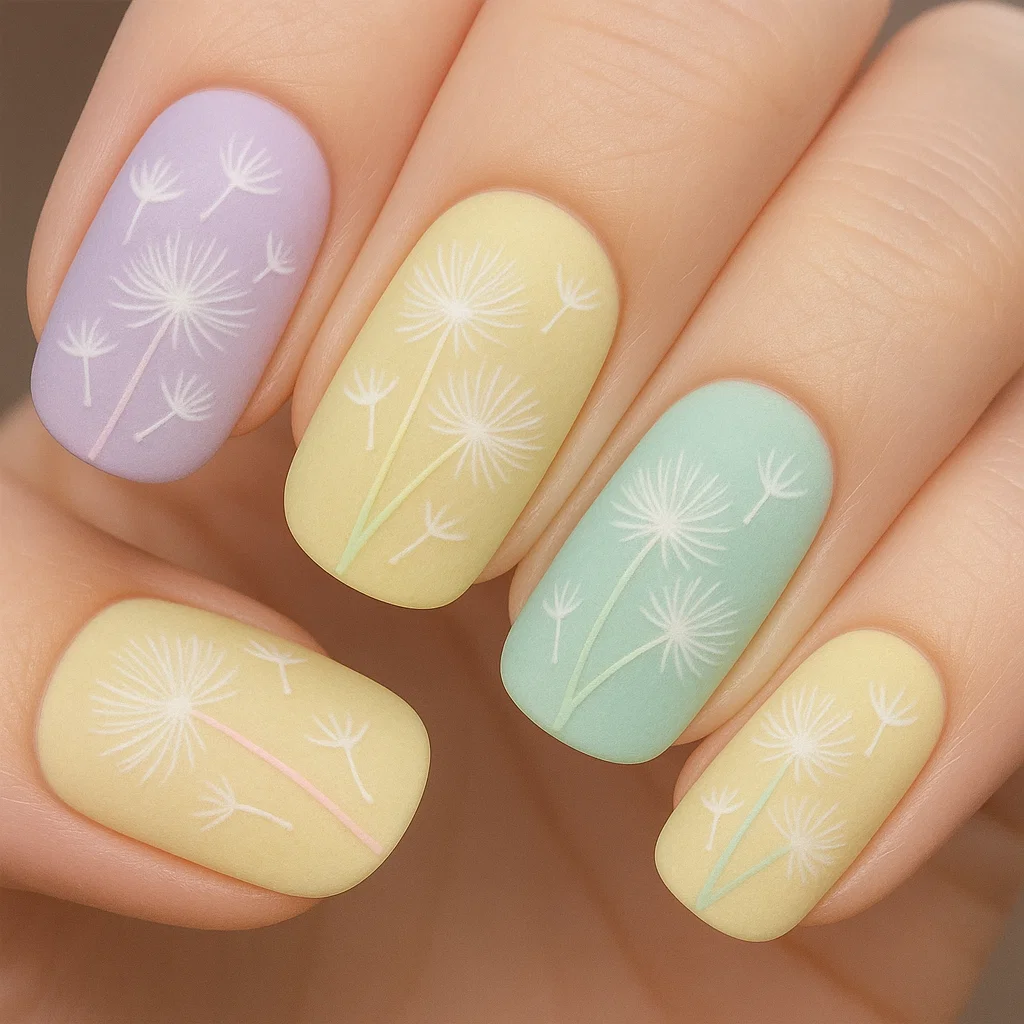
Soft pastel dandelions bring a dreamy, romantic quality to your manicure. Try pale pink stems with white seeds against a lavender base, or mint green details on a soft yellow background. These gentle colors create a whimsical, fairy-tale effect that’s perfect for spring and summer.
The key to successful pastel dandelion art is maintaining enough contrast so your design doesn’t disappear into the background. If your base color is very light, consider using a slightly deeper shade of the same color family for your dandelion details.
Pairing Dandelion Nails with Your Style
Your beautiful dandelion nail art deserves to be showcased with the perfect outfit pairings. These delicate designs complement many different styles and occasions, making them incredibly versatile additions to your beauty routine.
Bohemian Chic:
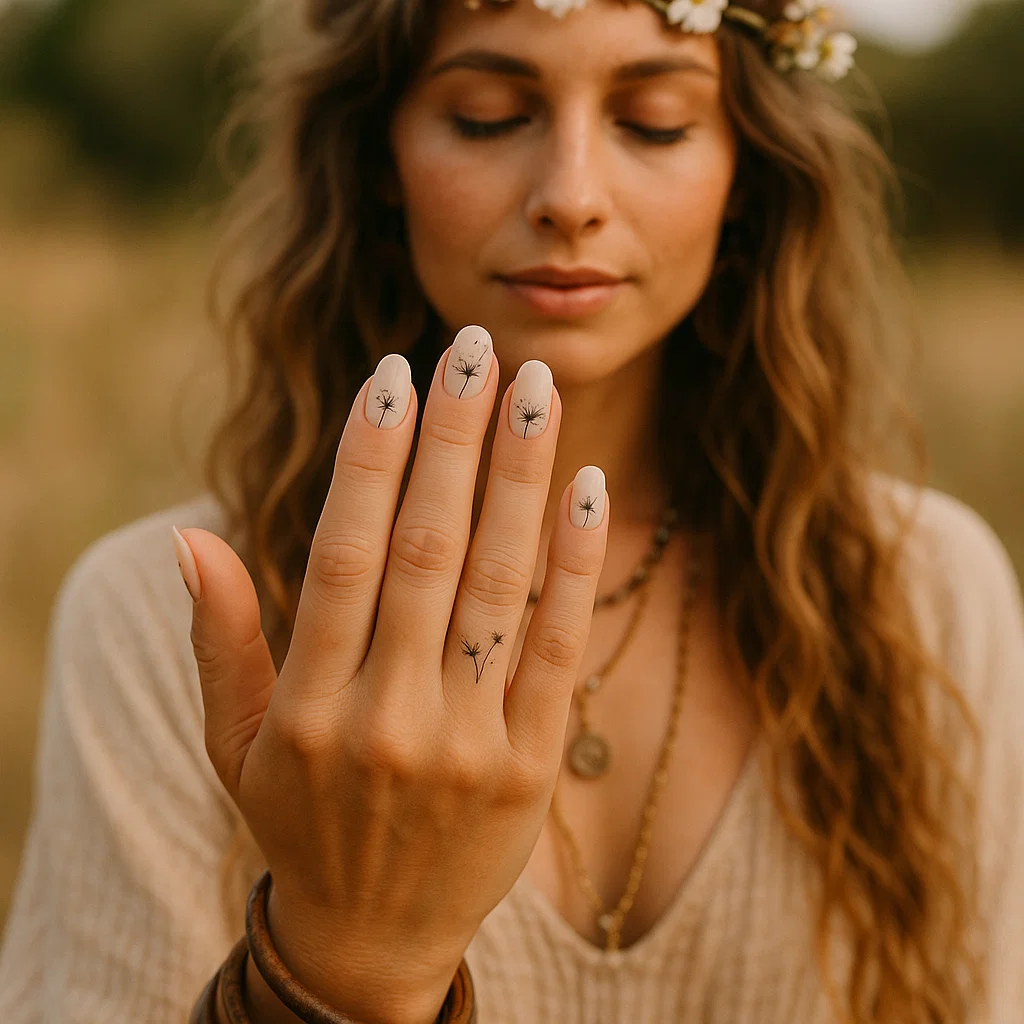
Dandelion nails are a natural match for bohemian style. Pair them with flowing maxi dresses, layered jewelry, and natural textures like linen and cotton. The organic, nature-inspired design enhances the free-spirited vibe of boho fashion perfectly.
Consider incorporating other natural elements into your look—wooden accessories, flower crowns, or earthy makeup tones all work beautifully with dandelion nail art.
Romantic Elegance:
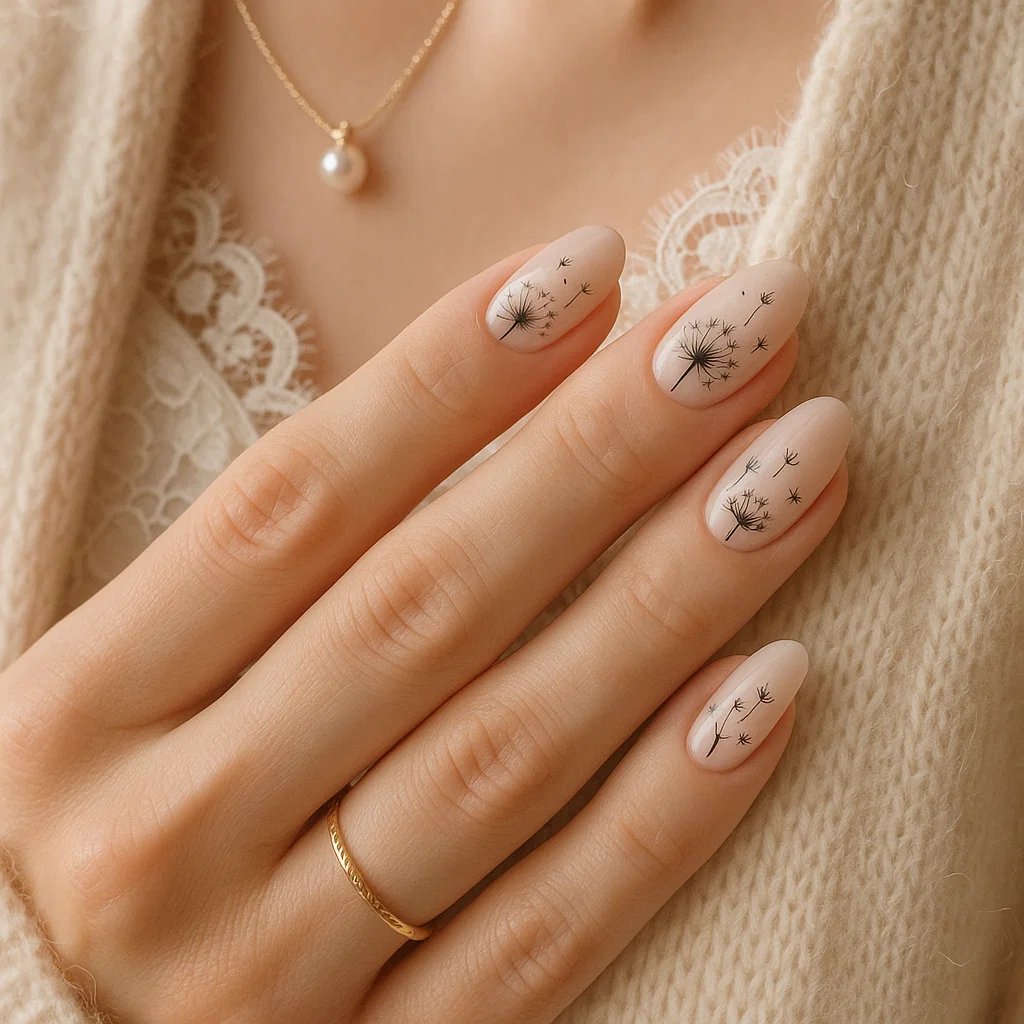
For romantic occasions, dandelion nails add a touch of whimsy to elegant outfits. They look stunning with lace dresses, soft cardigans, and delicate jewelry. The contrast between structured elegance and natural, organic nail art creates an interesting and sophisticated look.
Modern Minimalism:
Surprisingly, simple dandelion silhouettes work beautifully with minimalist fashion. Against clean lines and neutral colors, the organic shapes of dandelions provide an interesting focal point without overwhelming the overall aesthetic.
Seasonal Adaptations for Year-Round Beauty
Dandelion nail art isn’t limited to one season—with thoughtful color choices and design modifications, these beautiful motifs work year-round.
Spring Awakening:
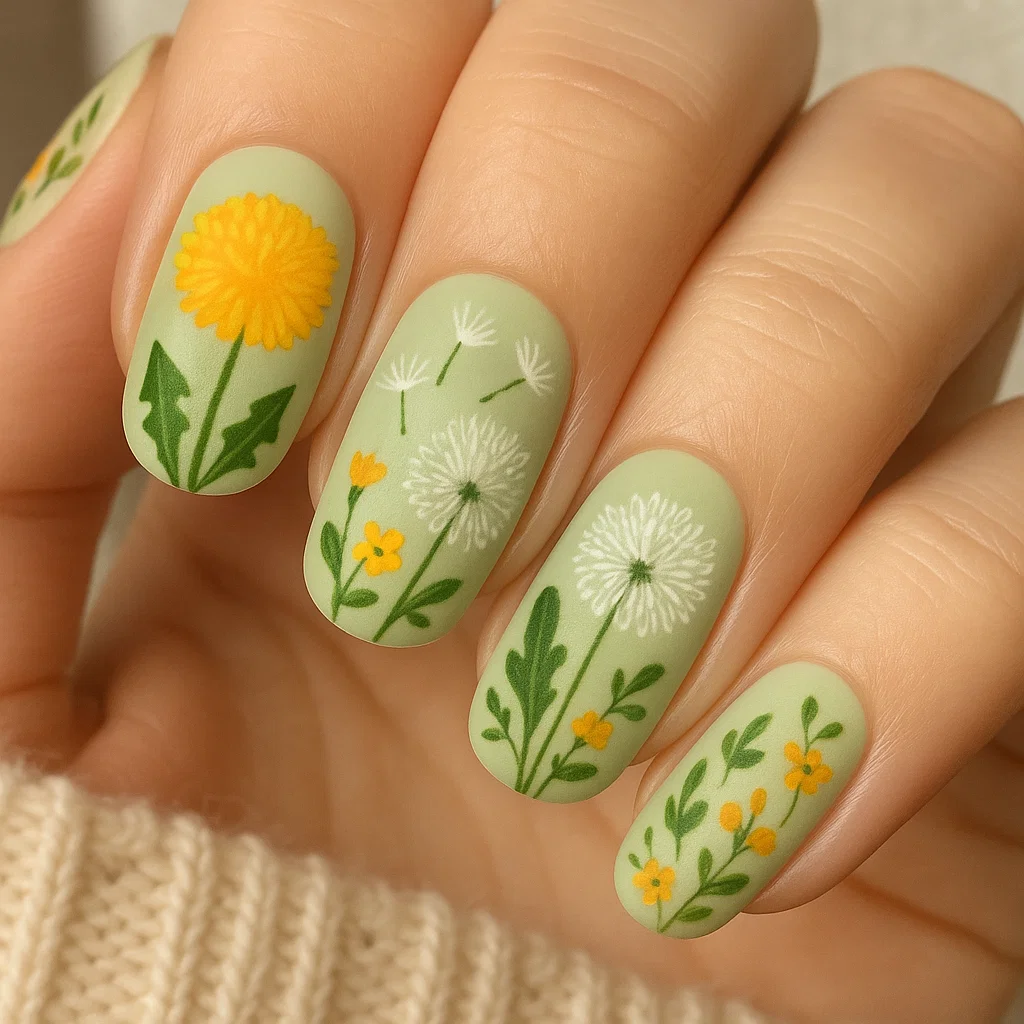
Spring calls for fresh, vibrant dandelion designs. Use bright yellows for flower heads, fresh green for stems, and crisp white for seeds. Consider adding small leaves or other spring flowers to create a garden scene across your nails.
Summer Breeze:
Summer dandelions can be bold and bright or soft and dreamy. Try sunset gradients with silhouetted dandelions, or go for a field-of-flowers approach with multiple small dandelions scattered across your nails.
Autumn Wishes:
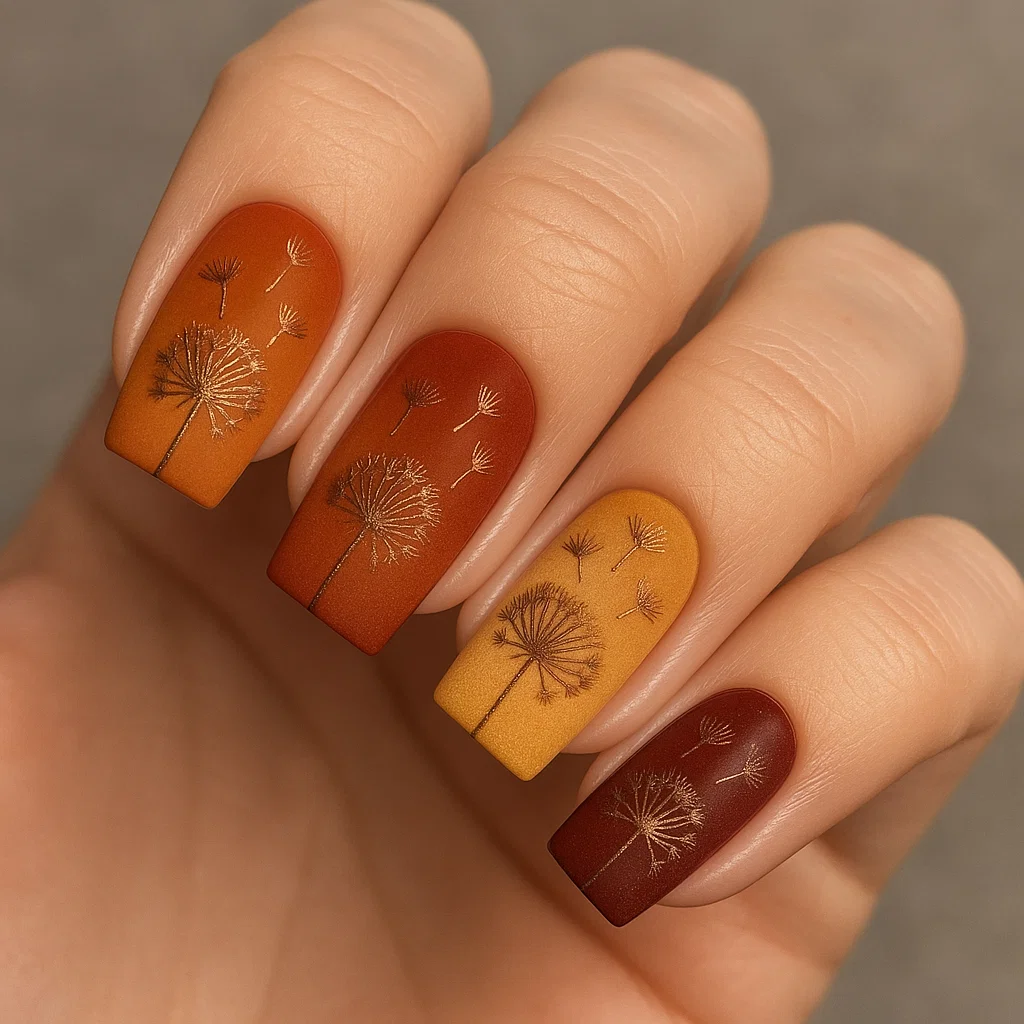
Fall dandelions work beautifully in warm, earthy tones. Use burnt orange, deep red, or golden yellow backgrounds with bronze or copper dandelion details. This creates a cozy, seasonal feel that complements autumn fashion perfectly.
Winter Wonder:
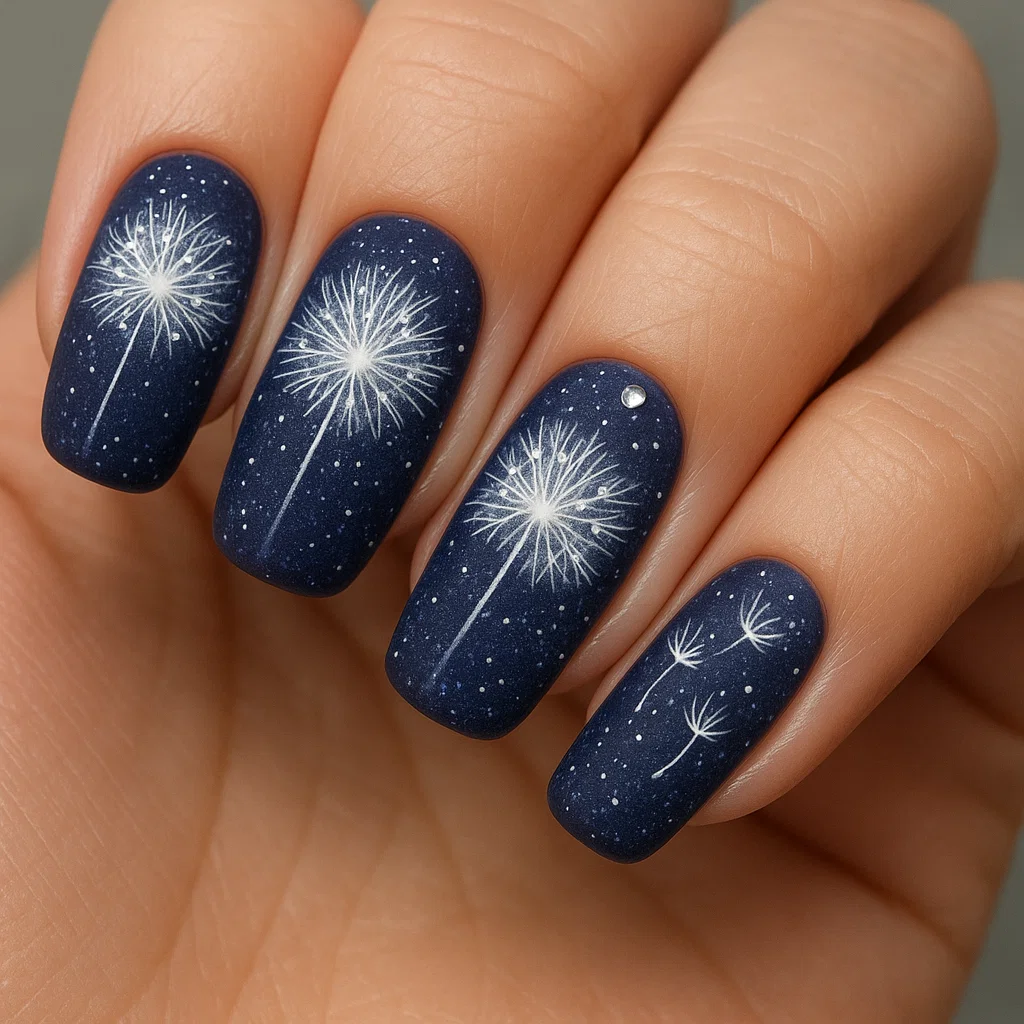
Winter dandelions can be magical and ethereal. Try silver or white dandelions against dark blue or purple backgrounds, creating a nighttime scene. Add small rhinestones or glitter to represent stars or frost for extra winter magic.
Professional Tips for Salon-Quality Results
Achieving professional-looking dandelion nail art at home is absolutely possible with the right techniques and mindset. These insider tips will help you create designs that rival anything you’d get at a high-end salon.
Patience Is Your Best Friend:
The biggest difference between amateur and professional-looking nail art is patience. Rushing leads to wobbly lines, smudged details, and frustration. Plan to spend at least 20-30 minutes per nail for detailed designs, and don’t try to do your entire manicure in one sitting if you’re feeling tired or rushed.
Practice Makes Perfect:
Before attempting intricate designs on your actual nails, practice on nail wheels or even paper. This helps you get comfortable with the brush movements and color combinations without the pressure of creating a perfect manicure.
Layer Building Technique:
Professional nail artists build their designs in layers, allowing each layer to dry completely before adding the next. This prevents colors from bleeding together and creates crisp, clean lines. Your base coat, color, design elements, and top coat should all be separate, fully-dry layers.
Maintenance and Longevity Tips
Your beautiful dandelion nail art deserves to look fresh and perfect for as long as possible. With proper care and maintenance, you can enjoy your artistic manicure for weeks.
Protection Is Key:
Always seal your design with a high-quality top coat. This protects the intricate details from chipping and adds a beautiful glossy finish that makes colors pop. Reapply top coat every few days to maintain shine and protection.
Gentle Handling:
Treat your nails like the art they are. Wear gloves when cleaning, avoid using your nails as tools, and be mindful of activities that might damage the delicate details.
Touch-Up Strategy:
Keep your design colors handy for quick touch-ups. Small chips or wear spots can often be fixed with a tiny brush and steady hand, extending the life of your manicure significantly.
Your Dandelion Nail Art Journey Starts Now
Creating beautiful dandelion nail art is more than just following techniques—it’s about expressing your creativity and bringing a piece of nature’s beauty to your everyday life. These designs offer endless possibilities for personalization and artistic growth.
Start with simple silhouettes to build your confidence, then gradually work up to more complex designs as your skills develop. Remember that every professional nail artist started as a beginner, and every expert was once someone attempting their first wobbly line.
Your nails are your personal canvas, and dandelion designs offer the perfect blend of elegance and whimsy to showcase your artistic side. Whether you choose subtle single accents or elaborate full-nail masterpieces, you’re creating something uniquely beautiful that reflects your personal style.
The magic of dandelions lies in their ability to make wishes come true—and with these stunning nail art ideas, your wish for gorgeous, eye-catching nails is about to become reality. Your journey into the enchanting world of dandelion nail art begins now, and the possibilities are as endless as seeds on the wind.