
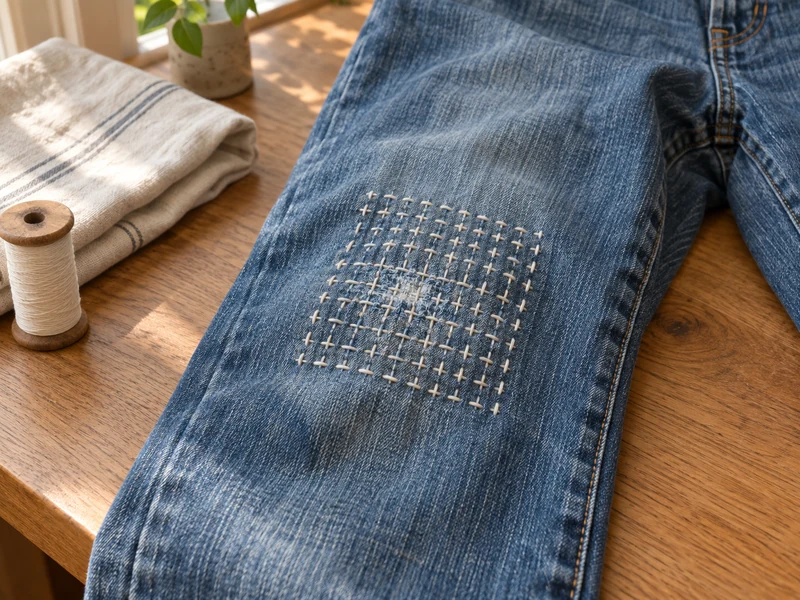
A small worn spot in jeans rarely stays small. The pale, fuzzy area surrounding a hole has already lost strength, so stitching only around the opening can create a hard edge that tears again. This repair places a soft denim patch behind the entire weak zone, then joins both layers with visible running stitches.
The result is sashiko-inspired rather than a claim of mastering every regional Japanese sashiko tradition. Sashiko developed as a practical way to reinforce and prolong textiles; the Metropolitan Museum of Art describes it as a running-stitch quilting technique used to strengthen fabric and join recycled cloth. This beginner repair respects that functional purpose while using a simple, easy-to-mark grid on modern jeans.
What This Repair Can—and Cannot—Fix
Use this method for a small knee or thigh hole surrounded by worn but intact denim. The example repairs a roughly 1-inch opening inside a 3-by-4-inch weak area. The underside patch finishes at 5 by 6 inches, extending at least 1 inch beyond sound fabric on every side.
Do not use this tutorial for a split seam, broken zipper, torn belt loop, or large crotch failure. Those areas carry concentrated stress and may need a machine repair or professional reinforcement. If the denim tears when you gently press beside the hole, enlarge the patch until every stitch lands in stable cloth.
Materials
- Clean, fully dry medium-weight jeans with one small worn area
- One 5-by-6-inch piece of prewashed denim close to the weight of the jeans
- White or cream sashiko thread, used as one strand
- Long sashiko needle or sturdy hand-sewing needle that passes through two denim layers without forcing
- Water-soluble fabric marker tested on a hidden area
- Clear quilting ruler
- Sharp fabric scissors
- Contrasting basting thread and a separate needle
- Four safety pins
- Optional palm thimble
Choose the patch carefully: a very heavy patch creates a stiff island, while thin quilting cotton may not support damaged denim for long. Prewash the patch so later shrinkage does not distort the repair.
Step-by-Step Instructions
1. Wash, Dry, and Assess the Weak Area
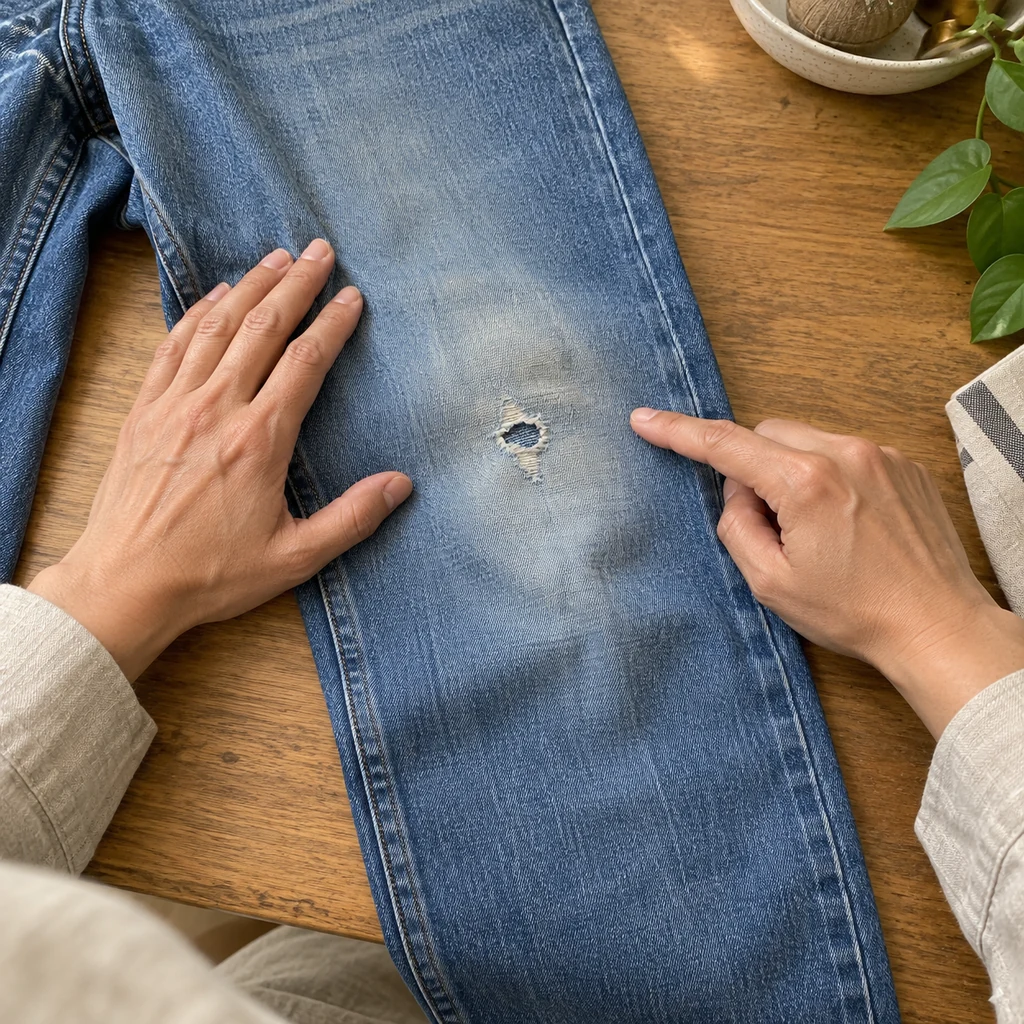
Wash and dry the jeans using the method you normally use. Lay the leg flat without stretching it. Trim only long loose threads that could tangle; keep the soft frayed edge because cutting a larger, clean-looking hole removes usable fibers.
Press lightly around the damage with your fingertips. Mark the full boundary where the denim looks thin, pale, or fuzzy. The patch and stitch field must extend beyond that boundary, not merely beyond the visible opening.
2. Cut a Rounded Patch Larger Than the Damage
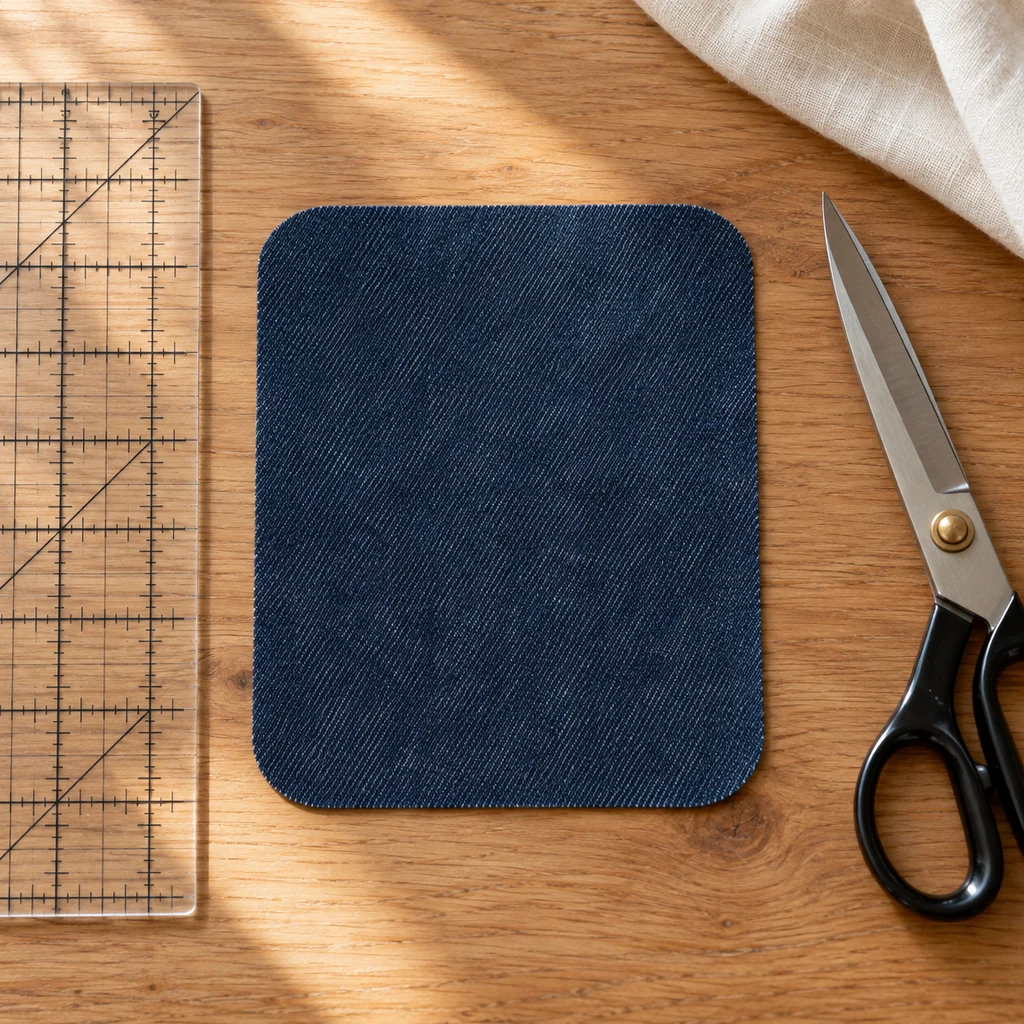
Measure at least 1 inch past stable fabric on all four sides. For the example, cut one 5-by-6-inch denim rectangle. Round the four corners so they cannot fold into bulky points. Align the patch grain in the same general direction as the jeans and place the smoother side toward your skin.
If the patch has a hard factory seam, avoid it. A flat single layer is easier to stitch and more comfortable to wear.
3. Center and Baste the Patch Inside the Jeans
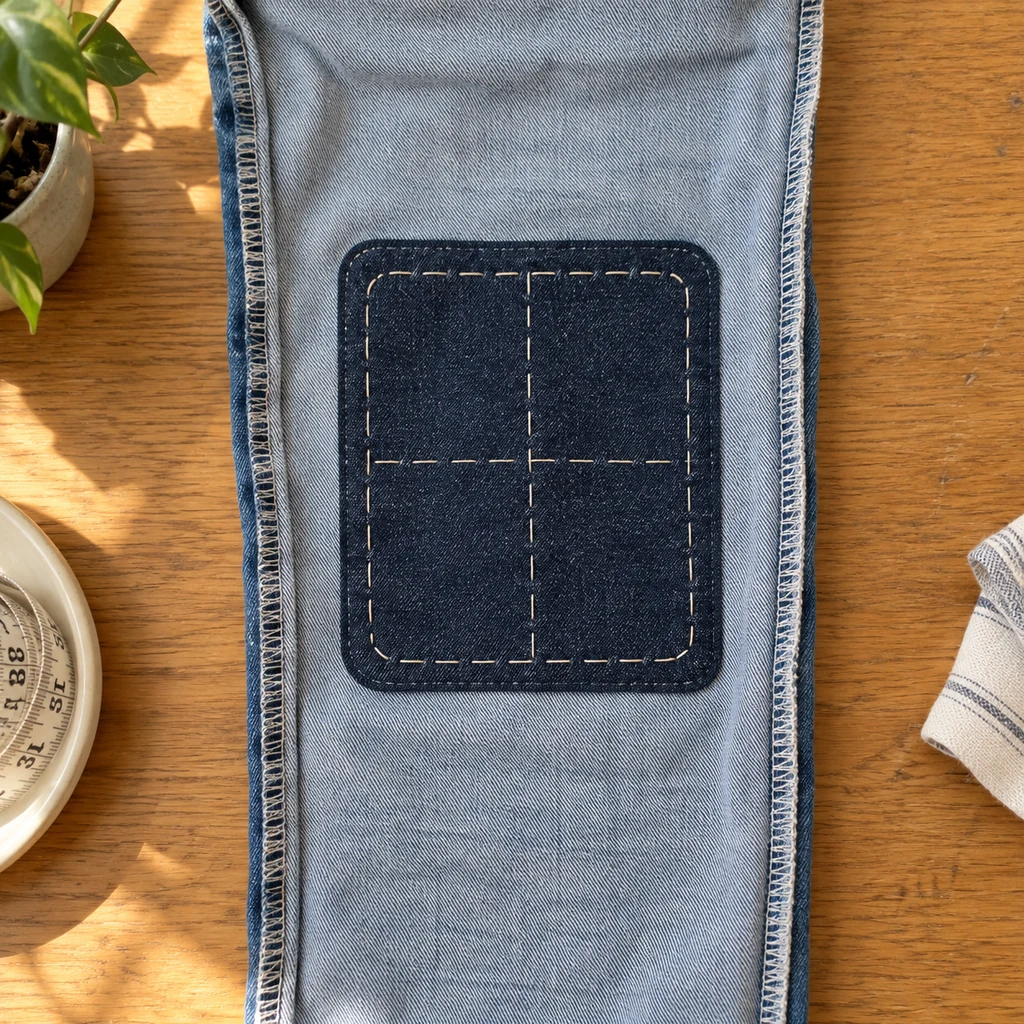
Turn the leg inside out and center the patch over the damage. Smooth both layers in their natural relaxed shape. Place four safety pins near the patch corners, keeping every pin outside the hole. Baste a large rectangle about 1/2 inch inside the patch edge, then add one vertical and one horizontal basting line through the center.
Remove the safety pins after basting. Turn the jeans right side out and lay them flat again. If the surface ripples before decorative stitching begins, undo the basting and reset the layers; stitching over a pucker will preserve it.
4. Mark a Simple Three-Eighths-Inch Grid
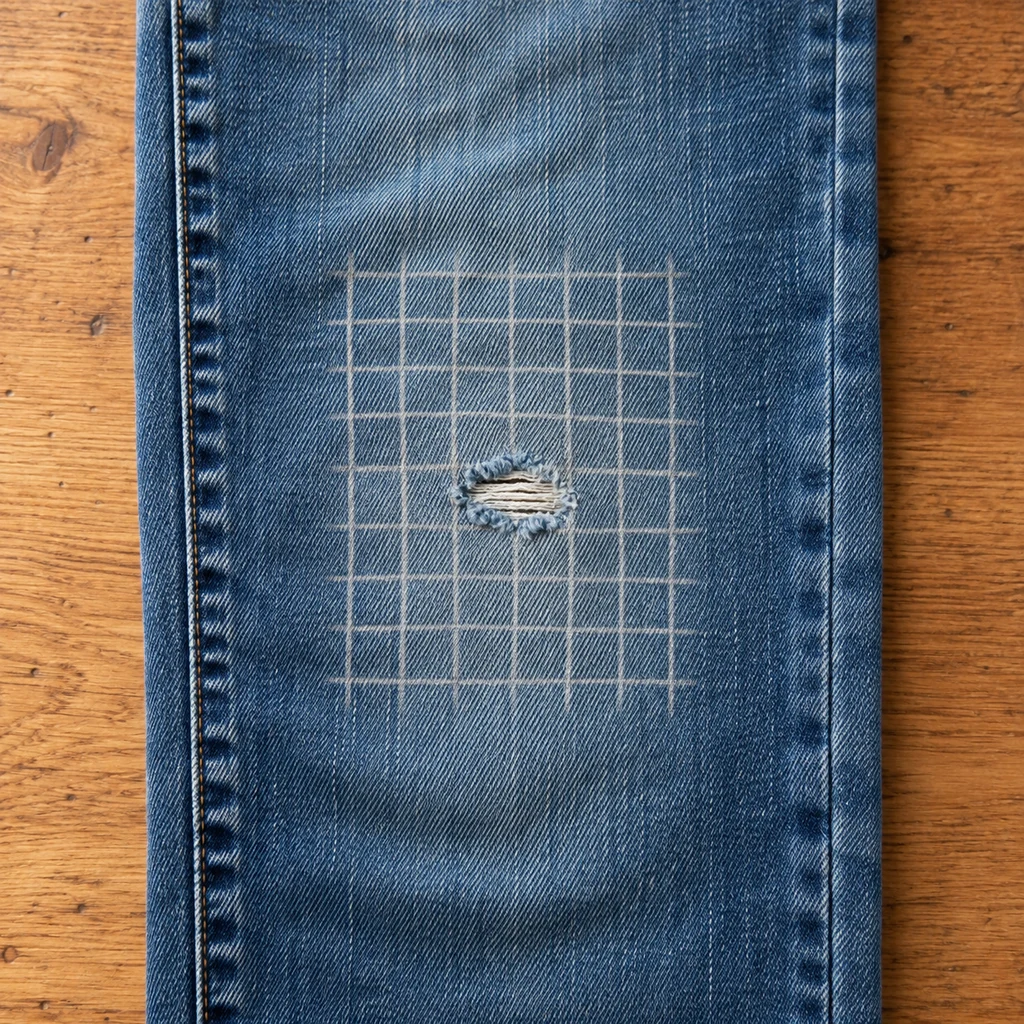
On the right side, use the tested water-soluble marker and ruler to draw parallel horizontal lines 3/8 inch apart across the full patch area. Add vertical lines at the same spacing to make a square grid. Stop the marked field about 1/2 inch inside the hidden patch edge so every visible stitch remains backed by the patch.
Keep the grid straight relative to the denim grain, not the irregular hole. Do not use a permanent pen or an untested heat-erase marker; some marks can return or set under heat.
5. Stitch the Horizontal Rows Without Pulling Tight
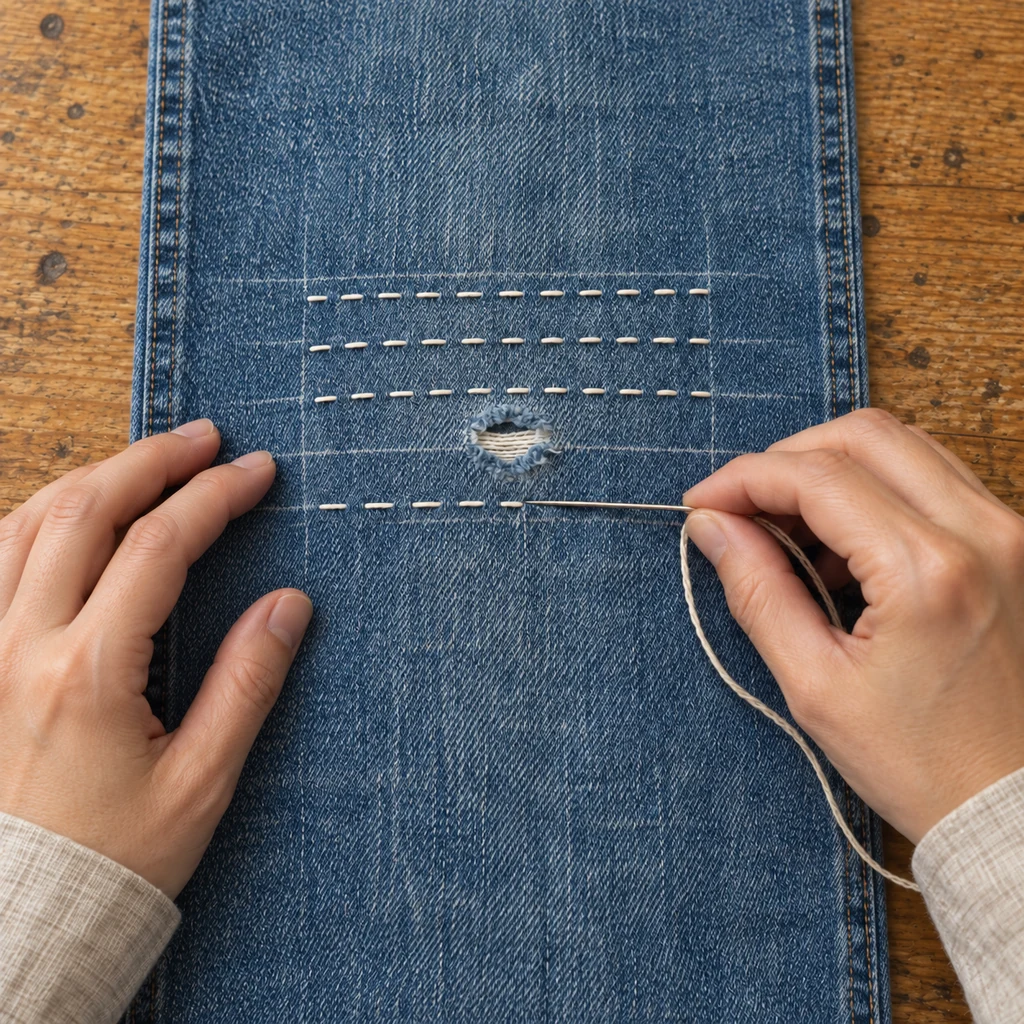
Cut one 20-to-24-inch length of sashiko thread and use it as a single strand. Begin in stable fabric near a grid edge. Instead of a bulky knot, work three small overlapping stitches to secure the start between the layers, following the instructions supplied with your thread and needle.
Use a running stitch along the first horizontal line. Aim for stitches about 1/8 inch long with slightly shorter gaps. Load several stitches onto the needle, but before drawing the thread through, keep the jeans flat and relaxed. Pull until the thread rests on the surface; stop before the fabric gathers. Smooth the row with your fingertips after every needleful.
6. Add the Vertical Rows and Secure Every Thread
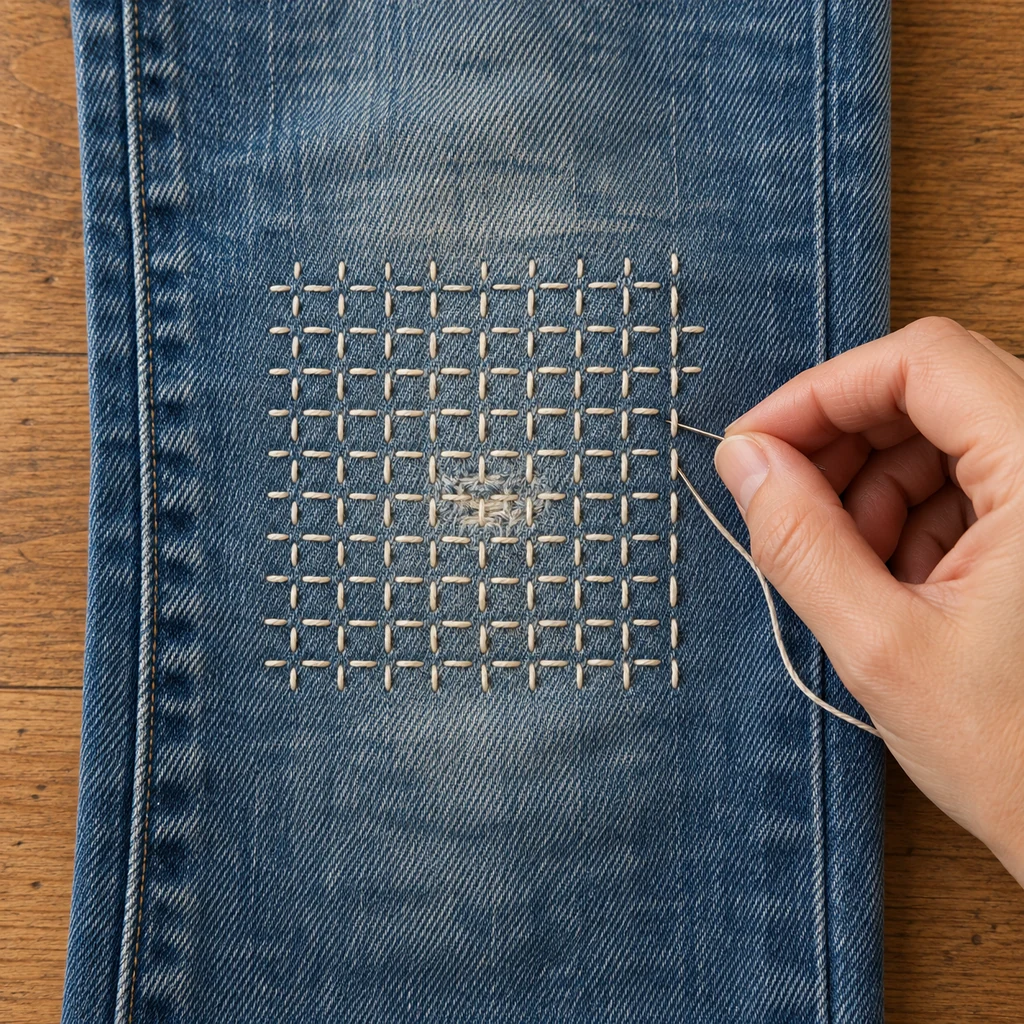
Complete the horizontal field, starting a fresh thread whenever the working length becomes awkward or fuzzy. Secure each ending with three overlapping stitches in sound fabric. Never bridge a long distance across the back; end the thread and restart so loose floats cannot snag inside the leg.
Turn the work and stitch the vertical grid lines in the same way. The crossings form a calm lattice that holds the patch across the full weak zone. At each intersection, the threads may visually cross on the surface, but the stitch rhythm should remain even and the denim should remain flat.
7. Remove Basting, Clear the Marks, and Inspect
Remove every basting stitch from the inside. Clear the marker exactly as its manufacturer directs; for a water-soluble marker, blot or rinse with cool water rather than applying heat first. Let the jeans dry flat, then inspect both sides.
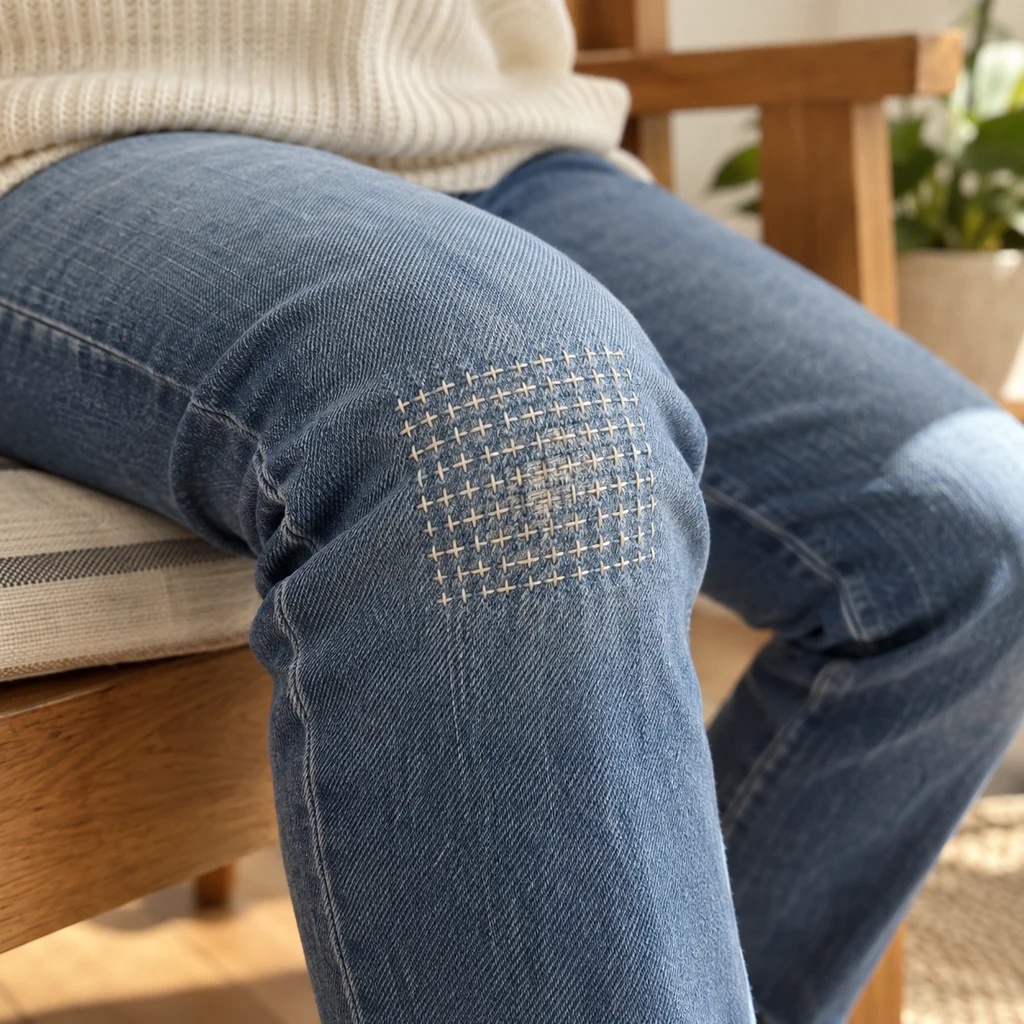
The patch should lie smooth, all four corners should remain covered by the stitch field, and no thread tail should hang loose. Bend the knee area several times and give the patch a gentle pull in different directions. If a row tightens the denim into a ridge, remove and restitch that row before wearing the jeans.
Why Sashiko-Style Repairs Pucker
- The jeans were stretched during basting: reset both layers in their relaxed shape.
- The thread was pulled taut: let each stitch rest on the surface and smooth every completed section.
- The thread was too long: shorter 20-to-24-inch lengths reduce tangling and abrasion.
- The patch shrank later: prewash and dry it before cutting.
- The patch ended inside weak fabric: extend it at least 1 inch beyond the entire thinned area.
- Long thread floats were carried behind the work: secure and restart instead.
Substitutions & Variations
For a quieter repair, choose thread close to the jeans color. For stronger contrast, use cream on indigo or rust on pale denim. Keep the first project to straight rows; traditional sashiko includes many beautiful patterns, but a simple lattice makes tension errors easier to see and correct.
If the jeans are lightweight stretch denim, use a similarly flexible patch and test the repaired area before wearing. Dense stitching can reduce stretch. Avoid adhesive-only patches for this method because stiff glue may gum the needle and create a rigid boundary.
Care After the Repair
Wash the jeans inside out on a gentle cycle and close zippers and buttons first. Air-drying reduces abrasion, although you can follow the garment care label when machine drying is necessary. Inspect the patch after the first wash and periodically thereafter. Add a few stitches while a loose area is small rather than waiting for the surrounding denim to fail.
This repair prolongs the garment; it does not make damaged denim indestructible. Stop wearing the jeans if a high-stress seam begins to split or the fabric tears beyond the supported area.
Frequently Asked Questions
Is this authentic traditional sashiko?
It is a sashiko-inspired functional mend using running stitches and layered cloth. Sashiko has distinct Japanese histories, regional practices, tools, patterns, and finishing methods that extend far beyond one beginner jeans repair.
Can I use six-strand embroidery floss?
It can separate and behave differently from sashiko thread. For the clearest result, use purpose-made sashiko thread as one strand or follow the instructions for a designated visible-mending thread.
Should I cut away all the frayed denim?
No. Trim only long loose threads that interfere with stitching. The remaining fibers can lie over the underside patch and become part of the reinforced area.