
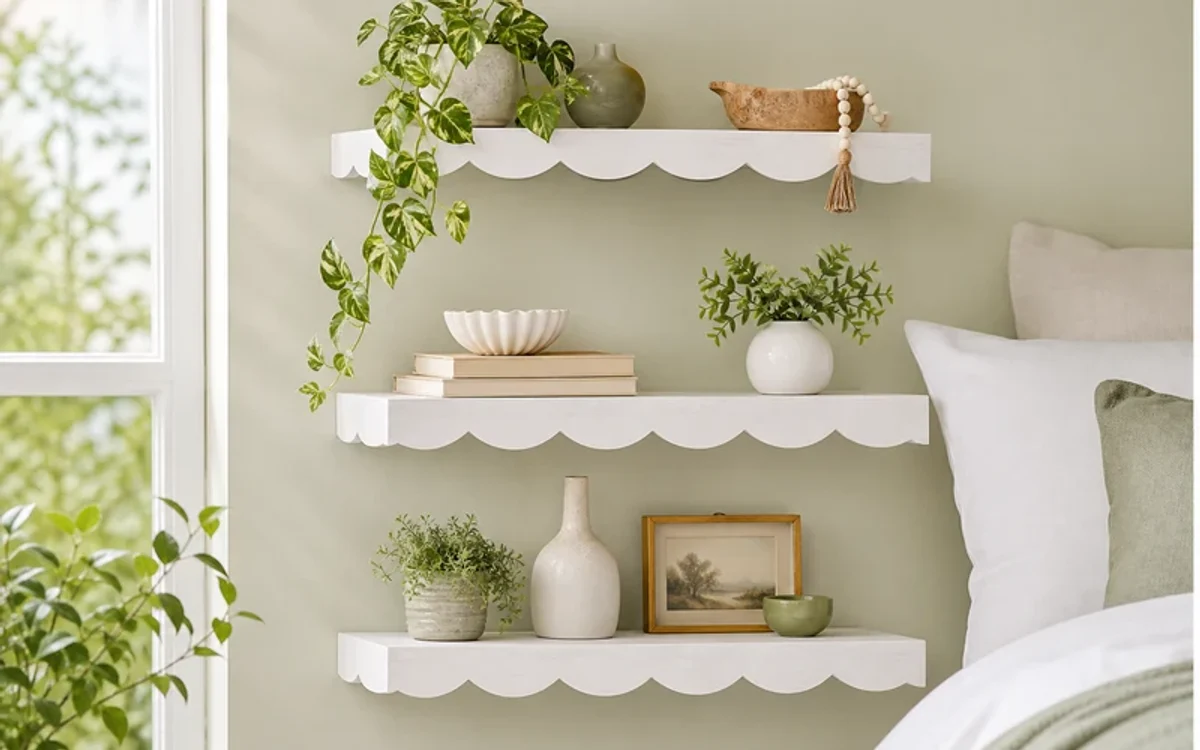
Scalloped floating shelves add just enough whimsy to feel fresh without tipping into overly cute territory. The gentle wave along the front edge softens a room instantly, and because the brackets hide behind the board, the shelves look like they are floating on the wall. If you want a quick summer refresh that costs less than a store-bought set and photographs beautifully for Pinterest, this DIY scalloped floating shelf tutorial is the weekend project to reach for.
Unlike plain rectangular floating shelves, scalloped edges catch light along each curve and create a subtle shadow line that makes small spaces feel more intentional. You can build one shelf above a desk or three in a staggered stack beside a reading chair. The technique works on pine, poplar, or any straight board you can cut with a jigsaw, and the finish is entirely up to you—soft white, sage green, natural stain, or a two-tone look with a painted body and stained scallops.
Why Scalloped Shelves Work for a Soft Summer Refresh
Summer decorating tends toward lighter palettes, more greenery, and surfaces that feel airy rather than heavy. Scalloped floating shelves hit all three notes. The curved front edge reads softer than a sharp 90-degree corner, which matters in bedrooms, nurseries, and small apartments where every line counts. Floating installation keeps floors clear, and the hidden bracket system means you are not staring at visible L-brackets under every board.
The project also scales. A single 24-inch shelf above a entryway hook board takes an afternoon. A trio of staggered shelves for a reading nook takes a full weekend once you account for drying time between paint coats. If you have built basic floating shelves before—like our chunky wooden floating shelf guide—you already know the mounting basics. The scallop is the only new skill, and it is easier than it looks.
Materials and Tools
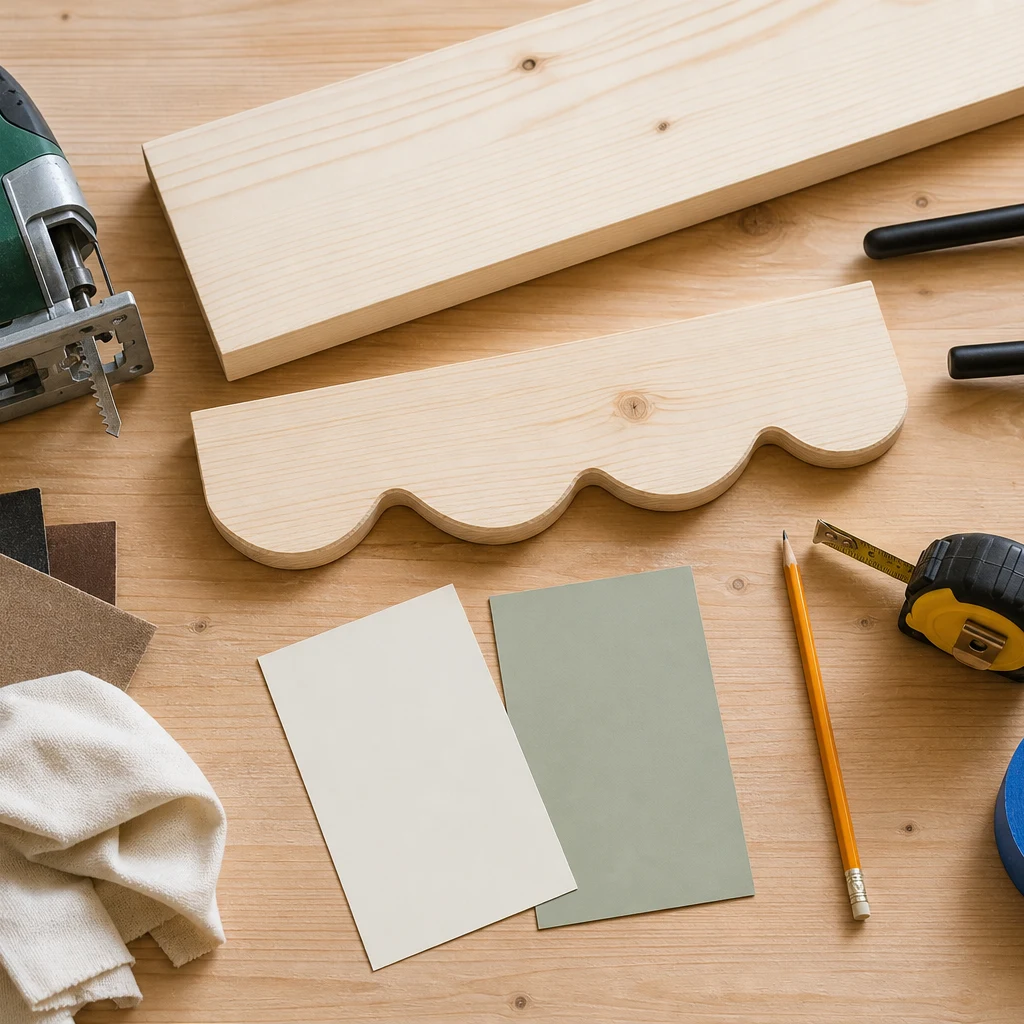
Gather everything before you cut so you are not hunting for sandpaper mid-project. For two 24-inch shelves, plan on the following:
- 1×6 pine or poplar board, 6 feet long (cut into two 24-inch lengths with extra for test cuts)
- Hidden floating shelf brackets rated for at least 25 pounds each (one bracket pair per shelf)
- Stud finder, level, and drill with bits sized to your bracket hardware
- Jigsaw with a clean wood-cutting blade
- 120-grit and 220-grit sandpaper or a random-orbit sander
- Pencil, tape measure, painter’s tape, and a compass or round object for tracing scallops
- Primer and paint or wood stain and clear topcoat
- Foam roller and angled brush for paint; lint-free cloth for stain
- Drop cloth, tack cloth, and wood filler for any edge chips
Board width tip: A true 1×6 measures about 5.5 inches deep—ideal for books, small plants, and stacked bowls. For deeper display space, upgrade to a 1×8, but keep scallop radius proportional so the curve does not overwhelm a narrow board.
Plan Your Layout Before You Cut
Measure your wall and mark bracket locations in pencil before touching the jigsaw. Standard spacing puts the center of each shelf 12 to 16 inches apart vertically. Use a stud finder and mount brackets into studs whenever possible; hollow-wall anchors work for lighter loads but reduce weight capacity.
Trace your scallop pattern on a scrap piece first. A 2-inch radius half-circle repeated along the front edge is the sweet spot for a 1×6—large enough to read from across the room, small enough to cut smoothly. Space scallop peaks evenly; odd numbers of scallops look more balanced on a 24-inch shelf. For narrow walls, see our small bathroom wall storage ideas for spacing tricks that apply to any tight vertical surface.
Step 1: Mark and Cut the Scalloped Edge
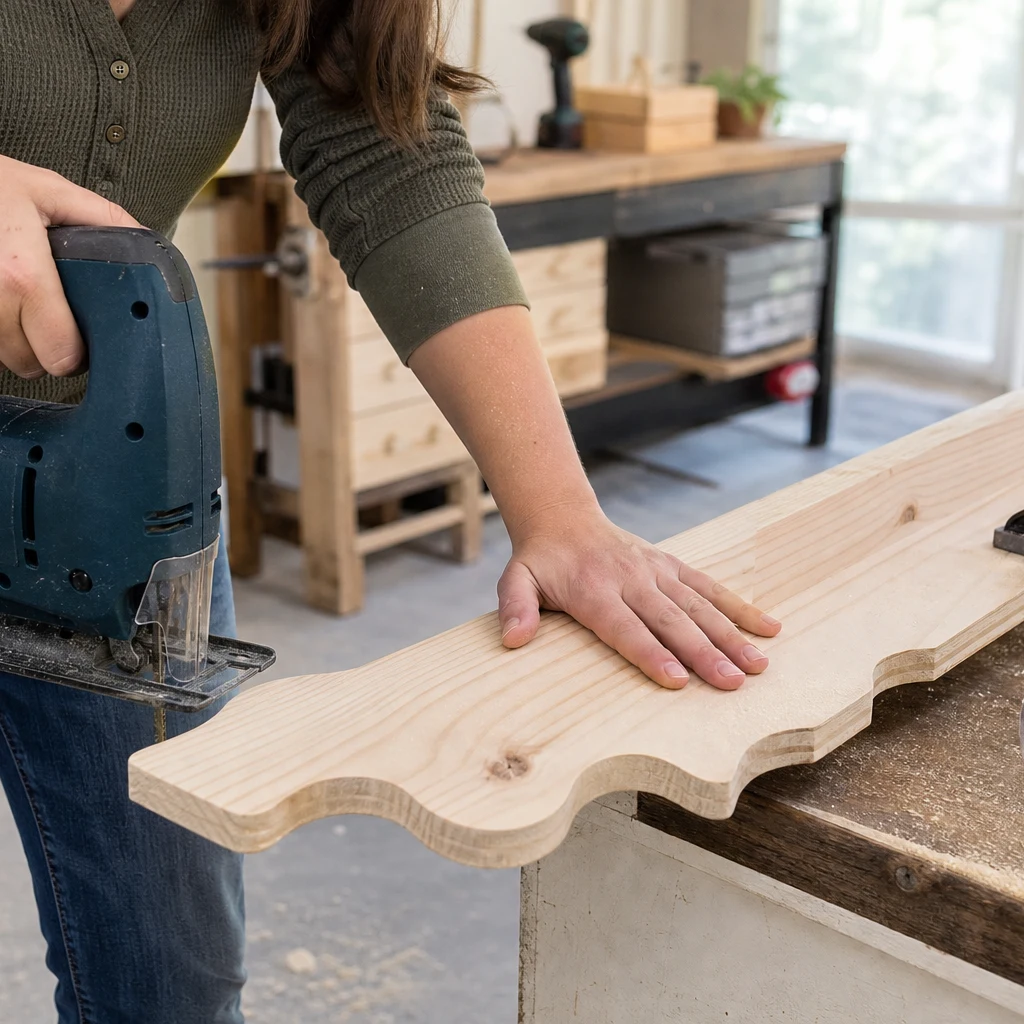
Clamp your board to a stable work surface with the front edge overhanging slightly so the jigsaw blade does not hit the bench. Trace scallops with a compass or trace around a jar lid moved along the edge. Connect the curves in pencil so you have one continuous cutting line.
Drill a starter hole inside each scallop valley if your jigsaw struggles with tight entry cuts. Cut slowly on the waste side of the line, then sand back to the pencil mark. Keep the blade perpendicular to the board face—a slight tilt shows after paint and catches shadow unevenly. Wear safety glasses; pine throws fine chips during curved cuts.
Common mistake: Rushing the curves leaves flat spots. If a scallop looks uneven, sand it rather than recutting unless you are more than an eighth-inch off.
Step 2: Sand and Smooth the Scallops
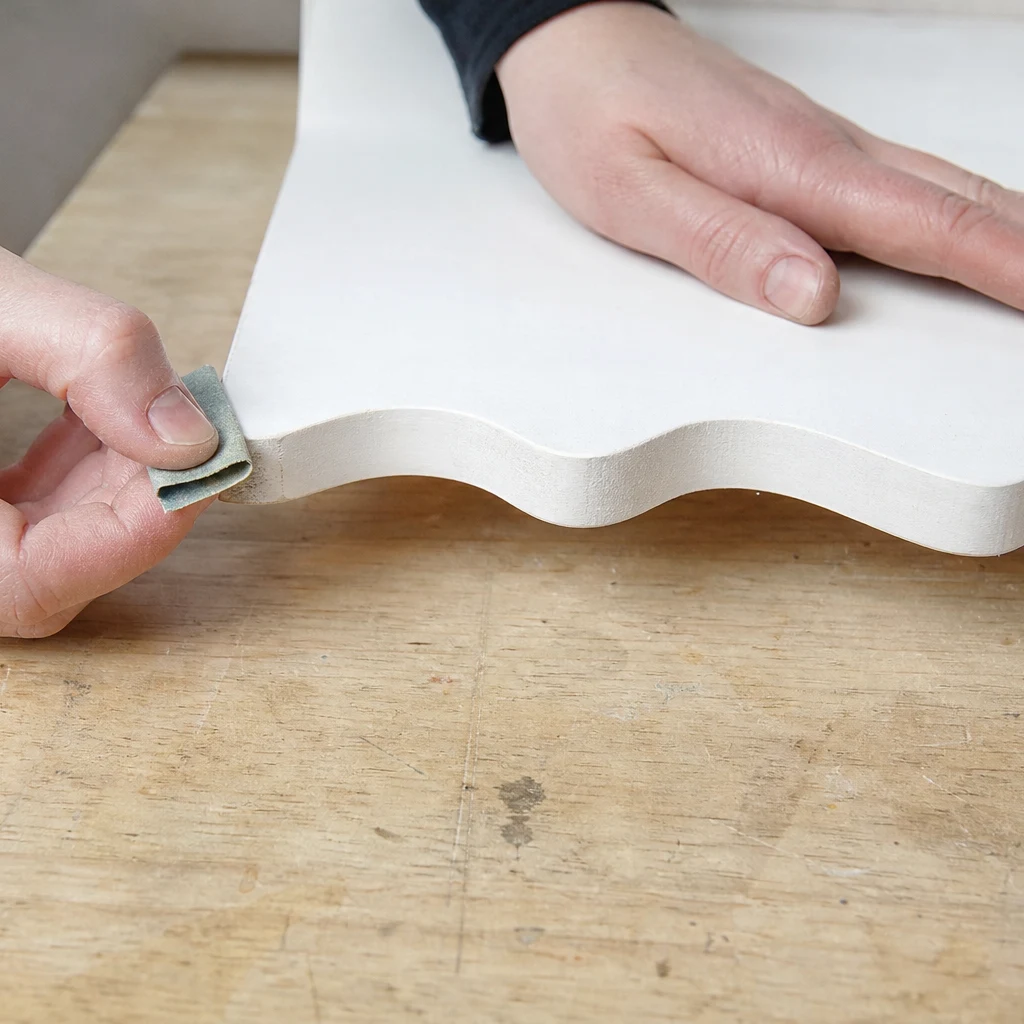
Start with 120-grit sandpaper to blend the jigsaw marks, then finish with 220-grit for a paint-ready surface. Fold sandpaper around a dowel or foam pipe insulation to reach inside each curve without flattening it. Break sharp corners on the top face and side edges lightly so paint does not chip when you slide the shelf onto brackets.
Wipe with a tack cloth before priming. Fill any chip or tear-out with wood filler, let it dry, and sand flush. The scalloped edge is the hero detail—spending ten extra minutes here makes the difference between handmade and polished.
Step 3: Prime, Paint, or Stain
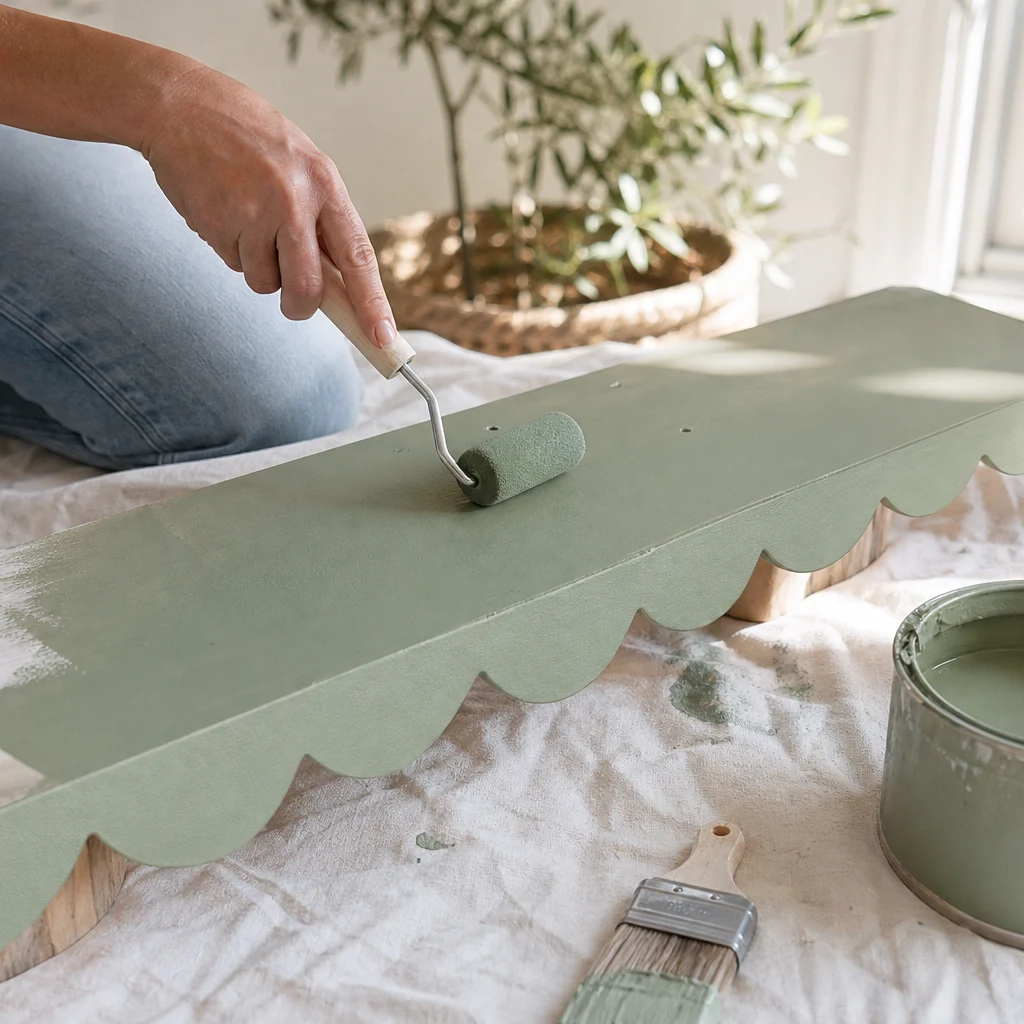
For a soft summer refresh, sage green, warm white, or pale blush over a white primer reads current without feeling trendy. Apply one coat of primer to all faces including the scalloped edge; the curves absorb more paint than flat boards. Follow with two thin coats of latex or chalk paint using a foam roller on flat surfaces and a small angled brush on the scallops.
Prefer natural wood? Skip paint and use a light oak or whitewash stain, then seal with water-based polyurethane. A two-tone look—painted shelf body with a stained scallop edge—adds depth and highlights the wave pattern. Let each coat dry fully before the next; humidity extends drying time in summer garages.
Pair your finished shelves with neutral textures from our neutral living room decor guide for a cohesive look across the room.
Step 4: Install Hidden Floating Shelf Brackets
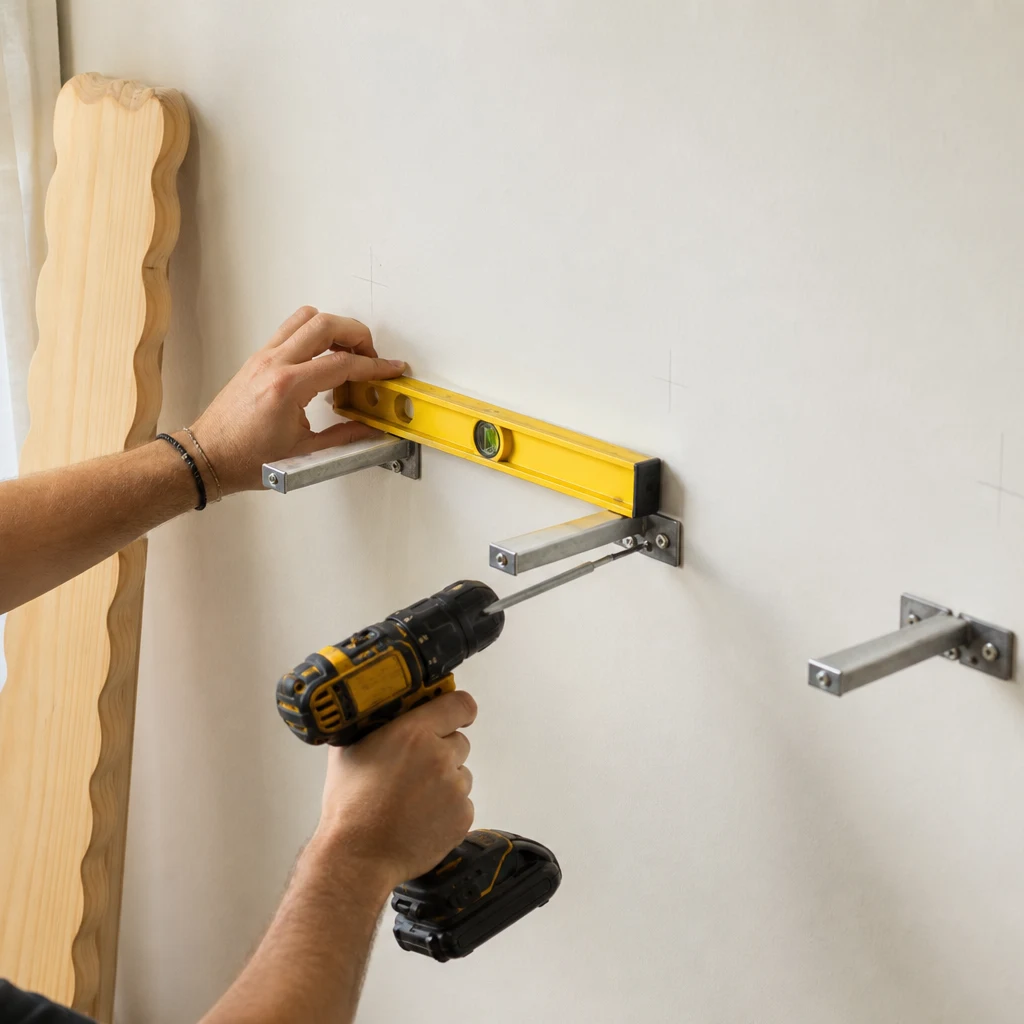
Hold the bracket plate to the wall at your marked height and check level before drilling. Drive screws into studs or use appropriate hollow-wall anchors for your wall type. Most hidden bracket systems use a keyhole plate on the wall and a matching rod or cleat inside a routed pocket on the shelf back.
If your board is not pre-routed, follow the bracket manufacturer’s template to drill or route the back cavity. Depth must be exact—too shallow and the shelf will not sit flush; too deep and you lose holding strength. Double-check level on the second bracket before final tightening; floating shelves show tilt immediately because there is no visible bracket to hide misalignment.
Weight note: Do not exceed the bracket rating. Books, ceramics, and small plants add up quickly on a 24-inch shelf.
Step 5: Slide On the Shelf and Style
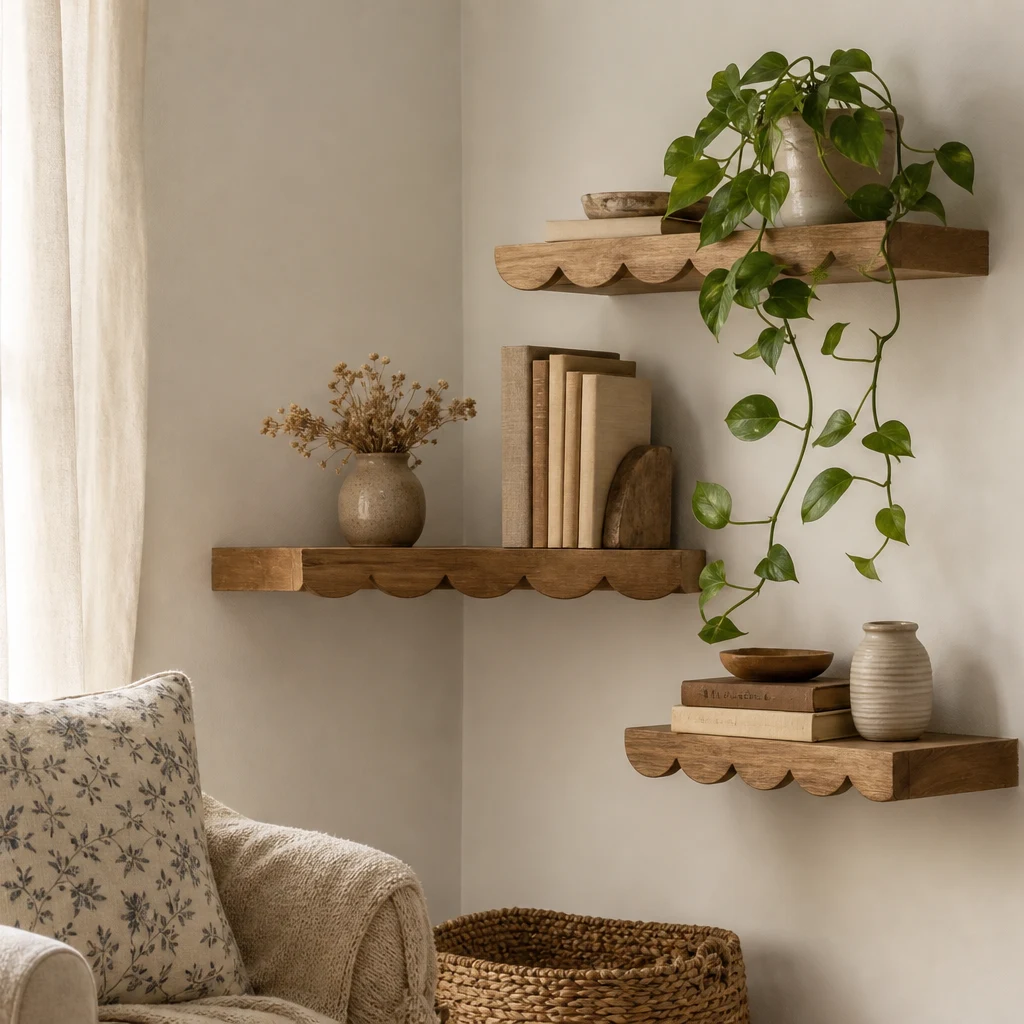
Once paint and topcoat are fully cured—typically 24 to 48 hours—slide the shelf onto the brackets according to the hardware instructions. Some systems lock with set screws underneath; others simply key into place. Give a gentle downward press to confirm seating.
Style with odd-number groupings: a trailing pothos, two stacked books, and one small vase reads balanced without clutter. Keep taller objects toward the wall and let one plant cascade over the scalloped edge—that curve was made for soft greenery spilling forward. For outdoor-adjacent spaces like a covered porch reading corner, coordinate with warm lighting from our DIY patio lighting ideas to highlight the shelves after sunset.
Styling Ideas for Scalloped Floating Shelves
Bedroom refresh: Install two shelves above a nightstand replacement zone—lamp on a narrow ledge elsewhere, shelves hold books and a small diffuser. Soft white scallops against a pale gray wall feel calm and hotel-like.
Entryway drop zone: One shelf by the door for keys in a small dish, sunglasses, and mail. Paint sage green to greet guests with color without committing to an accent wall.
Reading nook stack: Three staggered shelves in a corner with a floor cushion below. Mix vertical books, horizontal stacks, and one trailing plant per shelf for layered visual interest.
Kitchen open storage: Short shelves above a coffee station for mugs and a plant. Use a durable clear coat rated for humidity and keep heavy cast-iron off floating mounts.
DIY Scalloped Floating Shelf Checklist
- Measure wall space and mark stud locations before cutting wood
- Trace scallop pattern on scrap board and adjust radius if needed
- Clamp board securely before jigsaw cuts
- Cut on the waste side of pencil lines; sand to final shape
- Sand 120-grit then 220-grit, including inside each scallop curve
- Apply primer to all surfaces, especially curved edges
- Paint or stain with two thin coats; allow full cure time
- Route or drill bracket pocket on shelf back to manufacturer specs
- Level bracket plates on wall and anchor into studs when possible
- Confirm weight rating before loading with books and ceramics
- Style with odd-number groupings and one cascading plant for best effect
Frequently Asked Questions
Are scalloped floating shelves hard to build?
No. If you can use a jigsaw and a level, you can build scalloped floating shelves. The scallop cut takes patience but not advanced woodworking skills. Most beginners complete their first shelf in a single afternoon plus drying time.
What wood is best for DIY floating shelves?
Pine is affordable and easy to cut; poplar is straighter and takes paint smoothly. Avoid heavy hardwoods unless your brackets are rated for the extra weight. For shelves longer than 30 inches, use thicker stock or add a center bracket.
How do I cut even scallops without a template?
Use a compass set to a 2-inch radius or trace a consistent round object like a jar lid. Mark scallop centers evenly along the front edge with a tape measure before tracing. A paper template taped to the board guarantees repeatability across multiple shelves.
Can scalloped floating shelves hold books?
Yes, when you use brackets rated for the load and mount into studs. A typical 24-inch pine shelf on 25-pound hidden brackets handles a row of paperback and hardcover books plus a small plant. Do not overload with dense ceramics on both ends.
Should I paint or stain scalloped shelves?
Paint highlights the scallop shape with a crisp edge and suits soft summer color palettes like sage, blush, and warm white. Stain shows wood grain and feels more rustic. A hybrid approach—stained scallops with a painted body—emphasizes the wavy edge.
How far apart should I space floating shelves?
Space shelf centers 12 to 16 inches apart vertically for books and decor. Leave at least 6 inches between the lowest shelf and furniture below. For staggered layouts, offset horizontally by 4 to 8 inches to create visual movement up the wall.
Refresh Your Wall This Weekend
Scalloped floating shelves deliver a lot of design impact for a modest investment in lumber and an afternoon of cutting. The curves do the decorating work for you— even a single trailing plant spilling over the edge looks styled. Build one shelf to test the technique, then expand to a full stack once you are happy with the scallop size and paint color.
Keep the finish light, the styling simple, and the brackets properly anchored, and you will have a wall feature that feels fresh all summer and beyond. This is evergreen decor you can update seasonally with new plants, books, and small objects without rebuilding the shelves themselves.