

Fresh herbs are generous right up until they are not: one week the garden gives you three sprigs, and the next you are holding an armful of rosemary. This DIY herb drying rack turns a plain embroidery hoop into a compact, airy place to preserve the sturdy culinary herbs you cannot use at once. It is useful enough for a working kitchen and pretty enough to leave in view.
The important part is not the cottage-style finish. Successful air-drying depends on small bundles, low humidity, gentle room temperature, shade, and steady air circulation. This rack is designed around those needs, with separate drop cords that stop damp leaves from bunching together.
Why This Hanging Herb Rack Works
- Air reaches every bundle. Six hanging points create space around the leaves instead of packing herbs onto one crowded line.
- The hoop stays level. Four equal support cords distribute the weight and make the rack easier to load.
- Bundles can be removed separately. If thyme dries before sage, you can take it down without disturbing everything else.
- It uses vertical space. A wall hook in a dry spare room, pantry alcove, or shaded kitchen corner keeps the work surface clear.
Materials and Tools
- One 10- to 12-inch wooden embroidery hoop
- About 9 yards of food-safe cotton cord or unwaxed kitchen twine
- Scissors
- Tape measure or ruler
- Six small bundles of low-moisture herbs, such as rosemary, thyme, oregano, or sage
- One sturdy installed wall or ceiling hook rated for more than the finished rack weighs
- Optional: kraft paper lunch bags and a hole punch for dusty locations
Use the smooth inner ring from an embroidery hoop for the finished rack; set the screw-adjusted outer ring aside after measuring. Cotton cord grips unfinished wood better than slick synthetic ribbon. Avoid dyed, glittered, scented, or chemically treated craft string where it may touch herbs intended for food.
Choose Herbs That Air-Dry Reliably
Air-drying is best for relatively low-moisture herbs. Rosemary, thyme, oregano, marjoram, and sage are practical choices. Tender, moisture-rich leaves such as basil, mint, chives, and parsley are more likely to discolor or dry unevenly in a humid room; a dehydrator used according to its manual is usually the more controlled option.
Harvest clean, healthy stems after surface dew has dried. Remove yellowed, bruised, insect-damaged, or spotted leaves. If the herbs need rinsing, rinse them gently, shake off water, and spread them on clean towels until every surface is dry before bundling. Hanging visibly wet foliage defeats the airflow you are trying to create.
If you are starting from scratch, these easy herbs to grow in pots can help you plan a small, useful kitchen-herb collection.
Step-by-Step Instructions
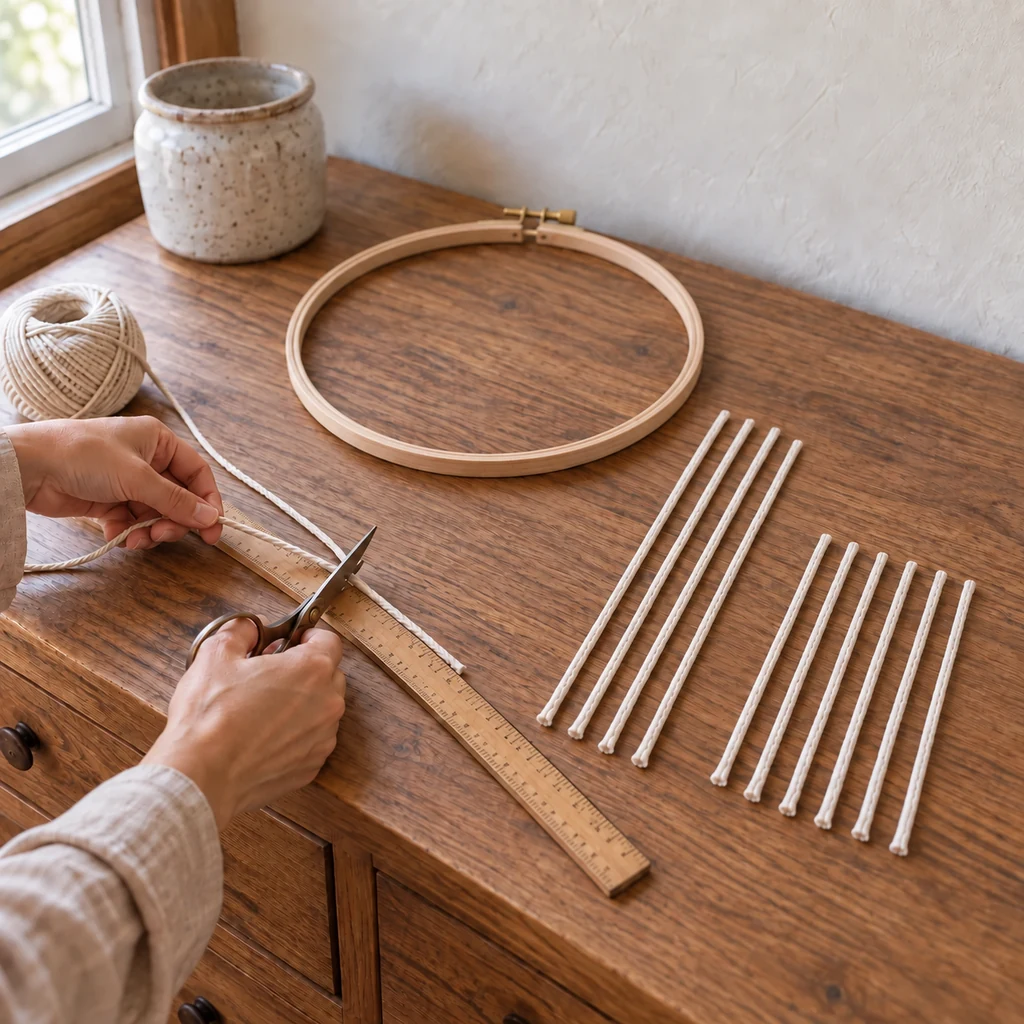
1. Cut the Support and Drop Cords
Cut four equal support cords, each about 30 inches long. Then cut six 18-inch drop cords for the herb bundles. Exact lengths can change with your ceiling height, but matching each set matters: unequal support cords tilt the hoop, while very short drops crowd leaves against the wood.
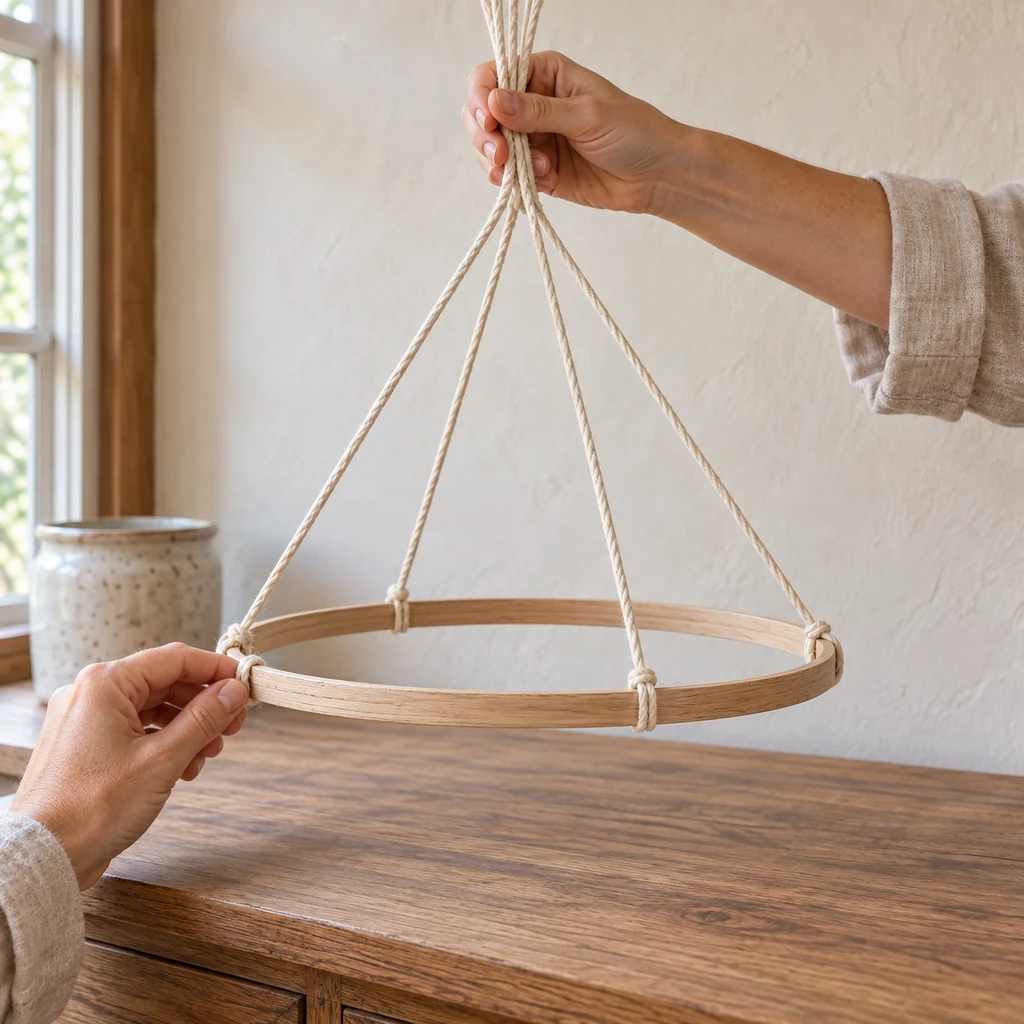
2. Build a Balanced Four-Point Hanger
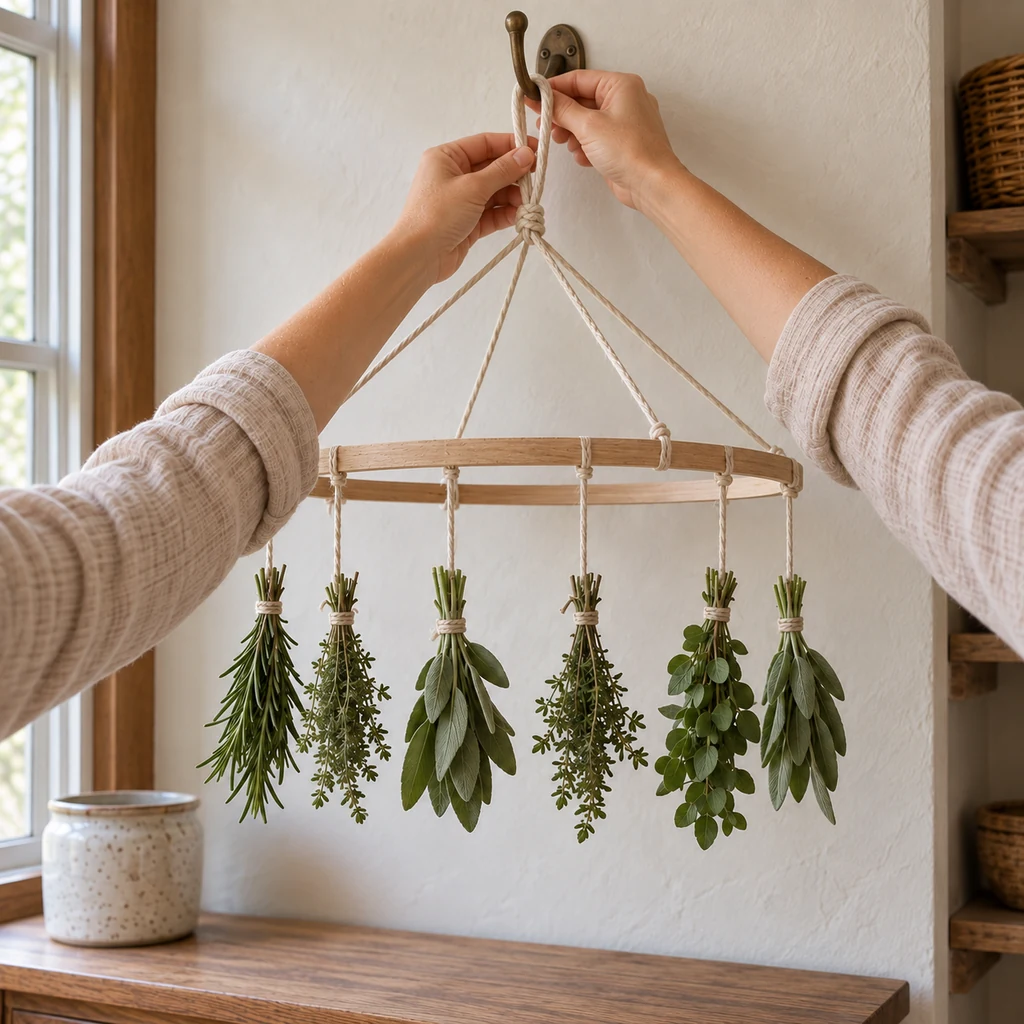
Mark four positions around the hoop at 12, 3, 6, and 9 o’clock. Secure one long cord at each point with the same knot, then gather the free ends above the center. Temporarily hold the loop and adjust until the hoop hangs level before tying a strong overhand loop at the top.
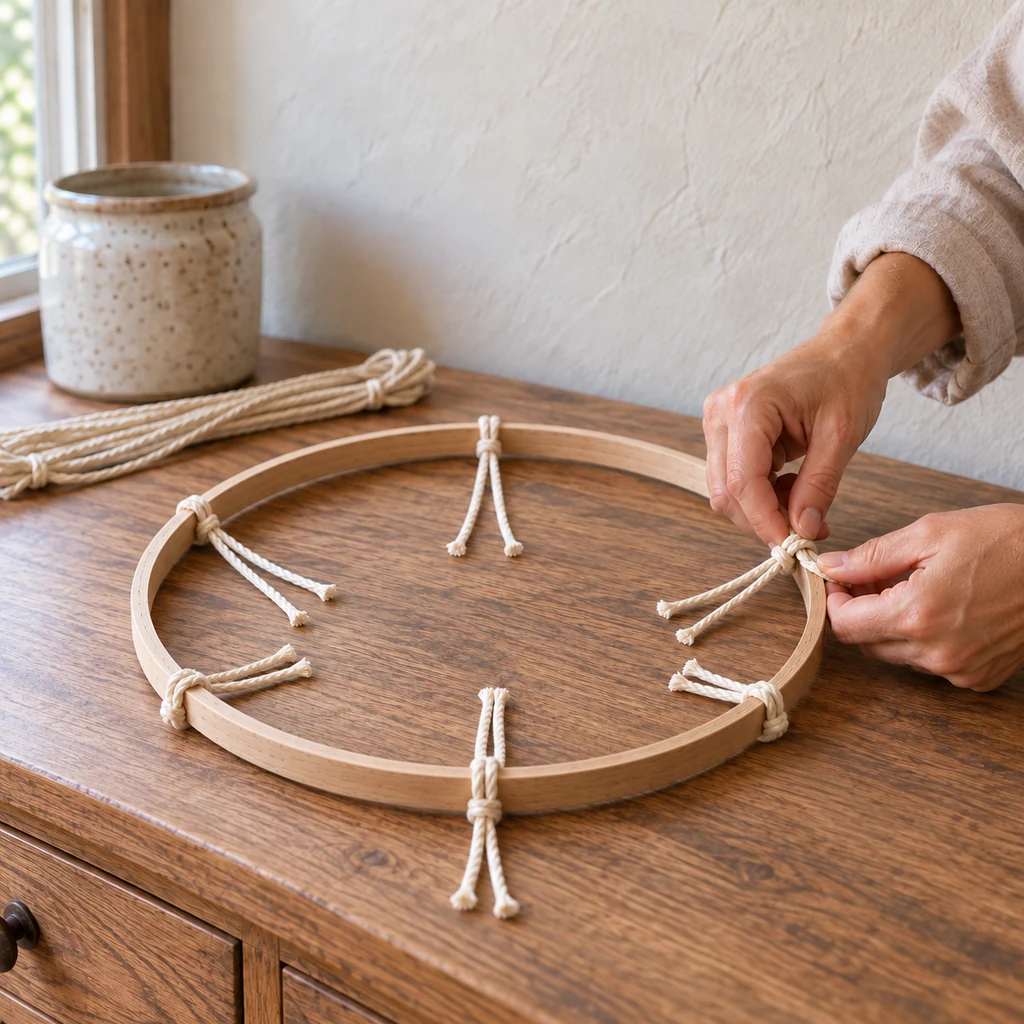
3. Add Six Evenly Spaced Drop Cords
Lay the hoop flat and attach the six shorter cords at equal intervals between the support points. A lark’s head knot is quick and removable: fold a cord in half, pass the loop beneath the hoop, bring both cut ends through the loop, and pull snug. Keep every drop clear of the four structural cords.
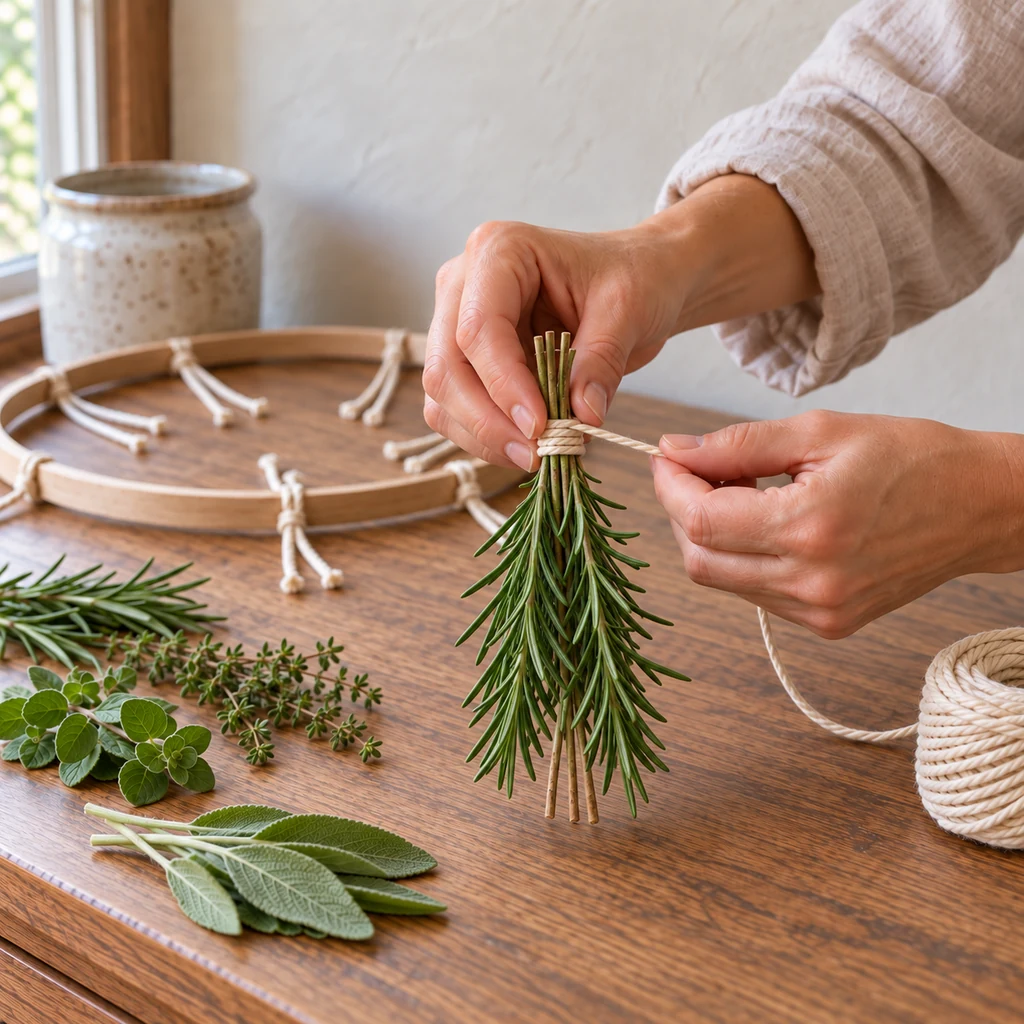
4. Prepare Small, Secure Herb Bundles
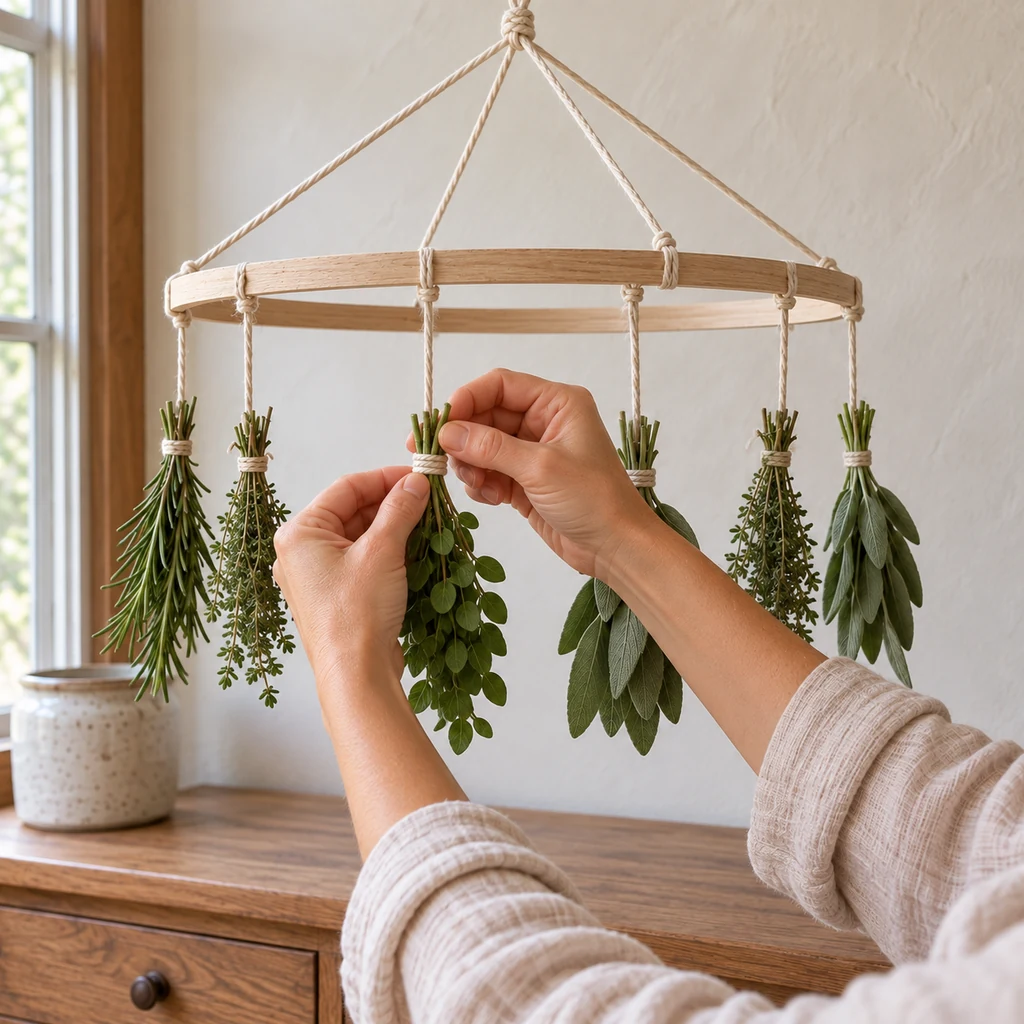
Group roughly four to six stems of one herb rather than making a thick mixed bouquet. Strip leaves from the lowest inch or two so the tie grips bare stems. Wrap cotton twine firmly around that area and knot it; stems shrink as they lose moisture, so a loose tie can let a bundle fall.
5. Attach the Bundles with Air Gaps
Hang the empty rack at a comfortable working height. Tie one prepared bundle to each drop cord with the leafy ends pointing down. Look at the rack from every side and shorten or shift a cord if leaves touch. Generous gaps are functional, not wasted space: moving room air must be able to pass around each bundle.
6. Hang in a Dry, Shaded, Ventilated Place
Place the finished rack on a sturdy hook away from direct sun, steam, grease, and splashing water. Do not hang it above a sink, kettle, dishwasher vent, or stove. A dry interior room with gentle air movement is better than a picturesque but humid kitchen window.
How to Know When the Herbs Are Dry
Drying time is not a promise you can put on a clock. Leaf thickness, bundle size, room humidity, and airflow all change it. Begin checking after several days. Properly dried leaves should feel crisp and crumble readily when rubbed; many slender stems will snap rather than bend. Thick woody rosemary stems may remain tough even when their needles are dry, so judge the leaves as well as the stem.
Inspect the rack daily. Discard any bundle that develops fuzzy growth, wet-looking dark patches, a musty odor, or slimy leaves. Do not try to rescue questionable herbs by drying them longer. If everything still feels soft after several days, the room may be too humid or the bunches too large; move them to a controlled dehydrator rather than gambling on the result.
Substitutions & Variations
No embroidery hoop? Use a clean, unfinished wooden ring or a small untreated dowel frame, provided it supports separated bundles. For a removable system, add small food-safe stainless-steel clips to the drop cords, keeping metal dry and clean between batches.
Only two herbs to dry? Balance the load across opposite sides of the hoop. Never put all the weight on one edge. For dust protection, place each bundle loosely inside a clean kraft paper bag punched with several ventilation holes, then tie the bag around the stems. Do not use sealed plastic bags; they trap moisture.
Decorative finish? Leave the hoop natural or finish only the exterior well before use with a food-contact-appropriate product, following its curing directions. The simplest and lowest-risk choice is an unfinished clean hoop with plain cotton cord.
Store the Dried Herbs Correctly
Take down only fully dry bundles and let them sit at room temperature before packing if they were moved from a cooler place. Strip the leaves over clean paper, then transfer them to clean, dry, moisture-proof containers. Label each jar with the herb and packing date. Store it in a cool, dry, dark cabinet rather than above the stove.
Check the jars during the first week. Condensation, clumping, or softening means moisture remains; discard any herbs with spoilage signs. Keeping leaves mostly whole until cooking can help preserve aroma better than grinding the entire batch immediately.
Common Mistakes and Practical Fixes
- The hoop tilts: unload it, retie the four supports to equal lengths, then distribute bundles by weight rather than by appearance alone.
- Leaves touch: reduce each bundle to fewer stems or use fewer of the hanging points. Airflow matters more than maximum capacity.
- Bundles slip: retie around bare stem ends with cotton twine and check the knot after the first day of shrinkage.
- Herbs stay pliable: improve ventilation, reduce bundle size, or switch to a dehydrator. Do not add heat from an unsafe improvised source.
- The location gets dusty: use ventilated paper bags or move the rack to a cleaner room; avoid airtight covers.
Frequently Asked Questions
Can I hang different herbs on the same rack?
Yes, as long as each variety has its own small bundle. Remove each one when it reaches dryness instead of waiting for the slowest herb.
Can this rack hang outdoors?
Outdoor humidity, dew, insects, dust, and direct sun make conditions difficult to control. An indoor, shaded, well-ventilated location is more dependable.
Should the leaves be washed first?
Use clean herbs and follow the handling guidance appropriate to your harvest. If you rinse them, do not bundle them until all surface water is gone.
Is a fan necessary?
Not always. Natural room circulation may be sufficient in a dry space. If you use a fan, keep it gentle and indirect so it circulates room air without blowing dust onto the herbs.
@media (max-width:600px){body.postid-23655 div[id^=”aswift_”][id$=”_host”],body.postid-23655 iframe[id^=”aswift_”]{width:100%!important;max-width:100%!important;min-width:0!important}body.postid-23655 div[id^=”aswift_”][id$=”_host”]{overflow:hidden!important}}html:has(body.postid-23655) > ins.adsbygoogle.adsbygoogle-noablate{display:none!important}