
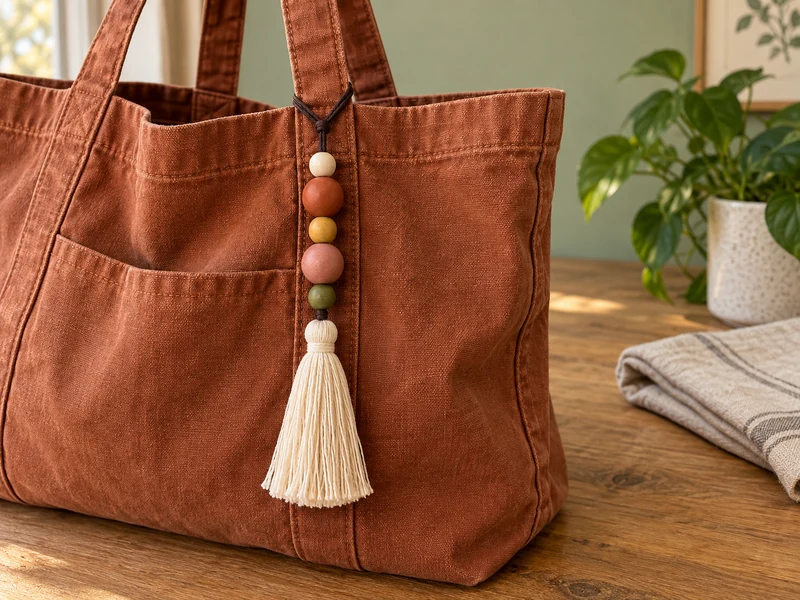
A bag charm should survive the bag, not just the photograph. This version uses one continuous waxed-cotton cord for the hanging loop and bead strand, a separate cotton tassel, and knots that remain visible enough to inspect. There is no metal clasp to scratch the handle and no hidden elastic to stretch out.
The color order is deliberately simple: cream, terracotta, mustard, dusty rose, and olive. Five beads create enough rhythm to look intentional without making the charm heavy. The finished piece can move between a tote handle, basket, or indoor storage bin in seconds.
Why This Design Stays Neat
- One load-bearing cord: the hanging loop and bead strand are made from the same folded length.
- Large bead holes: both cord ends pass through every bead without scraping or forcing.
- A captured tassel loop: the lower knot holds the tassel mechanically instead of relying on glue alone.
- Balanced proportions: two larger beads are separated by smaller beads, helping the strand hang straight.
- Removable attachment: the top loop fastens around a handle with a lark’s-head connection.
Materials and Exact Sizes
- 30 inches of dark-brown 2 mm waxed cotton cord
- One 14 mm matte cream wooden bead
- One 20 mm terracotta wooden bead
- One 14 mm mustard wooden bead
- One 20 mm dusty-rose wooden bead
- One 14 mm olive-green wooden bead
- Each bead must have a center hole wide enough for both cord ends together
- Approximately 10 yards of cream 1.5 mm cotton cord for the tassel
- One scrap of rigid cardboard, 3 1/2 inches tall and about 3 inches wide
- Wooden ruler or tape measure
- Sharp craft scissors
- Optional: one tiny drop of clear-drying fabric glue for the finished lower knot
Before cutting anything, test both brown cord ends through the smallest bead. If they drag or crush together, choose beads with larger holes or a slightly thinner smooth cord. Do not enlarge painted wooden beads with a power drill while holding them in your fingers.
Step-by-Step Instructions
1. Measure the Cord and Confirm the Bead Order
Cut one 30-inch length of waxed cotton cord. Lay out exactly five beads in the order they will appear from the top: small cream, large terracotta, small mustard, large dusty rose, and small olive. This dry layout catches color or size mistakes before a knot traps the pieces on the cord.
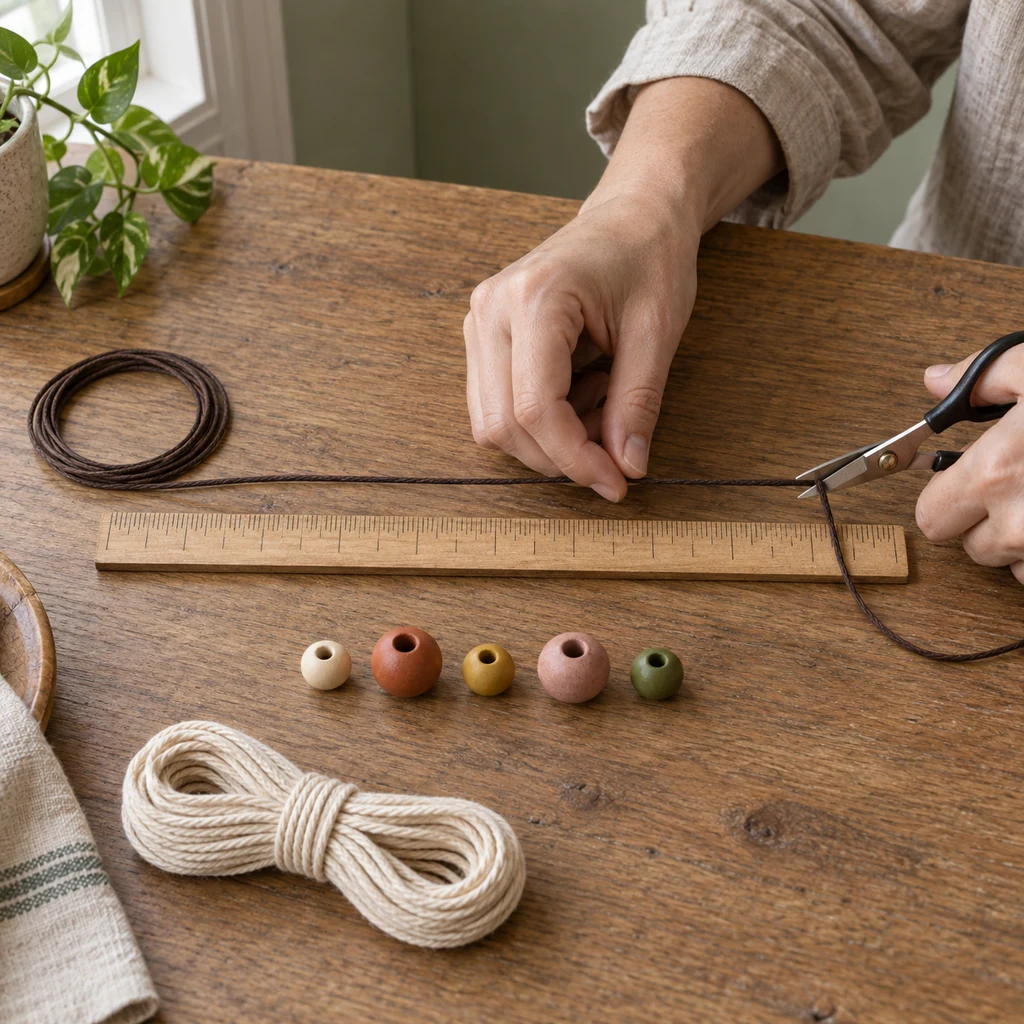
2. Tie the Top Hanging Loop
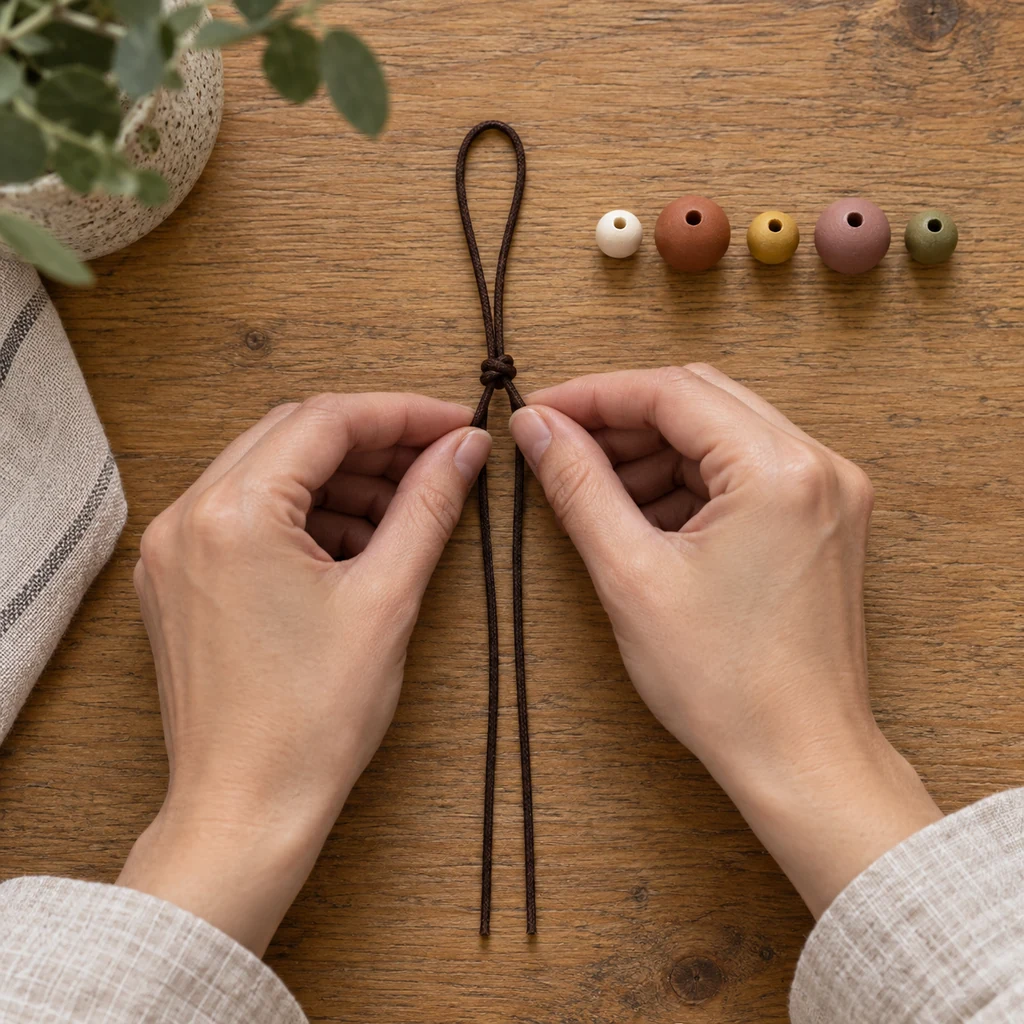
Fold the brown cord exactly in half so the two ends meet. Measure about 5 inches down from the fold and tie both parallel strands together in one overhand knot. Tighten the knot gradually while keeping the loop centered and the two loose ends equal. The finished loop needs to pass over the widest part of the charm later, so do not make it tiny.
3. Thread All Five Beads and Add a Temporary Stopper
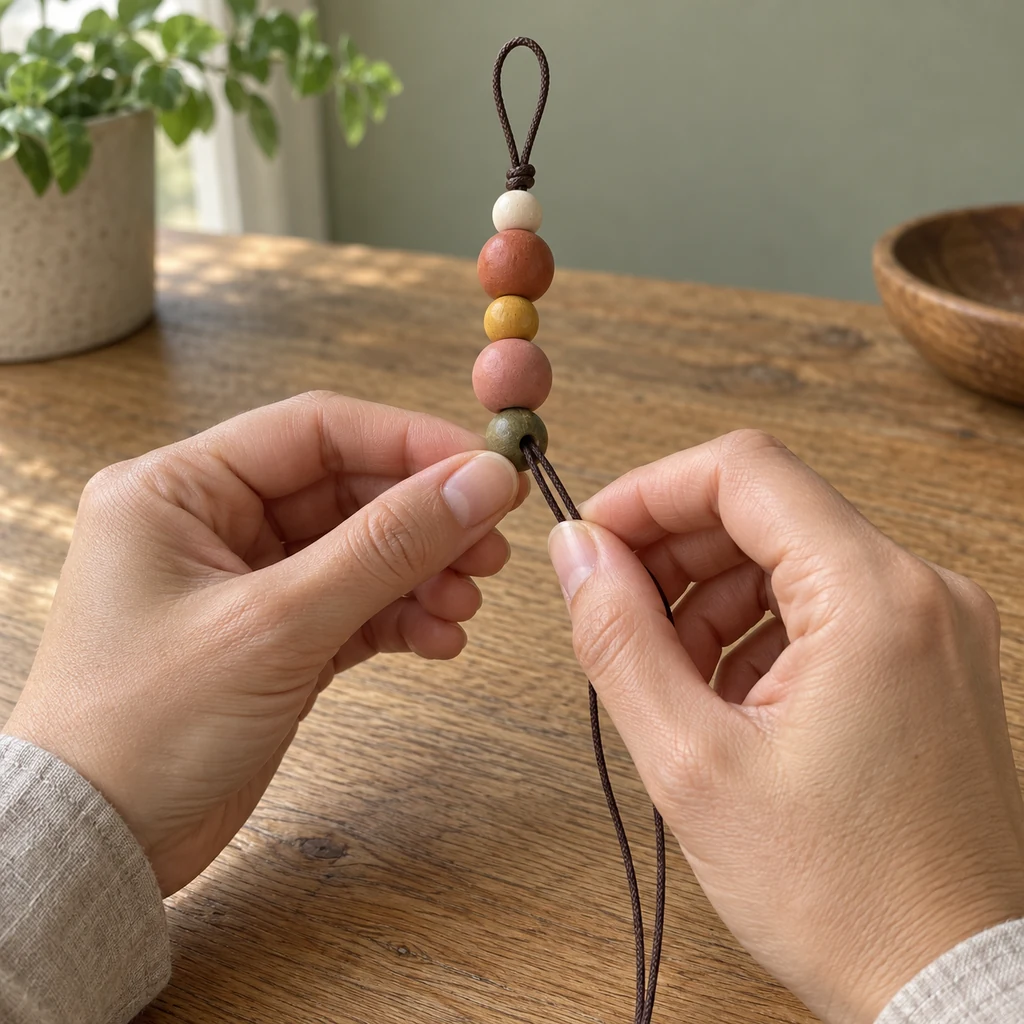
Bring the two loose ends together and feed both through the cream bead, followed by terracotta, mustard, dusty rose, and olive. Slide every bead firmly toward the top knot without crushing the wood. Tie a loose temporary overhand knot immediately below the olive bead so the stack cannot slip while you make the tassel. You will undo this temporary knot in Step 6.
4. Wrap One Even Tassel Bundle
Use the 3 1/2-inch side of the cardboard as the tassel length guide. Wrap the cream cotton cord around the card in flat, parallel passes until the bundle looks full but can still slide off without buckling the card. Keep a light, consistent tension. Pulling hard stretches cotton and can make the finished strands shrink to different lengths after cutting.
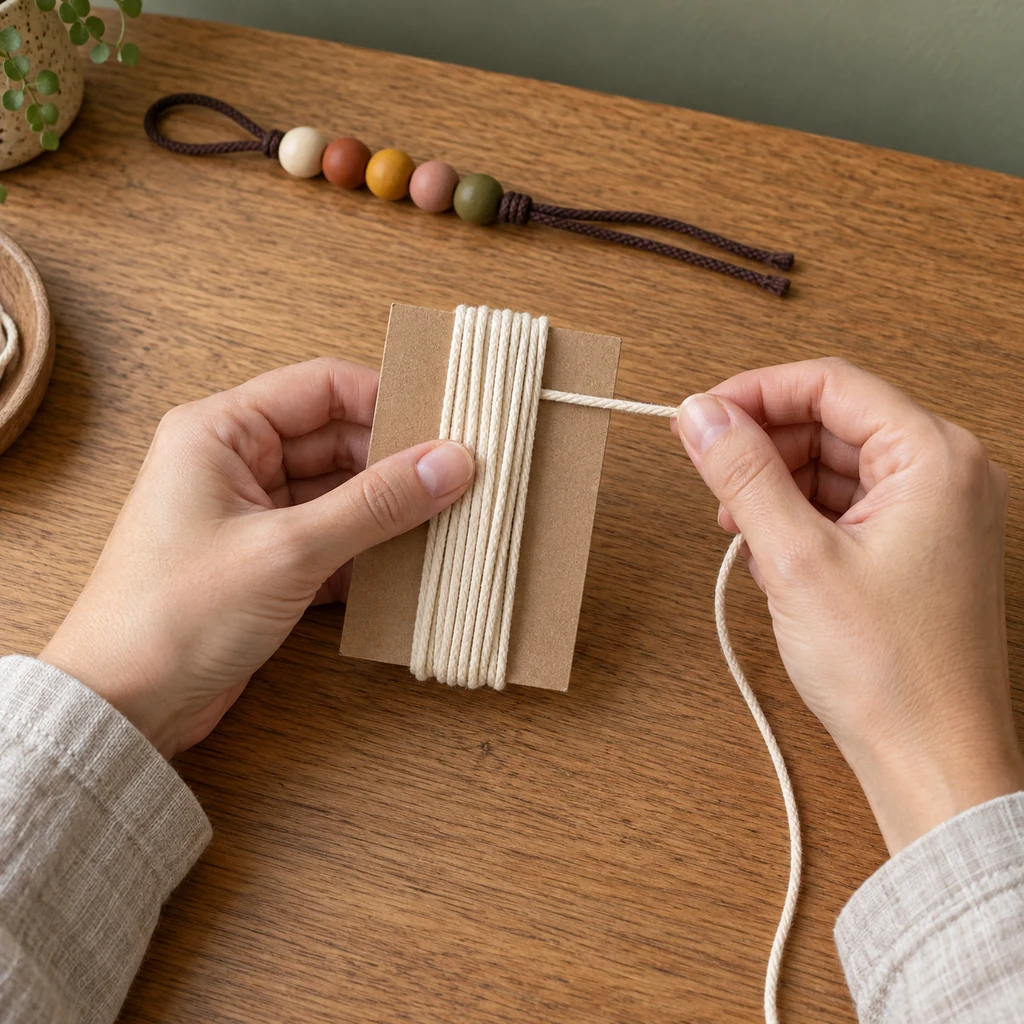
5. Tie the Tassel Head, Cut the Loops, and Trim
Cut a separate 10-inch piece of cream cord. Slip it under all wraps at the top edge of the card, tie it securely, and leave a small closed loop above the bundle. Slide the bundle off the card. Wrap another short cream strand around the tassel neck several times and knot it at the back.
Cut through every folded loop at the bottom, then hold the tassel by its top loop and trim only the obvious long ends. Do not chase perfect straightness one strand at a time; repeated trimming quickly makes the tassel too short.
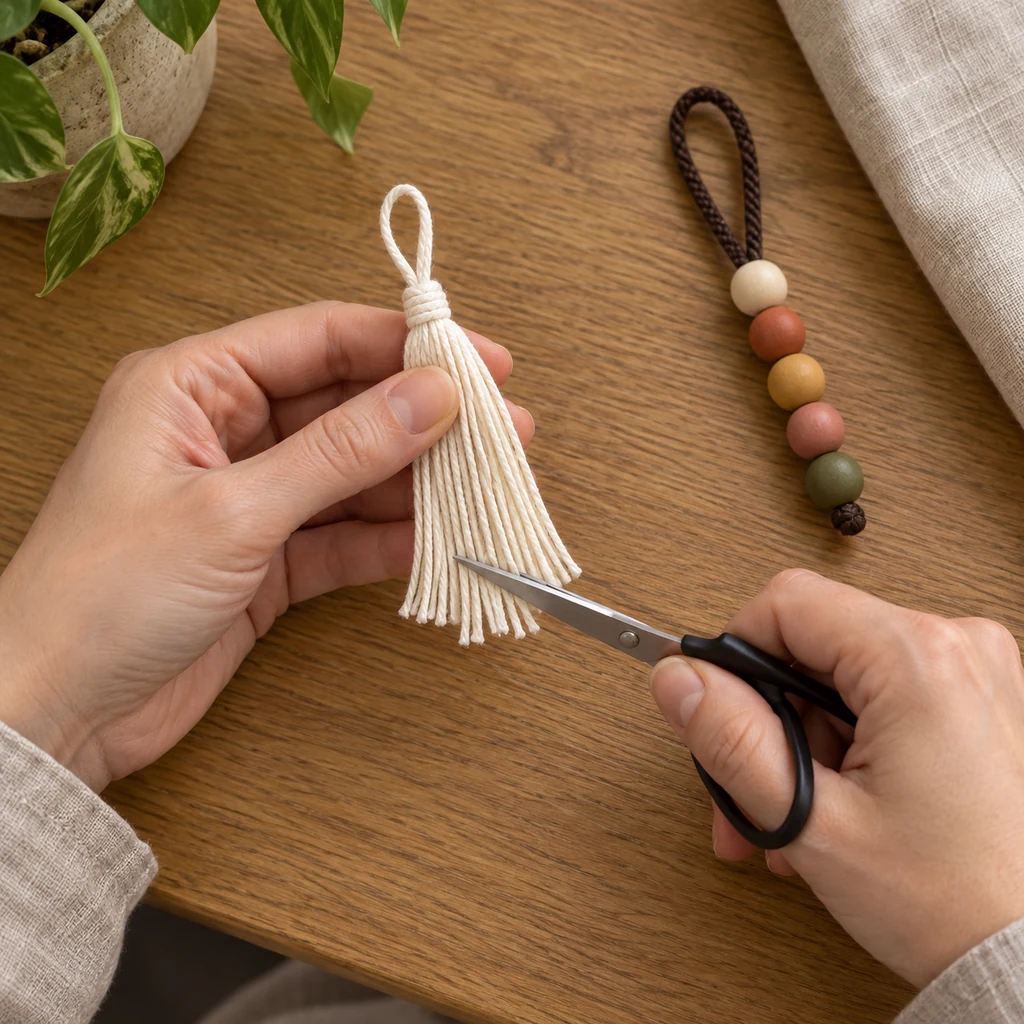
6. Capture the Tassel Loop in the Lower Knot
Undo the temporary brown stopper knot without letting the beads slide off. Pass one brown end through the small cream loop at the tassel head. Tie the two brown ends together in a compact square knot directly below the olive bead, capturing that cream loop inside the knot. Tighten by pulling the brown ends evenly while supporting the bead stack; do not pull on the tassel fibers.
Inspect the knot from both sides. When it is firm, trim the brown tails to about 1/4 inch. If the waxed cord feels unusually slippery, press a pinhead-size amount of clear-drying fabric glue into the completed knot and let it dry fully. Glue is only backup—the knot must hold before glue is applied.
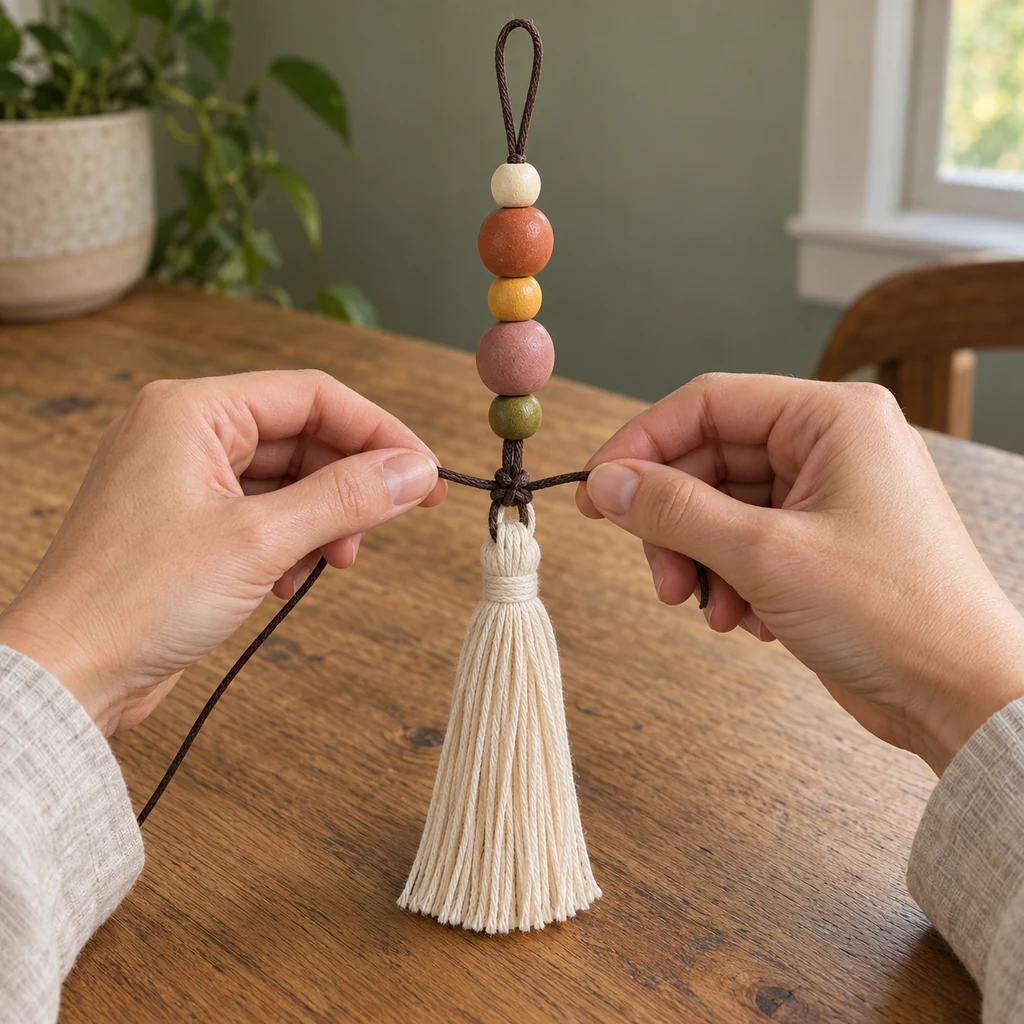
7. Attach the Charm Without Metal Hardware
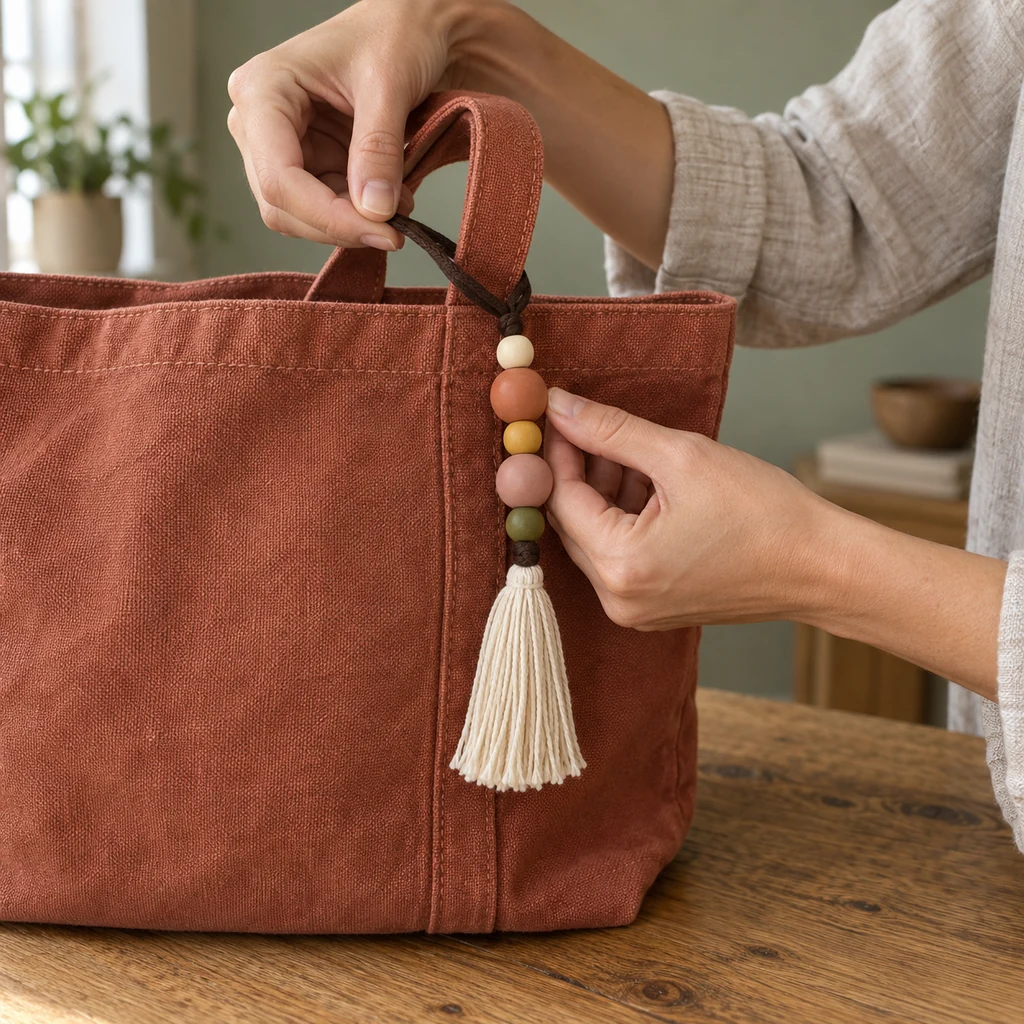
Place the brown top loop behind the tote handle. Bring the entire beaded strand and tassel through that loop, then pull the attachment snug. This lark’s-head connection removes without tools: loosen the loop, pass the charm back through, and move it to another handle.
Before carrying the bag, hold the handle over a soft surface and give the brown cord—not the tassel—a firm downward tug. Stop using the charm if a bead splits, a knot shifts, or the cord coating wears through.
Why Beaded Bag Charms Twist or Unravel
The two cord ends are different lengths. An off-center fold pulls the bead stack to one side. Match the ends before tying the top knot.
The bead holes are too tight. Forced cord bunches inside a hole and prevents the beads from settling. Test the smallest bead first.
The tassel is glued on without a loop. Surface glue carries the whole load. A tied tassel loop captured in the lower knot creates a mechanical connection.
The tassel was wrapped under heavy tension. Stretched cotton relaxes unevenly after cutting. Wrap neatly, not tightly.
The handle loop is too short. If the completed charm cannot pass through its own loop, the lark’s-head attachment will not work. A 5-inch folded loop gives this five-bead design practical clearance.
Substitutions and Variations
- No painted beads: use unfinished wooden beads and seal them with a product intended for wood before assembly. Let them cure fully so finish does not transfer to fabric.
- Shorter charm: omit the mustard bead, but keep the remaining sequence visually balanced and recount every reference in your own plan.
- Washable look: use colorfast cotton cord, but still remove the charm before washing the bag. Painted wood and prolonged soaking are a poor combination.
- No fabric glue: leave it out. A correctly dressed square knot should be the working connection.
- Different tassel: embroidery floss creates a finer, silkier finish; 1.5 mm cotton cord creates the fuller texture shown here.
What to Attach It To
The charm works best on a sturdy tote handle, an indoor basket, a drawer pull, or a zip pouch with a wide fabric tab. It is decorative and not suitable as a load-bearing key fob, pet accessory, zipper repair, or child’s toy. Wooden beads are small parts; keep the project and finished charm away from babies and young children.
Care and Storage
Remove the charm before washing the bag. To freshen the tassel, comb it gently with clean fingers and snip only a few obvious long strands. Avoid soaking painted beads or saturating the lower knot. For storage, lay the charm flat with the tassel straight instead of folding it under the bead stack.
Troubleshooting
- The beads wobble: retie the lower knot closer to the olive bead before trimming the tails.
- The strand leans: check that both brown cords are the same length and pass through every bead hole together.
- The tassel sheds strands: the top tie may not encircle the complete bundle. Rebuild the tassel rather than adding heavy glue.
- The loop slips on a narrow handle: wrap it around the handle twice only if the loop still lies flat and the beads hang freely.
- The tassel looks thin: add more wraps on a new bundle; do not splice loose strands into the finished head.
Frequently Asked Questions
Can I use elastic cord?
Elastic can stretch under the weight of large beads and makes the knots harder to inspect. A smooth waxed cotton cord is a more predictable choice for this design.
Do I need jewelry pliers?
No. The charm uses no jump ring, crimp, chain, or metal clasp. Scissors and a ruler are the only tools required.
How heavy should the finished charm be?
There is no universal target because wood density and bead size vary. The charm should not pull the handle out of shape. If the bag fabric puckers, use smaller or fewer wooden beads.
Trend Source and Editorial Note
This project was selected after reviewing the official Pinterest Hobbies Trend Report 2026, which reports rapidly rising searches for beaded bag charm DIY projects. The tutorial focuses on a specific functional problem—keeping the charm straight and preventing the tassel connection from unraveling—rather than promising a universal result for every cord or bead. Check your own materials before final assembly.