
DIY yarn wrapped letters are one of those craft ideas that stay popular because the finished result is simple, personal, and easy to style. You can use them for nursery decor, kids rooms, party tables, seasonal shelves, craft rooms, dorm rooms, or handmade gifts. The basic method is beginner-friendly: choose a letter, secure one end of the yarn, wrap neatly, and hide the ends on the back.
This guide shows you how to make yarn wrapped letters that look clean instead of messy. The trick is not wrapping faster; it is planning the corners, curves, yarn direction, and glue points before the letter becomes bulky. Once you understand those small details, the craft becomes much easier to repeat.
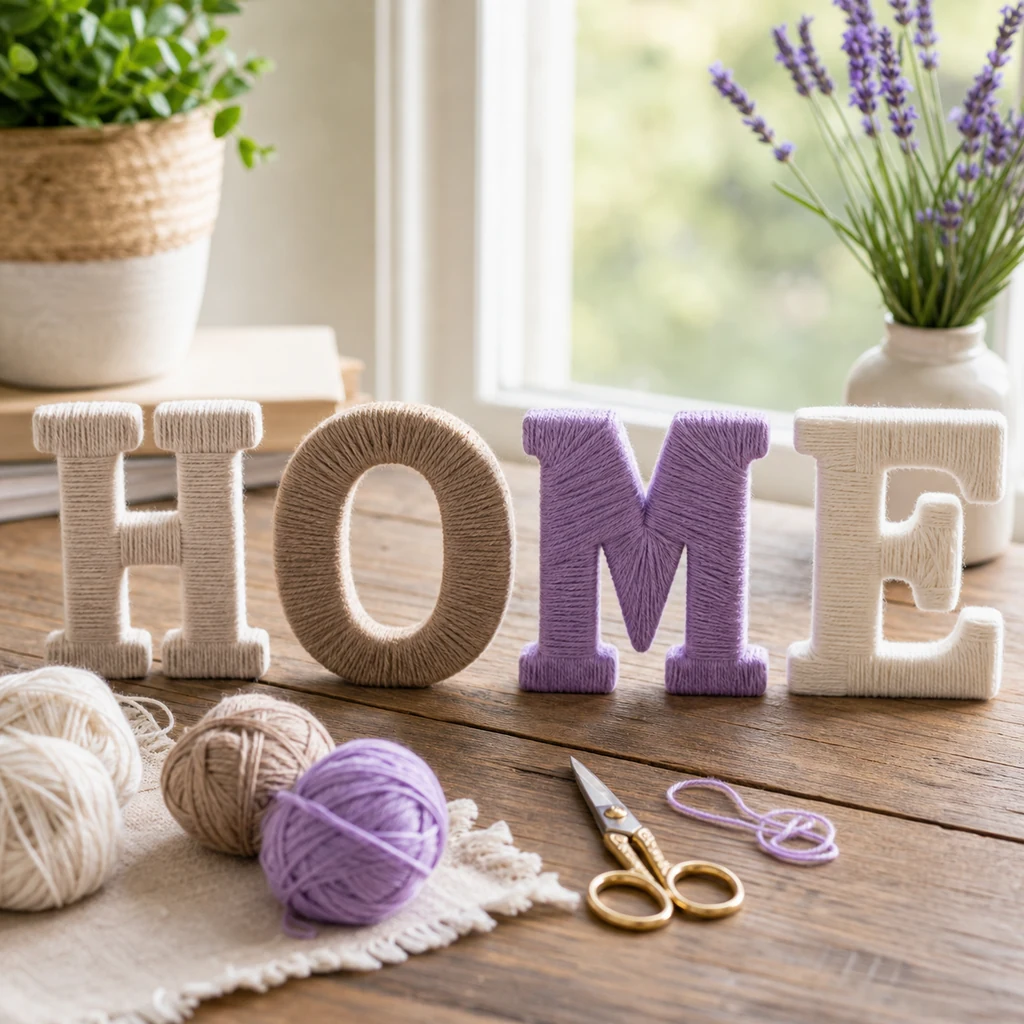
Why Yarn Wrapped Letters Work So Well
Yarn wrapped letters are inexpensive, customizable, and forgiving. You can make one monogram letter, a child’s name, a word such as HOME, LOVE, JOY, or CREATE, or a short phrase for a party table. The same technique works on cardboard letters, papier-mache letters, lightweight wooden letters, foam letters, and even cut-out cardboard shapes.
They also photograph well for Pinterest because the idea is instantly understandable. A viewer can see the finished result and imagine where it would go in their own home. That is one reason this kind of DIY decor has remained a strong Pinterest format for years.
Supplies You Need
Gather everything before you start. Yarn wrapping is easier when you do not have to stop mid-letter and search for glue, scissors, or tape.
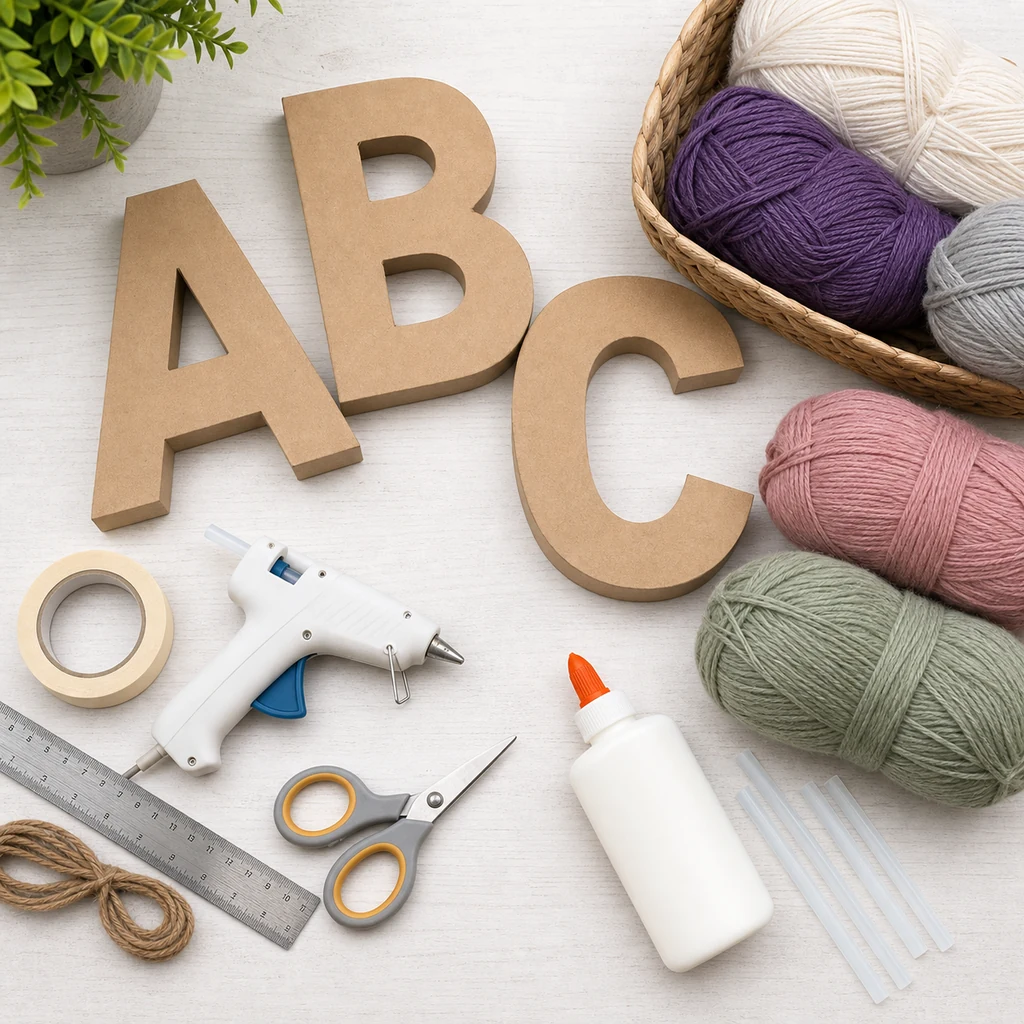
- Cardboard, papier-mache, wooden, or foam craft letters
- Yarn in one or more colors
- Scissors
- Hot glue gun or strong craft glue
- Painter’s tape or masking tape
- Ruler or measuring tape
- Felt or paper for covering difficult ends, optional
- Small decorations such as felt flowers, pom poms, beads, or ribbon, optional
Best Yarn For Wrapped Letters
Medium-weight yarn is the easiest choice for most letters. Very thin yarn takes longer and can show gaps. Very chunky yarn covers quickly, but it can make corners bulky and hide the shape of smaller letters. If you are making large statement letters, chunky yarn can work beautifully. For smaller letters, choose a smoother worsted-weight yarn.
Soft acrylic yarn is affordable and comes in many colors. Cotton yarn gives a cleaner, matte finish. Wool can look warm and cozy, but it may shed or stretch depending on the style. If this is your first project, use one solid color before trying stripes or color blocking.
Step 1: Plan The Direction Of The Wrap
Before gluing anything, look at the shape of the letter. Straight letters such as I, L, T, and H are easy. Curved letters such as C, O, S, and G take more patience. Letters with inner openings, such as A, B, D, O, P, and R, need extra planning because the inside edges are harder to wrap neatly.
Decide where the back of the letter will be. All glue dots, knots, and yarn ends should sit on the back whenever possible. This keeps the front clean for display and photos.
Step 2: Cover Difficult Ends First
Some letter ends are hard to cover if you only wrap in one direction. Before wrapping the whole letter, cut short pieces of yarn and glue them across exposed tips, corners, and end caps. This is especially helpful on letters such as E, F, K, M, N, T, and W.
Think of this as a base layer. Once the awkward end is covered, your main wrapping layer can go over it and hide the glue.
Step 3: Start Wrapping The Letter
Glue the first yarn end to the back of the letter. Let it set for a moment, then begin wrapping. Keep each strand close to the previous strand so there are no gaps. Pull the yarn snug, but not so tight that it bends cardboard or foam letters.
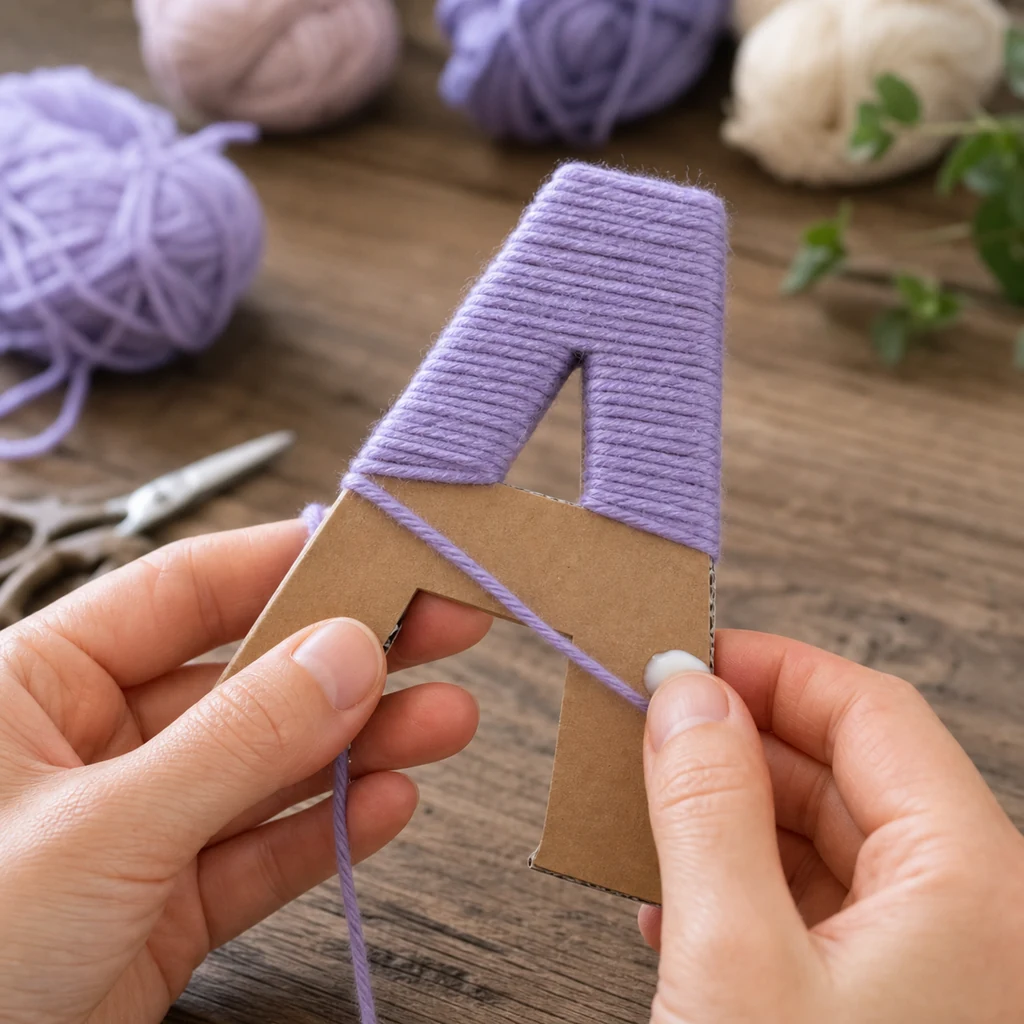
For long straight sections, wrapping is simple. For curves, angle the yarn slightly and adjust as you go. If the outside curve spreads apart, push the strands together gently with your fingers. If the inside curve becomes crowded, overlap slightly on the back where it will not show.
Step 4: Handle Corners And Curves Cleanly
Corners are where yarn wrapped letters can start to look bulky. Instead of forcing the yarn around every angle in one continuous motion, use small glued sections. Wrap up to the corner, glue the yarn on the back, trim it, then restart in the new direction. This keeps the front flatter.
Curves need slow spacing. The outside of the curve has more surface area than the inside, so tiny gaps can appear. Use a matching marker or paint on the letter before wrapping if you are worried about small gaps showing through.
Step 5: Hide The Final Yarn End
When the letter is fully covered, cut the yarn with a few extra inches. Glue the tail to the back of the letter and press it flat until secure. If the end still looks messy, cover it with a small piece of felt, cardstock, or ribbon on the back.
Check the front of the letter under good light. If you see gaps, add a short piece of yarn in the same direction as the surrounding wrap. Avoid wrapping the whole letter again unless the base is very uneven.
Color Ideas For Yarn Wrapped Letters
Color is what makes this craft easy to personalize. Use soft neutrals for calm home decor, pastels for nurseries, bright colors for parties, and deep colors for seasonal displays.
- Nursery: cream, blush, sage, sky blue, lavender, or soft yellow.
- Modern home decor: ivory, charcoal, taupe, olive, rust, or muted blue.
- Birthday party: rainbow colors, bright pink, turquoise, orange, or purple.
- Holiday decor: red and white, green and cream, metallic thread accents, or winter neutrals.
- Craft room: cheerful mixed colors or color-blocked letters.
Display Ideas
Once the letters are finished, style them where the texture can be seen. Yarn wrapped letters look especially good on shelves, mantels, nursery dressers, gallery walls, craft carts, party dessert tables, and entryway consoles.
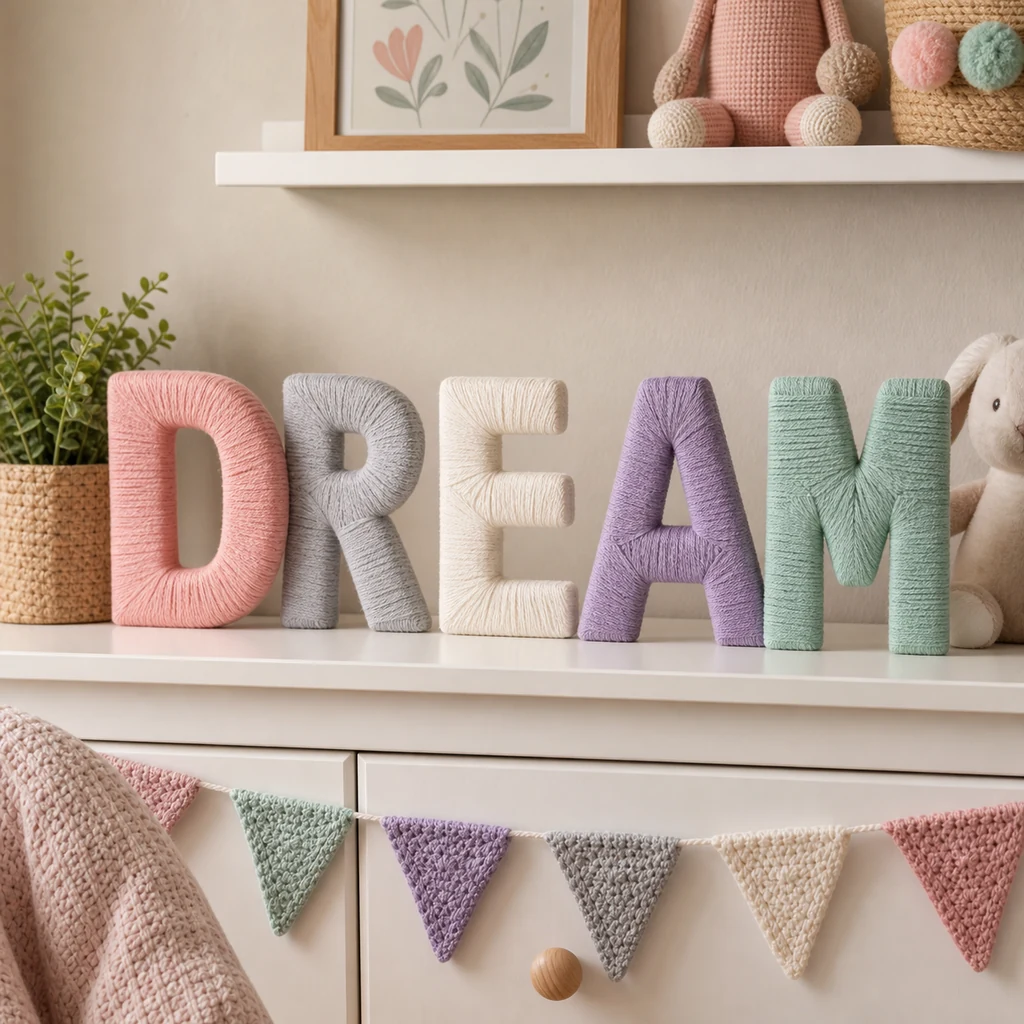
For a shelf display, mix the letters with a small plant, framed print, candle, books, or a basket. For a party, place the letters behind the cake or dessert tray. For a nursery, spell the child’s name above a dresser or on a floating shelf.
Common Mistakes To Avoid
- Starting without planning the back: decide where glue and yarn ends will hide before wrapping.
- Using yarn that is too bulky: chunky yarn can blur small letter shapes.
- Wrapping too loosely: loose yarn shifts and leaves gaps.
- Pulling too tightly: cardboard and foam letters can bend.
- Ignoring end caps: cover awkward ends first so bare letter edges do not show.
- Using too much glue on the front: keep glue on the back or inside edges whenever possible.
Yarn Wrapped Letters Checklist
- Choose letters with a size that fits your display space.
- Pick medium-weight yarn for the easiest wrapping.
- Mark the back of each letter before starting.
- Cover awkward ends and corners first.
- Wrap slowly and keep strands close together.
- Glue yarn ends on the back, not the front.
- Use short sections around corners and curves.
- Style finished letters where the yarn texture is visible.
Helpful Safety Tips
If you use a hot glue gun, protect your work surface and keep the glue away from children. Low-temperature glue guns are easier for beginner craft projects. Let glue dry fully before moving letters to a shelf, wall, or party table.
If the letters are for a nursery or child’s room, use them as decor only. Avoid placing loose yarn, small decorations, beads, or pom poms where babies or toddlers can pull them off.
For more ideas, browse the DIY & Crafts and Home Decor categories.
Frequently Asked Questions
What kind of letters work best for yarn wrapping?
Cardboard, papier-mache, foam, and lightweight wooden letters all work. Beginners usually find cardboard or papier-mache letters easiest because they are light and inexpensive.
Can I make yarn wrapped letters without hot glue?
Yes. Strong craft glue can work, but it may need more drying time. Tape can help hold yarn ends temporarily while the glue sets.
How do I keep yarn from slipping?
Keep the yarn snug, glue the starting point well, and add tiny glue dots on the back of the letter when changing direction. Avoid glue on the front unless absolutely necessary.
Can I use more than one yarn color?
Yes. Color blocking, stripes, ombre yarn, and mixed letters all work. For the cleanest look, change colors on the back of the letter and secure both yarn ends there.
Are yarn wrapped letters good for party decor?
Yes. They are lightweight, customizable, and easy to match to party colors. Use them on dessert tables, welcome tables, photo backdrops, or gift tables.
Final Thoughts
DIY yarn wrapped letters are simple, but the small details make the finished project look much better. Choose the right yarn weight, cover awkward ends first, keep glue on the back, and slow down around corners and curves.
Once you make one letter, the process becomes easy to adapt. Try a name, short word, seasonal phrase, or single monogram in colors that match your room or event.