
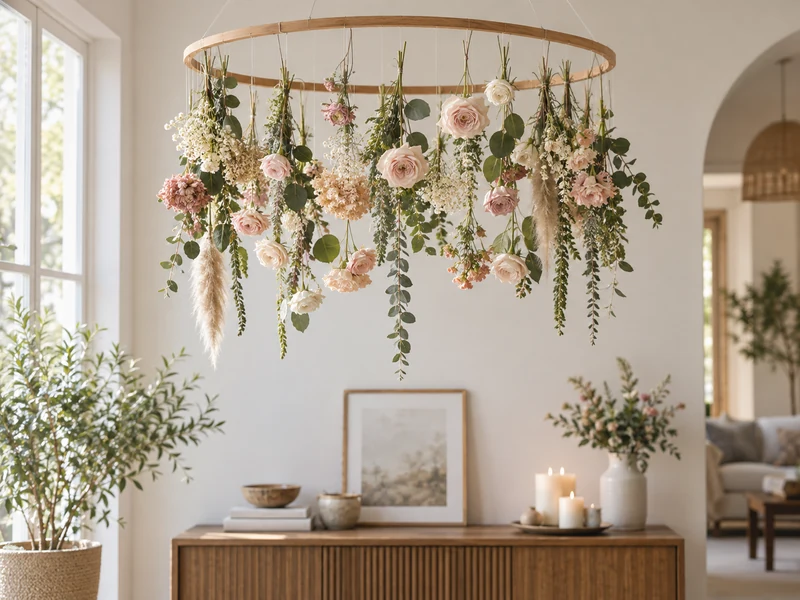
DIY hanging floral decor is one of the fastest ways to make a room feel softer, more romantic, and more intentional. Instead of placing flowers in a vase and calling the corner finished, this project lifts the arrangement into the air so it becomes part of the room’s architecture. A simple wooden hoop, greenery, flowers, and nearly invisible hanging line can create a floating centerpiece that works for a dining nook, nursery corner, bridal shower, birthday table, seasonal entryway, or photo backdrop.
The best version looks graceful without feeling overworked. The trick is to plan the shape before attaching anything, build a light greenery base, cluster flowers where the eye naturally lands, and balance the hanging points before the piece goes overhead. You can use fresh flowers for a one-day event, dried stems for a muted boho look, or high-quality faux flowers when you want the arrangement to last for months.
Why You’ll Love It
- Big visual impact: A hanging floral piece draws the eye upward and makes a simple room feel styled.
- Flexible for many spaces: Use it above a table, console, reading corner, party station, or empty wall area.
- Easy to personalize: Change the flower color, greenery type, ribbon, and hoop size to match the season or event.
Materials
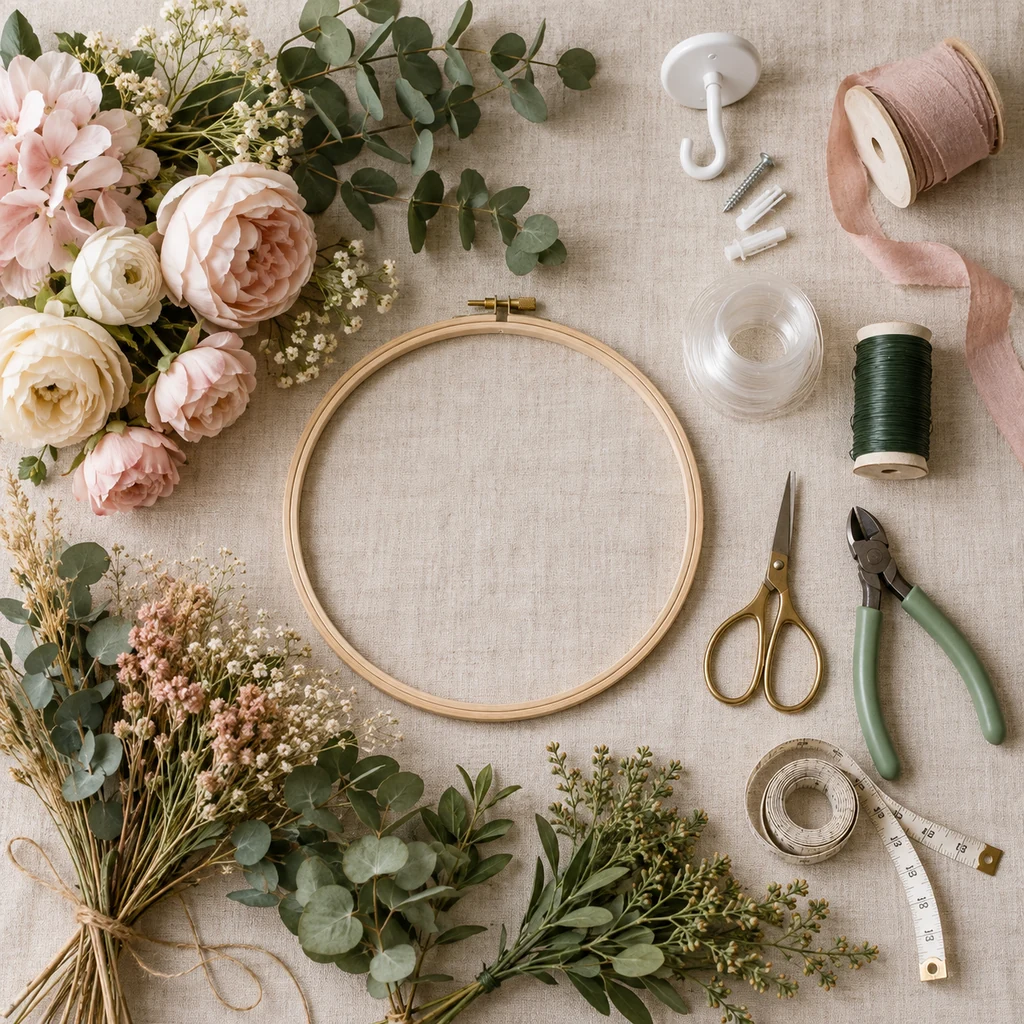
- 1 wooden embroidery hoop or lightweight wreath hoop
- Assorted faux, dried, or fresh flowers in 2 to 3 sizes
- Eucalyptus, olive branches, ruscus, or other soft greenery
- Floral wire or flexible paddle wire
- Clear fishing line or strong transparent hanging cord
- Ribbon, optional for a softer finish
- Wire cutters and small scissors
- Measuring tape
- Removable ceiling hook or secure hanging hardware rated for the finished weight
Step-by-Step Instructions
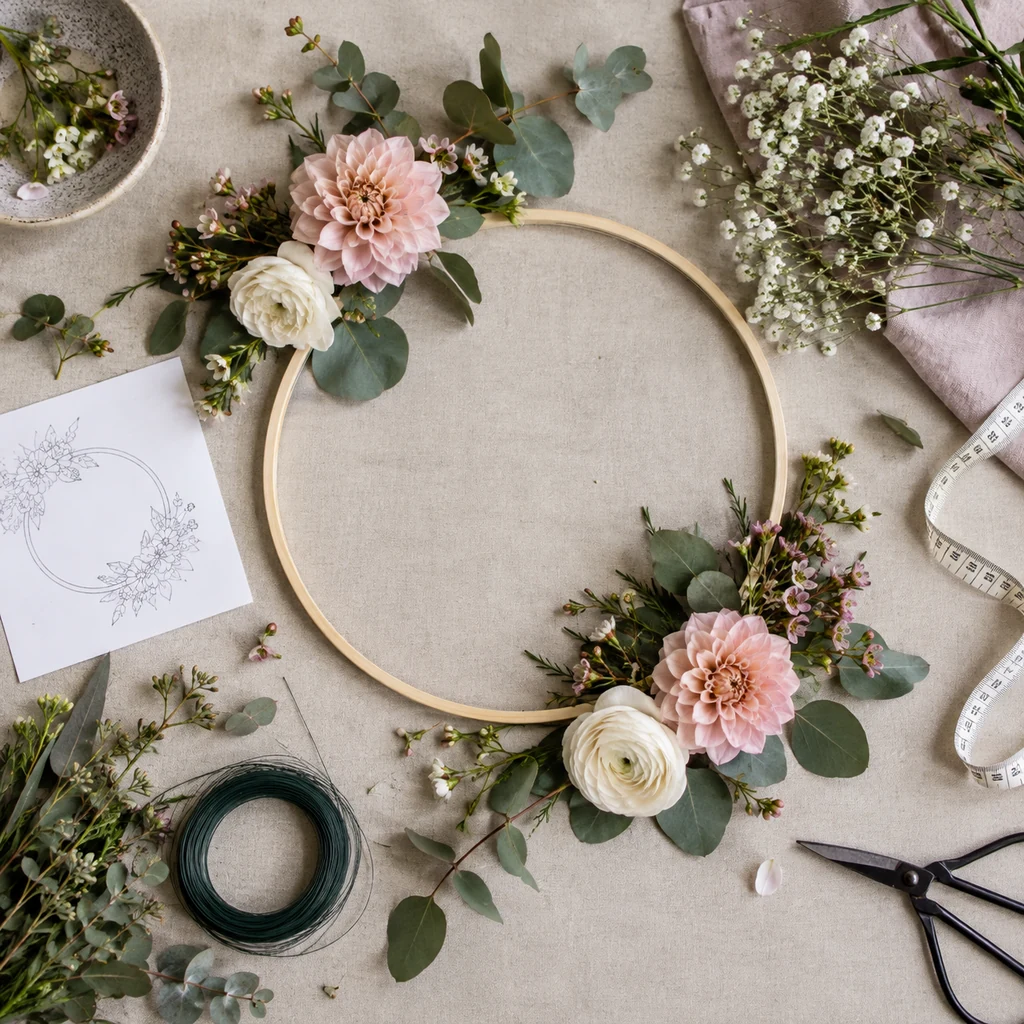
Plan the Shape Before Attaching Stems
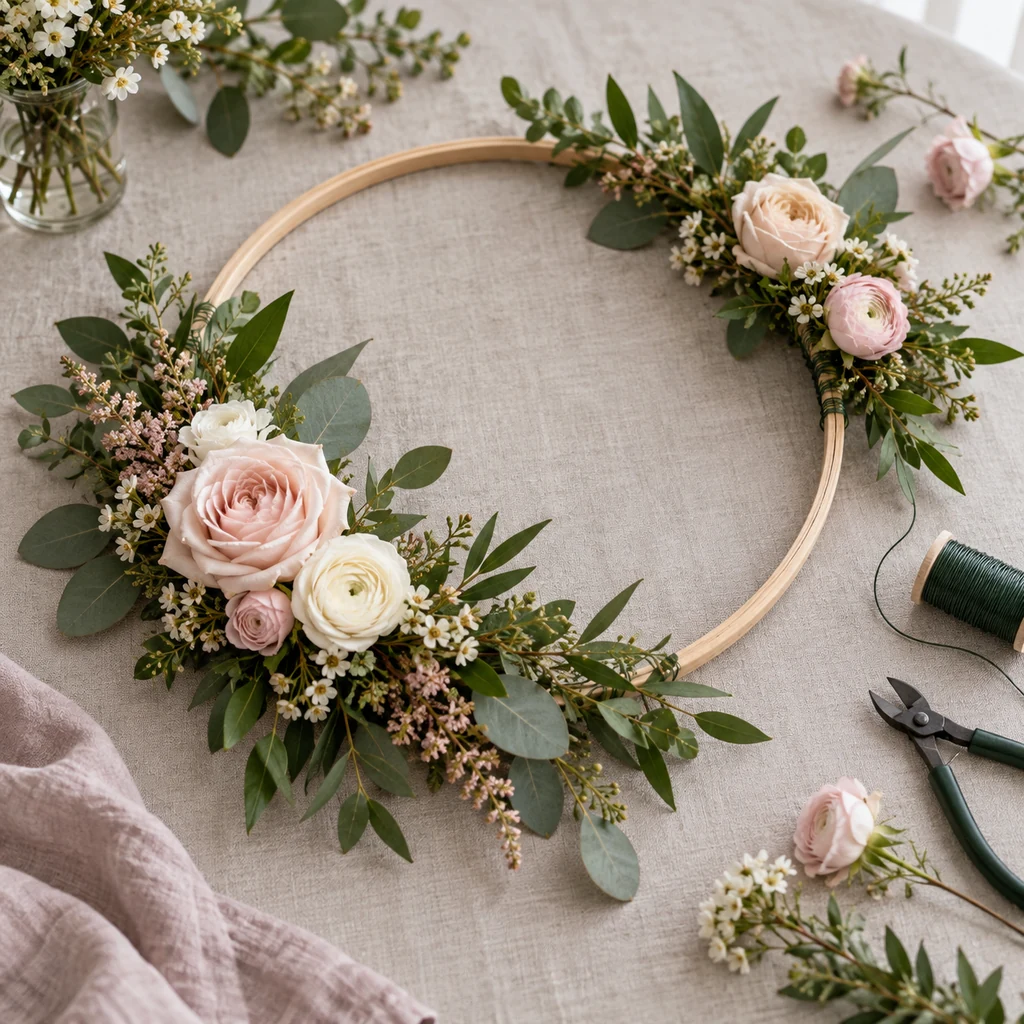
Place the hoop on a table and arrange the greenery and flowers loosely around it before cutting wire. Decide whether you want a full wreath look, two asymmetrical clusters, or a mostly open hoop with a few dramatic hanging stems. Keep the heaviest flowers near the lower third or opposite sides of the hoop so the finished piece feels balanced. Take a quick photo of the layout before removing anything; it becomes your map while you work.
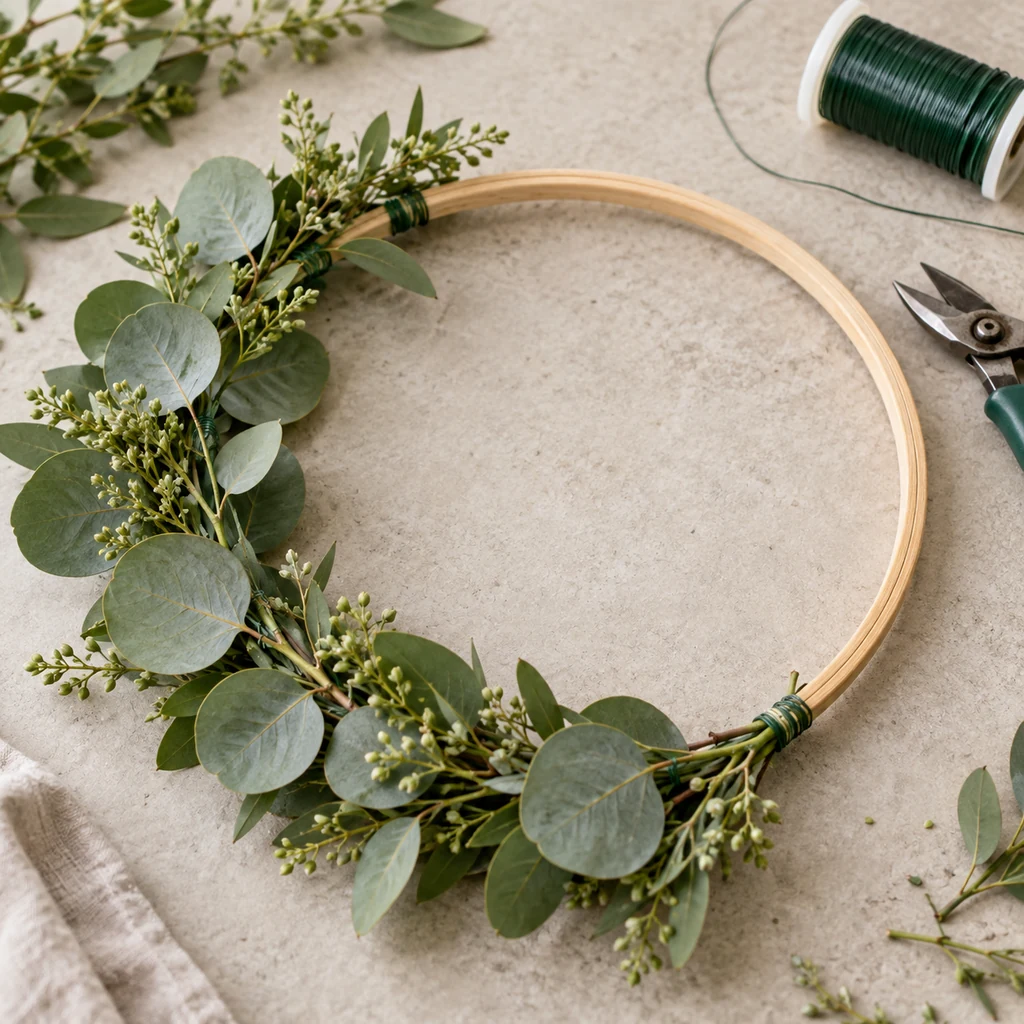
Wrap the Greenery Base
Start with flexible greenery because it hides wire and gives the floral decor a natural foundation. Lay one stem along the hoop, wrap floral wire around the stem and wood, then overlap the next stem so the leaves cover the previous cut end. Continue around the sections you want covered, keeping some areas lighter so the hoop still looks airy. Tug gently after every few wraps to make sure the greenery is secure but not crushed.
Add Flower Clusters With Depth
Add the largest flowers first, then fill around them with smaller blooms and airy filler stems. Place flowers at slightly different angles instead of pressing every bloom flat against the hoop. This gives the arrangement depth and keeps it from looking like a flat craft-store wreath. If you are using fresh flowers, keep stems a little longer and attach them close to the event time. For faux or dried flowers, trim the stems shorter and wire them firmly.
Tie the Hanging Lines Evenly
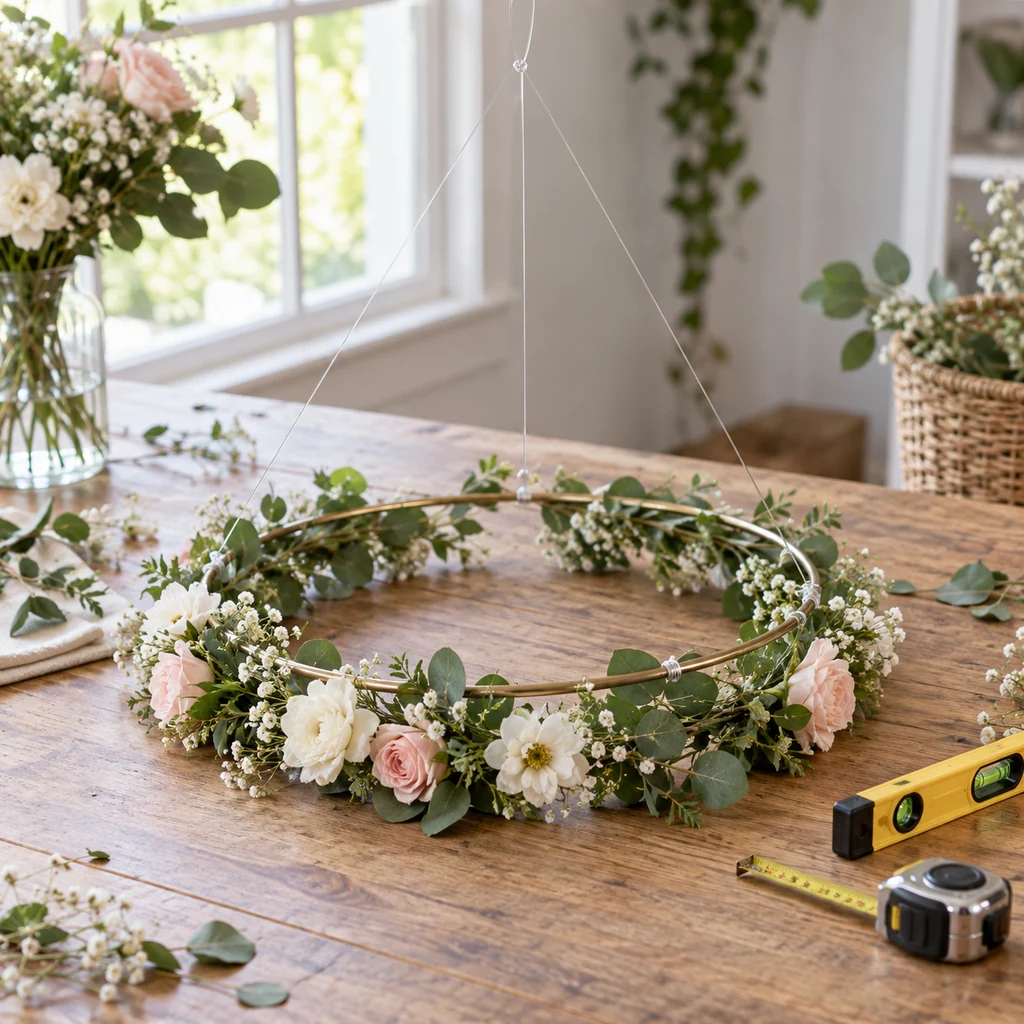
Cut three or four equal lengths of clear fishing line. Tie them to evenly spaced points around the hoop, then gather the ends above the center. Lift the hoop a few inches from the table and check whether one side dips. If it does, shorten the line on the low side or move a heavy floral cluster closer to the center. This balance check is worth doing slowly because it prevents the decor from hanging crooked after installation.
Hang and Style the Finished Decor
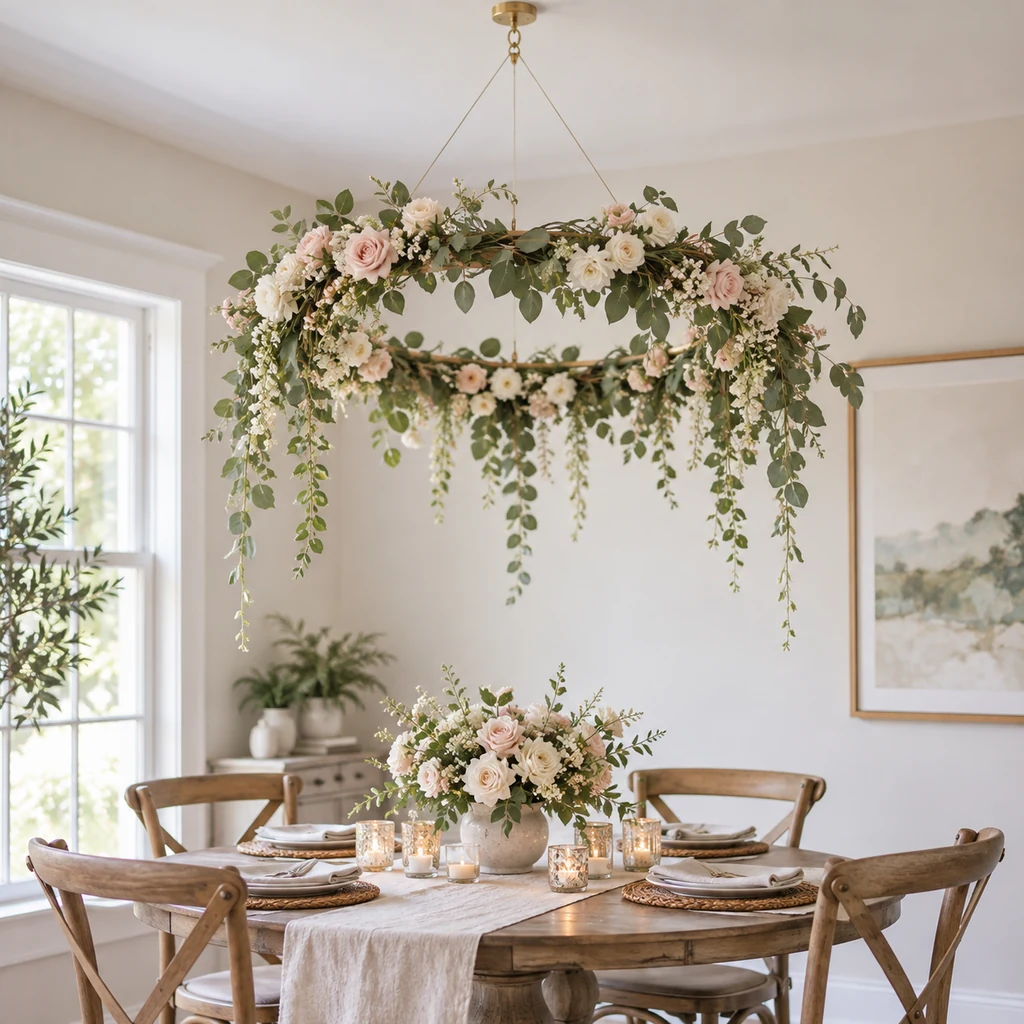
Install a ceiling hook or other secure hardware in the chosen spot, following the weight rating and surface instructions. Hang the floral hoop, step back, and rotate it until the prettiest side faces the room. Trim any stray wire ends, fluff the greenery, and adjust dangling stems so they look intentional. If the piece hangs above a dining table or party station, leave enough headroom so guests can sit and move comfortably below it.
Substitutions & Variations
For a romantic spring look, use blush roses, ranunculus, baby’s breath, and eucalyptus. For fall, swap in dried grasses, rust-toned mums, preserved leaves, and velvet ribbon. Winter versions look beautiful with cedar, pine, white flowers, dried oranges, or a few matte ornaments. If your room is very minimal, use mostly greenery and only three or four statement flowers so the decor feels sculptural rather than busy.
You can also change the base. A grapevine wreath gives a rustic finish, a metal hoop feels modern, and a branch or driftwood piece creates a more organic hanging installation. For rentals, use lightweight faux stems and removable hooks whenever possible. For events, make the hoop ahead with faux greenery, then add fresh flowers on the day so the arrangement looks alive without requiring a full last-minute build.
Where to Display Hanging Floral Decor
This project works beautifully above a dining table, dessert station, nursery reading corner, entry console, craft room desk, or wedding welcome area. The safest location is somewhere people can admire the piece without constantly brushing against it. If the ceiling is low, hang it closer to a wall or above furniture instead of directly over a walkway. The goal is drama without making the room harder to use.
For photos, place the floral hoop near a window or against a soft neutral wall so the flowers stay visible. Pair it with candles, linen, wood, ceramic vases, or simple tableware rather than lots of competing decor. A hanging floral piece already has movement and texture, so the surrounding styling should support it instead of fighting for attention.
Frequently Asked Questions
Can I use fresh flowers for hanging floral decor?
Yes, but fresh flowers are best for short events. Build the greenery base first, then add delicate blooms close to the event time so they stay full and hydrated-looking.
How do I keep the hoop from hanging crooked?
Use three or four evenly spaced hanging lines and test the balance before installing it overhead. If one side dips, adjust the line length or move heavier flowers toward the opposite side.
Is this safe for rentals?
It can be rental-friendly if the finished piece is lightweight and you use removable hooks rated for the weight. Avoid heavy fresh arrangements unless you have permission to use stronger ceiling hardware.